 Brien Allison
Background
The initiation for this idea actually came way back in 2019, after competing in the 'Polypanels' 3D printing design competition. Polypanels were created by Devin Montes, of the 'Make Anything' Youtube channel fame, and the purpose of the competition was to creat custom 'Polypanels' as a sort of open source construction kit.
I took second place in the competition with my Beam Engine model. I had added some basic moving parts: gears, links, and shafts, to create the 3D printable model. Then the idea was seeded. To make a new construction kit, like Meccano, K'nex or Lego Technic, to be able to make custom mechanical creations limited only by your imagination and printing filament.
I personally was a K'nex kid. I made all sorts of strange mechanical things, but was frustrated by how limited the pieces were, try making a tank with a differential from K'nex (I did... with difficulty). I remember learning how a clock escapement worked, and then tried making one with K'nex... it worked... most of the time (pun intended). I wish I had that particular part or thing to make something, but I knew nothing of 3D printing back in 2010.
So now I have the perfect opportunity to make a construction kit how I want to. To be able to make any part I want, or use someone elses who had the same problem/idea. This is the essense of open source 3D printing, and many people are making their own construction kits, notably the awesome PrintABloks by The 3D Printing Professor, or the aforementioned Polypanels.
Development
It has taken me over four years to develop this new type of panel, which is similar, but different to Polypanels. I could write a 5 page essay on just developing the panel, so I won't. You can see the previous iterations of panel on my MyMiniFactory page. Essentially the design has become progressively refined by reducing the number of different panels, reducing the complexity of the building techniques, and making the panel generally more robust and modular.
The final version of the panel is not yet published (along with many of the features shown here) but I will be publishing them soon over the next month or so. I plan to use the new 'Clubs' feature of the Printables 3D printing sharing site. Once I have created the 'Club', you will be able to support the ongoing development of Omnipanels with donations or a subscription. The subscription will give early access to the published parts, free access to comercial files (only some particular special designs files will be commercial, they will be generally optional interesting components which will not be functionally better than free models), and a poll to give direct stake in what parts I design next. I have so many ideas of things to make (I will never run out) and am open to suggestions on what parts people want; or you could just make it yourself!
Key Features and Components
For brevity, I will list the key features of the system, along with some images, more details for some things already designed can be found on the respective pages.
Base Squares
The base of the system is composed of squares, which can be joined together to make a cubic grid of any shape and size. Details of how the system works can be found here, although those are the older iteration of the panel design. My latest design is a bit better and simpler (to be released soon), but the basic building pattern and panel types (A,B, and C) are the same.


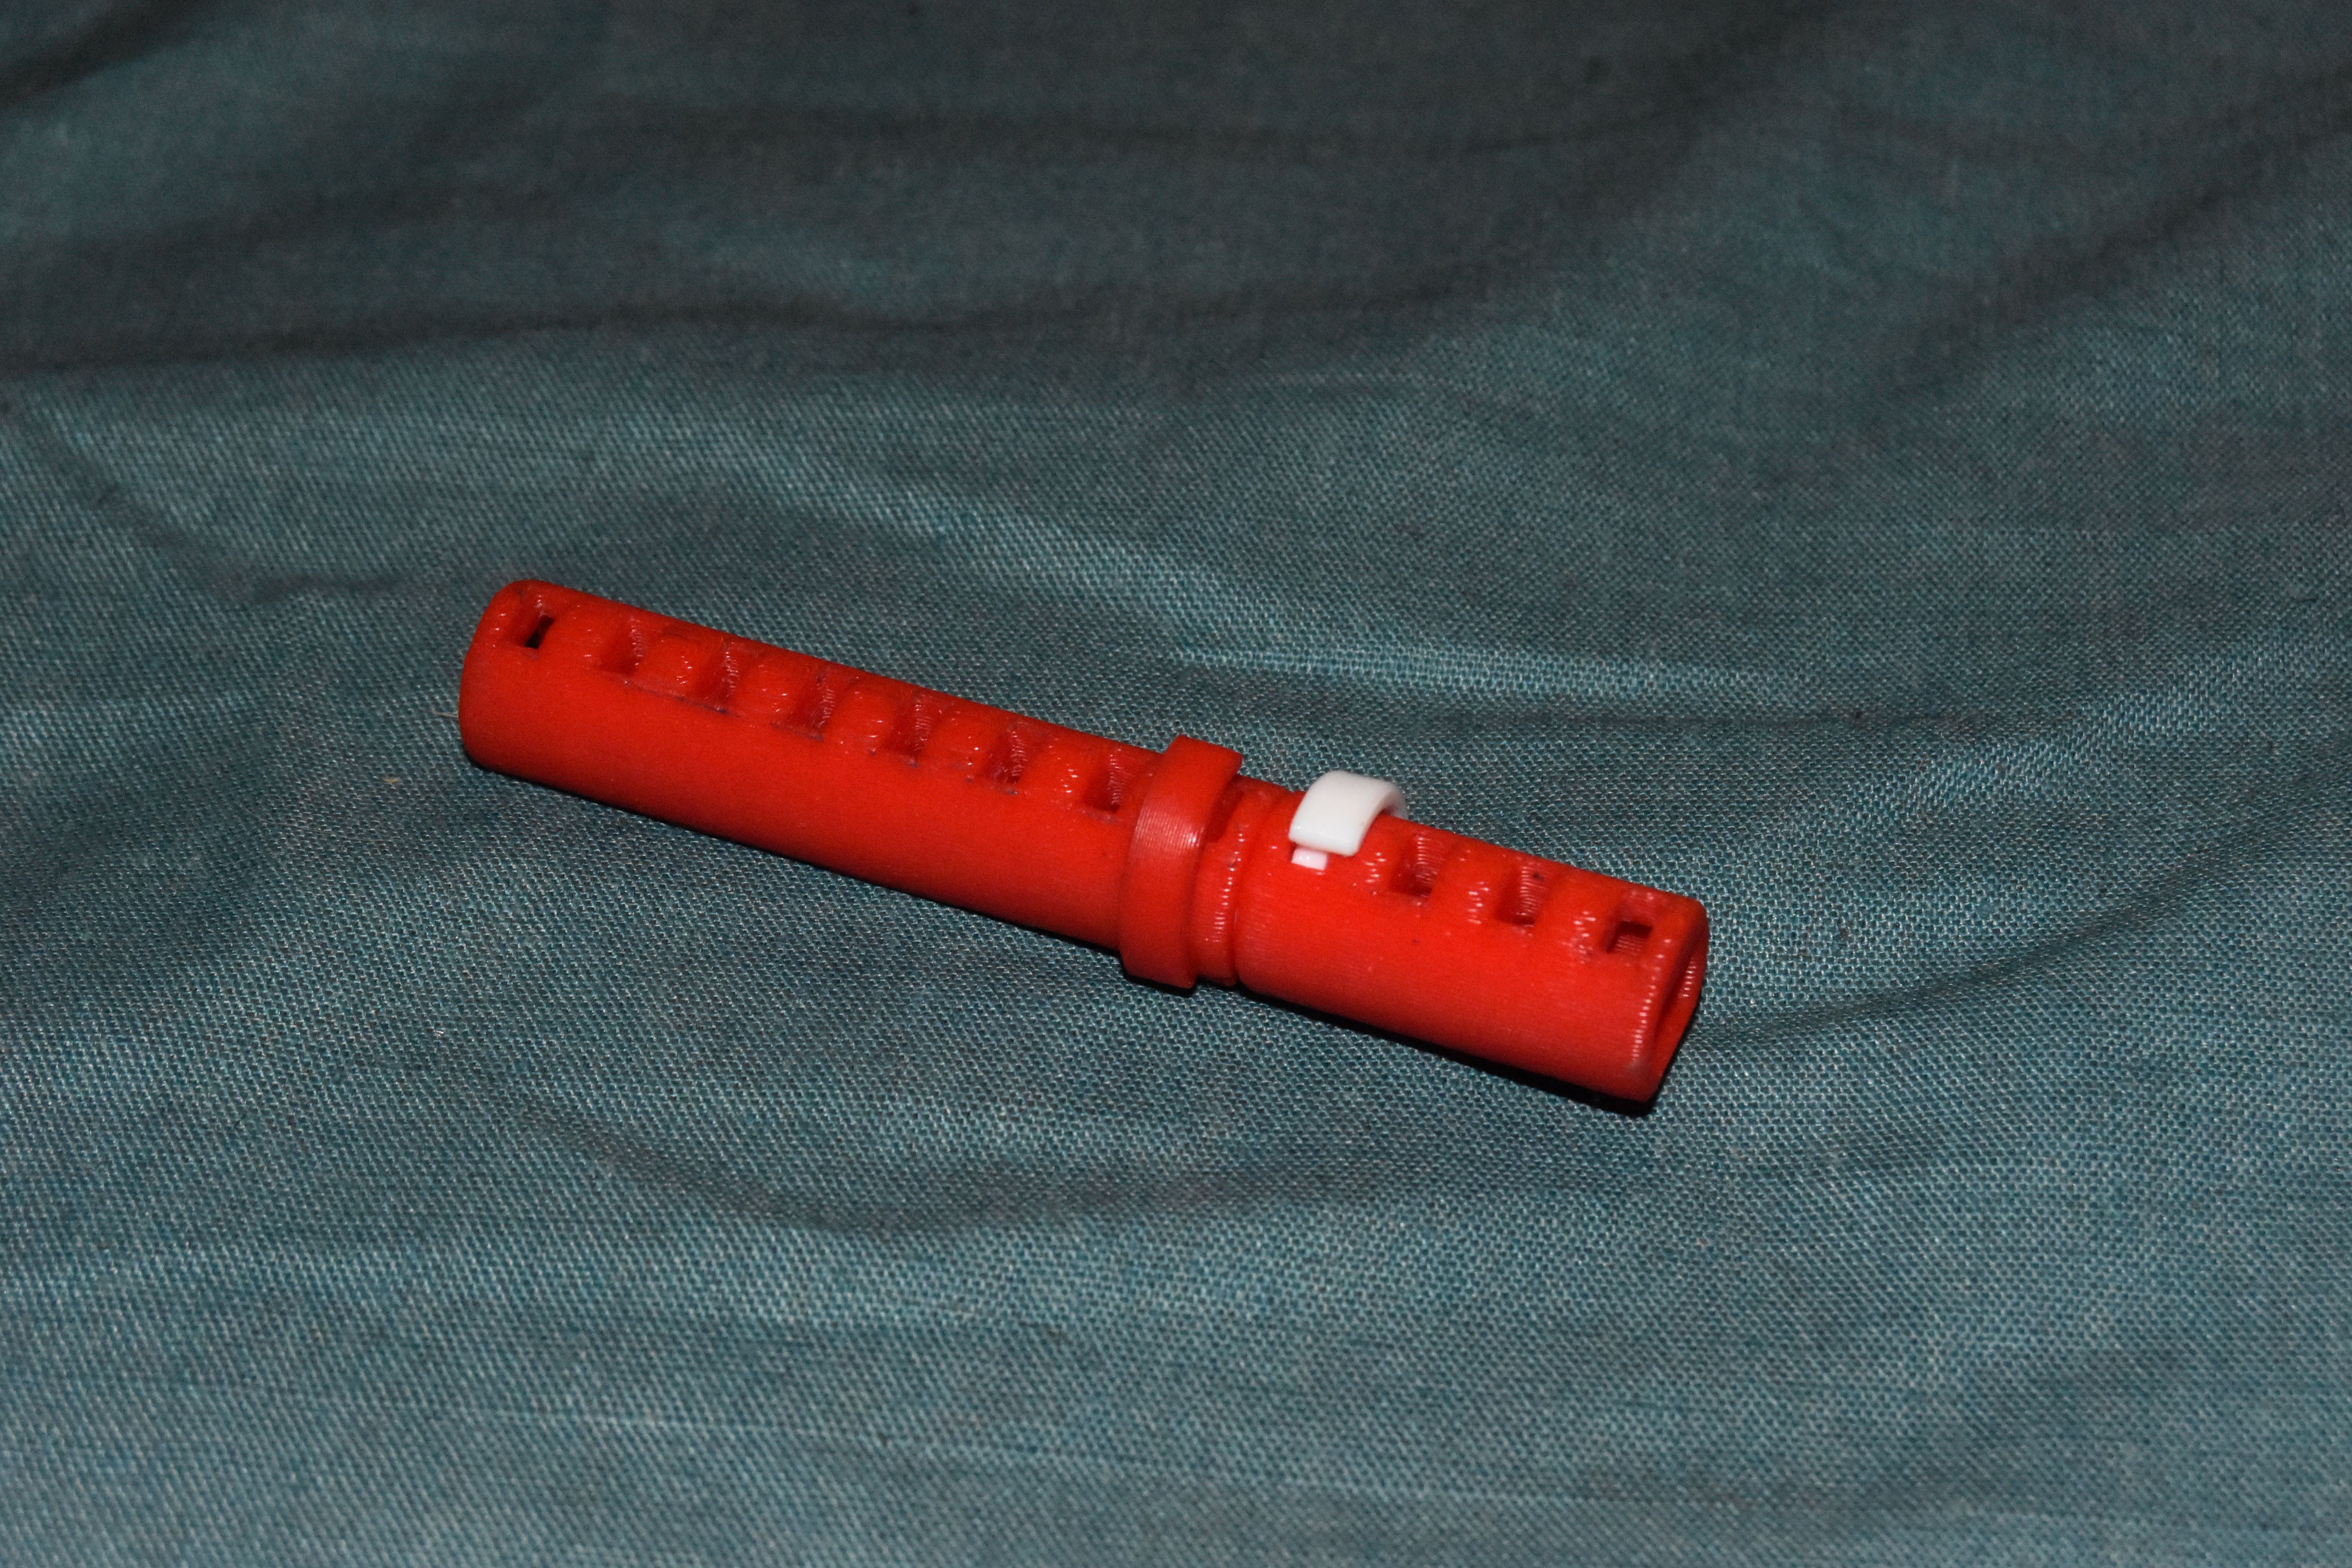
Shafts
The main form of motion transfer is through shafts, allowing rotation and sliding motion, with a flat bottom to key components to it and pin holes for locking parts along it.
Shafts can be joined together with 'Joiners' and pins to make longer shafts (although they will be available in 32 different lengths for printing). I think the optimium lengths to print are binary lengths: 1,2,4,8,16,32 units long, as they can be added together to make any custom length (but a custom length printed shaft is always ideal).
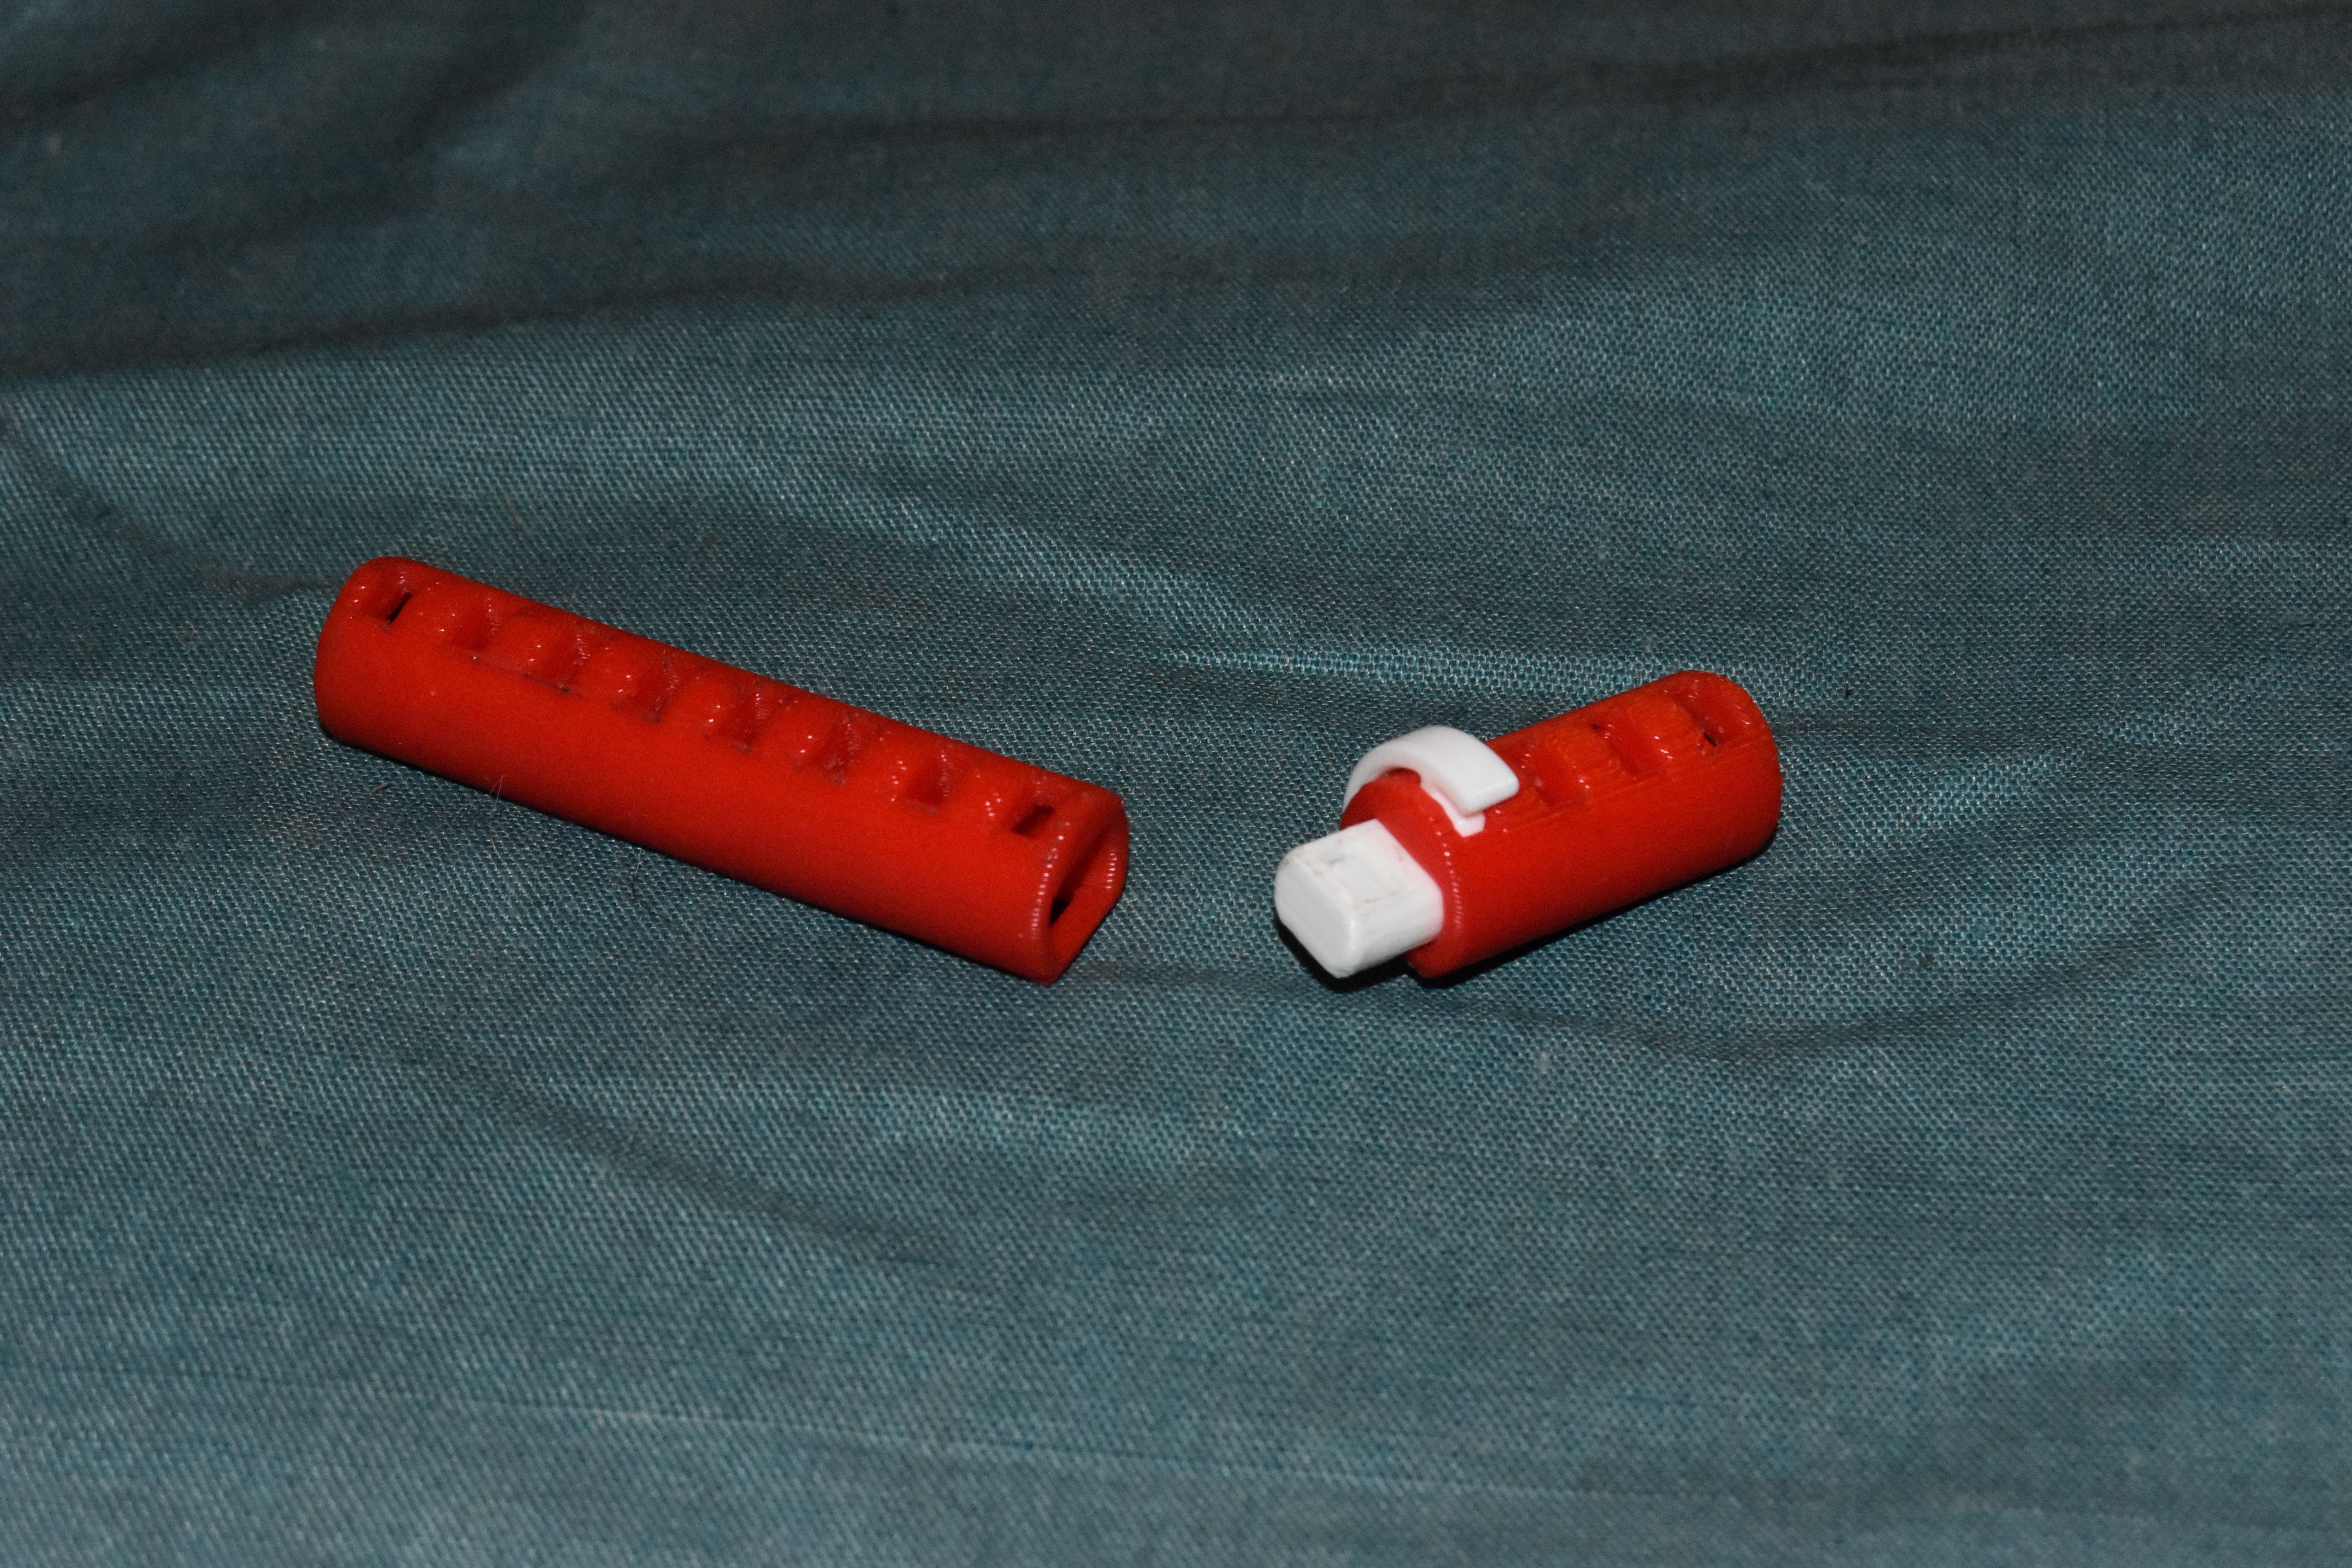
Joined shaft.
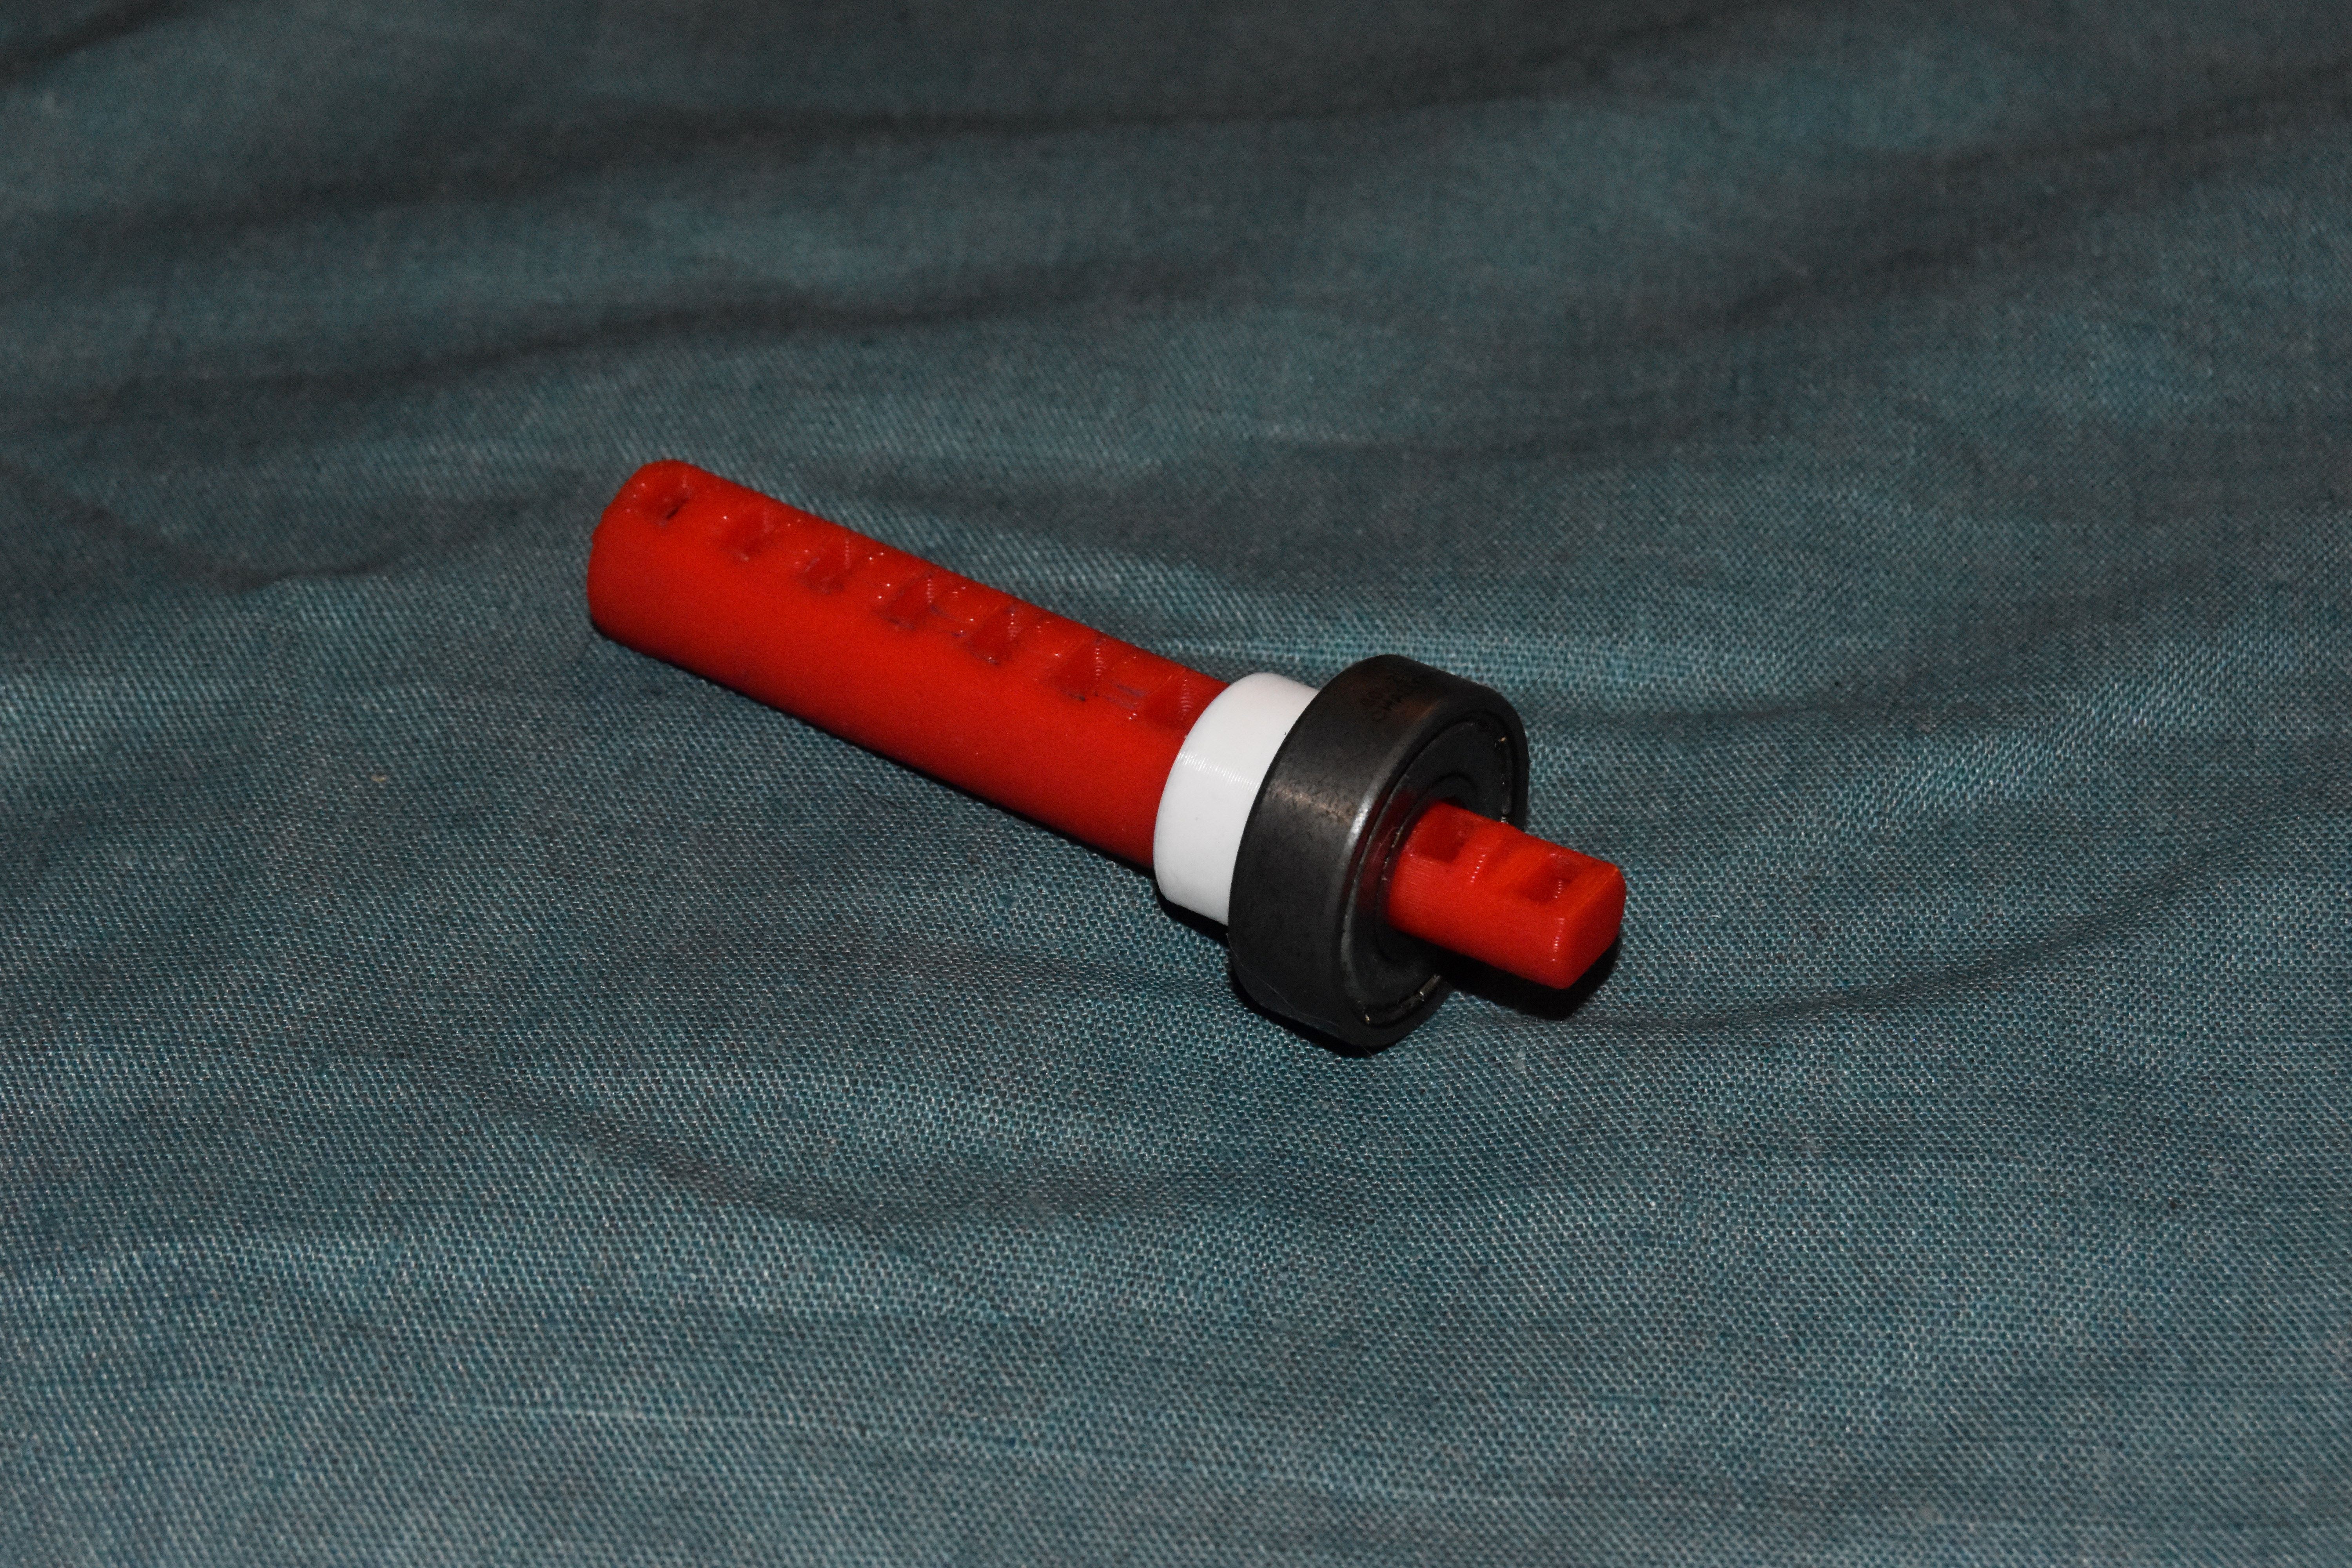
The joiners that fit into the ends of the shafts, are actually smaller shafts in of themselves which are nominally 8mm in diameter. This means they can be fitted into commonly available 608zz bearings as support bearings.
Pins
The main form of joining things together (other than the panels themselves) are simple pins. There are too many to go into detail here, but they are available in 2 different tolerances to suit different printers or needs.
 Gears
Gears Simple parts to transmit rotary motion. I have currently designed both spur and helical gears in three different sizes: small, medium, and large.
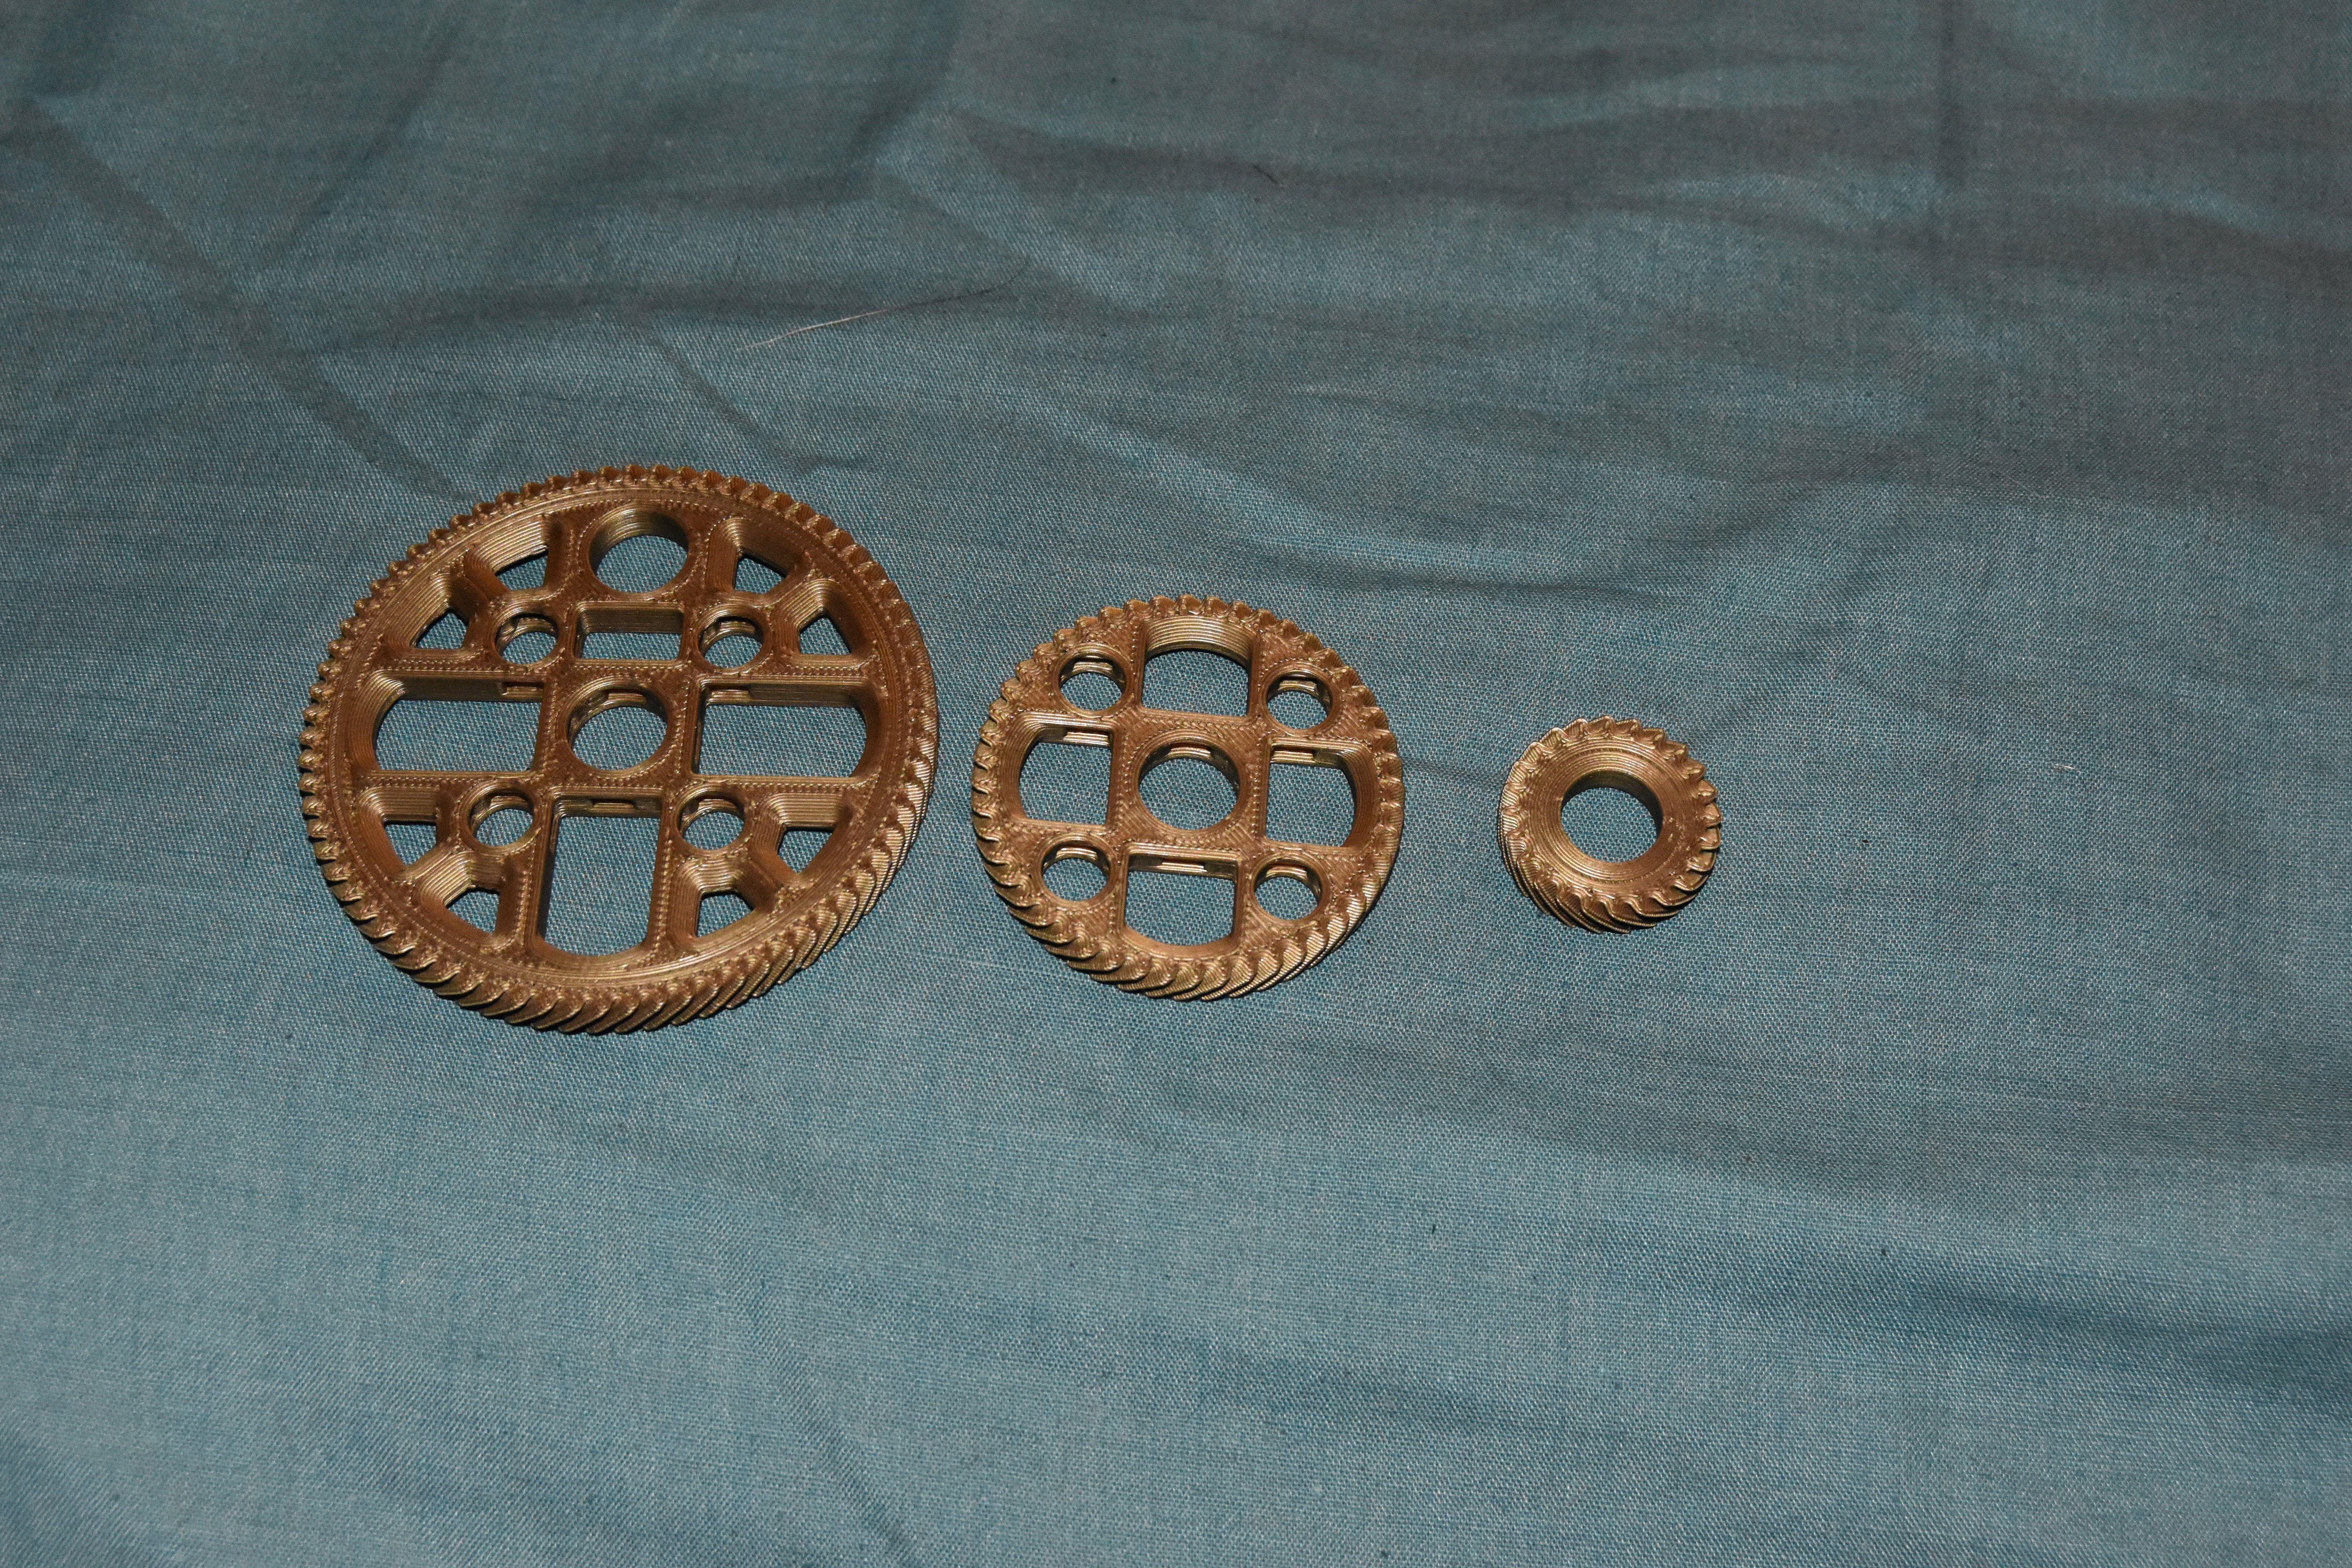
Gears can be joined together with joiners and pins to create compound gears e.g. large-medium compound gear.
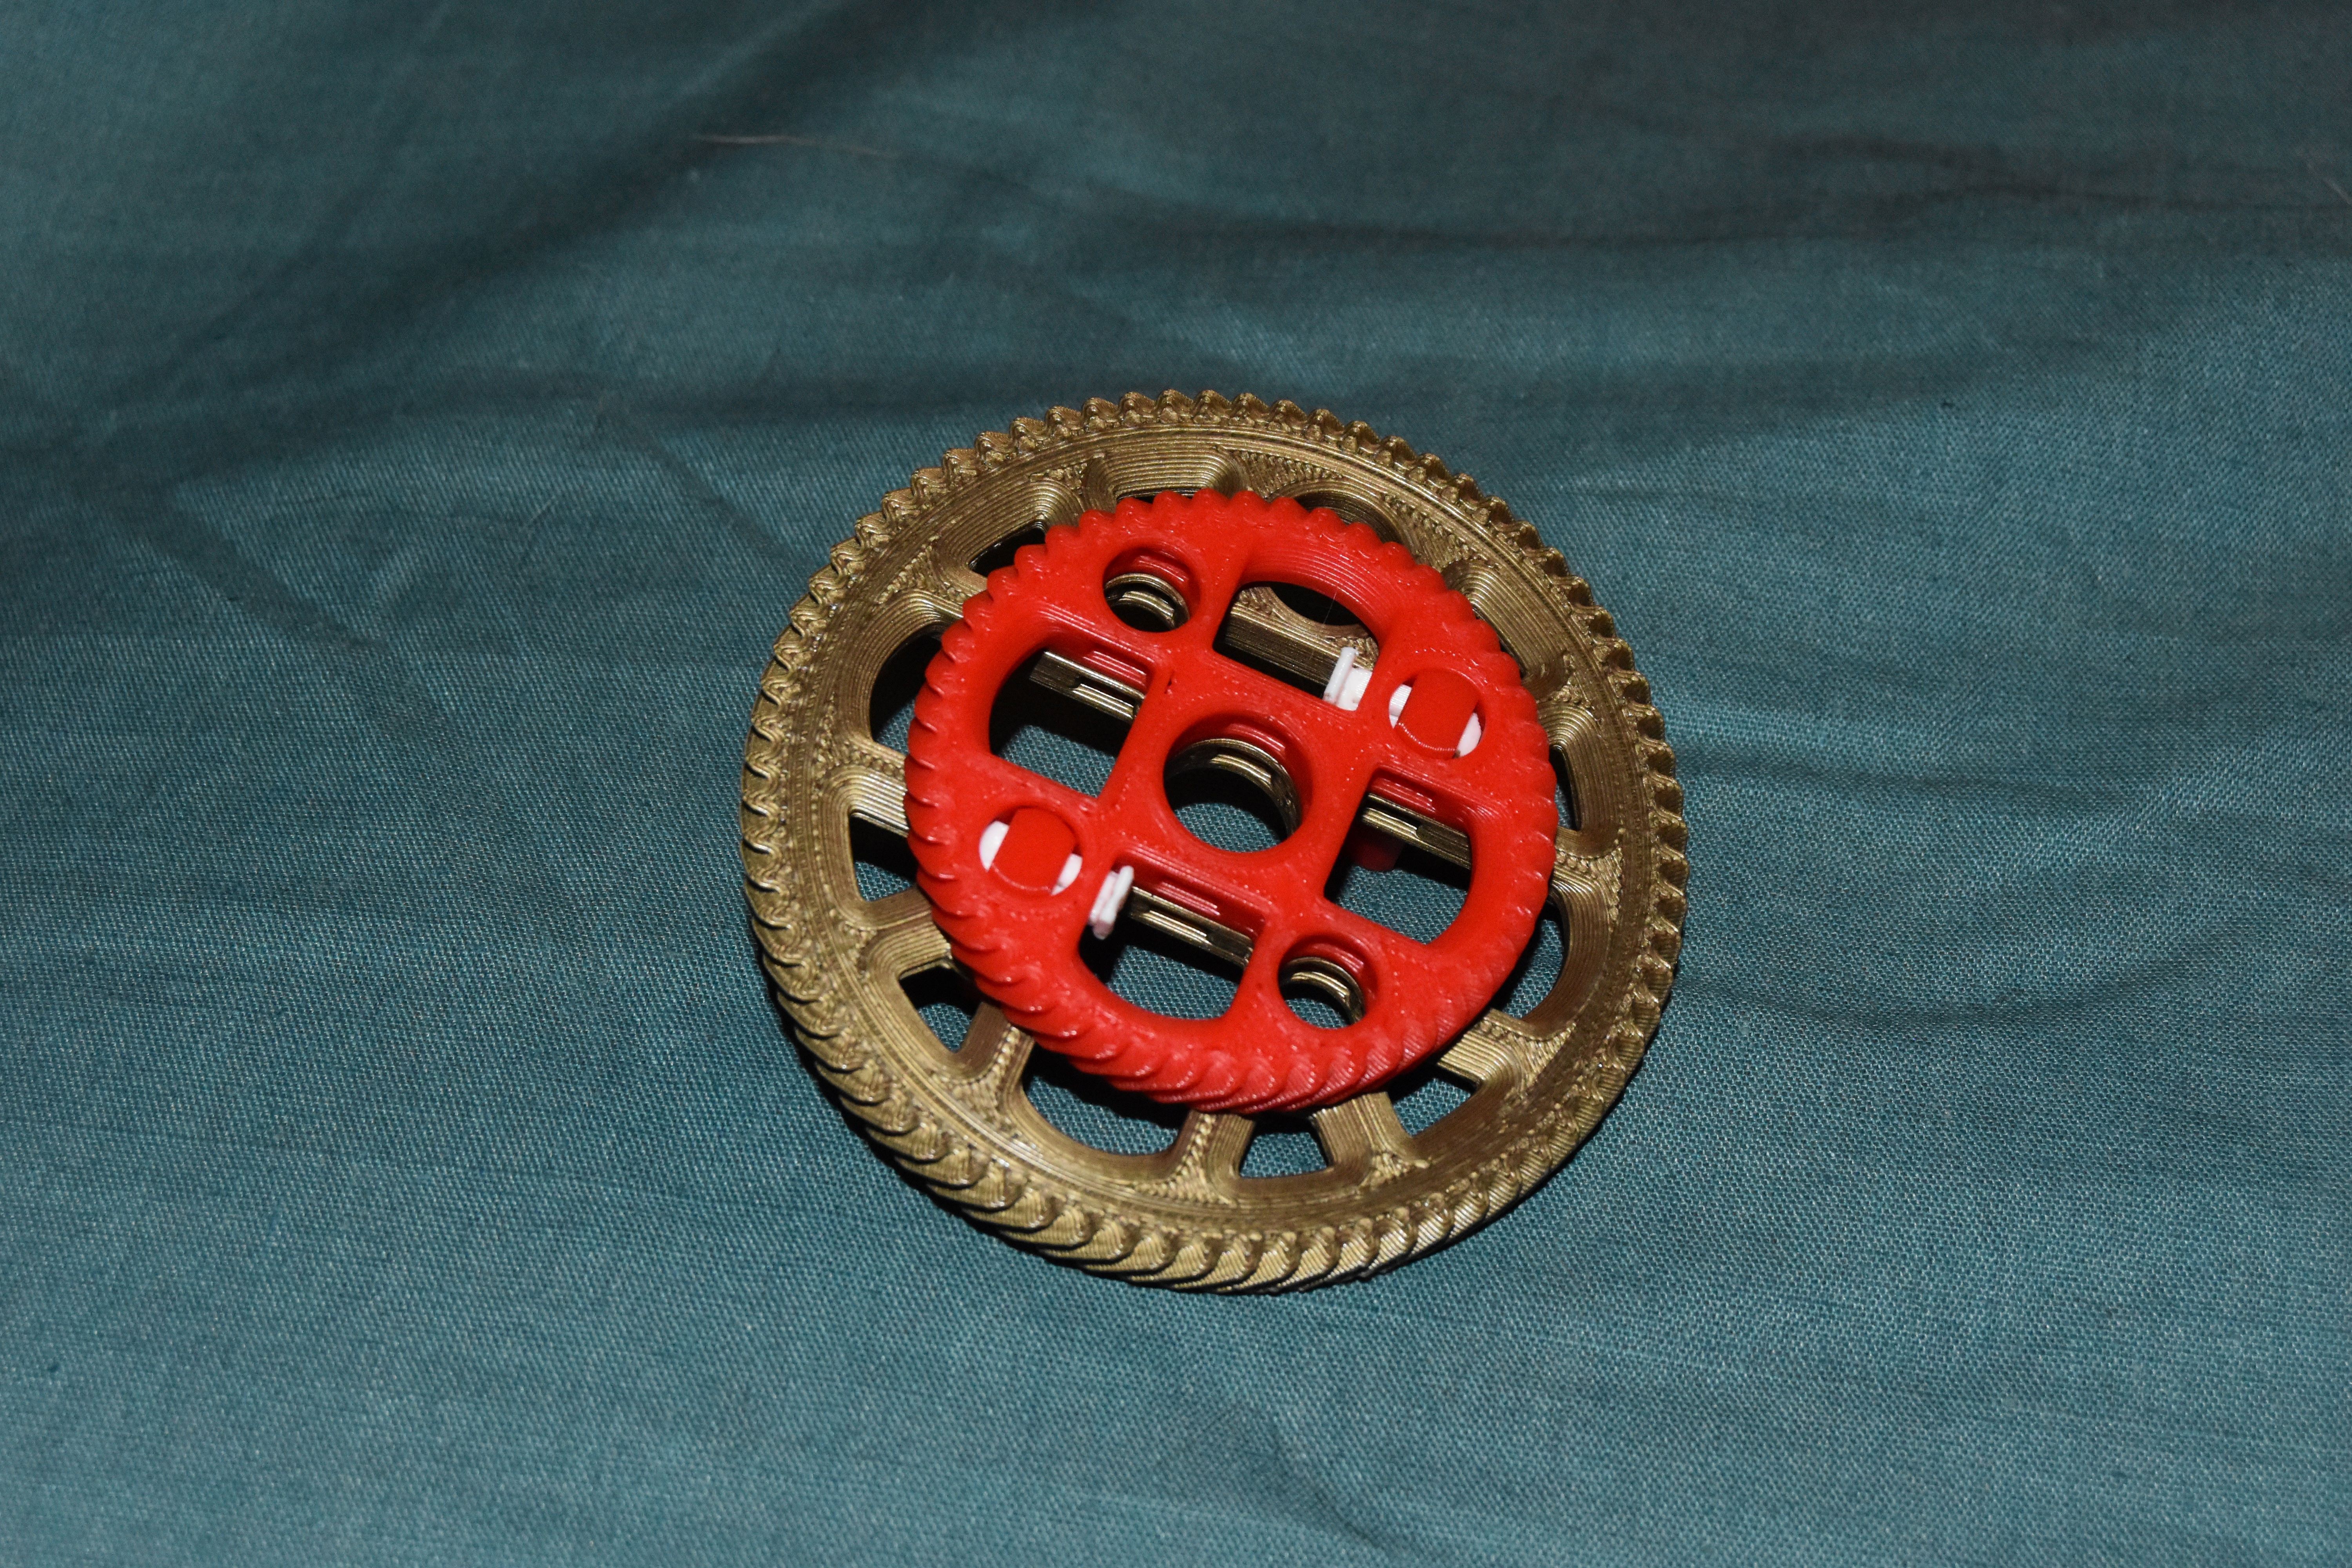
Helical gears can be combined to make larger helical gears and/or herringbone gears.
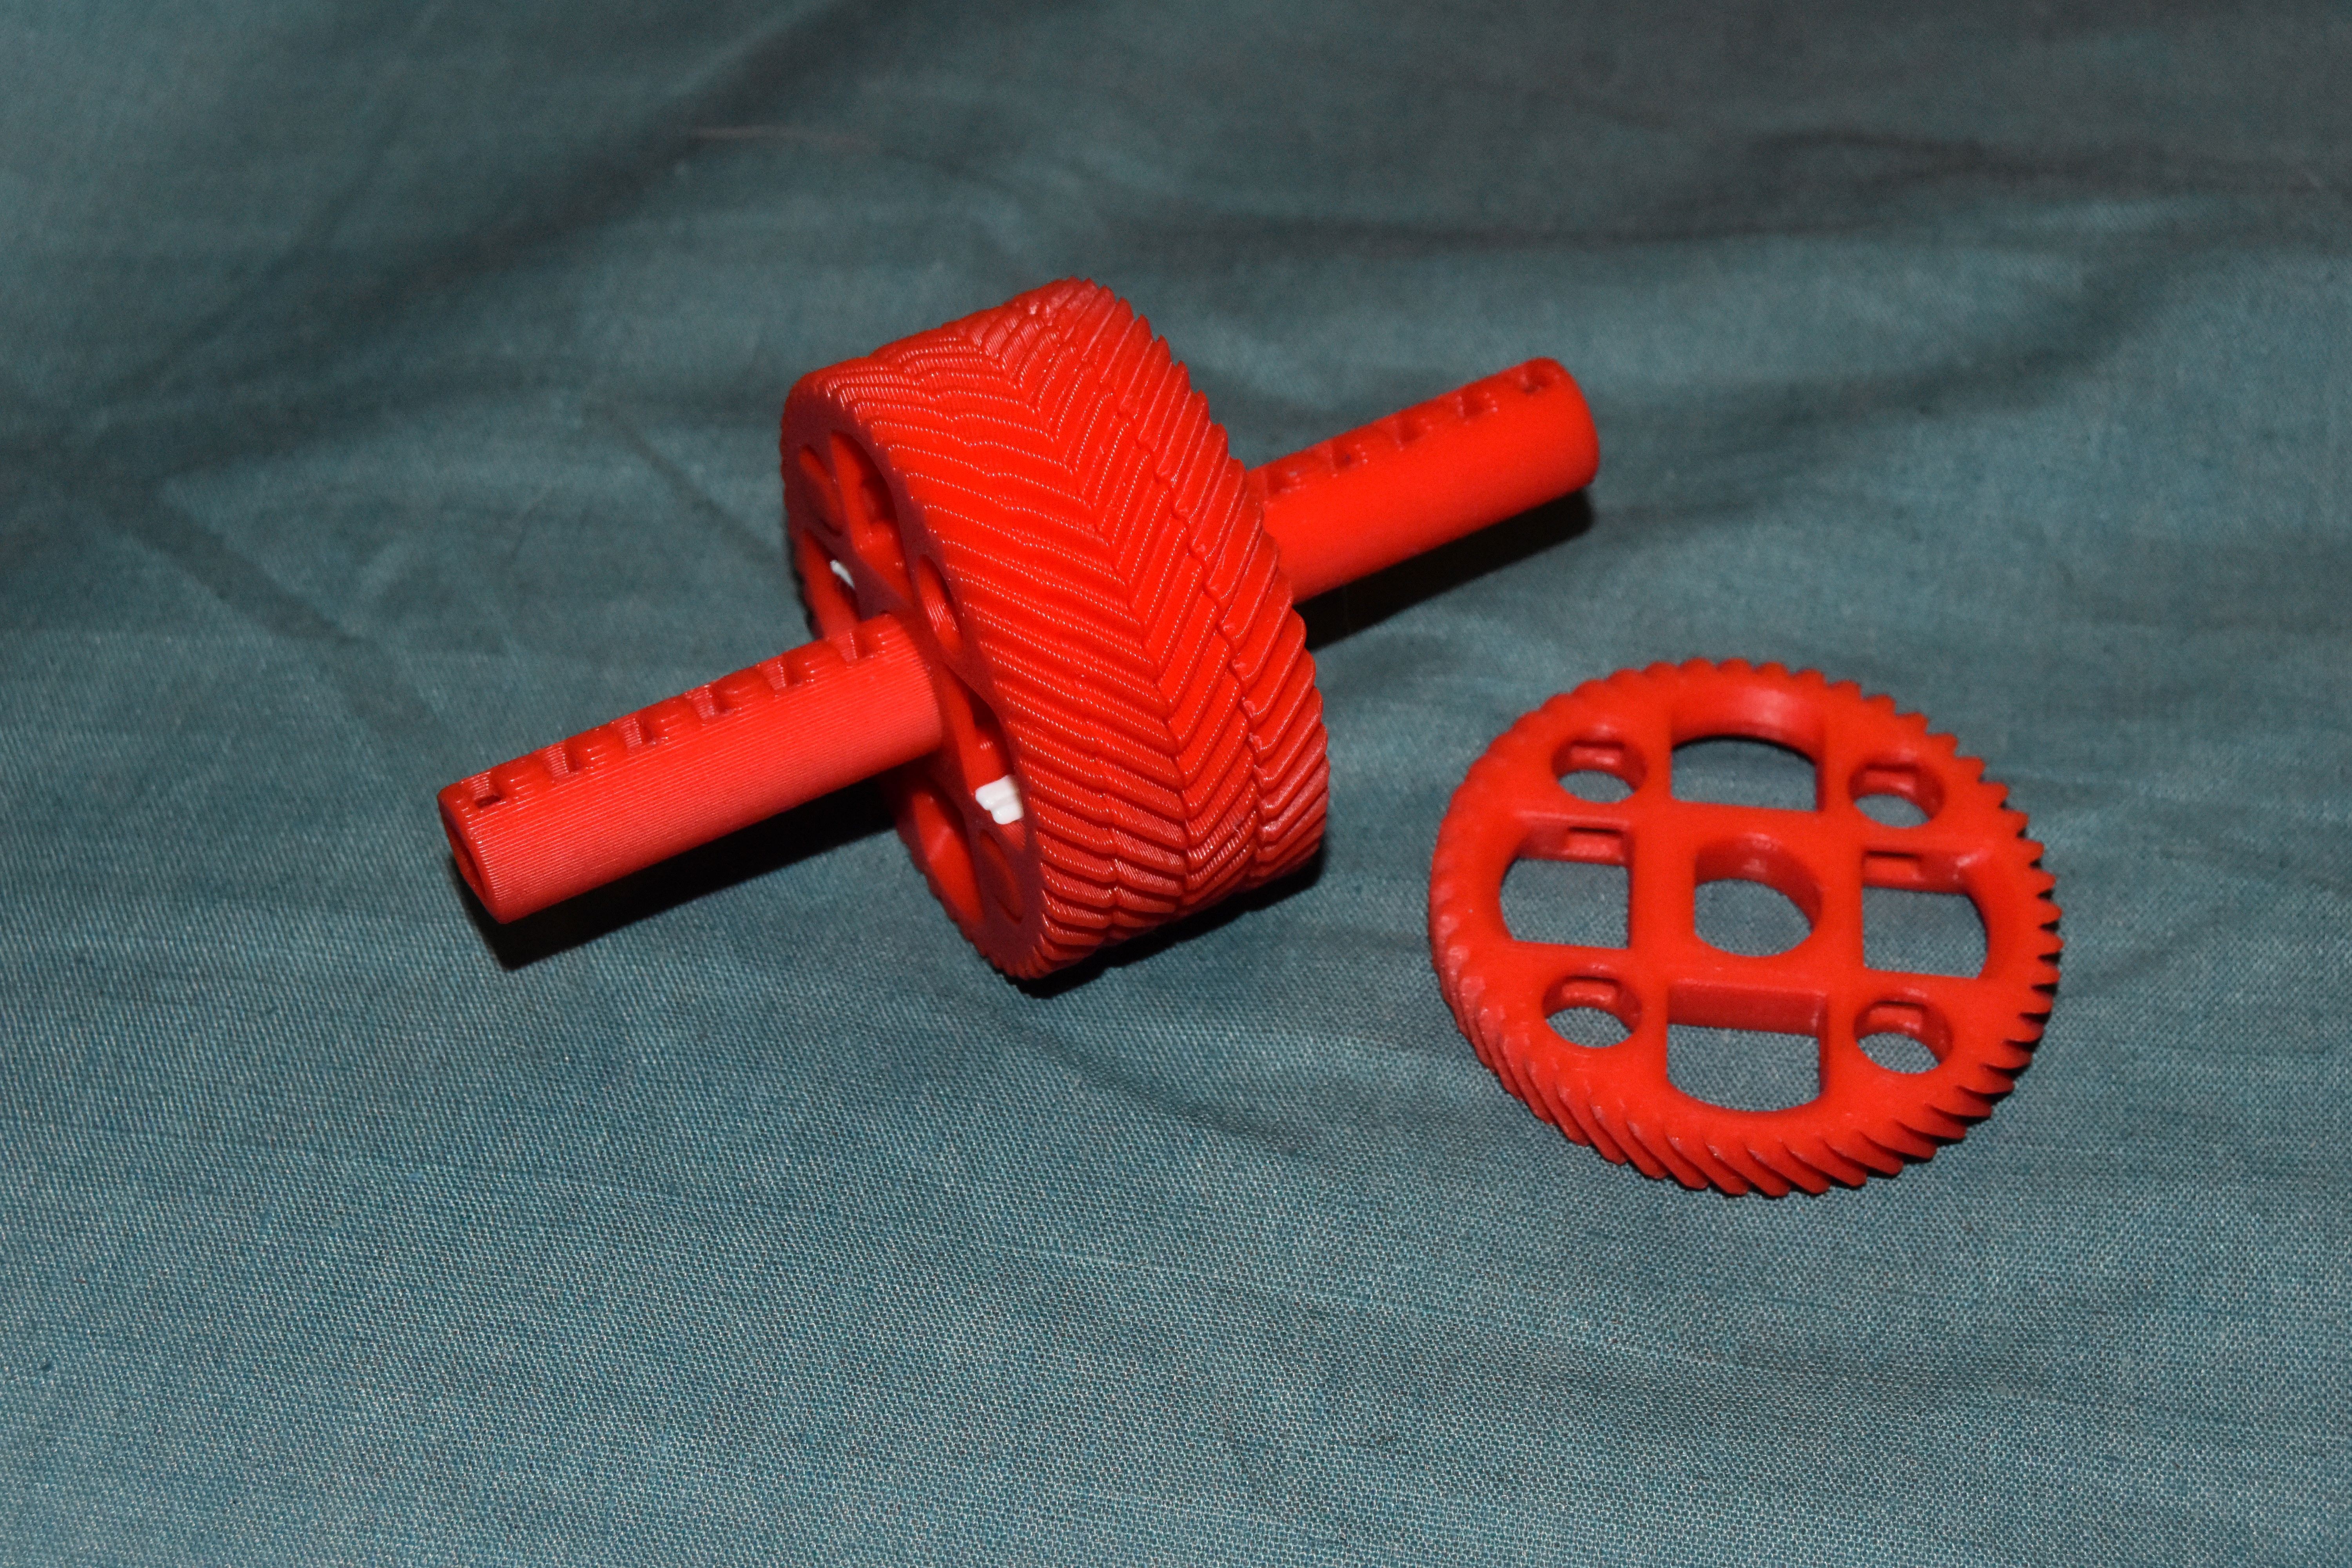
The helical gears have an angle of 45 degrees, so in theory they can be used in a crossed helical arrangement. In practice I have found the rough printed surfaces make them very poor turning (but in theory with a high resolution printer they will work).
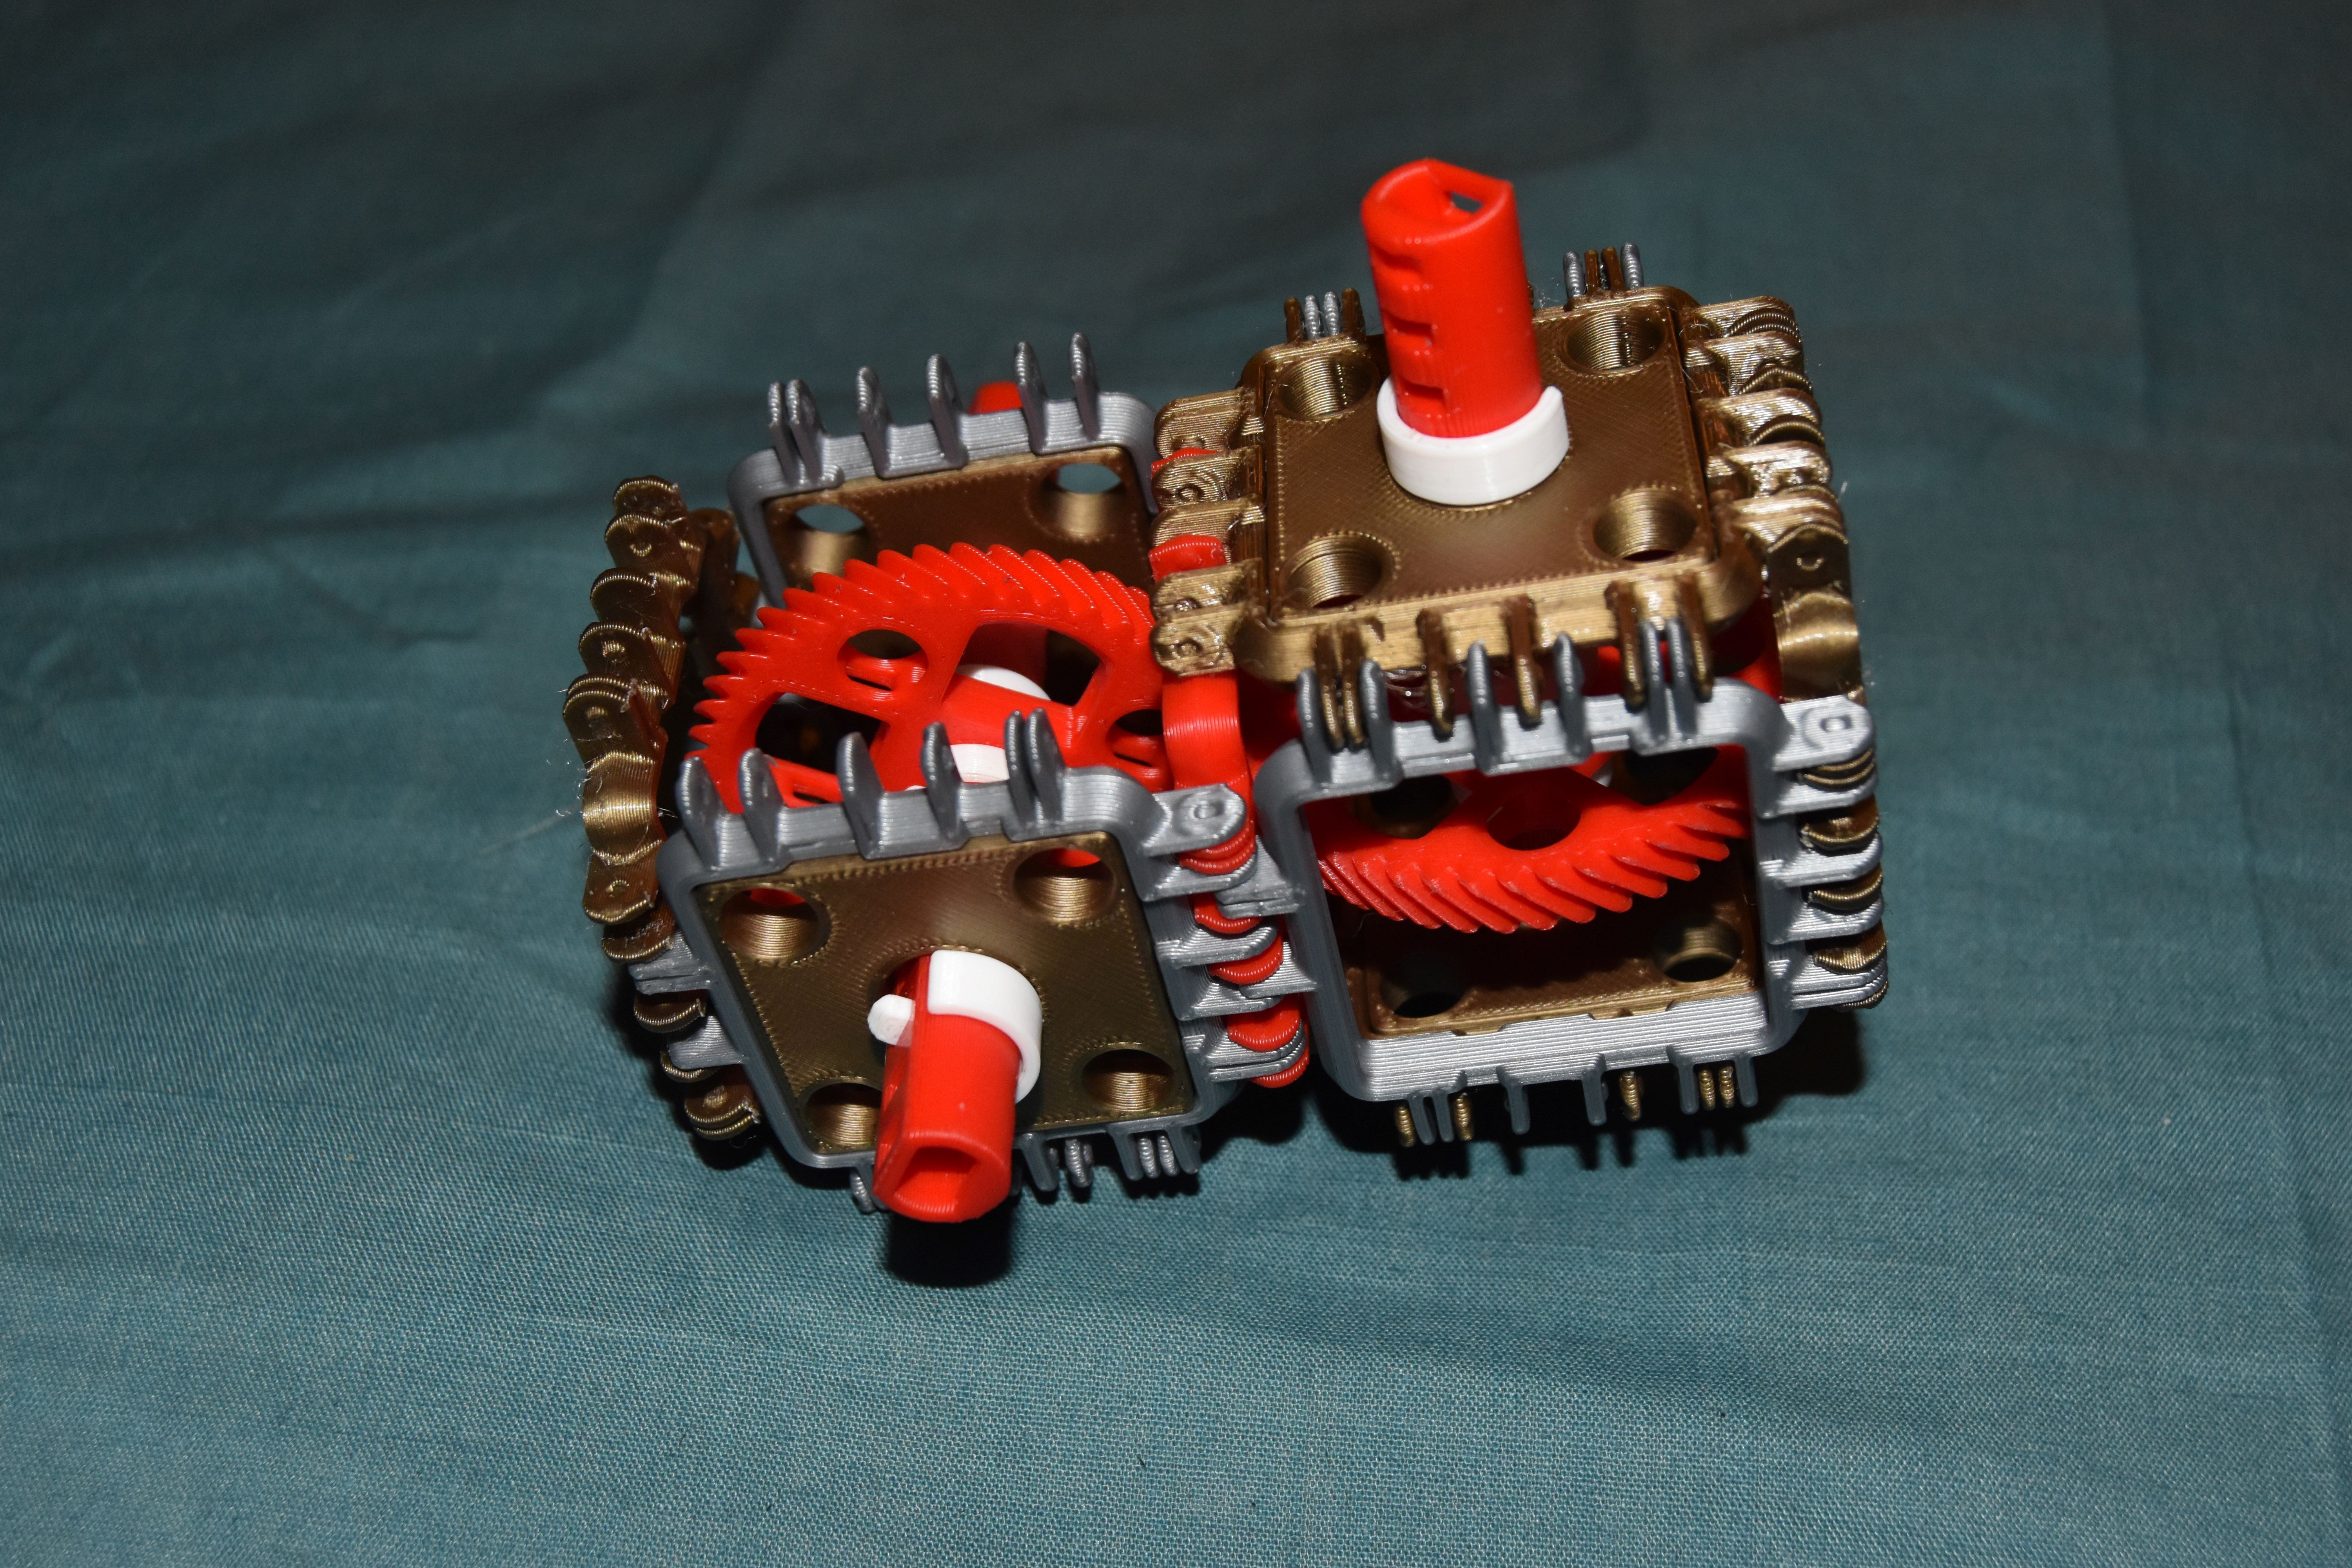
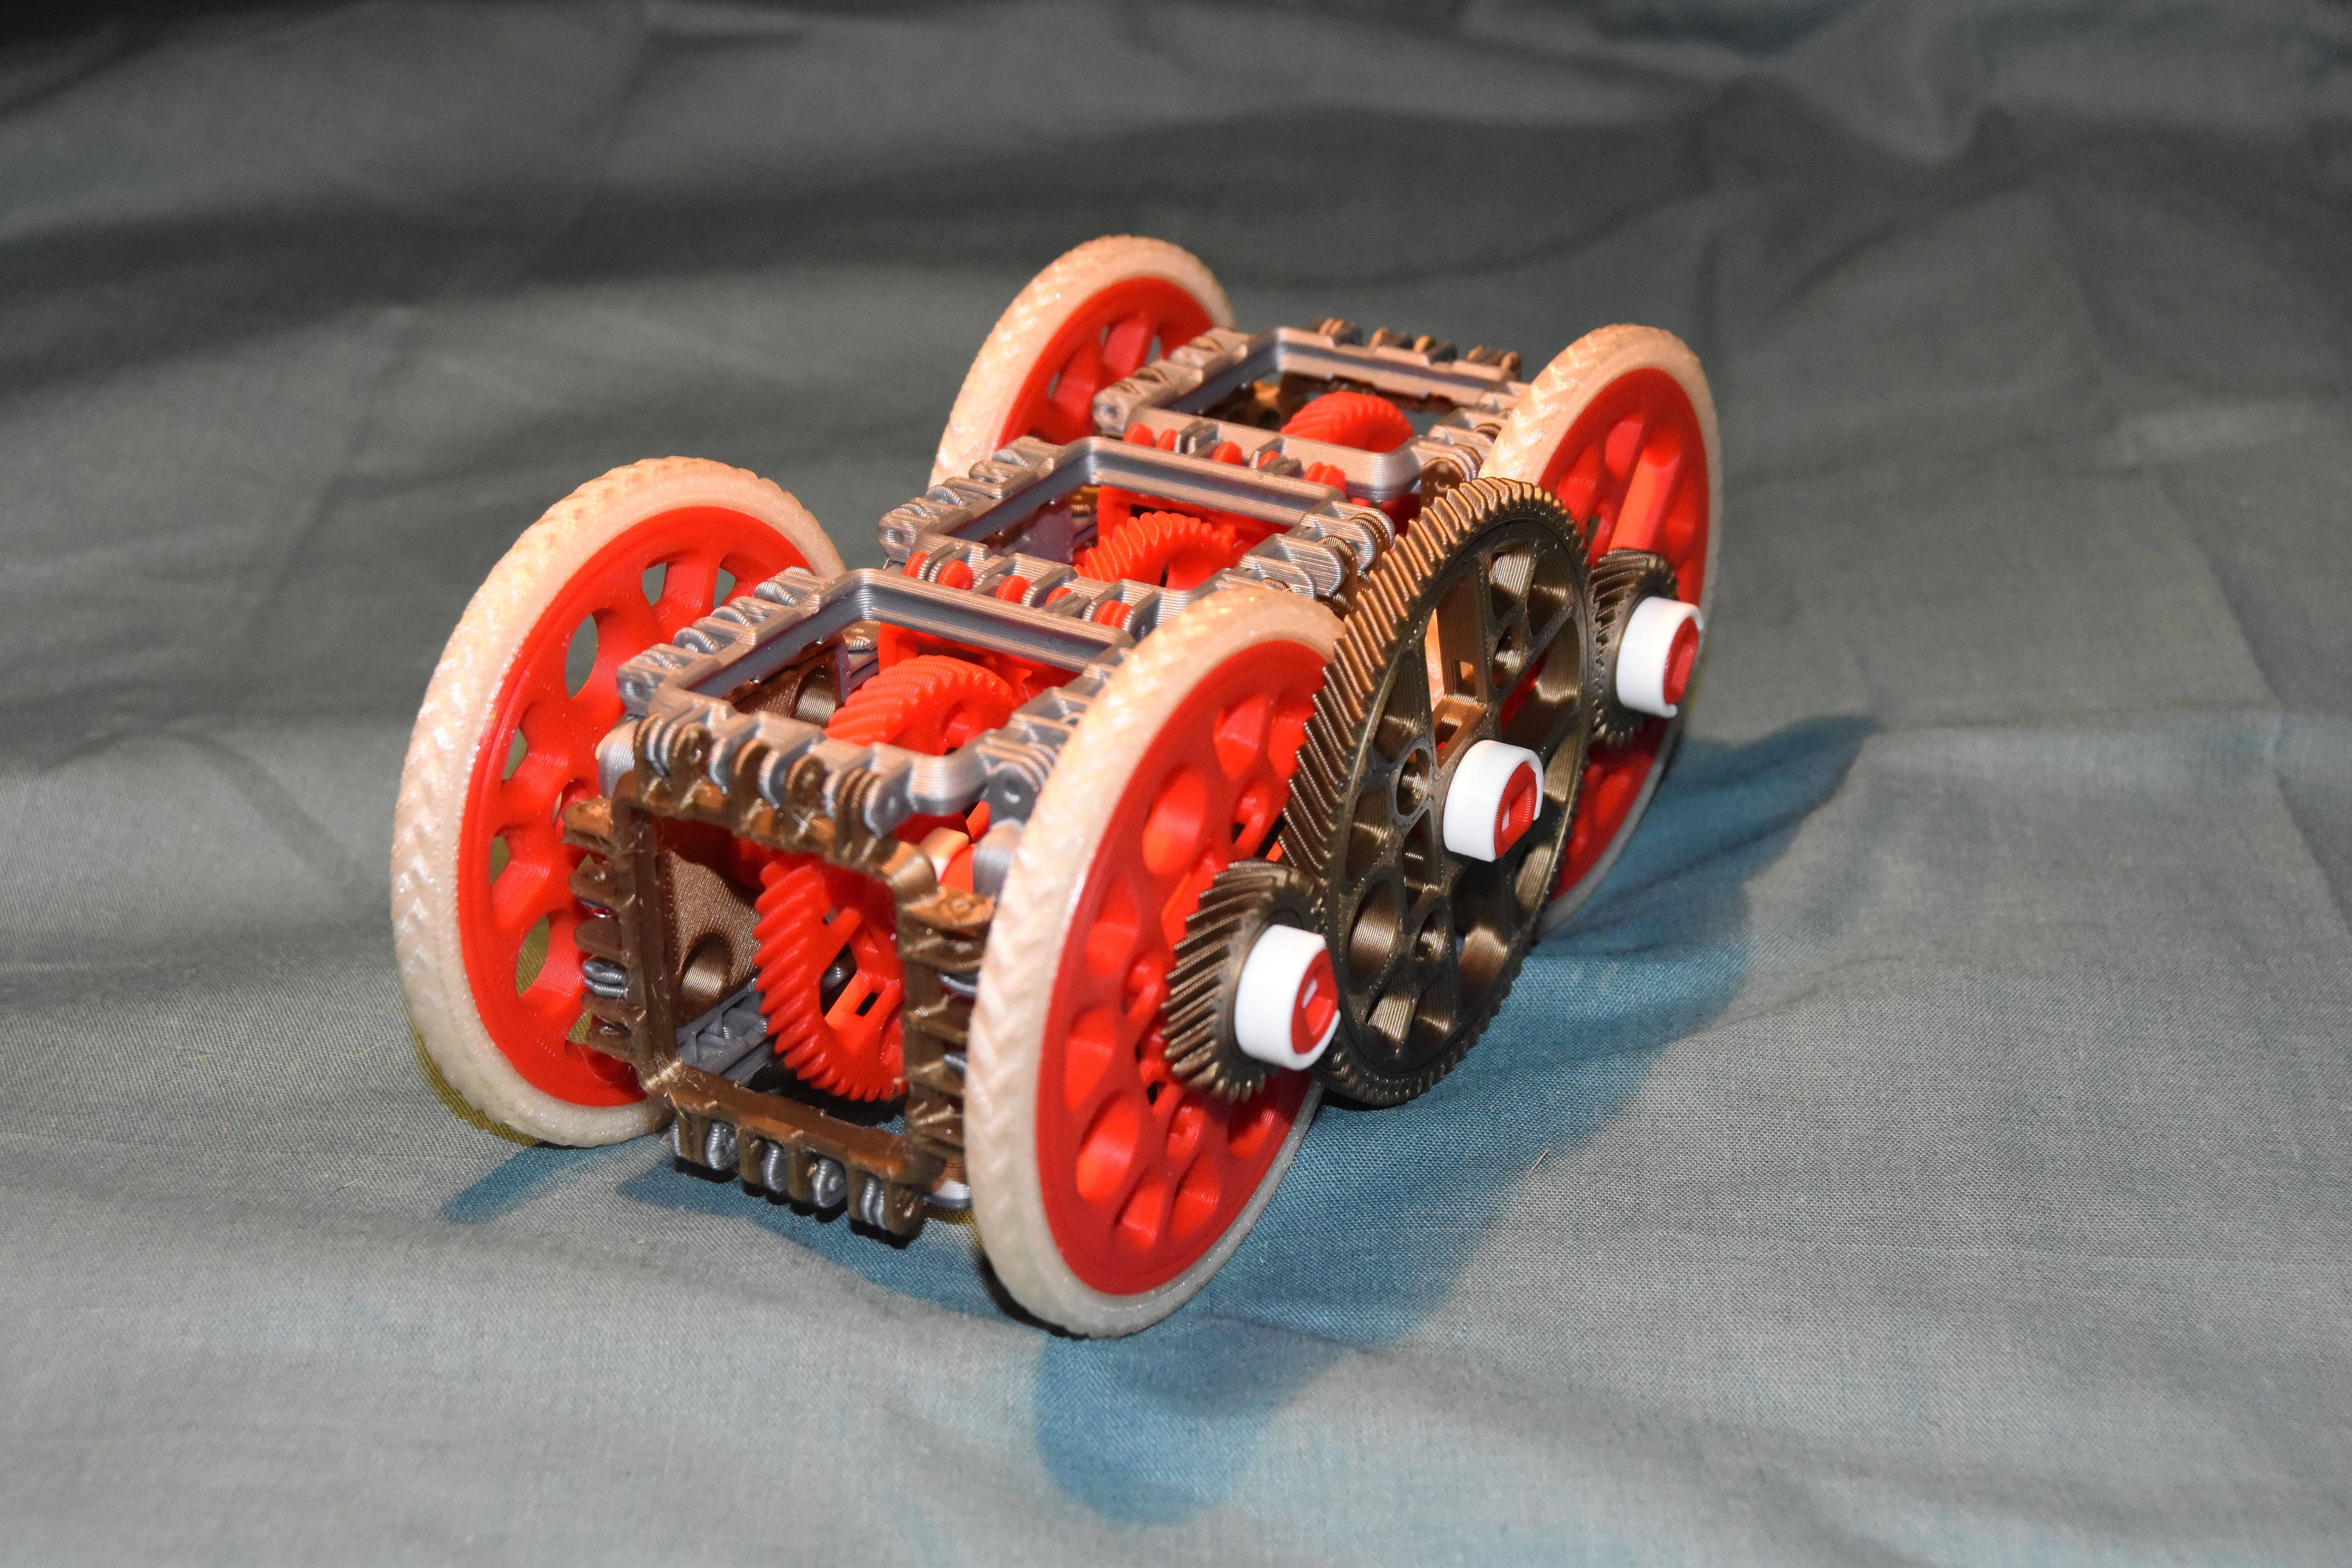
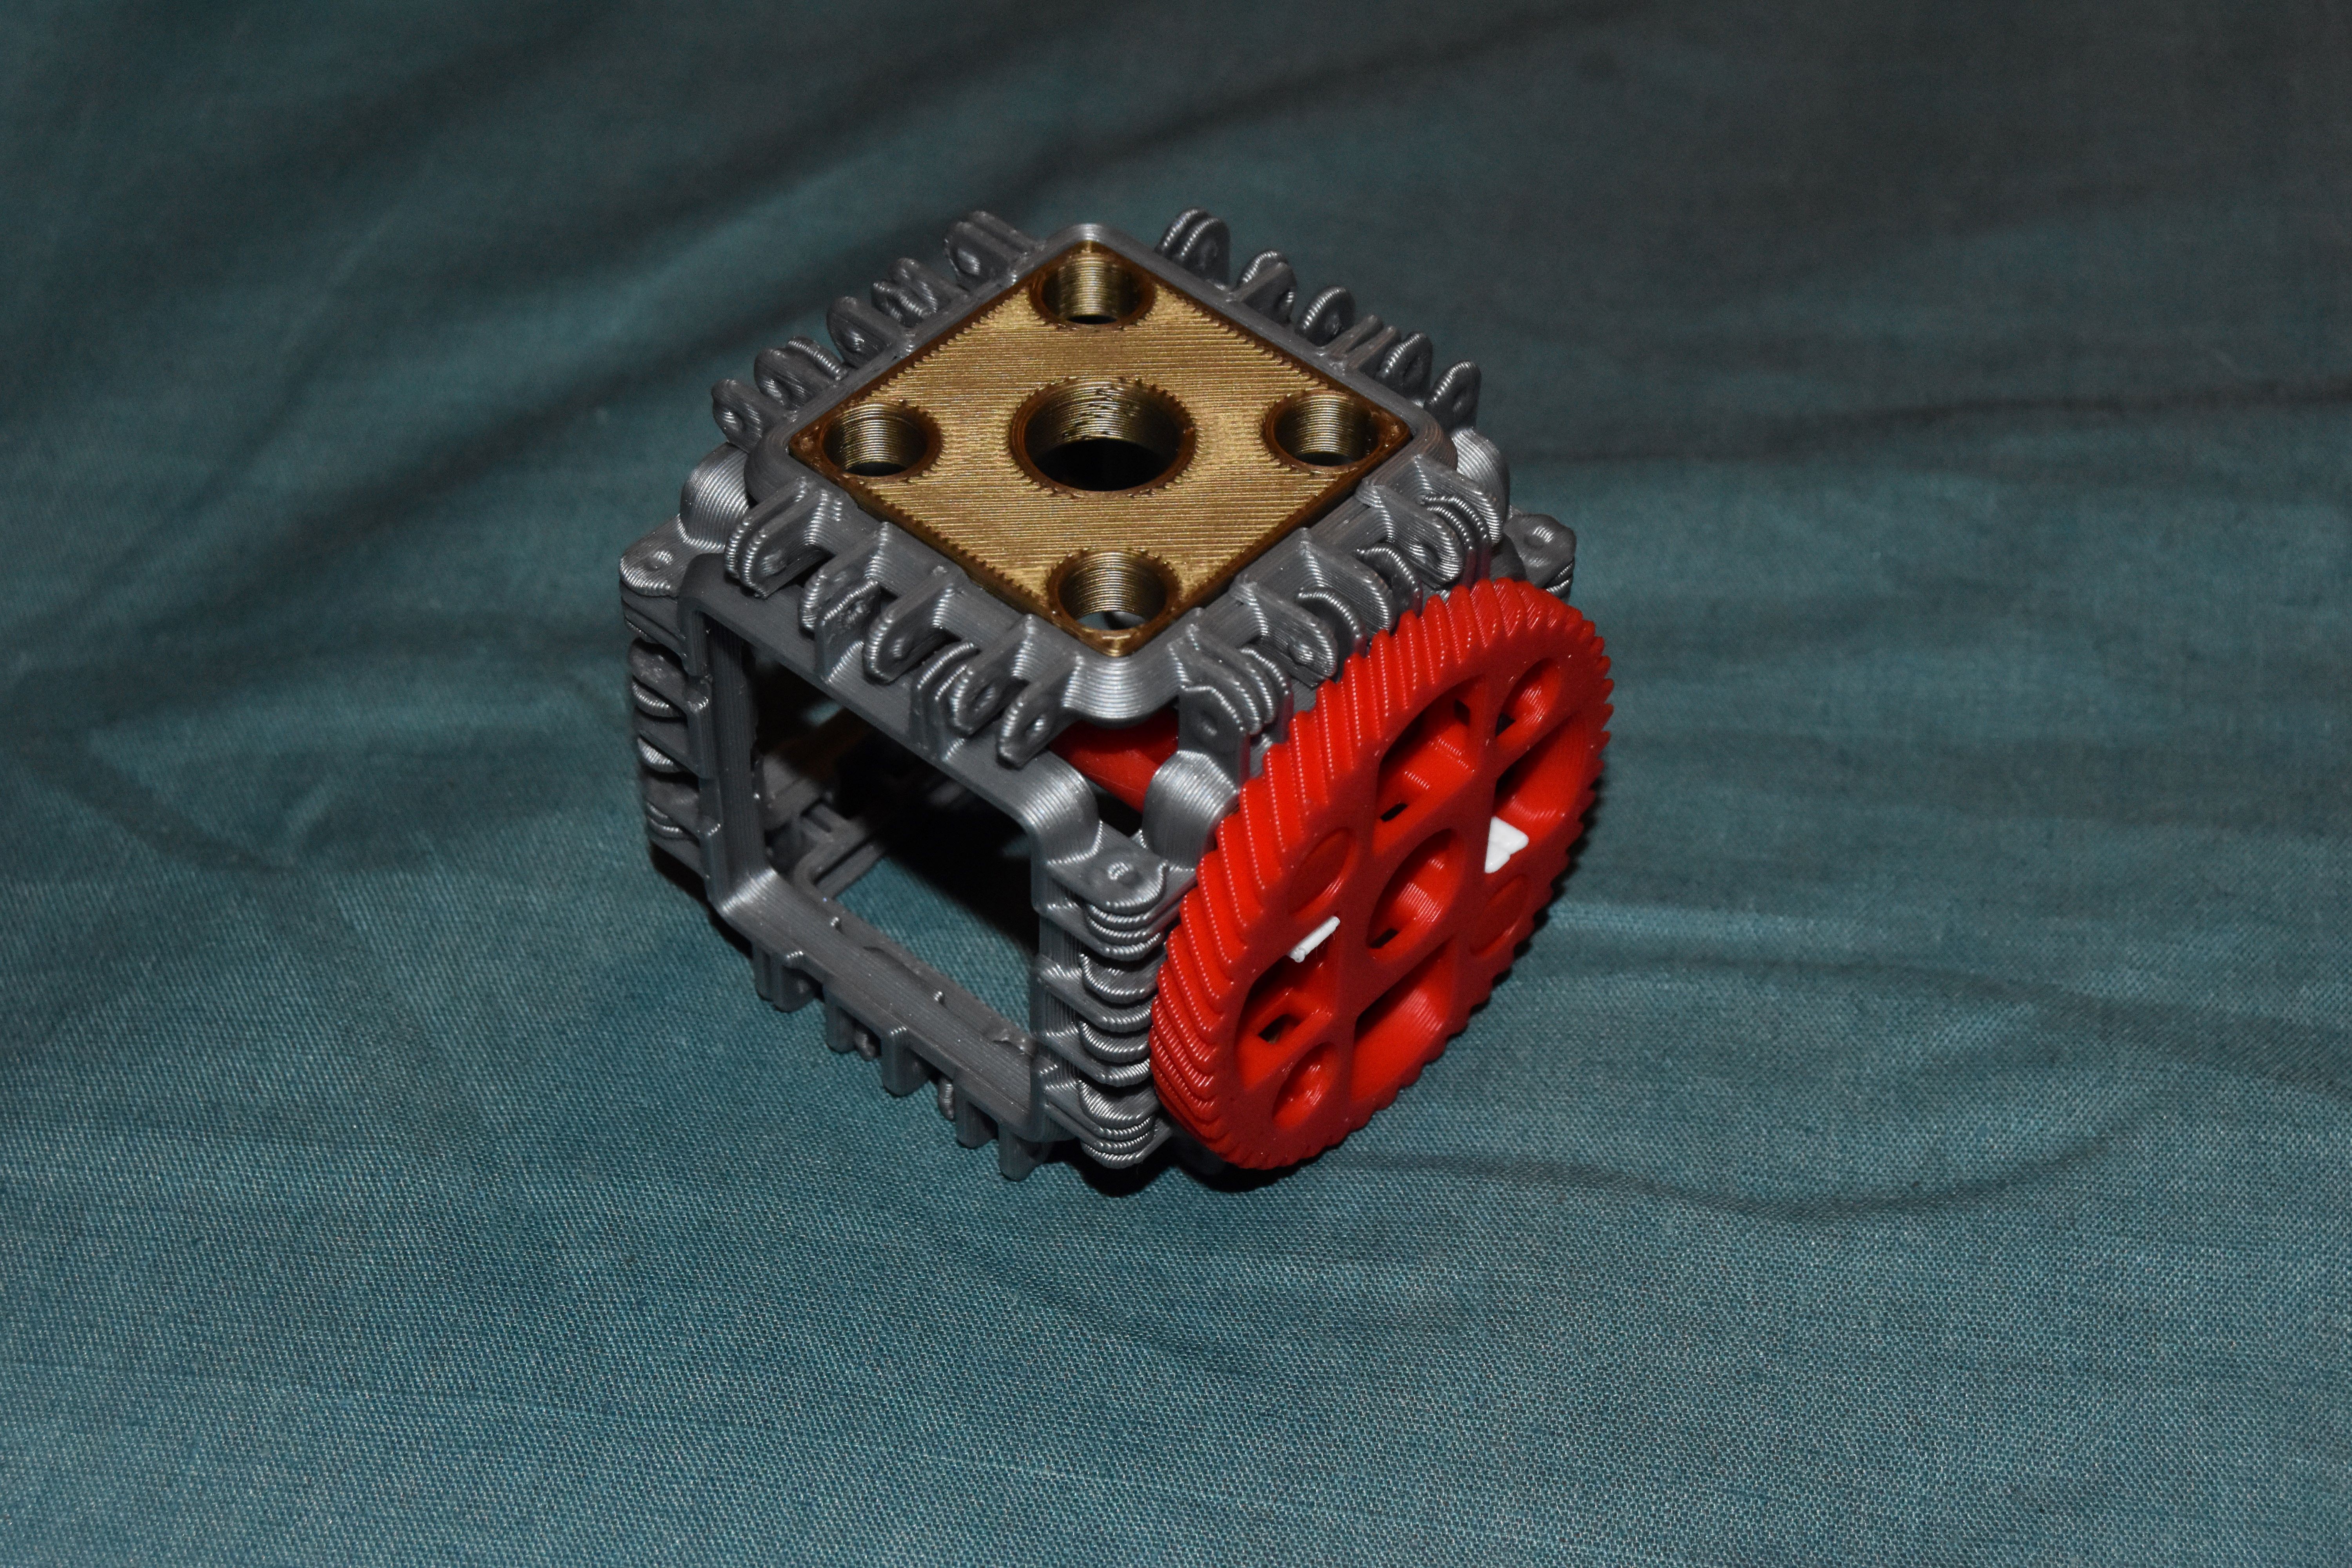
Here is a basic car model with small, medium and large gears connecting both wheel shafts. Note how the medium gears fit entirely within the grid structure, making them useful compact gears.
Gears can be joined to many other things including panels themselves.
Ratchets and Springs
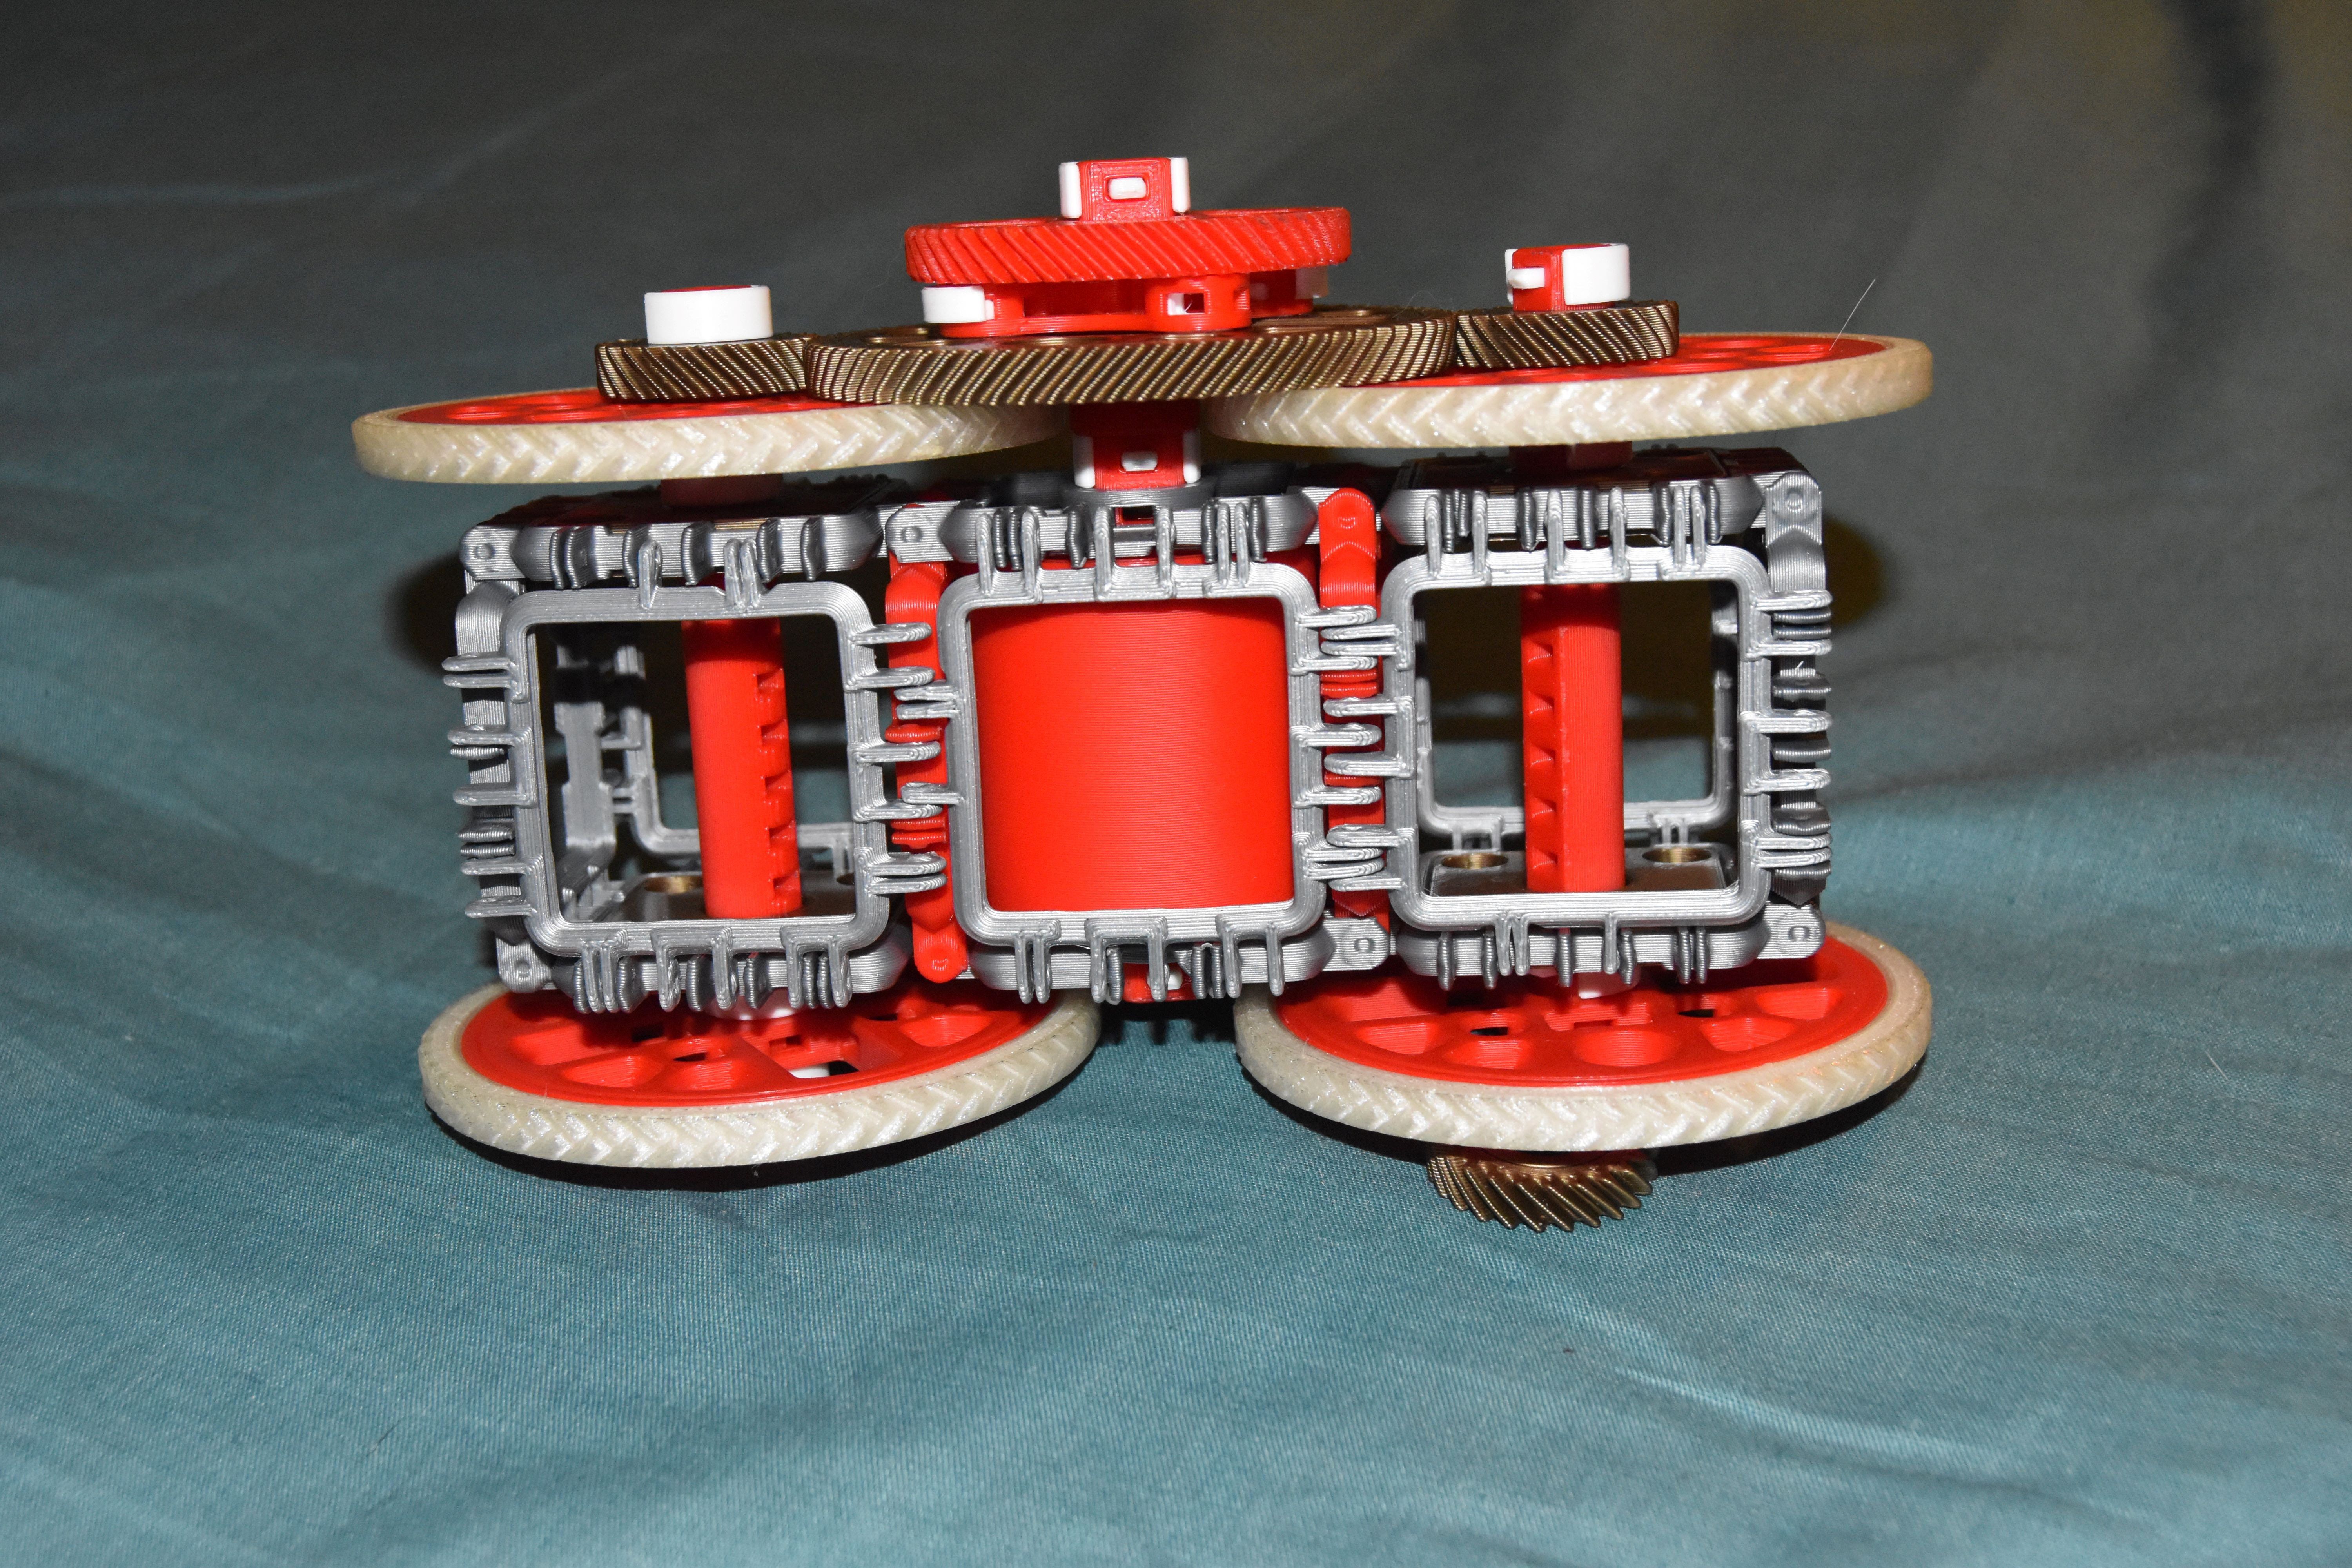
Including springs and ratchets (and bearings), I have enough components in the system so far to make a simple wind up car.

Here is a base view.
PrintABlok Compatiblity
Omnipanels can be joined to the aforementioned PrintABloks using an adapter. The PrintABloks system needs to be scaled up by a factor of 25/24 (or 1.04166666...) to work with Omnipanels at standard scale (or the inverse to make Omnipanels work at PrintABloks scale, but this is not recommended).
I actually tried re-making the whole system at PrintABloks scale (for two weeks!) but alas the Omnipanels do not work well at that size, so I reverted to the current larger size.
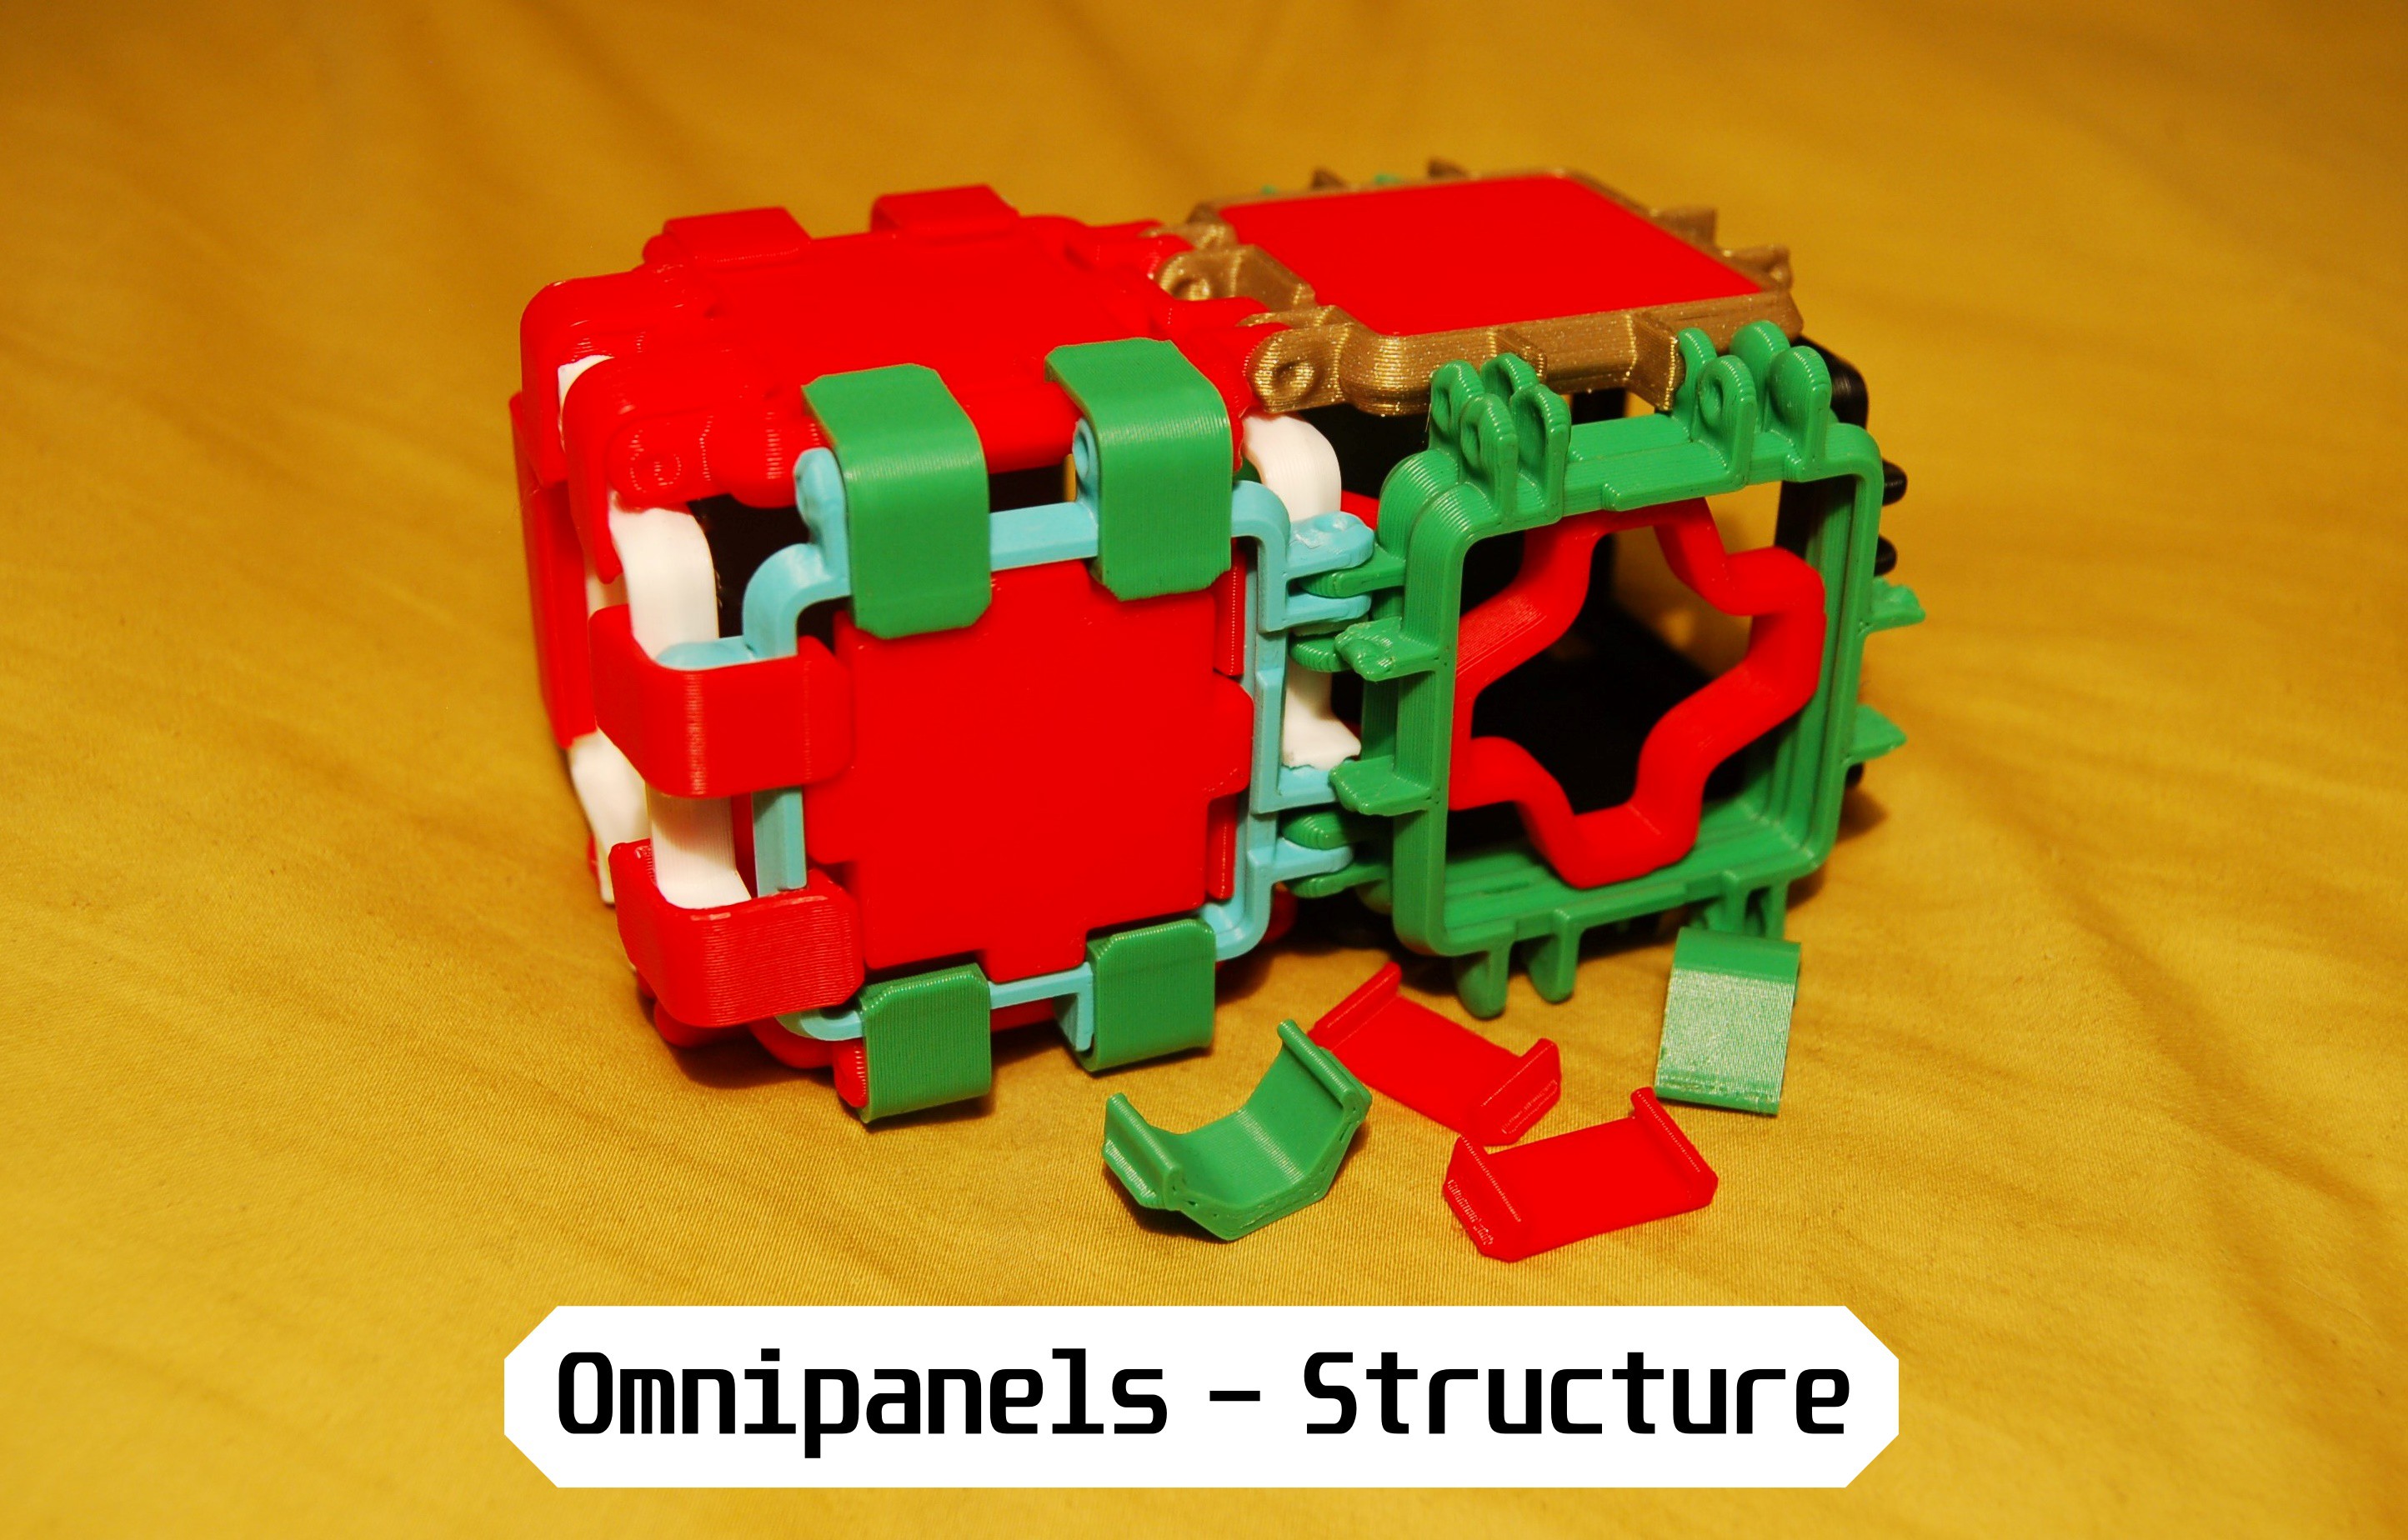
Structural Components
Reinforcing clips and other features such as panel inserts (useful for adding features to panels, without having to design whole new panels in CAD), are available here, and will work with the new panels.
Omnitiles
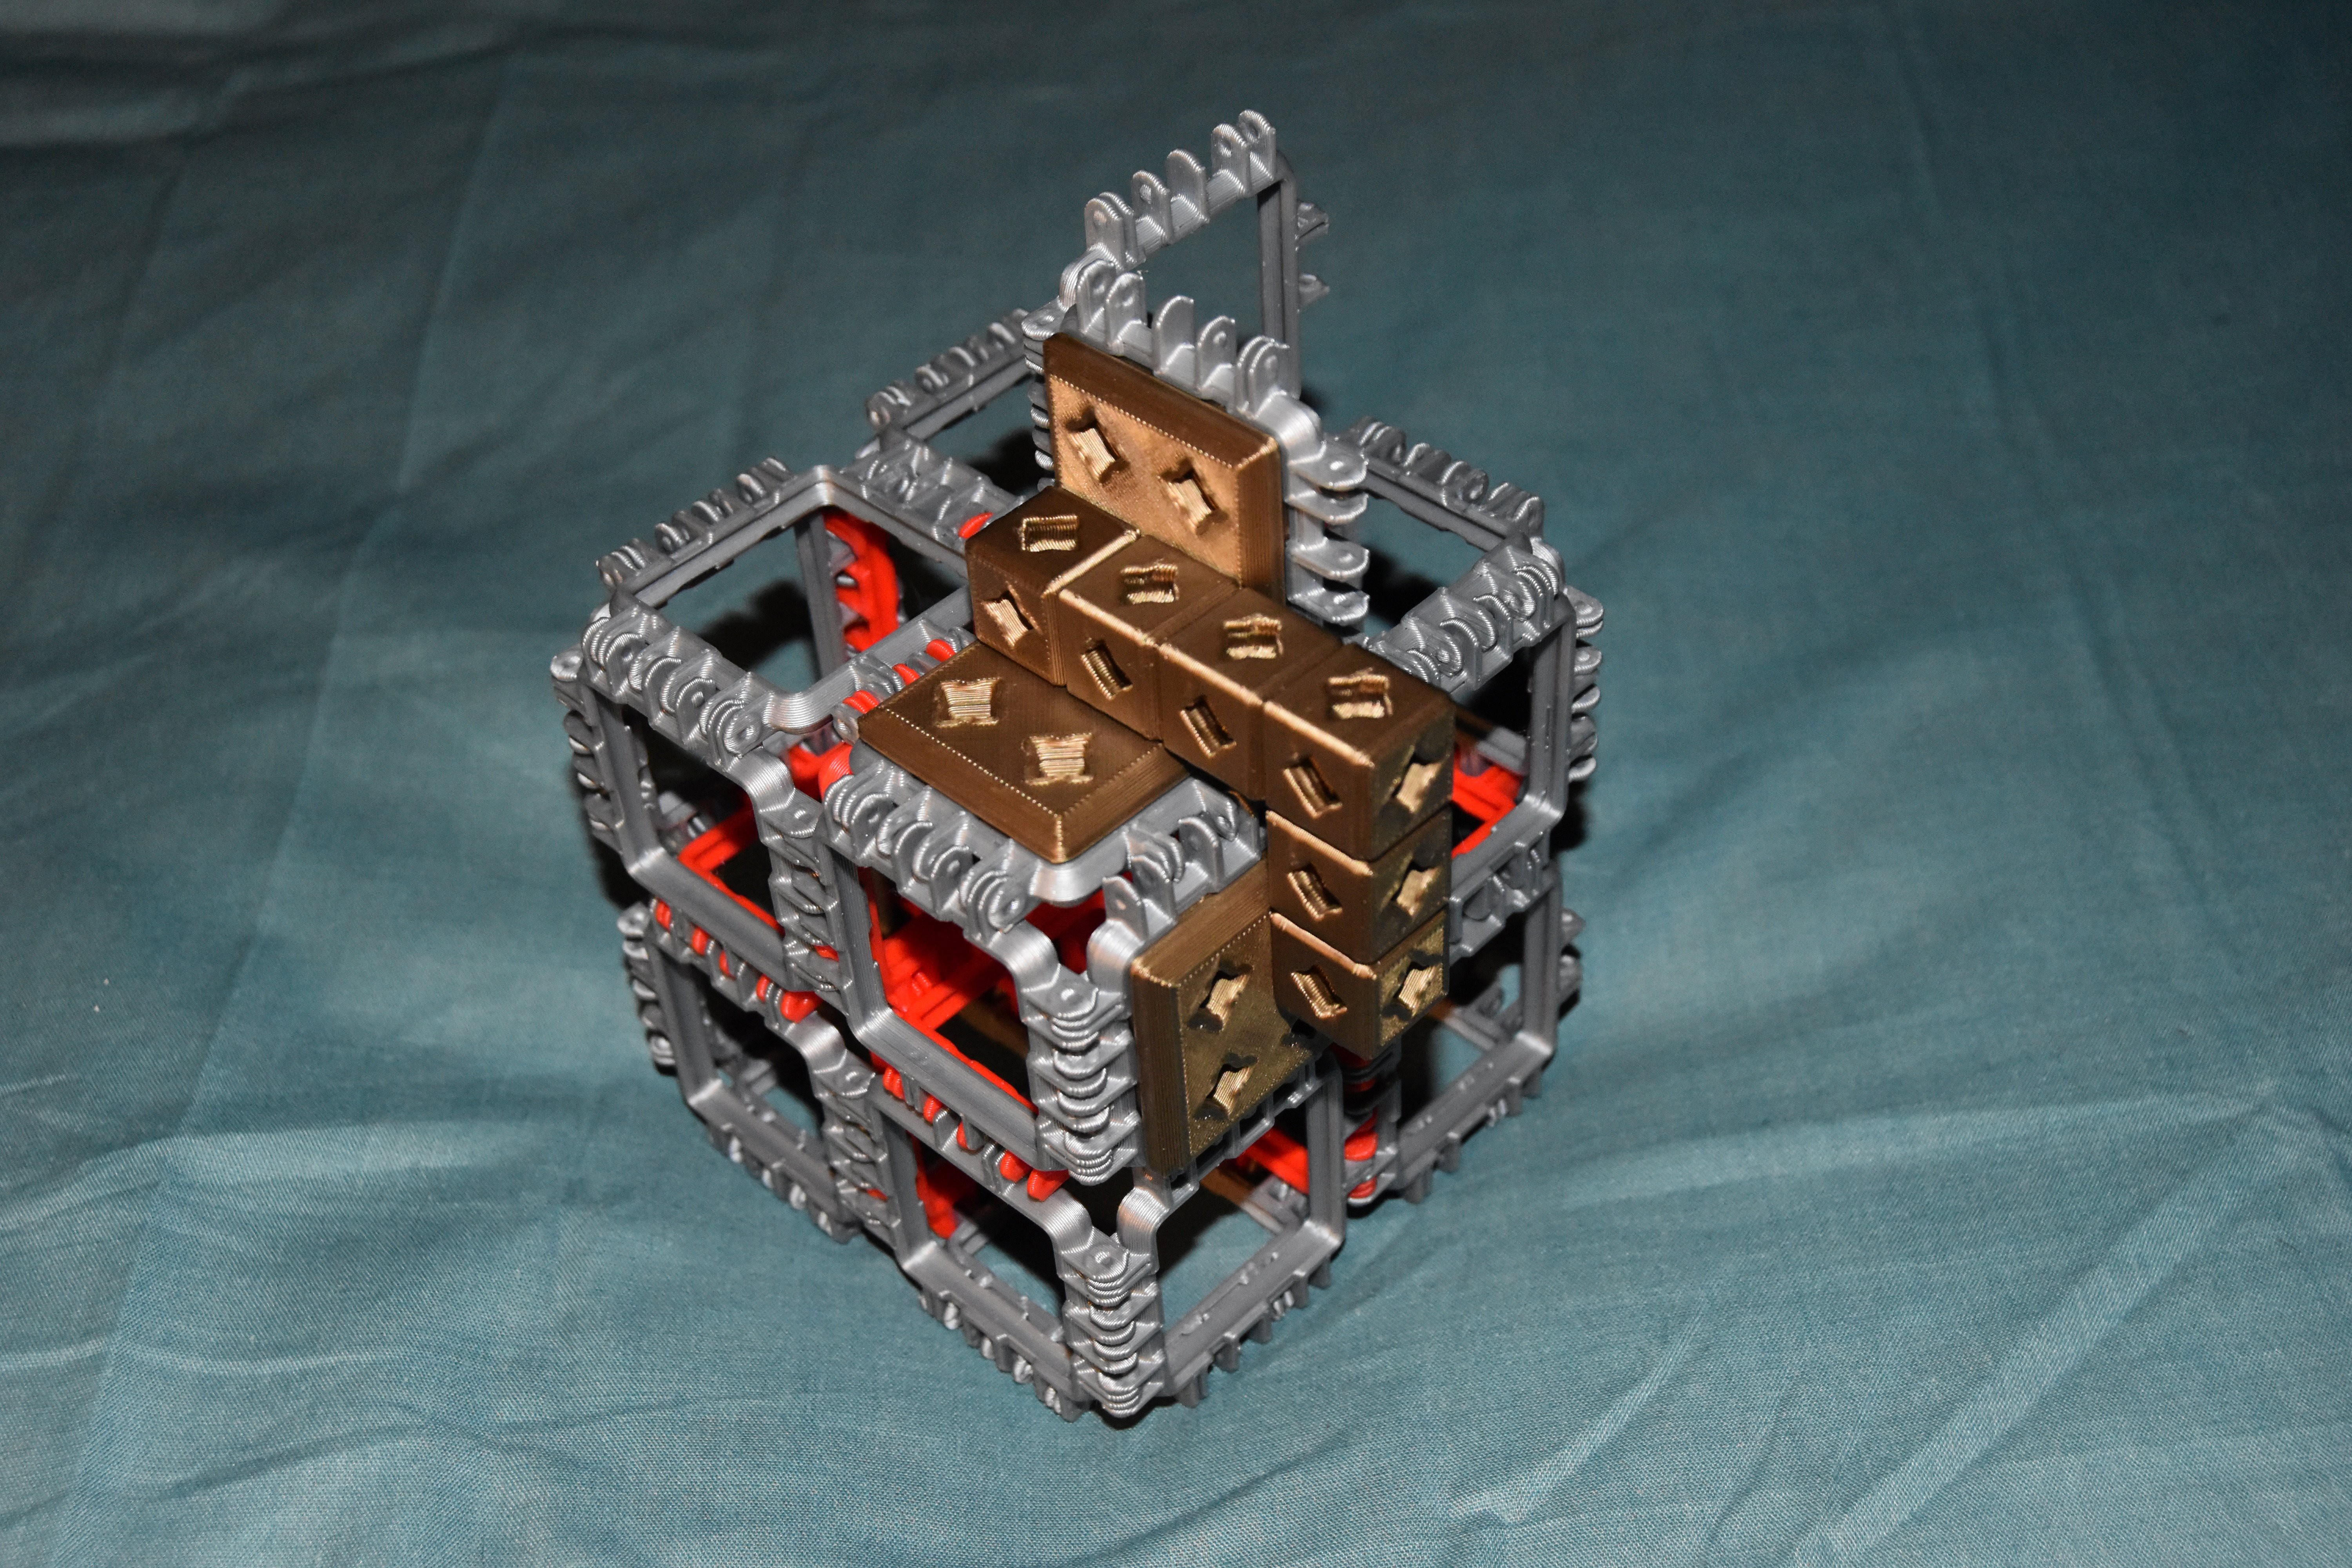
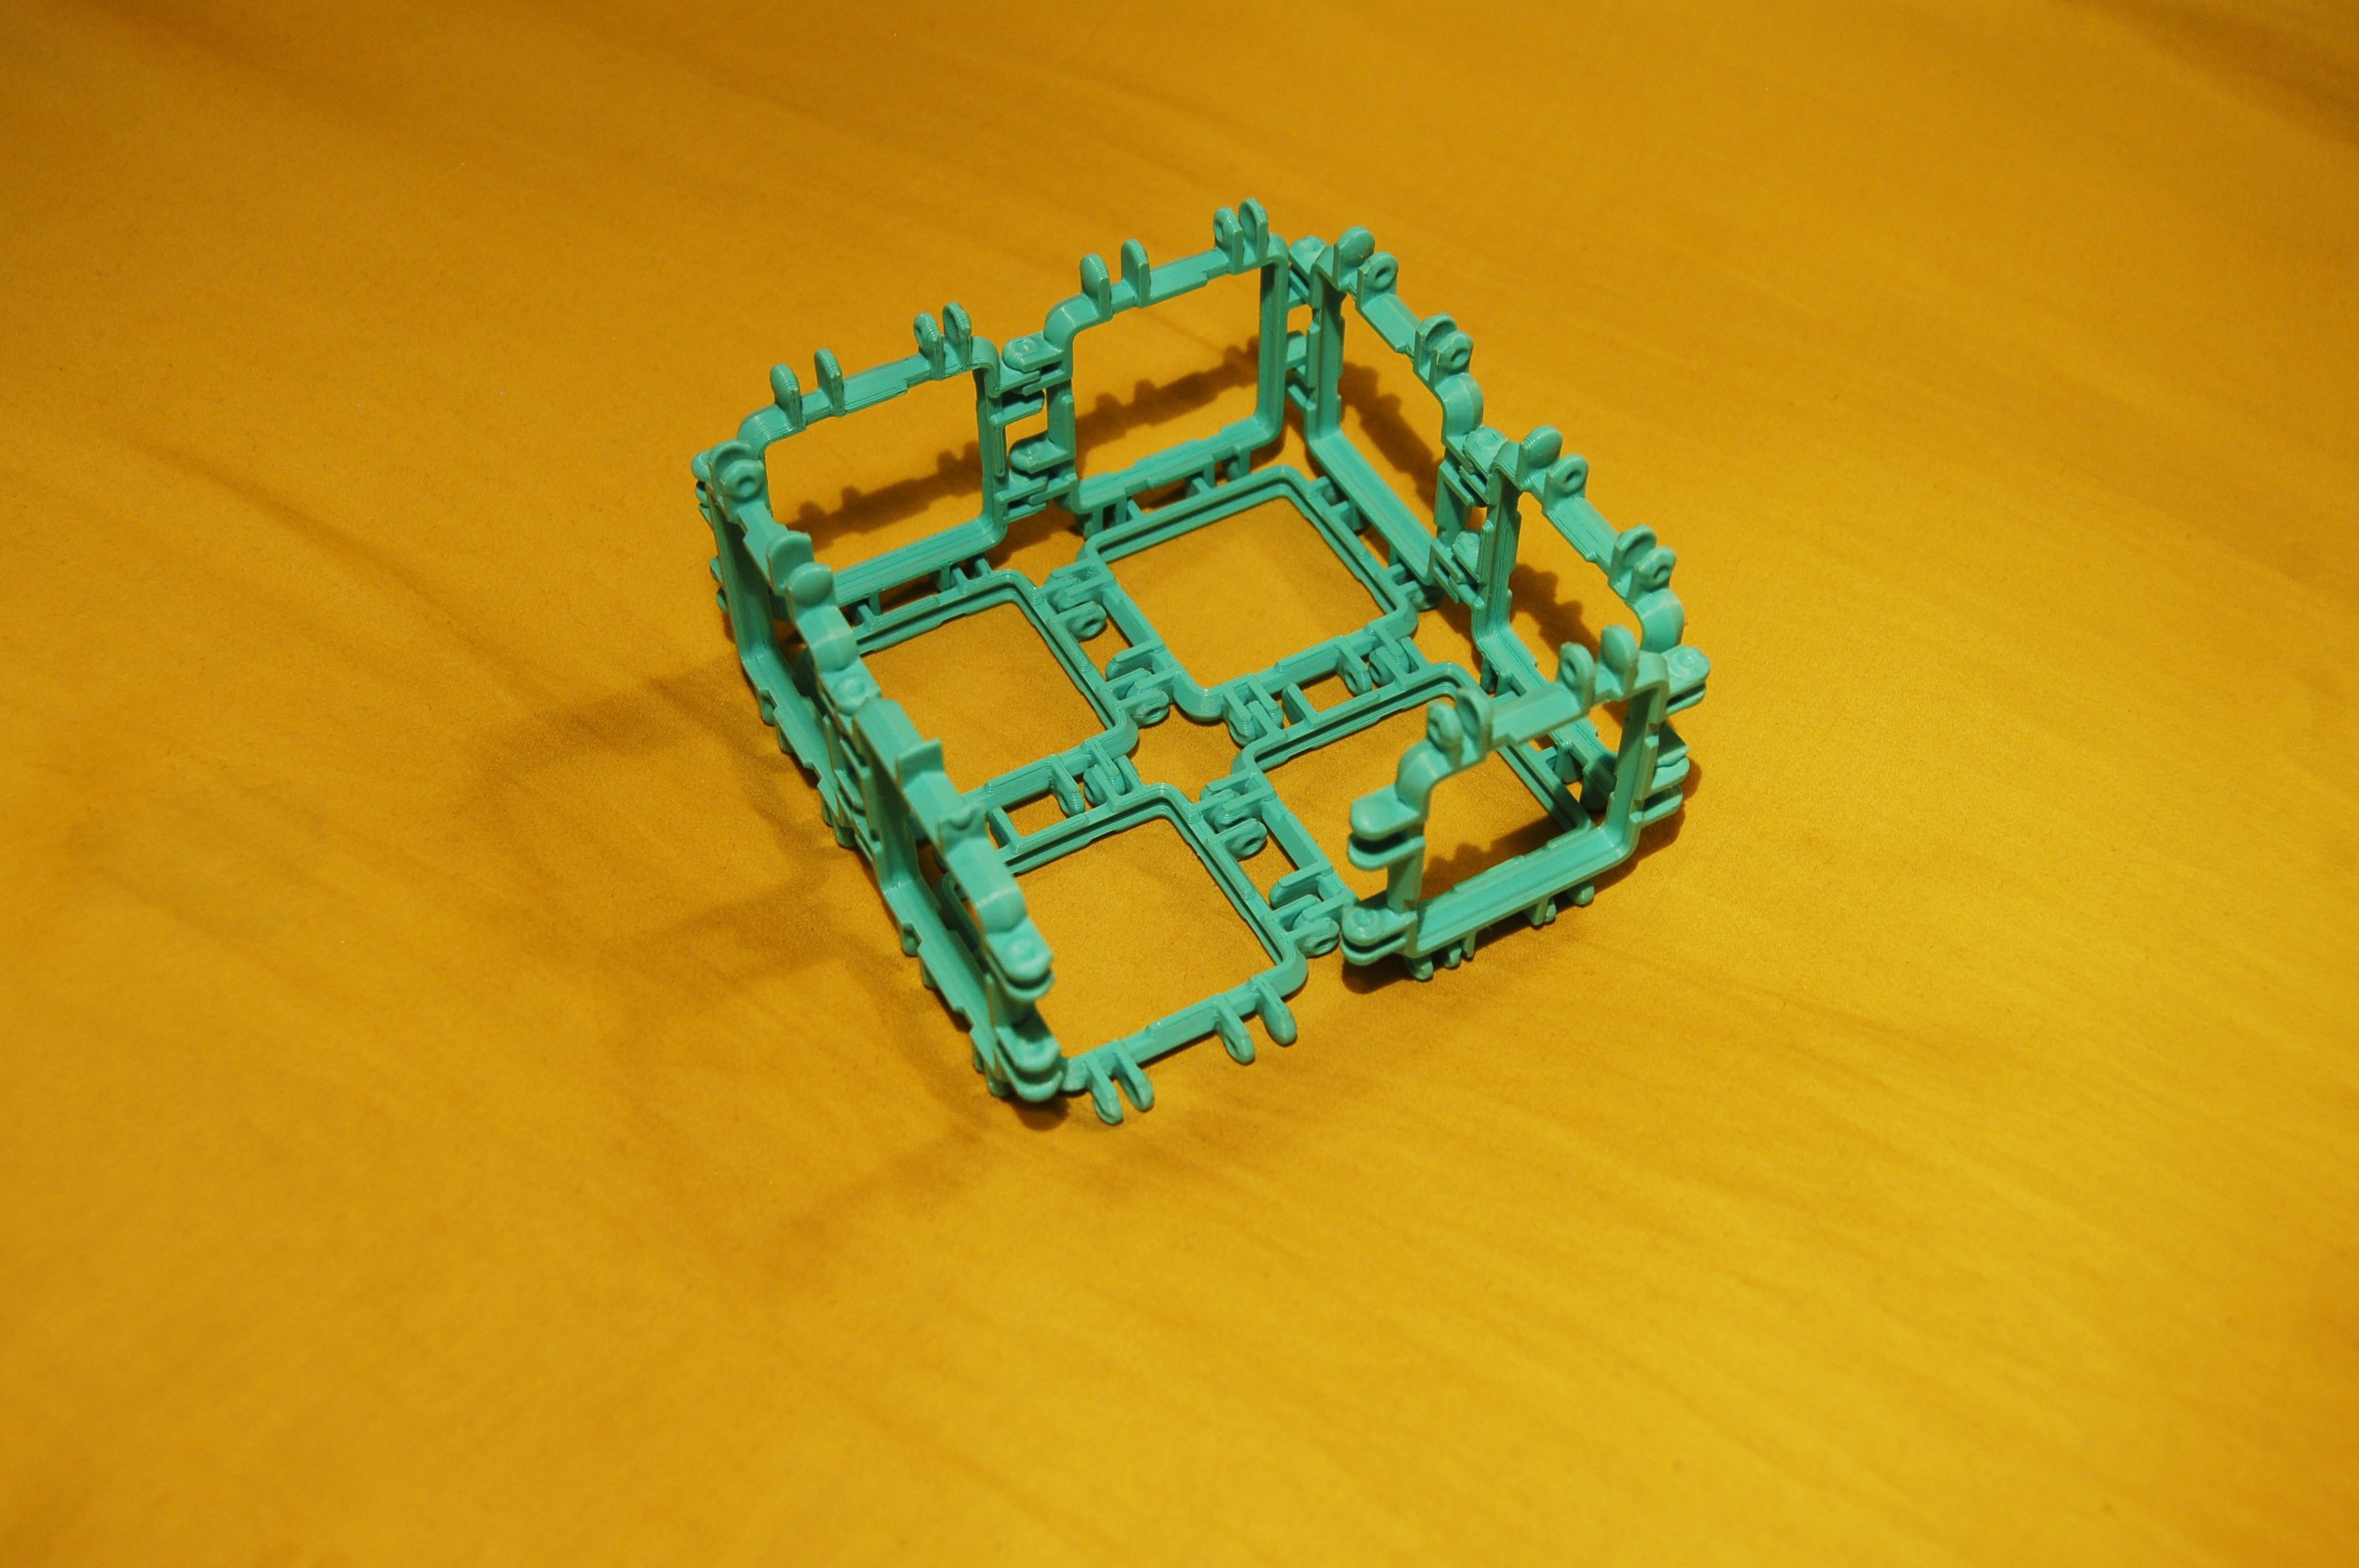
A very big feature of the Omnipanels system, are Omnitiles. These allow you to clad an Omnipanels structure with decorative tiles. The intention for this add on it to make highly modular terrain e.g. Castles, for tabletop gaming etc (although there are no decorative tiles made yet). Also the connectors parts are not compatible with the new panels (I will make them in due course).
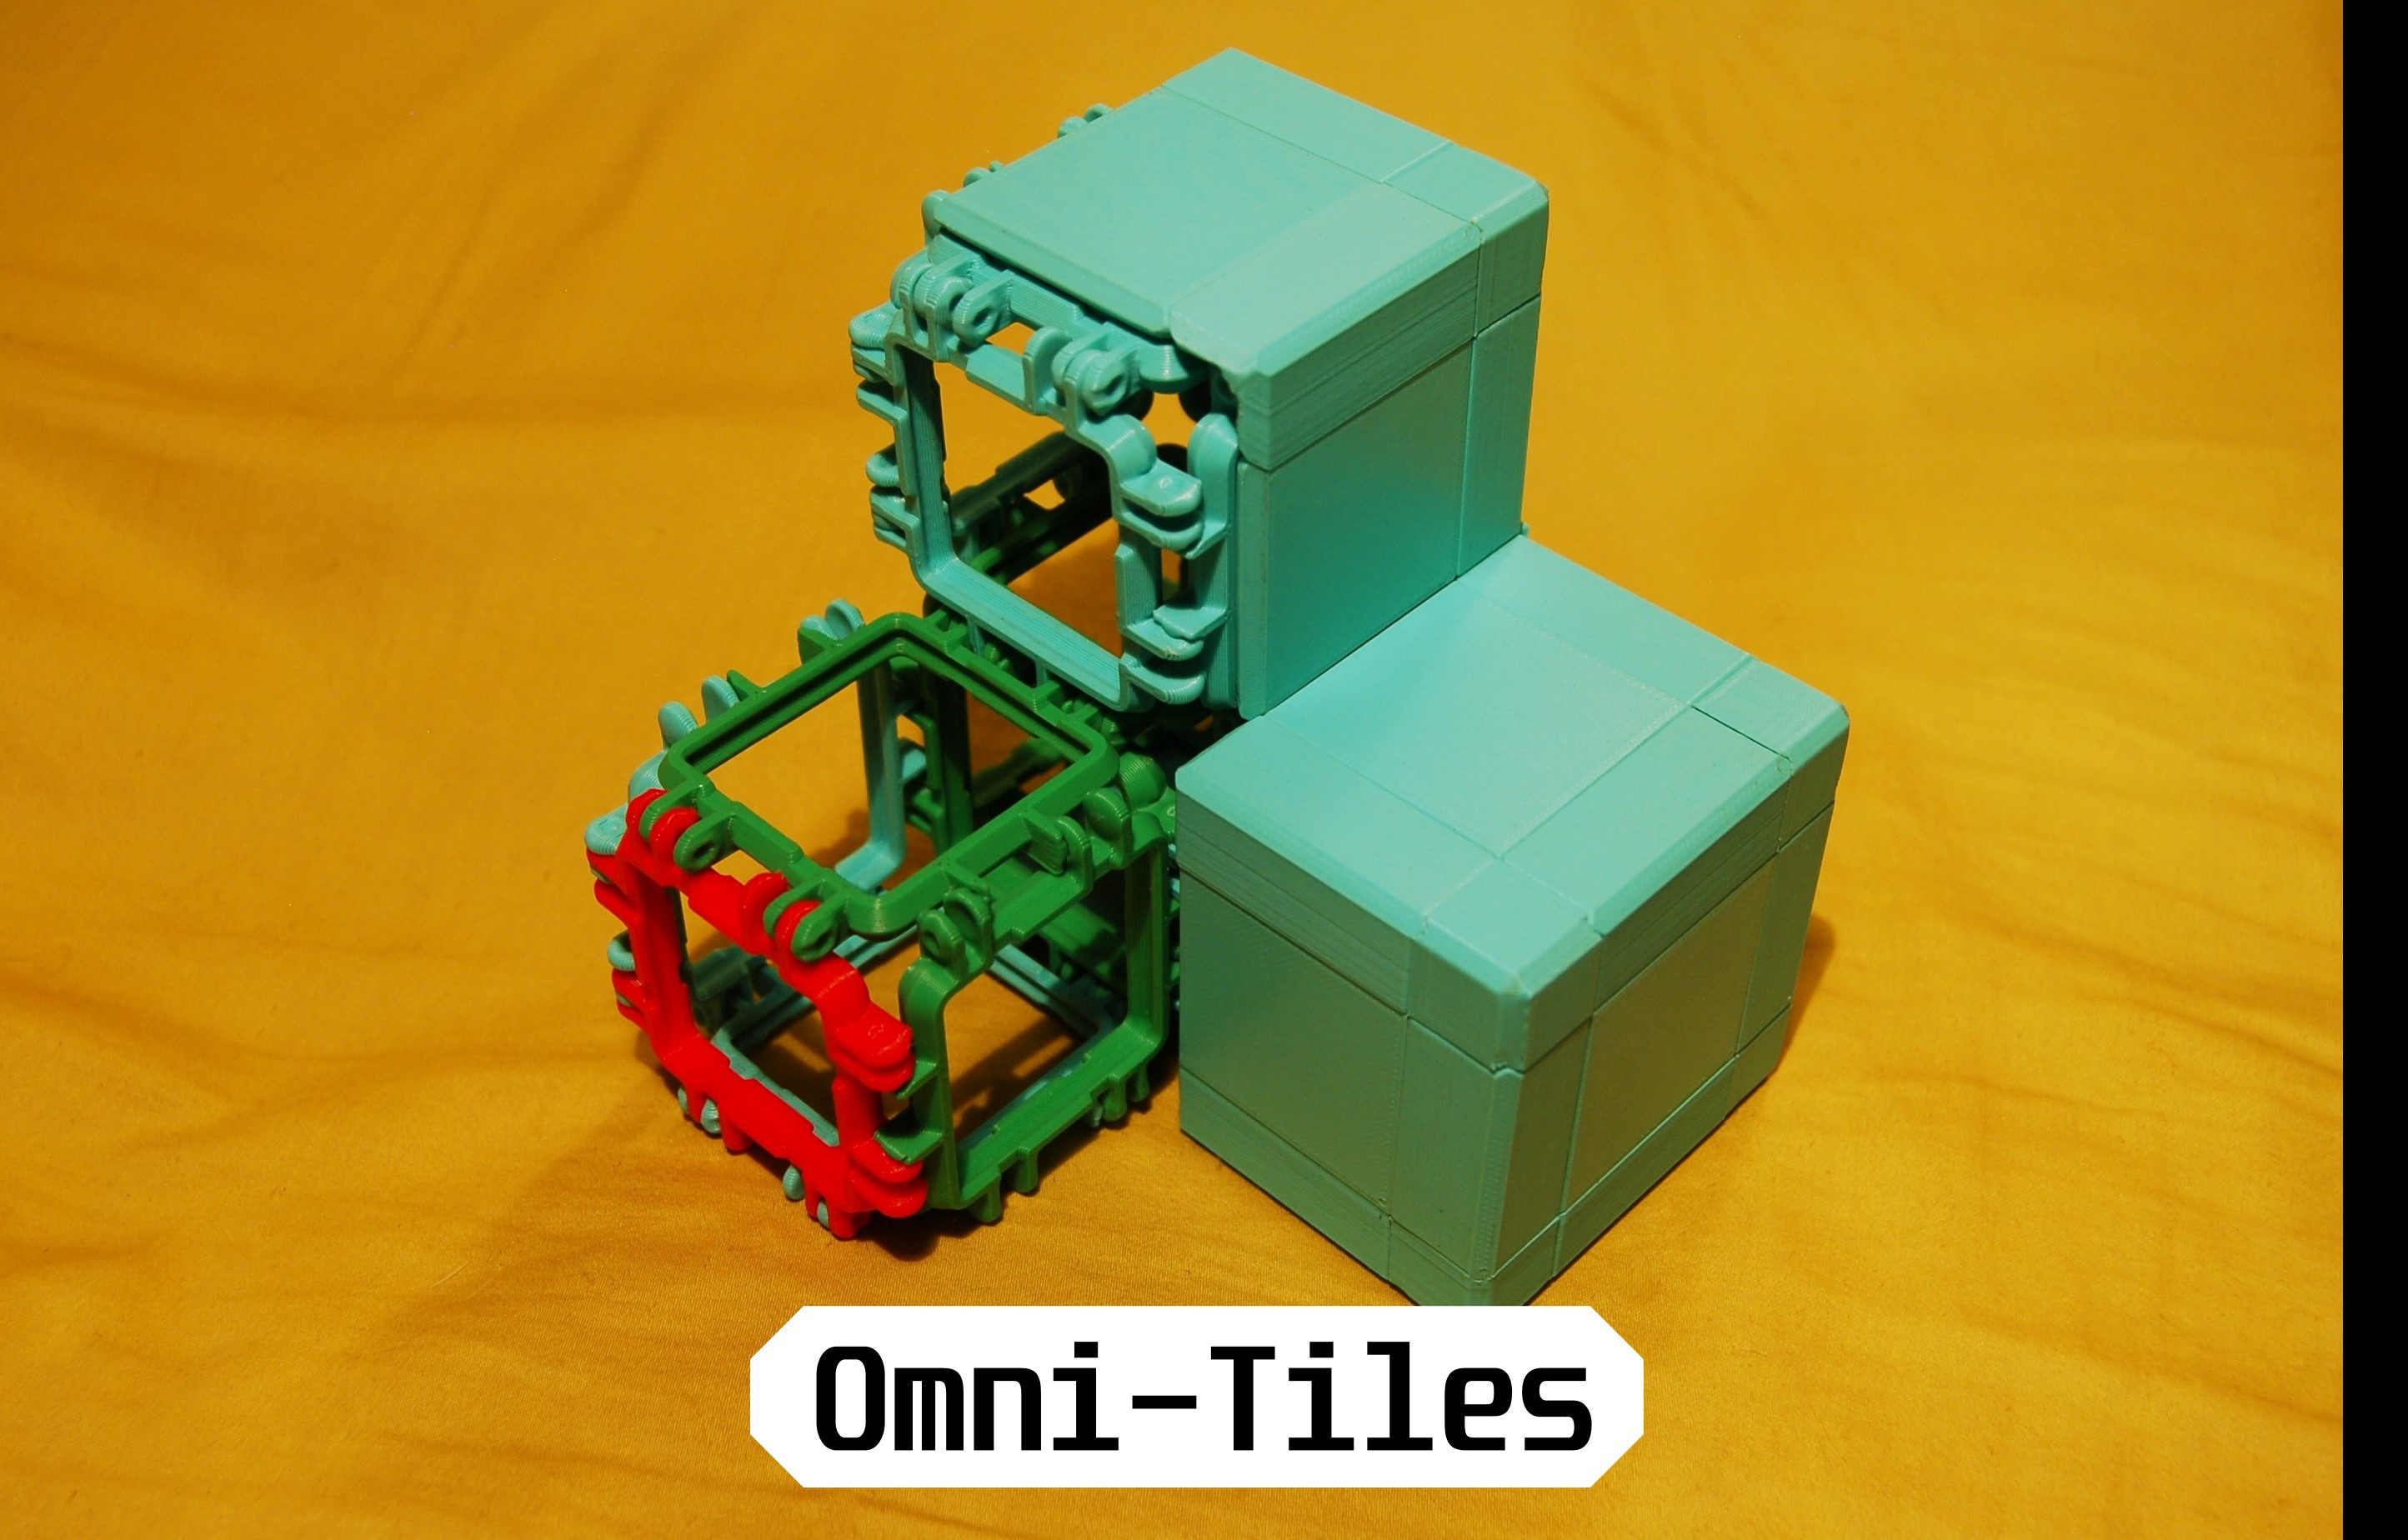
Another base structure.
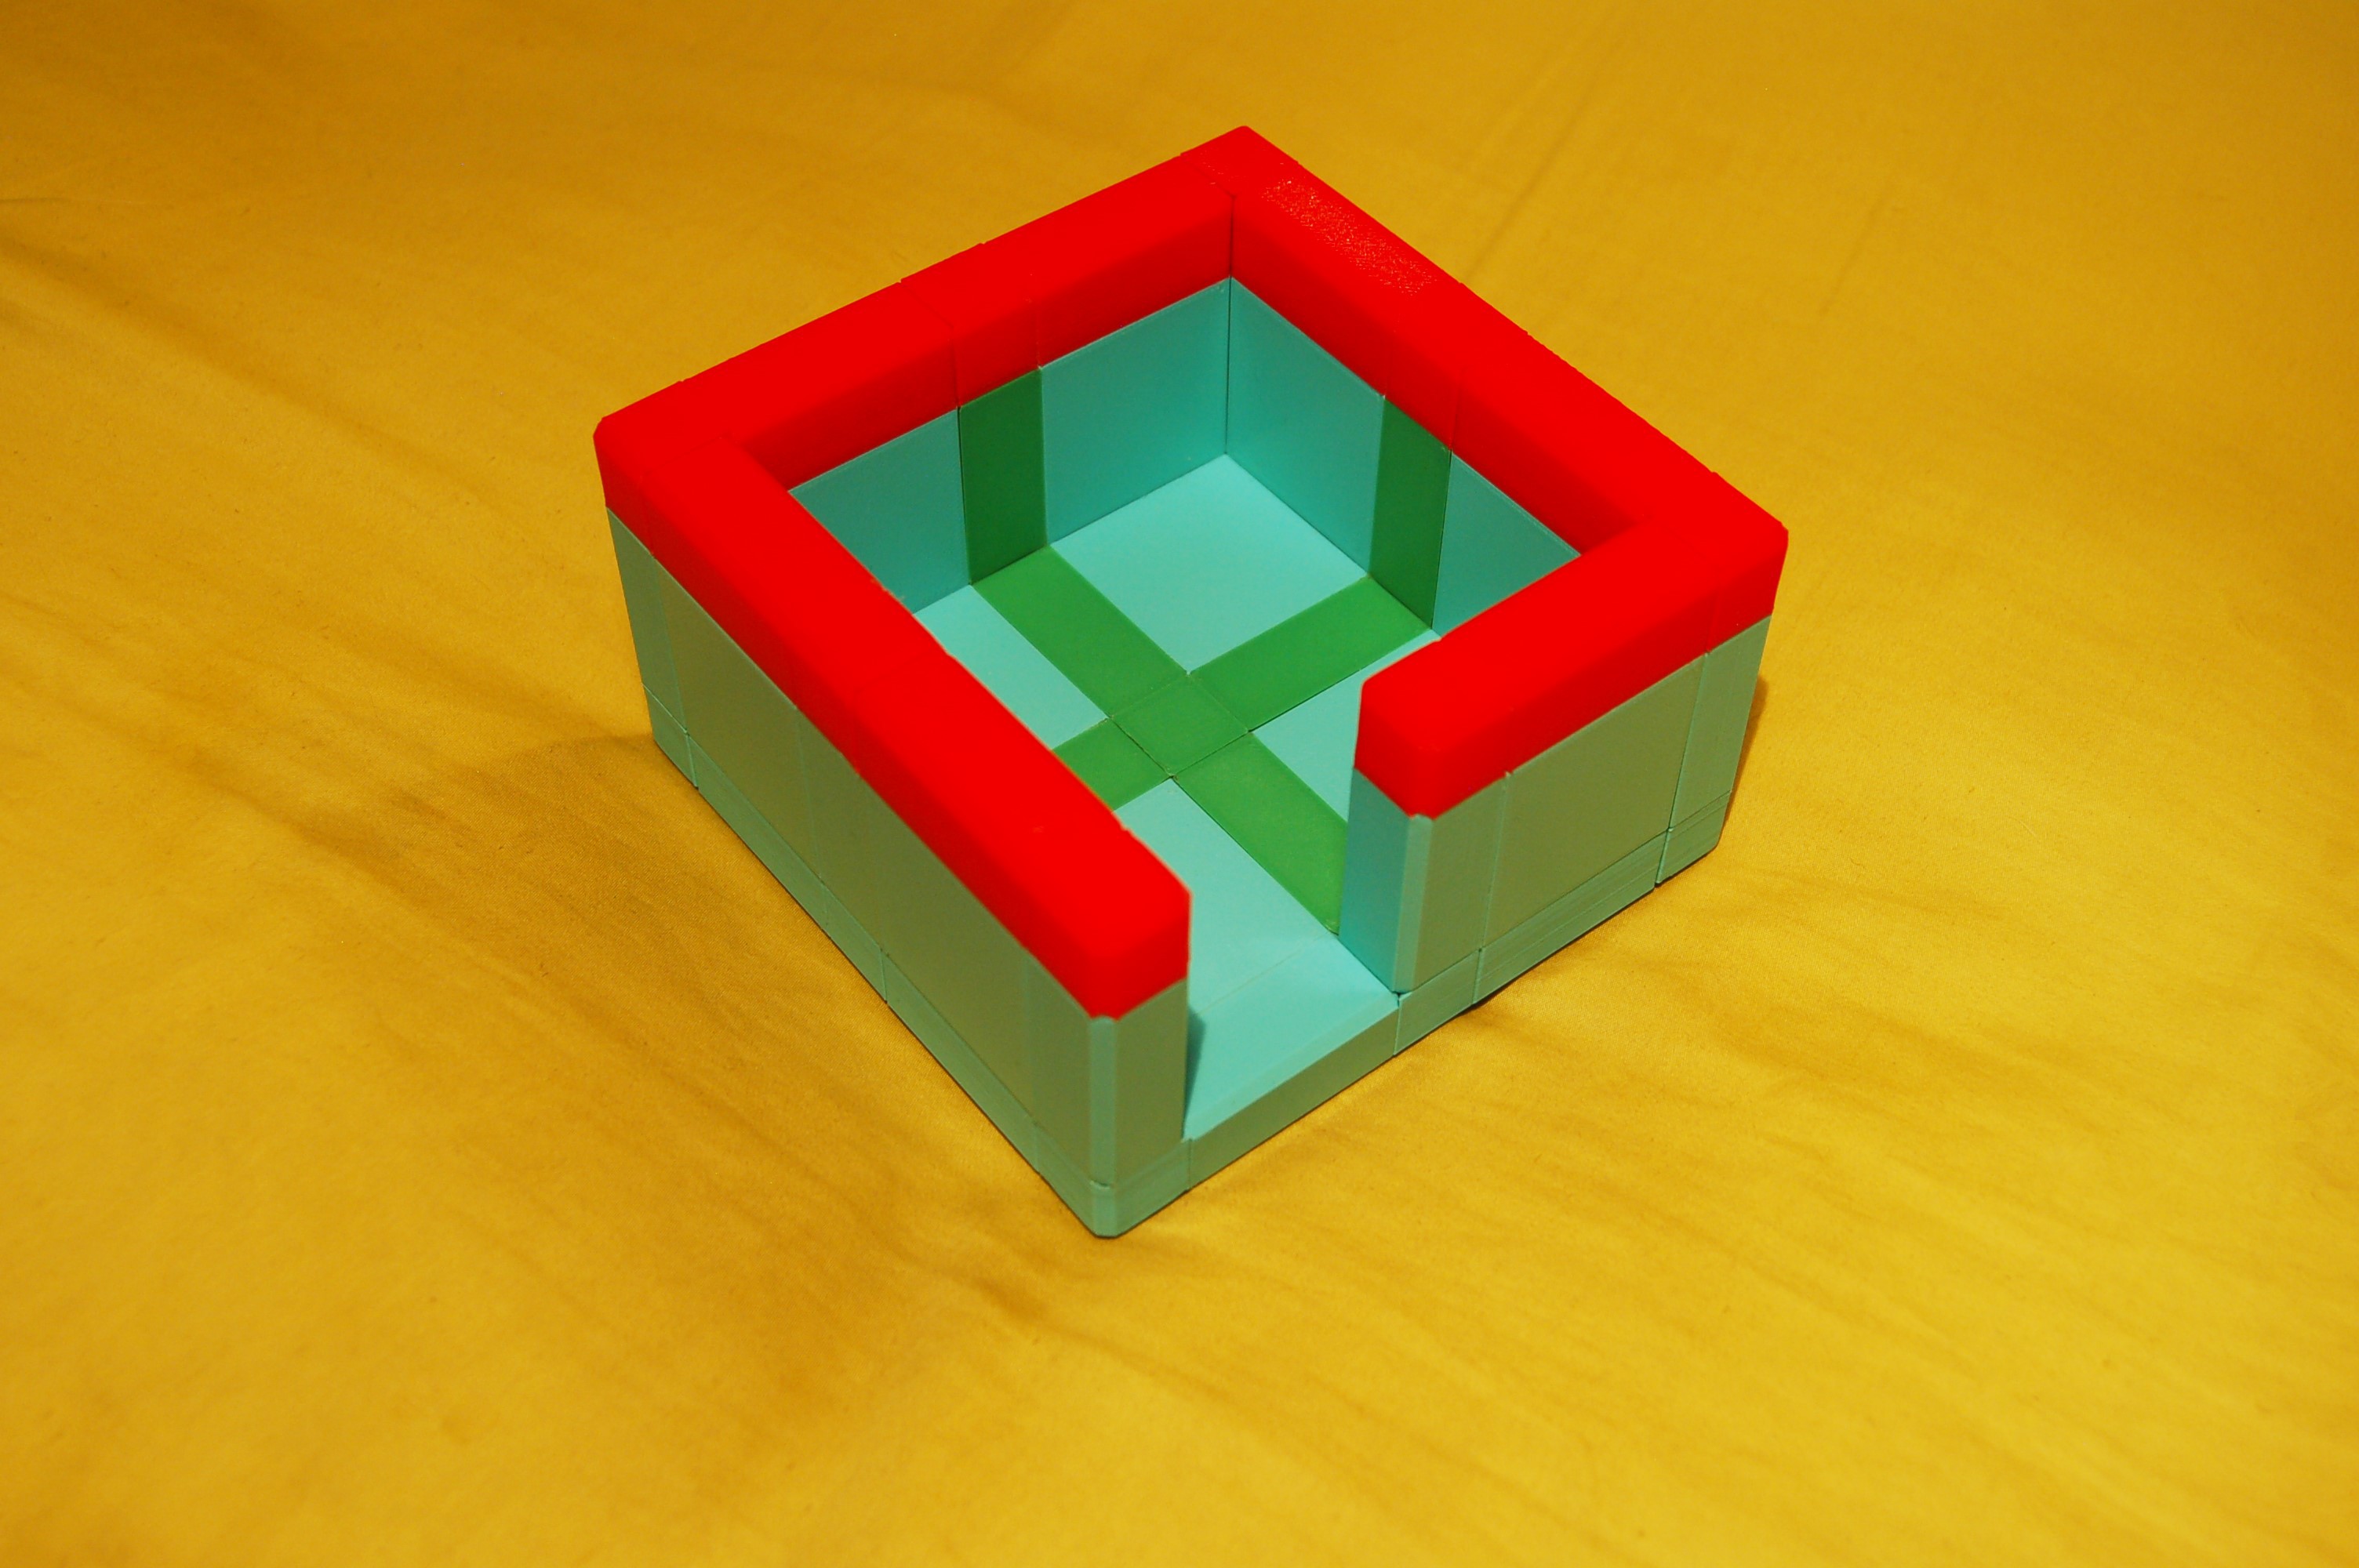
Then clad with Omnitiles.
Example Functional Project
Omnipanels are intended also for functional items. Recently I built a spool holder for an 8.5kg spool of filament (yes I need that much... to print more Omnipanels).
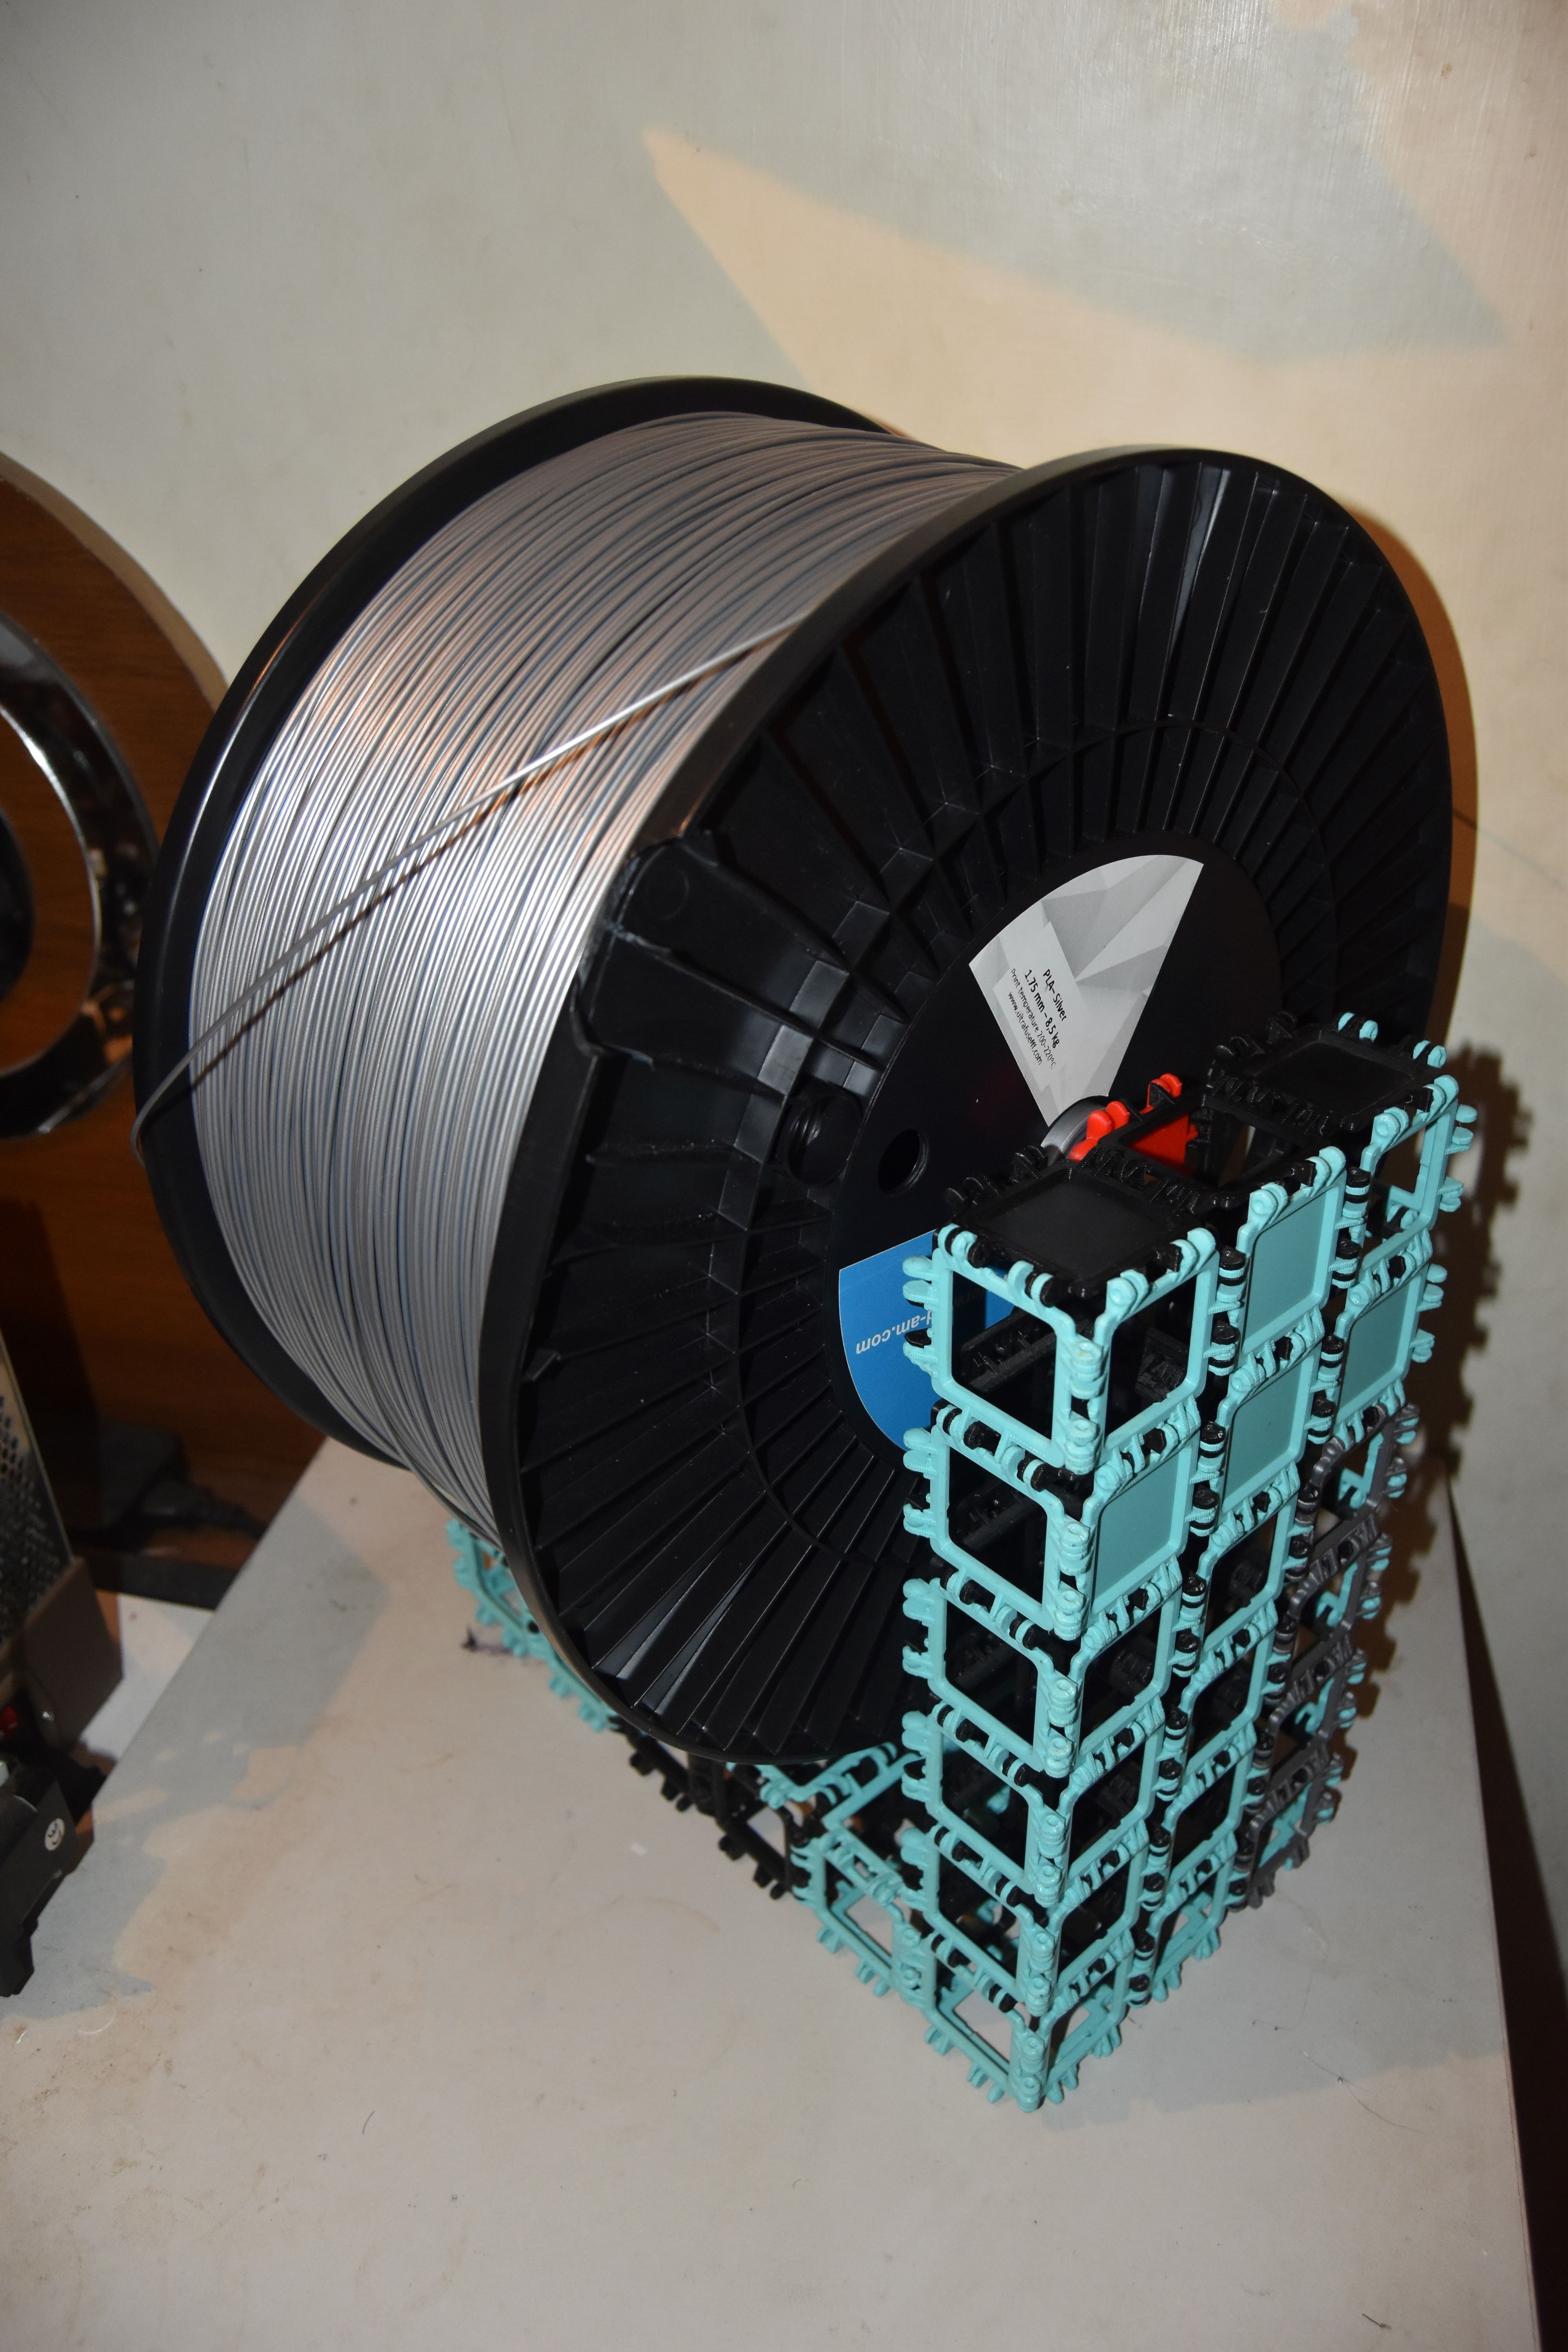
I could have printed something custom, or indeed not printed one at all, but by using Omnipanels, this can be deconstructed into other things, or simply made smaller for smaller spools etc when I am finished with this monster spool. The panels shown here are the old type but are just as strong as the new type I will be publishing.
Future Plans
As I have previously mentioned, I will be publishing the new parts soon (tm), along with the FreeCAD files (not 100% sure what licence to use yet).
I have many, many, many ideas for custom parts to design, it has taken me this long just because I wanted to make the base system right, before building upon it. Of course with 3D printing we have the option of 'Software Updates' to 3D files, and I will indeed adjust and improve things going forwards, but I want to try to stick to this system now for the most part for long term compatibility.
Indeed someone else could design a completely new panel connector design which is better, and in theory the whole systems of moving parts could work with them (just by changing the panels themselves). But now I have done the boring part of making a robust base system, I can move onto the fun part of designing all the special mechanisms and such.
Here is a (non-exhaustive) list of the ideas I have so far:
- Other shapes of panels definitely (triangles, hexagons etc)
- Bevel Gears
- Differentials
- Universal Joints
- Constant Velocity Joints
- Chains and sprockets
- Steering linkages
- Planetary reduction gears
- Cycloidal reduction gears
- Larger wheels and tyres (e.g. monster trucks)
- Sprag clutches
- Dog clutches
- Linkages (of various kinds)
- Decorative Omnitiles
- Printed roller bearings e.g. like these
- Springs of various kinds
- Hypoid Gears
- Worm wheel gears
- Omnigears
- Real bearings adapters
- Electronics
etc, etc...
Plus everything everyone else will make :)
Thanks for reading, and showing interest :)