This project delves into the construction of a laser projection microscope capable of magnifying objects using laser light, providing a detailed examination of how it operates and its construction process using readily available components. The technical summary follows:
- Laser Source Selection: To power the microscope, a high-powered red laser diode from a DVD burner was chosen due to its brightness and beam symmetry characteristics. The quality of the laser source is crucial for achieving clear and detailed projections.
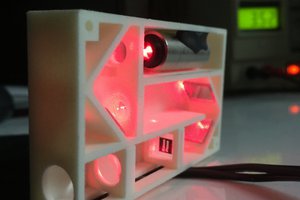
- Electronics Build: A custom driver circuit using the AMC 7135 current regulator was constructed to control the laser diode. The laser diode and driver were mounted onto a specialized laser heat sink, which included the necessary optics and a cooling fan. To simplify power delivery, a buck converter was used to step the voltage down from 12 volts to the 4 volts required by the laser diode. This streamlined power management and allowed for a single input voltage source.
- Assembly of Laser Unit: The laser diode was securely positioned within the laser heat sink, with the wires routed to the back. The current regulator was soldered onto the diode, followed by the addition of a smoothing capacitor. This capacitor also served as a connection point for input wires.
- Optics Configuration: To project images over a substantial area, a double concave lens was employed. The laser diode and lens were mounted on an extruded aluminum frame with 3D printed parts to ensure alignment and adjustability of distances. A large poster board served as the projection screen, allowing for adjustments in the projection size by changing the distance between the lens and the screen.
- Sample Holder Design: A 3D printed part was created to hold samples in place. It featured an alligator clip for securing objects within the laser beam path.
 J
J
 FabLab München
 mendezjr
 TheThirdMan
 Joseph Lavoie