Close
0%
0%

Amazon Dash Button for Arduino!

A project using the AmazonDRS library for WiFi101 connected Arduinos. Just like the AWS IoT button, but completely open source!

Similar projects worth following
You can consider this project a how-to or getting started guide for using Amazon's Dash Replenishment service API with Arduino. It's targeted at hardware hackers and Arduino aficionados looking to add frictionless Amazon purchases to their prototypes. After following along you'll have a working dash button prototype that's completely open source.

TL;DR; Buy some stuff on Amazon by clicking a pushbutton connected to your WiFi101 enabled Arduino. It's like a Dash button, but cooler!

Motivation

Back in the Spring of 2015 Amazon released the Dash Button to help facilitate frictionless product purchases with just the click of a button! For example this dash button ensures my pups insatiable appetite for Greenies dog treats is always well served and my pantry never runs low! You register the button to your amazon account and when you're about to run out you press the button, a couple days later voilá treats at your doorstep! Cool.
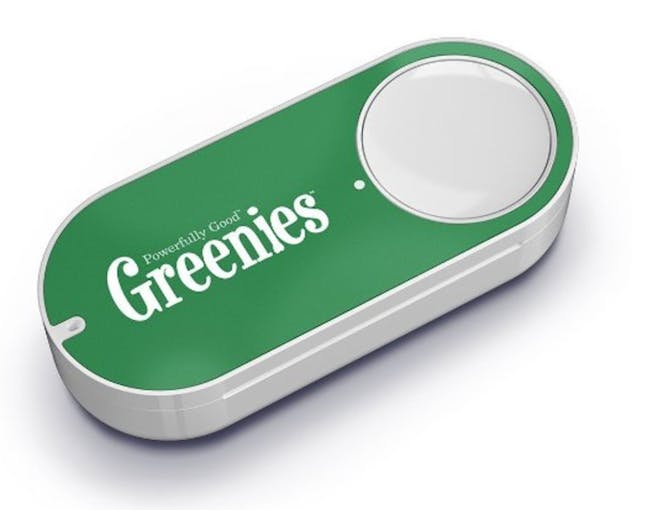
Greenies Dog Treats Dash Button Greenies Dog Treats Dash Button

Then for the developer community Amazon released the AWS IoT button!
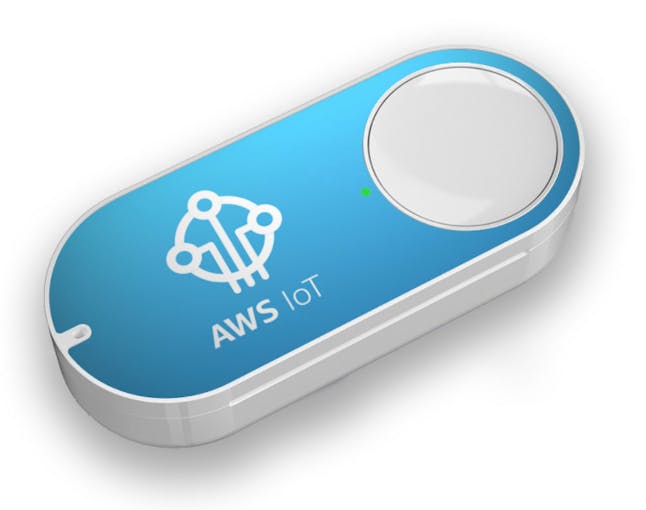
AWS IoT Button AWS IoT Button

It's possibilities are endless! Amazon describes the AWS IoT Button as...

"...a programmable button based on the Amazon Dash Button hardware. This simple Wi-Fi device is easy to configure and designed for developers to get started with AWS IoT, AWS Lambda, Amazon DynamoDB, Amazon SNS, and many other Amazon Web Services without writing device-specific code."

This is great if you're a web savvy developer comfortable with AWS or are looking to learn more about the IoT services Amazon is now supporting. Unfortunately this boxes out us hardware hackers! Where's my I/O? What if mildly "device-specific code" is sort of your thing? Sure you could hack open a Dash Button and dive headfirst into some "bare metal" dash embedded dev like the talented folks at Adafruit have documented for you. But if you're still building your chops on Arduino and aren't quite ready to dive into hardware abstraction layers and shift registers you're still out of luck. Until now!

Amazon has released the Dash Replenishment API for device manufacturers and developers!

The good news... now we can create hardware devices that can initiate frictionless purchases all on their own! This means our coffee makers can purchase filters for us before we run out, or our laundry machines can order detergent based off of usage statistics. It's now up to us to build these creative frictionless purchasing devices.

The bad news... communicating directly between the Arduino and the Dash API involves OAuth2.0 handshakes, building POST requests, parsing JSON responses and other non-trivial tasks to be handled in a single Arduino sketch.

So to lower the barrier to entry for Arduino DRS hackers I've abstracted these boring details out and into the AmazonDRS Arduino Library. This way you can continue to focus on creating unique purchasing actuators(buttons are boring) and spend less time concatenating strings and exchanging tokens! With this amazonDashButton example sketch you can start purchasing items on Amazon after editing only a handful of lines of code.

requestReplenishmentForSlot(slotId); //It's that easy                         

Let's walk through getting all set up and get you ordering all your favorite vices on Amazon automatically!

  • 1 × Arduino MKR1000
  • 1 × pushbutton
  • 1 × 10k resistor
  • 1 × LiPo battery w/ JST plug

View project log

  • 1
    Step 1

    Getting Started

    Hardware

    I've decided to use the Arduino MKR1000 as the hardware platform for this project, for a few reasons...

    • Similarly sized form factor to dash button.
    • 100% Arduino IDE compatible.
    • Utilizes the Atmel ATWINC1500 WiFi Module(TLS capable w/ onboard SHA-256 encryption).
    • ARM SAMD21 Cortex-M0 (256KB of Flash : ) ).
    • LiPo Battery JST plug for portability.

    That being said this library should work well with any ATWINC1500 WiFi enabled Arduino that uses the WiFi 101 library. Other options could include an Arduino Zero or Due sporting the WiFi101 shield, an Adafruit MO WiFi Feather, or really any Arduino with sufficient space, and Atmel's ATWINC1500 WiFi module.

    Here's what you'll need...

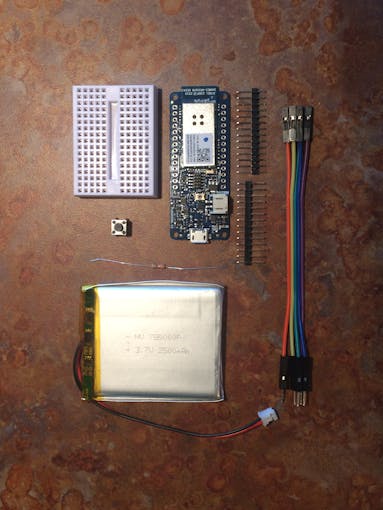
    Arduino MKR1000 w/ header pins, push button, female-male jumpers, resistor LiPo battery, breadboardArduino MKR1000 w/ header pins, push button,

    female-male jumpers, resistor LiPo battery, breadboard

    The battery is of course optional and the resistor can be of any value really. We're just using it to pull down one of the push button pins to ground. The small push button will have 4 pins that are organized into two pairs. You'll want to bridge the gap in the breadboard by placing the button so that the longer gap between pins is utilized to span the space between the two sides of the breadboard.

  • 2
    Step 2

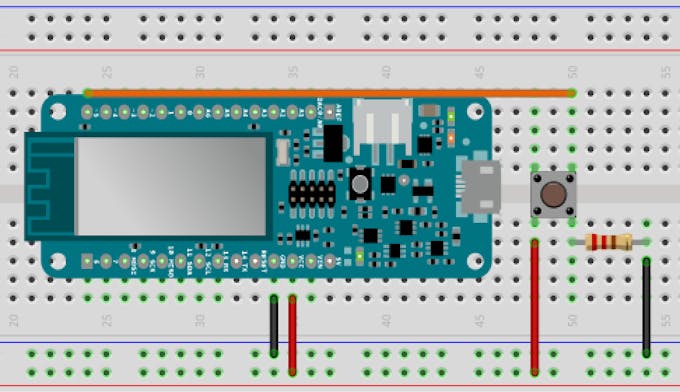
    Time to wire up the breadboard like so...

    Fritzing Breadboard ViewFritzing Breadboard View

    Any digital I/O pin will do for the pushbutton. Just remember to set

    const int dashButton = 14;     //DIO number of the pushbutton pin 

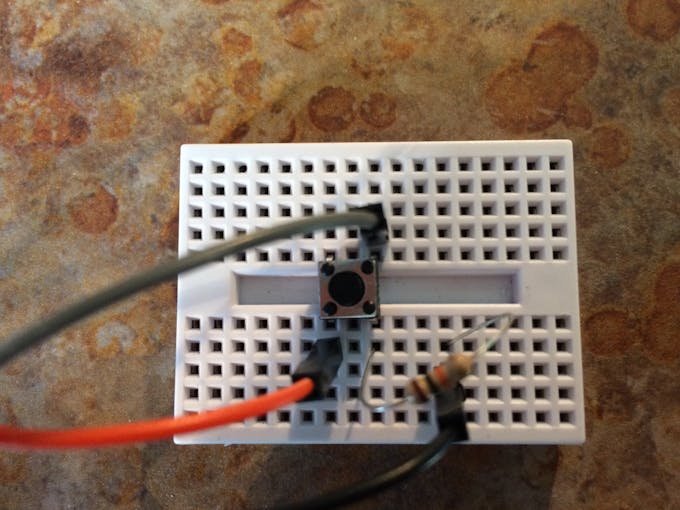
    to whichever pin you end up choosing. I've used jumper cables and a smaller breadboard so my final configuration looks like this...

    Breadboard Arduino Dash ButtonBreadboard Arduino Dash Button

    If you feel like making this a bit more portable you can grab a prototype board, and a header plug to create a sort of push button shield for the MKR1000.

    Dash Button Shield Dash Button Shield


  • 3
    Step 3

    Software

    The initial setup procedure and configuration does involve a good amount of steps but once you are set up and configured the development process becomes that much easier. I've written a full fledged getting started guide in the readme/wiki pages located at the AmazonDRS GitHub repo which I'll paraphrase in this section. If you haven't set up "Login with Amazon", AWS SNS, your dash device, or stepped through the authCodeGrant example sketch head over to the repo wiki and follow along. By the time you come back you should have...

    • Created your LWA Security Profile, created a Dash Replenishment Device, and your Amazon Web Services Simple Notification Service configuration.
    • Completed the LWA Authorization Code Grant process and exchanged your auth_code for your refresh token by running the authCodeGrant example sketch.
    • Updated the AmazonTokens.h header file in your AmazonDRS library 'src' directory with values for...client id, client secret, refresh token, and redirect uri.

    If you've made it this far you're ready to test your new Arduino dash button! Let's take a look at the sketch in detail.

View all 6 instructions

Enjoy this project?

Share

Discussions

Similar Projects

Does this project spark your interest?

Become a member to follow this project and never miss any updates