 Ben Brooks
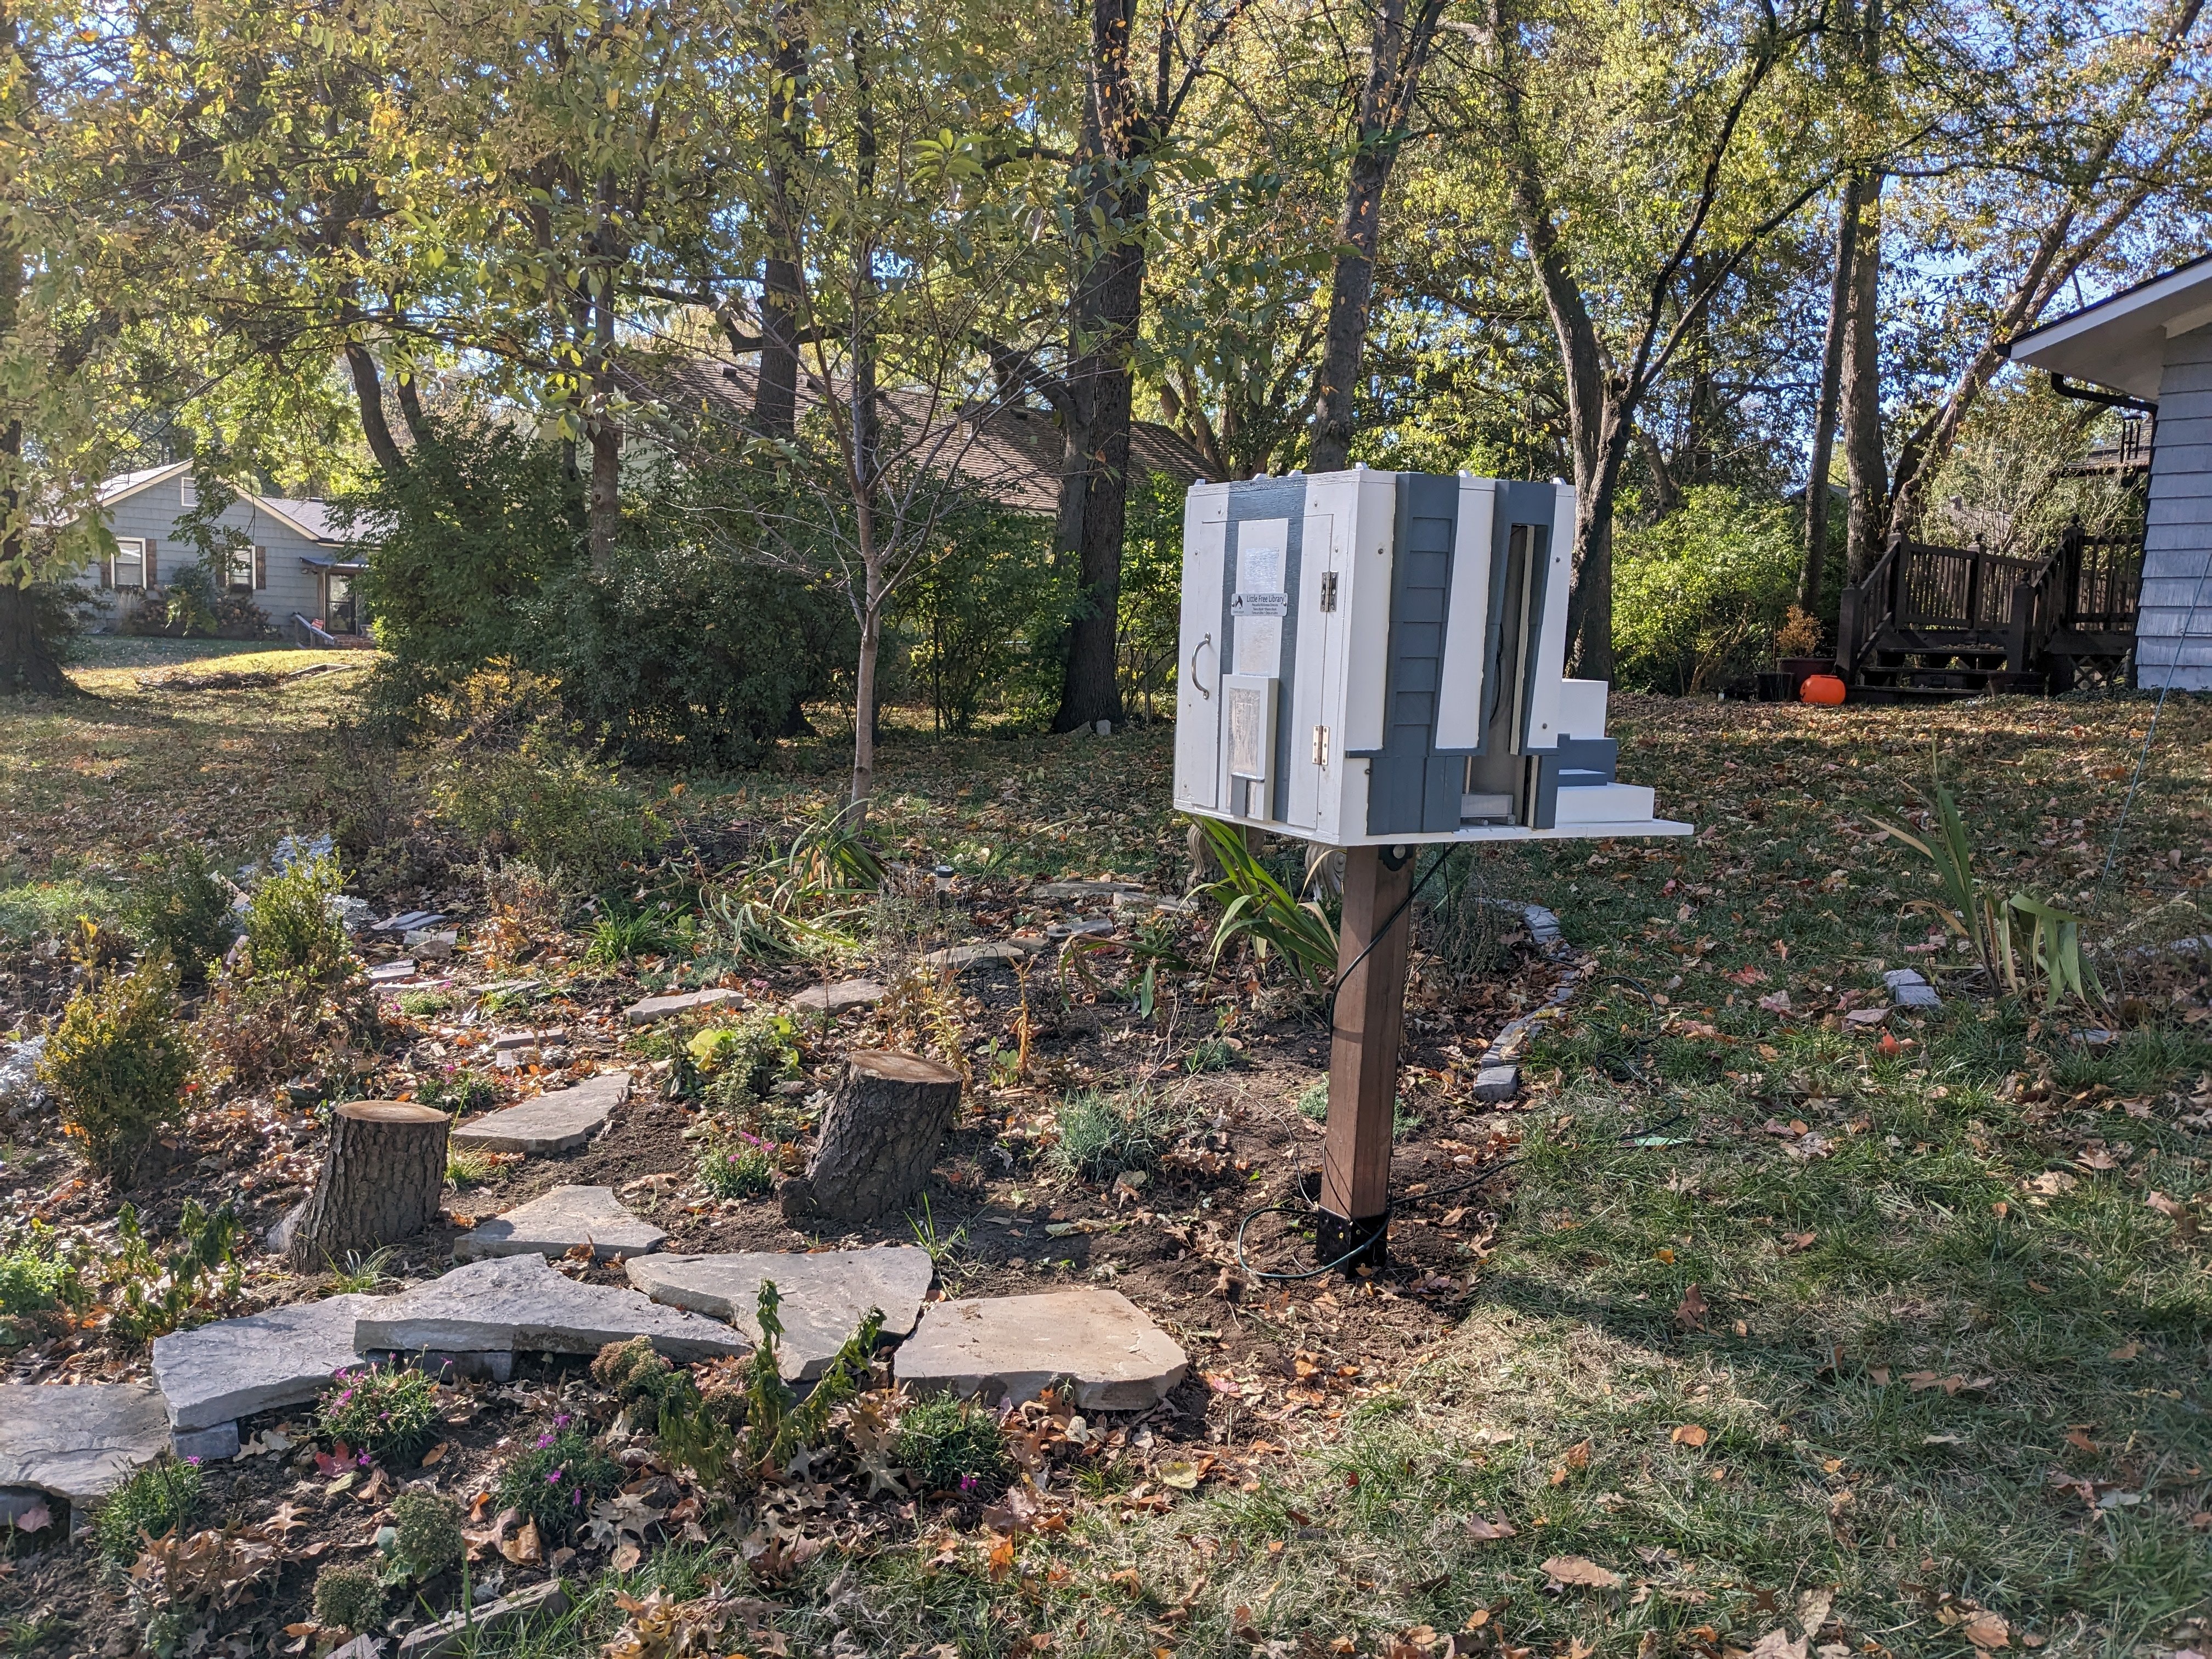
This project started quite some time ago (the first picture I could find was from March of 2020, but it was already pretty far along by then). My first exposure to little free libraries was ~15 years ago. Thought it was neat and my wife and I had always talked about making one someday. Fast-forward to more recent times and another house and we again encountered one. Combine this with having our first kiddo a few years later and the rekindling of my interest in making/tinkering and you get to the origin of the idea: It had become a fact that we would make one and that it would be space-themed in some way. The specific idea of modelling it on the Vehicle Assembly Building (VAB) is lost to time, but once it came to mind, it made so much sense. The actual building is basically a giant box, so no crazy shaping required. What additional details are required are all fairly simple and easily made via a 3D printer (which I had newly acquired around the time I was working through the idea). During pre-COVID times, I started on design and construction of it. We had some neighbor kids across the street that also had a love of space and we’re just a few houses down from the neighborhood Elementary school: it was the perfect location!
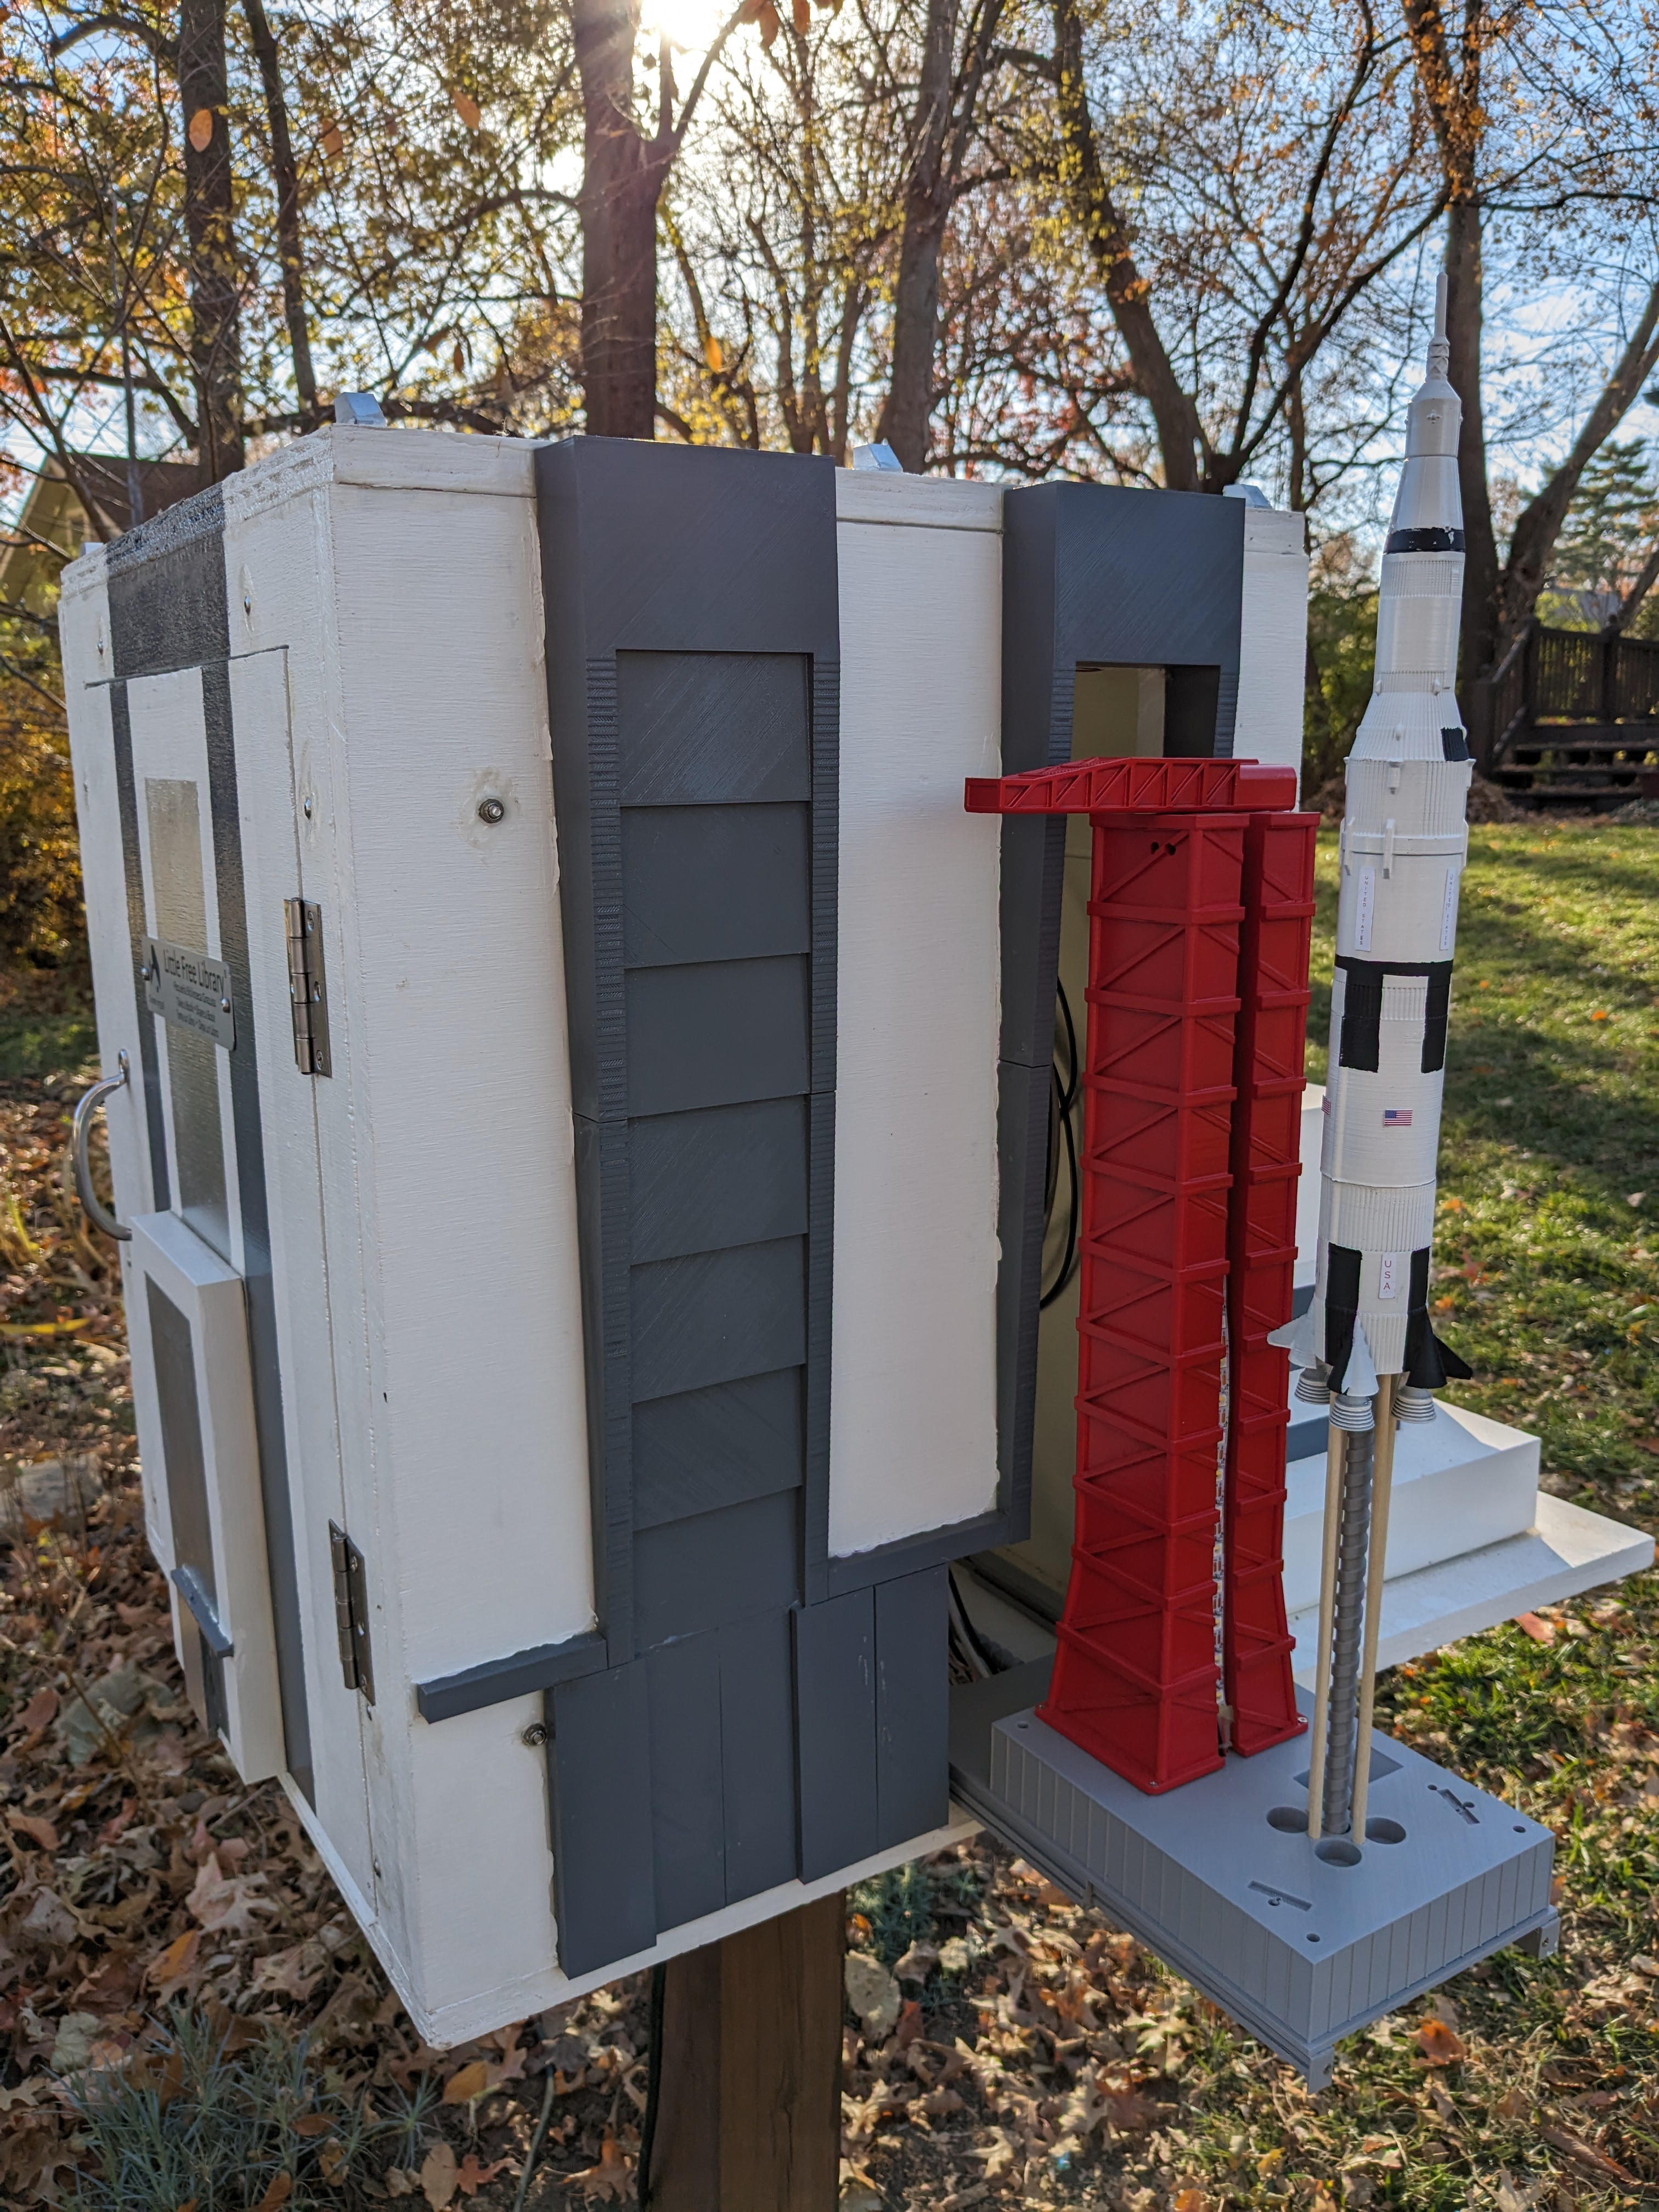
I was able to find a 3D model of the building online that was to scale and I had previously found a pretty decent model of the Saturn V as well. I ended up scaling everything down to what my printer could handle; at the time I planned the Saturn V to be a single piece, so it’s height was scaled to the max height for my printer and everything else followed suite. I also ultimately found a 3D model of the tower and crane made for model rockets, but which translated well to my use (with some modifications). Unfortunately, I didn’t really document things during this early phase, so I don’t have links for these sourced items; regardless, my sincere thanks to the folks that made them and gave me these great starting points on the models!
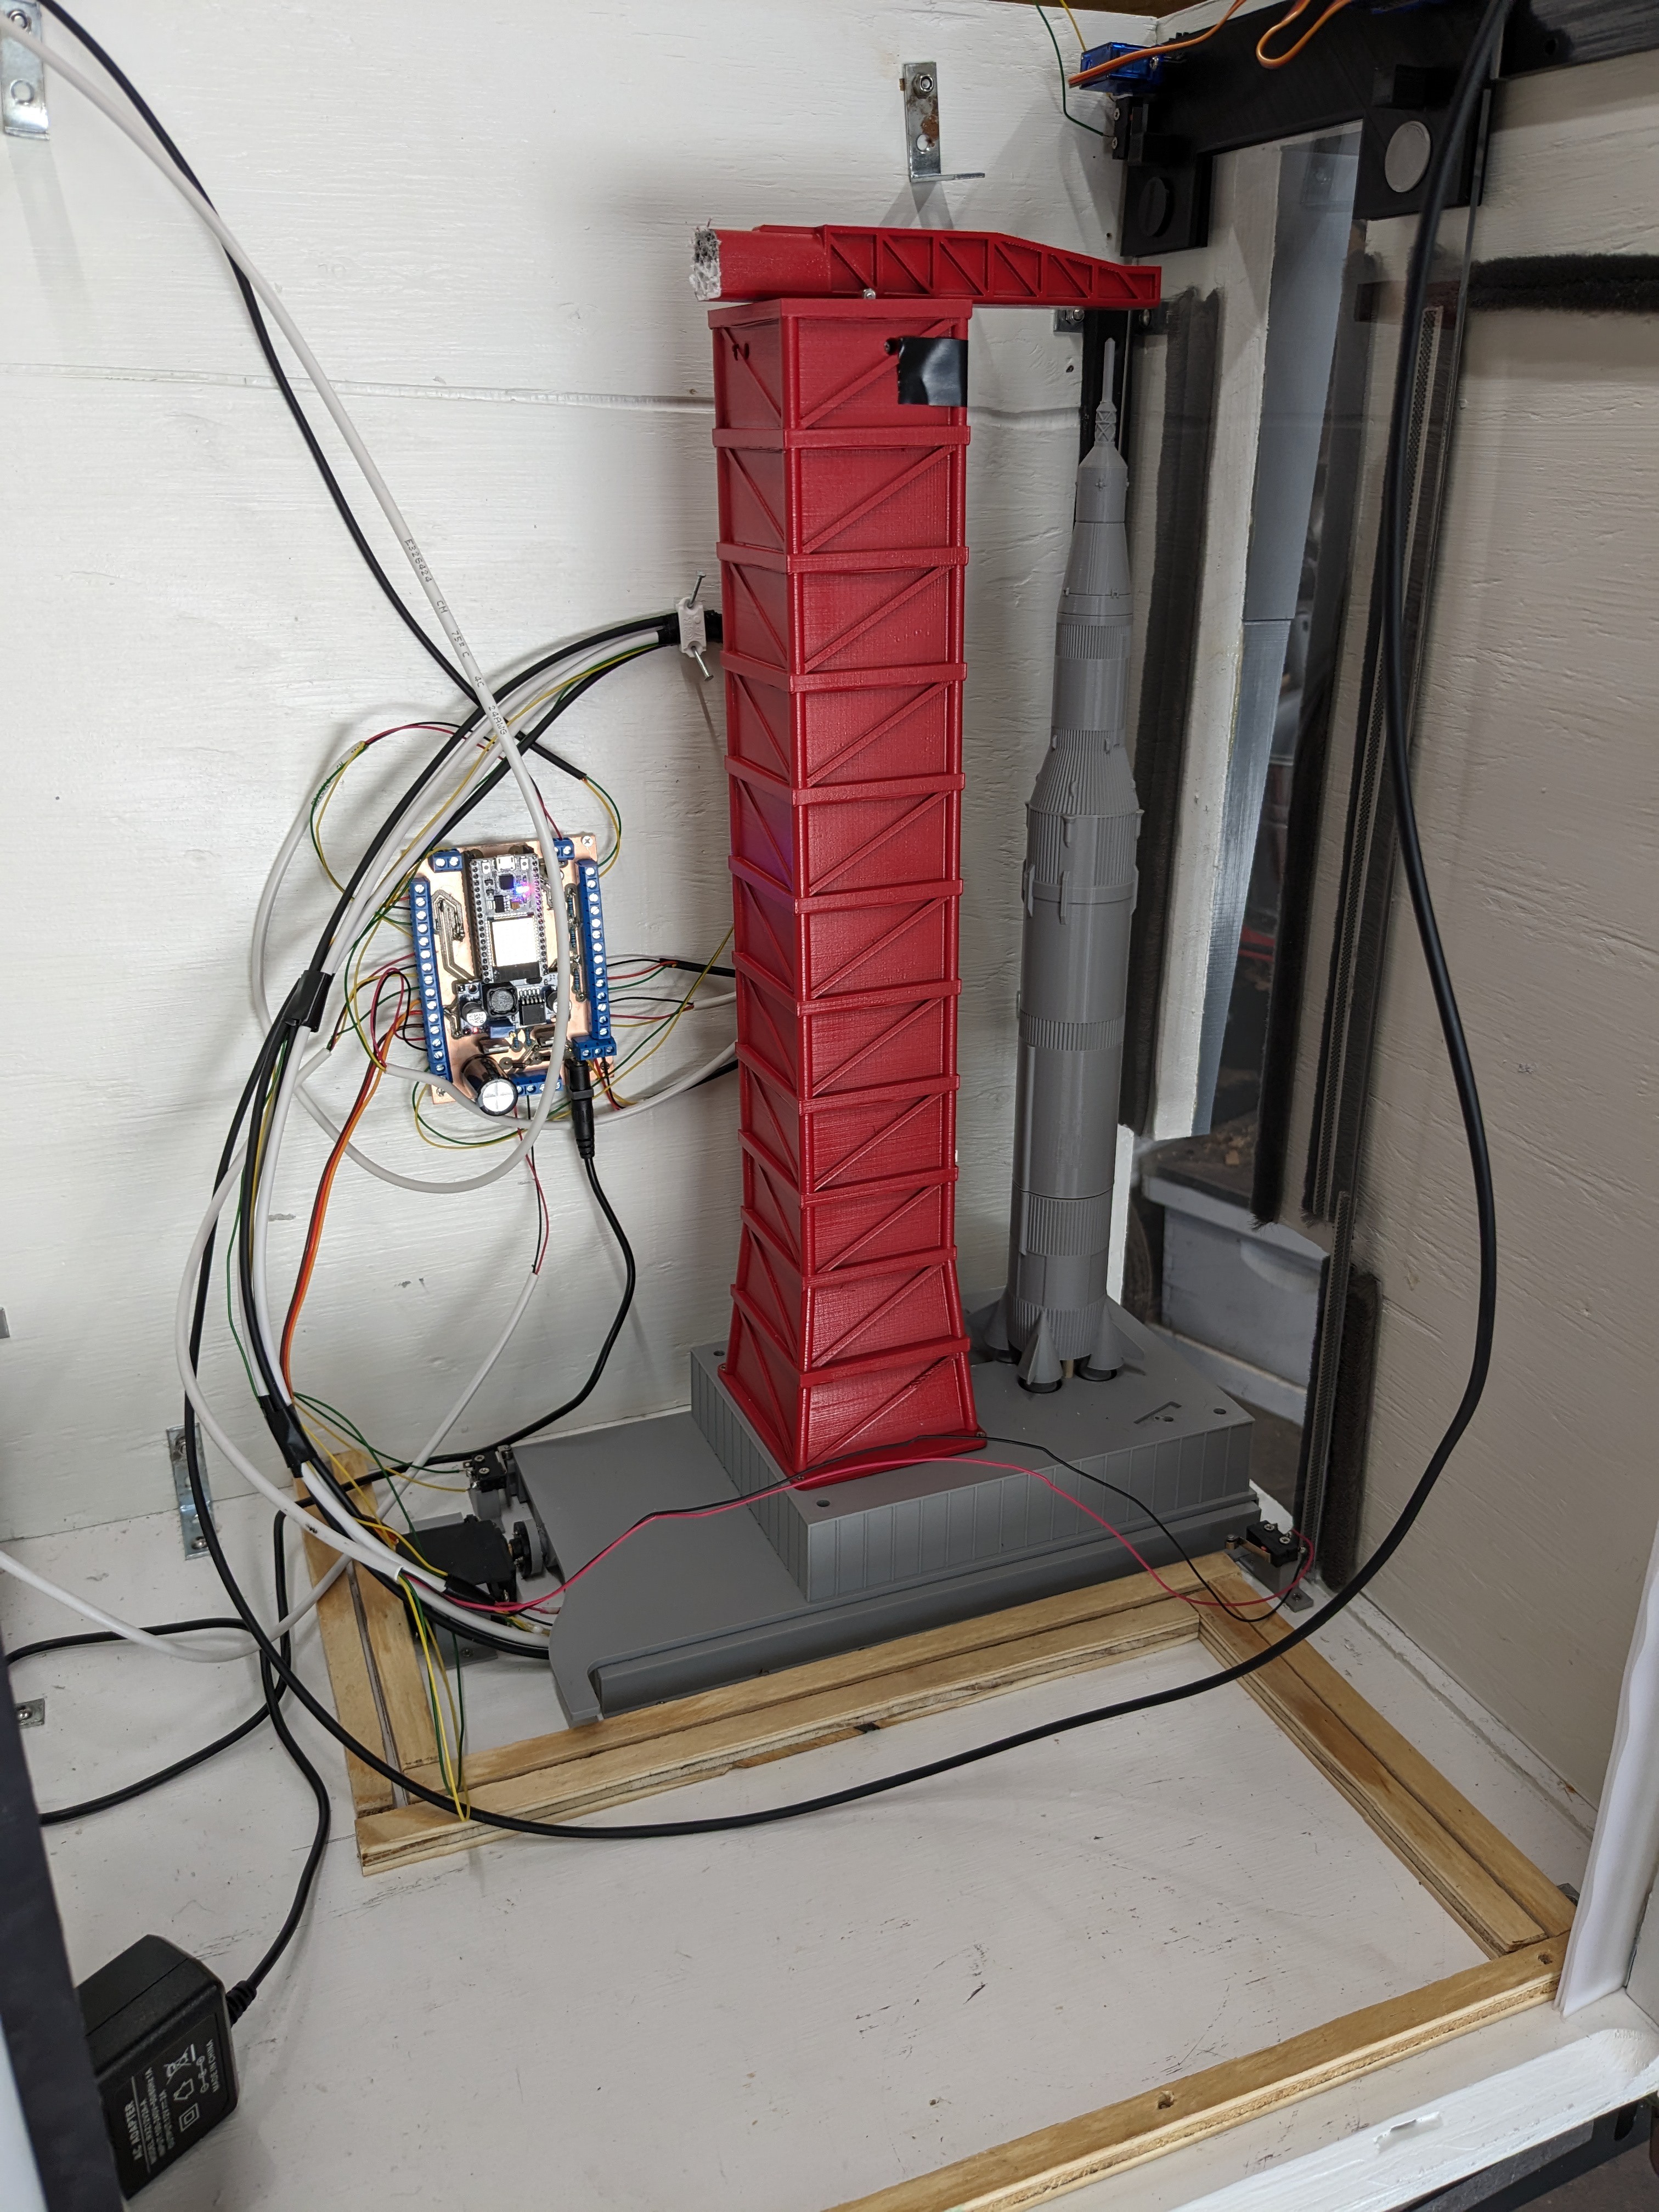
Most of the cosmetic things were contained in the models I found, but all of the ‘interactive’ parts had to be fully designed, printed and tested myself. While there were a lot of components I could have just bought (and they would have likely worked better: looking at you drawer sliders!), because my 3D printer was still shiny and I was having fun designing things, I decided to essentially print EVERYTHING. The big benefit was I didn’t have to force existing things into my design: I could just make exactly what I wanted/needed. For the electronics side of things, at the time I was using Particle Photons for my projects and that’s what I utilized in my initial design. Ultimately, I ended up with this functional bit to go inside the library along with a PCB I had printed for the controller:
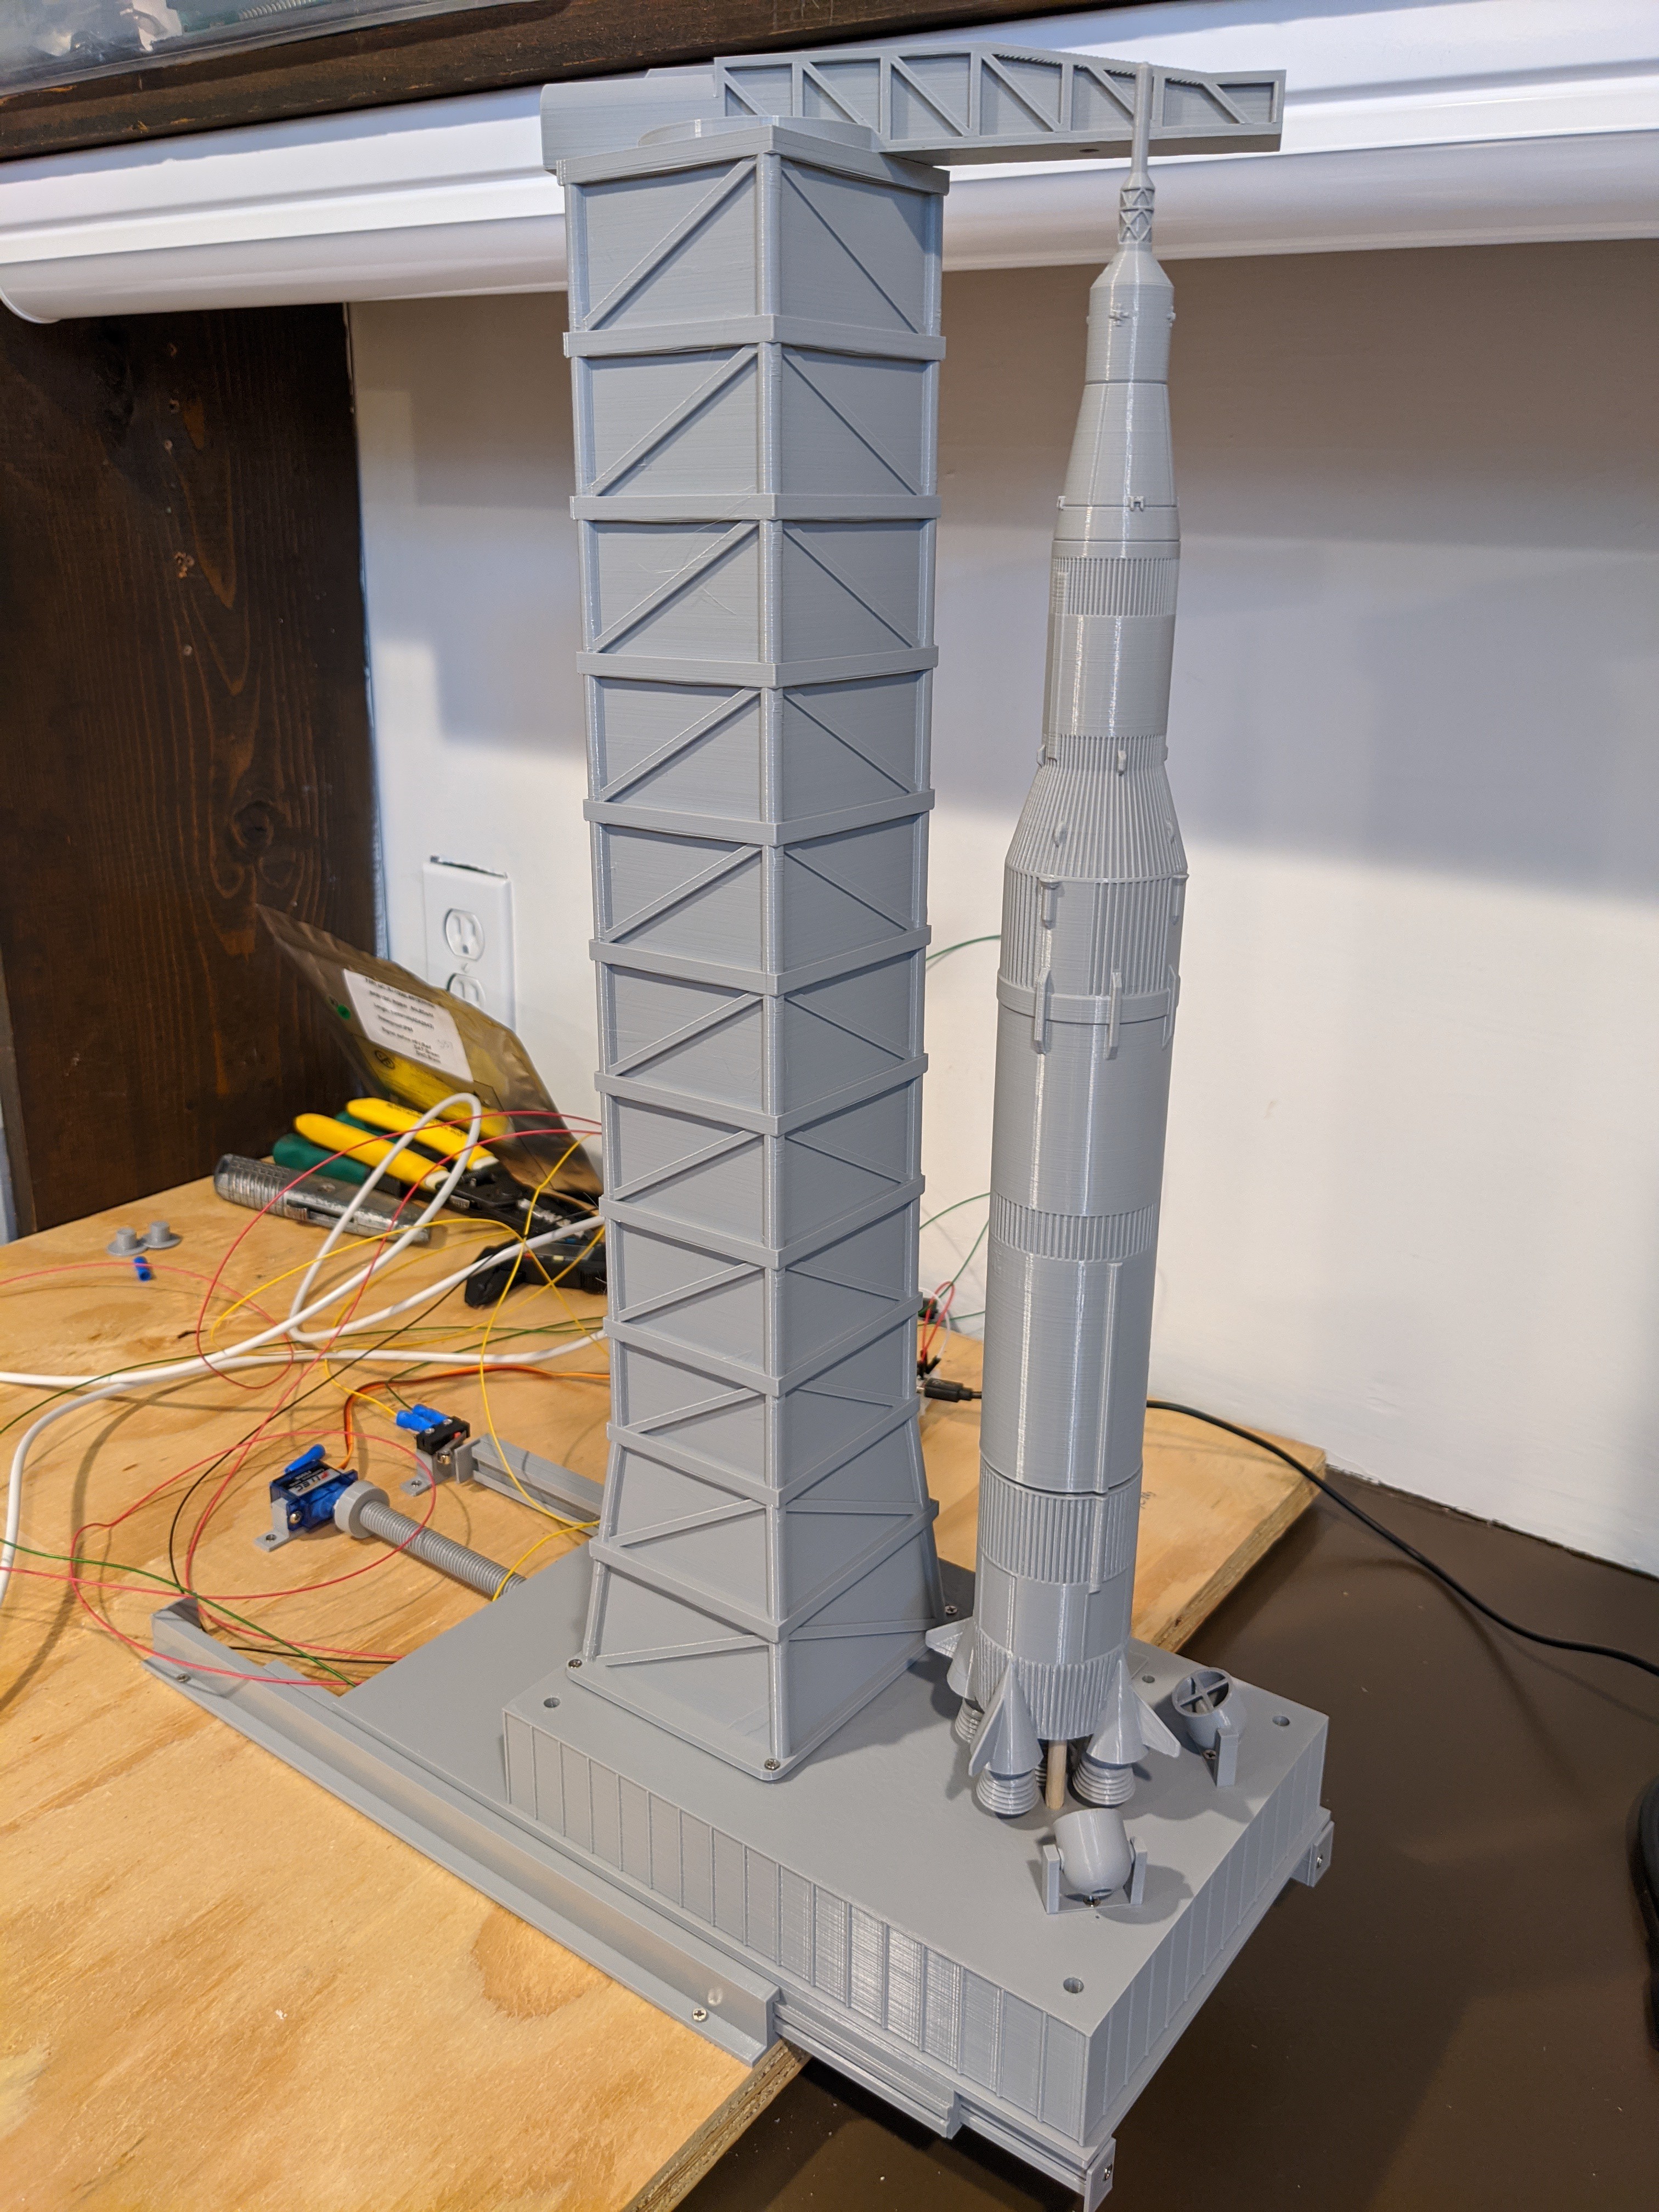
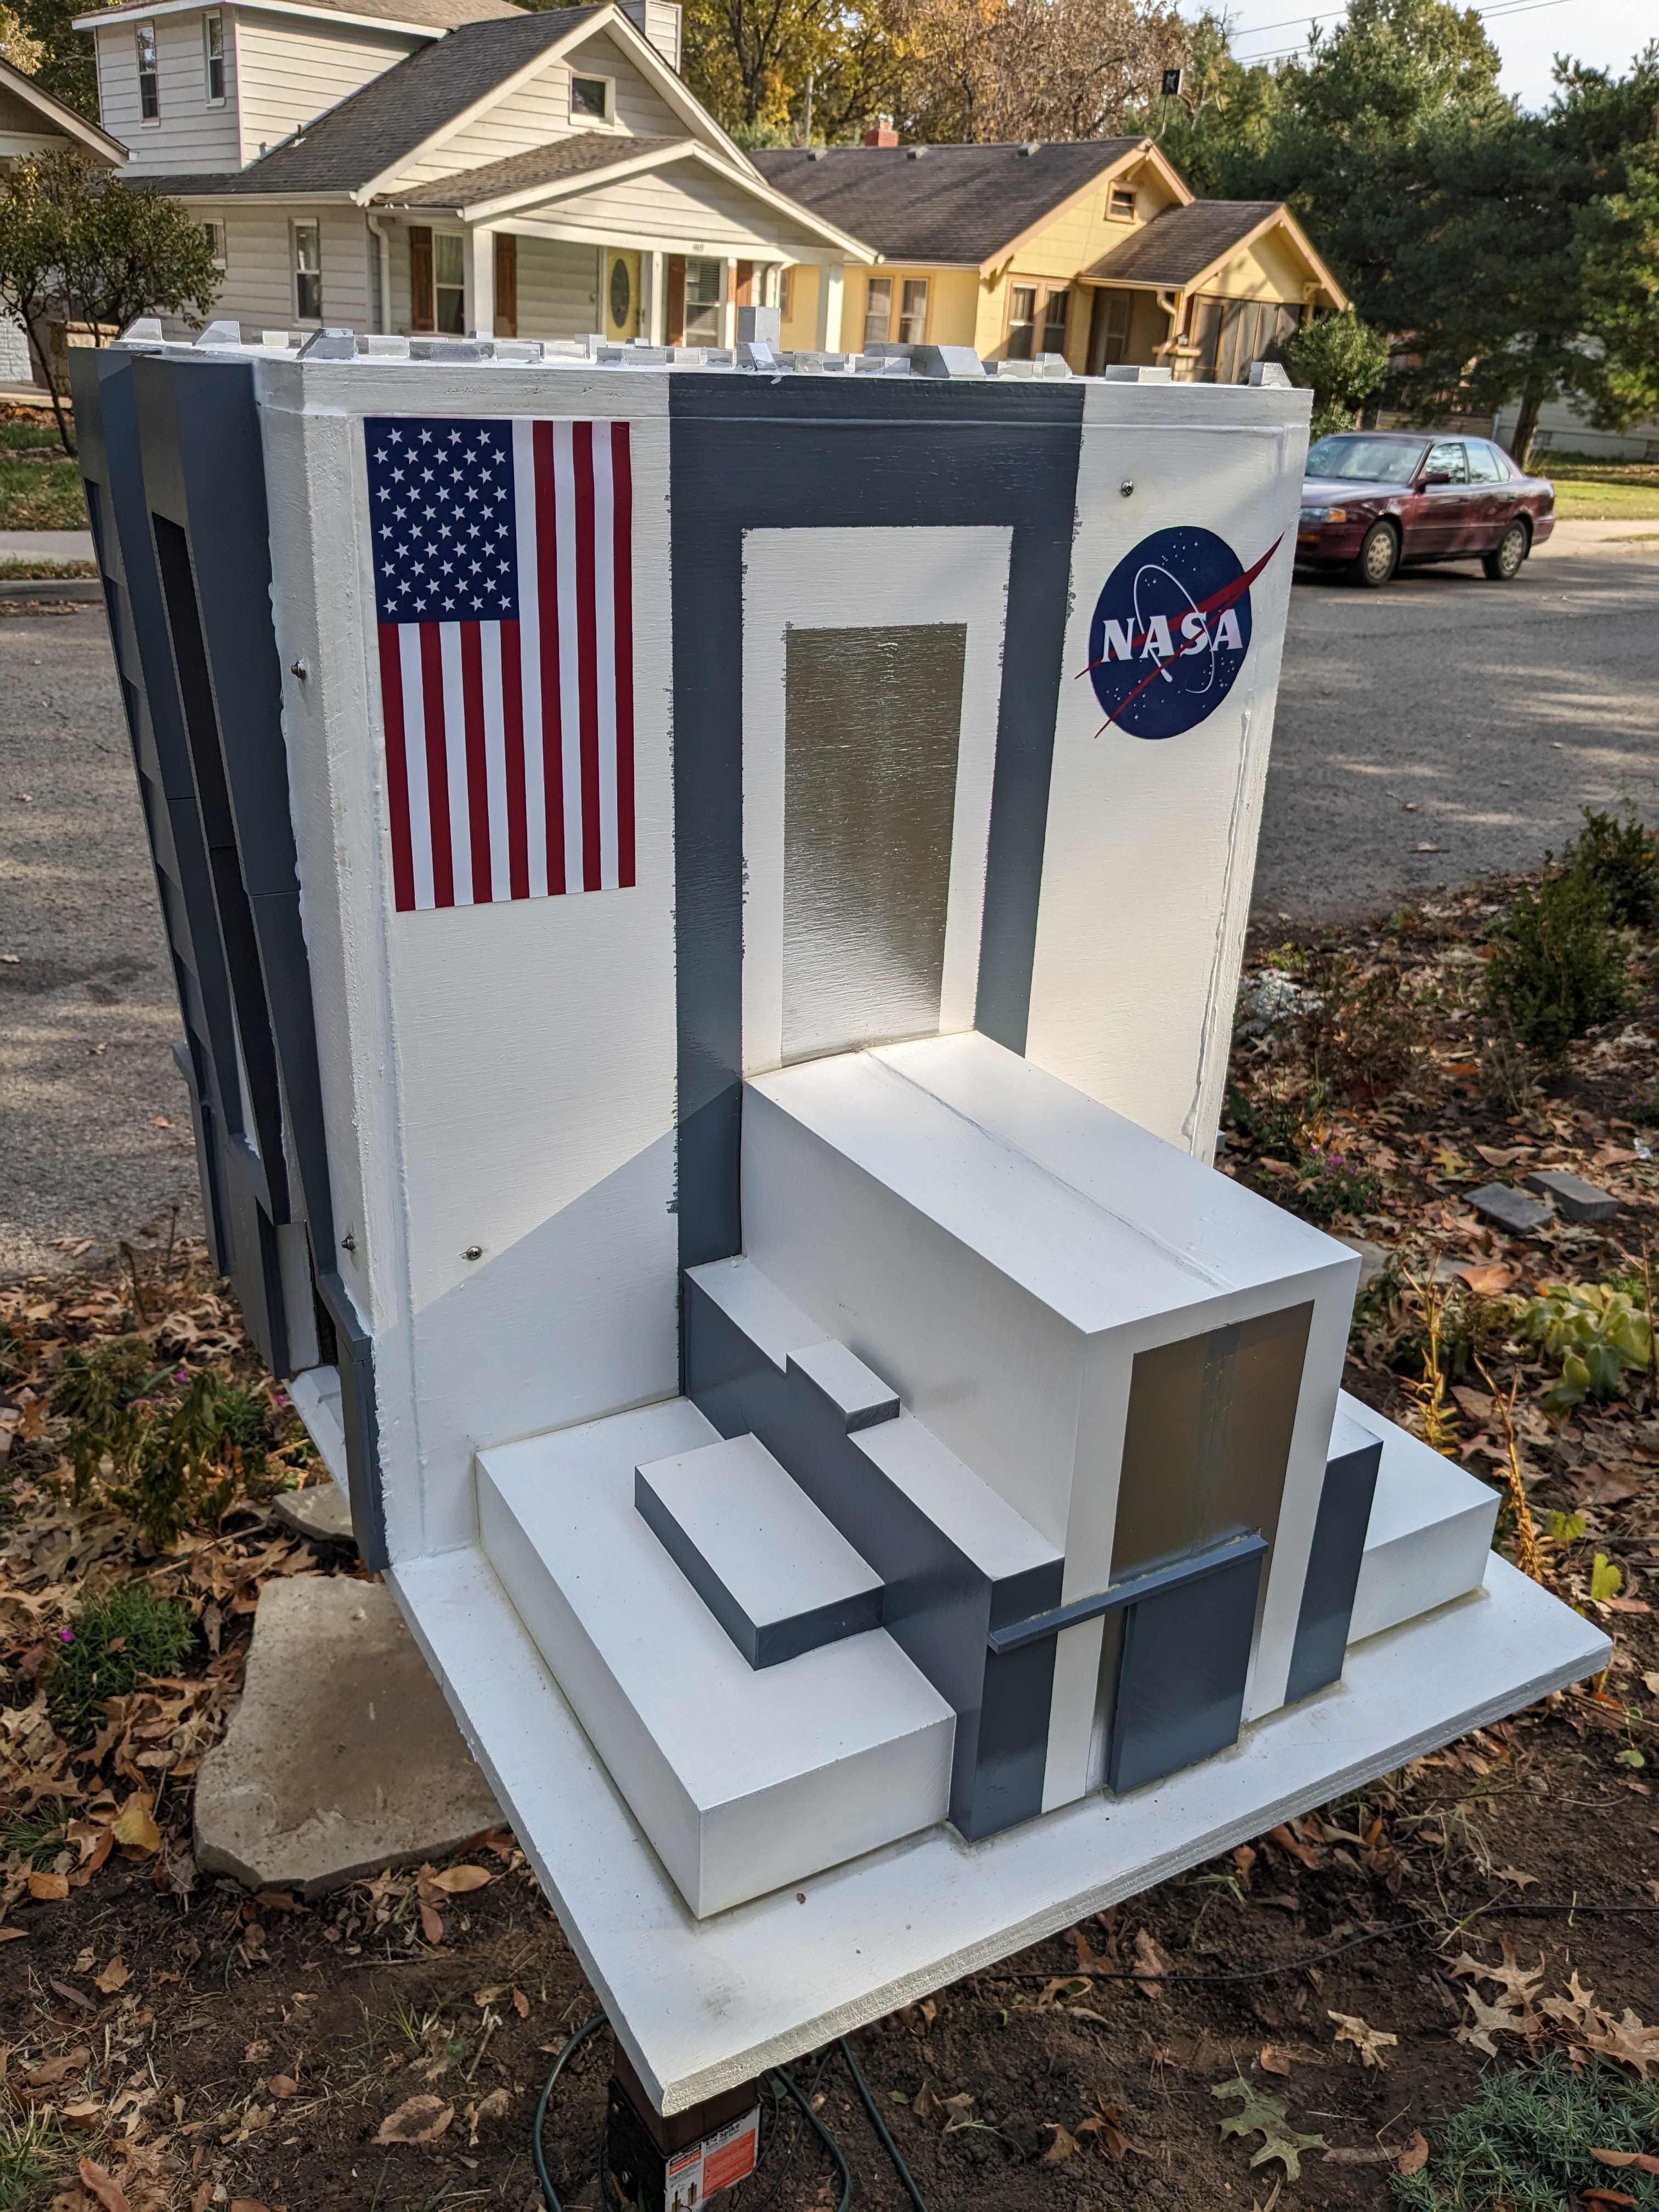
The sequence of the whole interactive bit is made up of a couple parts: A sliding door (plexiglass/acrylic) opens, the ‘crawler’ (with the rocket, pad and tower) slides out, the crane rotates and then the Saturn V rocket lifts up (or launches). (A close observer will notice that the orientation of the tower/rocket is reversed from how it would actually be while inside the VAB; I oriented it this way so that the rocket would be fully visible through the open bay door versus just seeing the back of the tower.) All of this is done via small servos (and a larger one for the pad) as well as a whole bunch of limit switches to keep track of where everything actually is. I also added some individually addressable LEDs to the tower to illuminate the rocket, some ‘dumb’ LEDs for the library itself and a sensor to tell whether the library door is open/closed. I made reasonable progress and then COVID hit. As it became extra-clear that schools would be closed for a while and our neighbor kids ultimately moved away, I lost motivation to finish it up (my son was only a few years old, so he wasn’t reading or terribly interested in it yet). At the time I was almost ready to start painting and assembly, but that’s as far as I got.
It sat in multiple pieces in both our garage and on my workbench collecting dust for several years. Fast-forward to this past summer and I finally decided it was time to just finish it up. My son was older and now an AVID reader and he has a younger sister now too, plus he was starting kindergarten at the school down the street so it seemed like the perfect time to get it installed. I’ve also gone all-in on Home Assistant and ESPHome since then, so I took the restart as an excuse to port everything over to ESPHome and an ESP32 to both simplify a lot of things and allow for it to integrate beautifully into Home Assistant. In addition, last year I got a small hobby CNC that among other things, I’ve used to make my own PCBs (instead of having them made for me). Originally, I had planned to hide the PCB inside the ‘extension’ of the building, however I ended up prominently placing it on the back wall of the library to hopefully inspire someone to tinker themselves. Some acrylic panels were fitted to separate the ‘interactive’ part of the library from the actual books, but still allow for seeing it all. Ultimately it still took more time and effort to wrap it up than I anticipated, but it’s finally done!
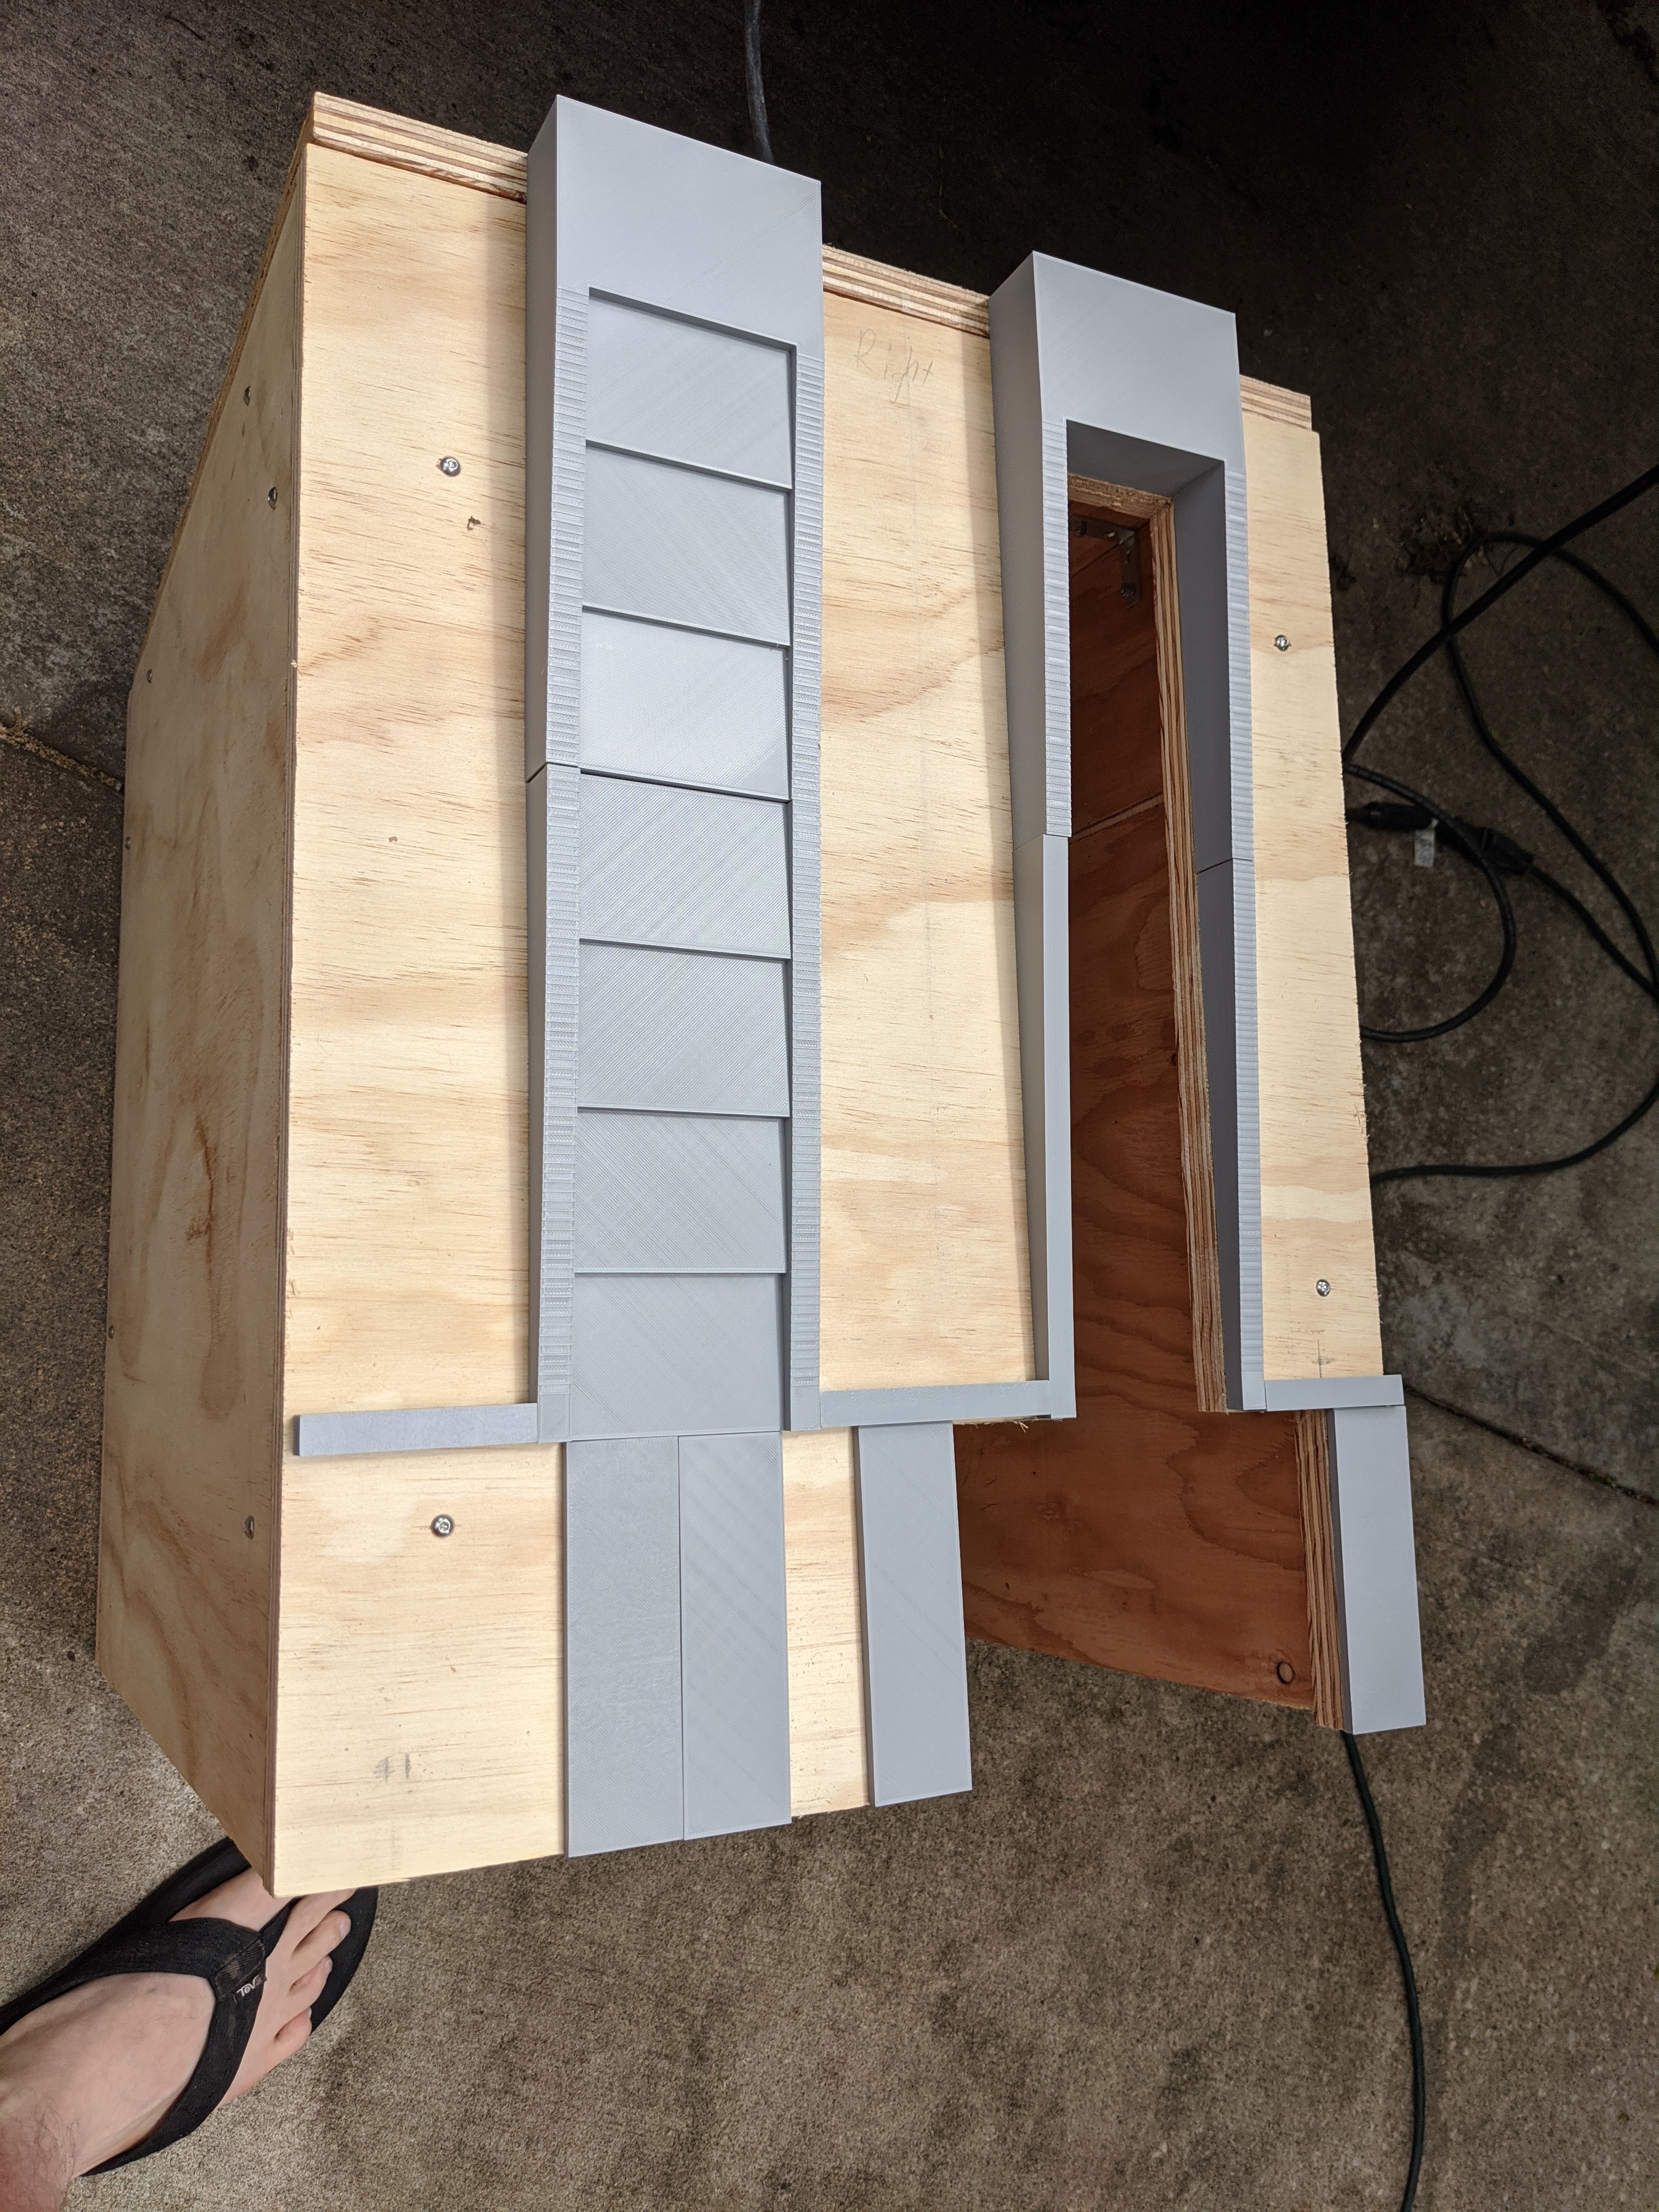
Weatherproofing effectiveness is still to be determined, as we get some pretty brutal thunderstorms in the summer, but thus far it’s handled more modest weather without any issues (including a small snowstorm). Lots of clear caulk was applied to all the edges and I’m hopeful that it stands up well to the elements (and that any leaks are easily fixable), but as some insurance I designed and printed a false bottom in the library (in addition to a shelf) to keep all of the books a good bit off the bottom should some water make its way in. Additionally, from the beginning as part of my design I made everything as ‘modular’ as possible (the plywood panels are connected with brackets and bolts/nuts and basically everything else is 3D printed and the entire thing is bolted via a bracket to the post). This was done both to make it easier to fix/replace anything that breaks on its own or doesn’t work as intended as well as easily move the entire library if larger repairs are needed, but also because I’m very pragmatic; I’m under no illusions that some teenagers may someday decide to intentionally damage it and I want to make it as easy for myself as possible to get it back in working order.
Most of my projects are rather ‘one-off’ in their usefulness for me relative to other people, but this one seems extra that way. In addition, nothing I’ve done is particularly novel or unique. As a result, I decided to focus on simply providing pictures and a simple narrative of what I did. However, if anyone is interested to see any of the actual design or PCB files, just hit me up and I’d be more than happy to post those as well!
Potential Future Plans: Part of my original design had been to create a physical panel for my son to be able to control it all from his bedroom (his window overlooks the library) and I still haven’t decided if I am going to do this or not. I previously did a similar project for the LEGO Saturn V I have in my office, and while he LOVES using that he hasn’t seemed very interested in having another one for the library, thus I’m not terribly motivated to make one. In addition, Home Assistant allows me to make a very clean dashboard for either of us to be able to control it from my phone with ease. And lastly, while it works (as proved by the video of it doing so!), it’s also kind of finicky: The sliding door in particular gets stuck trying to open frequently and I’ve had a lot of problems with the servo’s 0/off positions seeming to drift (and to make matters worse, the ESPHome servo code doesn’t seem to properly handle servo detach commands in all cases). While I know I could fix all of these with some redesigns or replacements, it’s working well for my current needs and I’m not inclined to put in the extra effort right now.
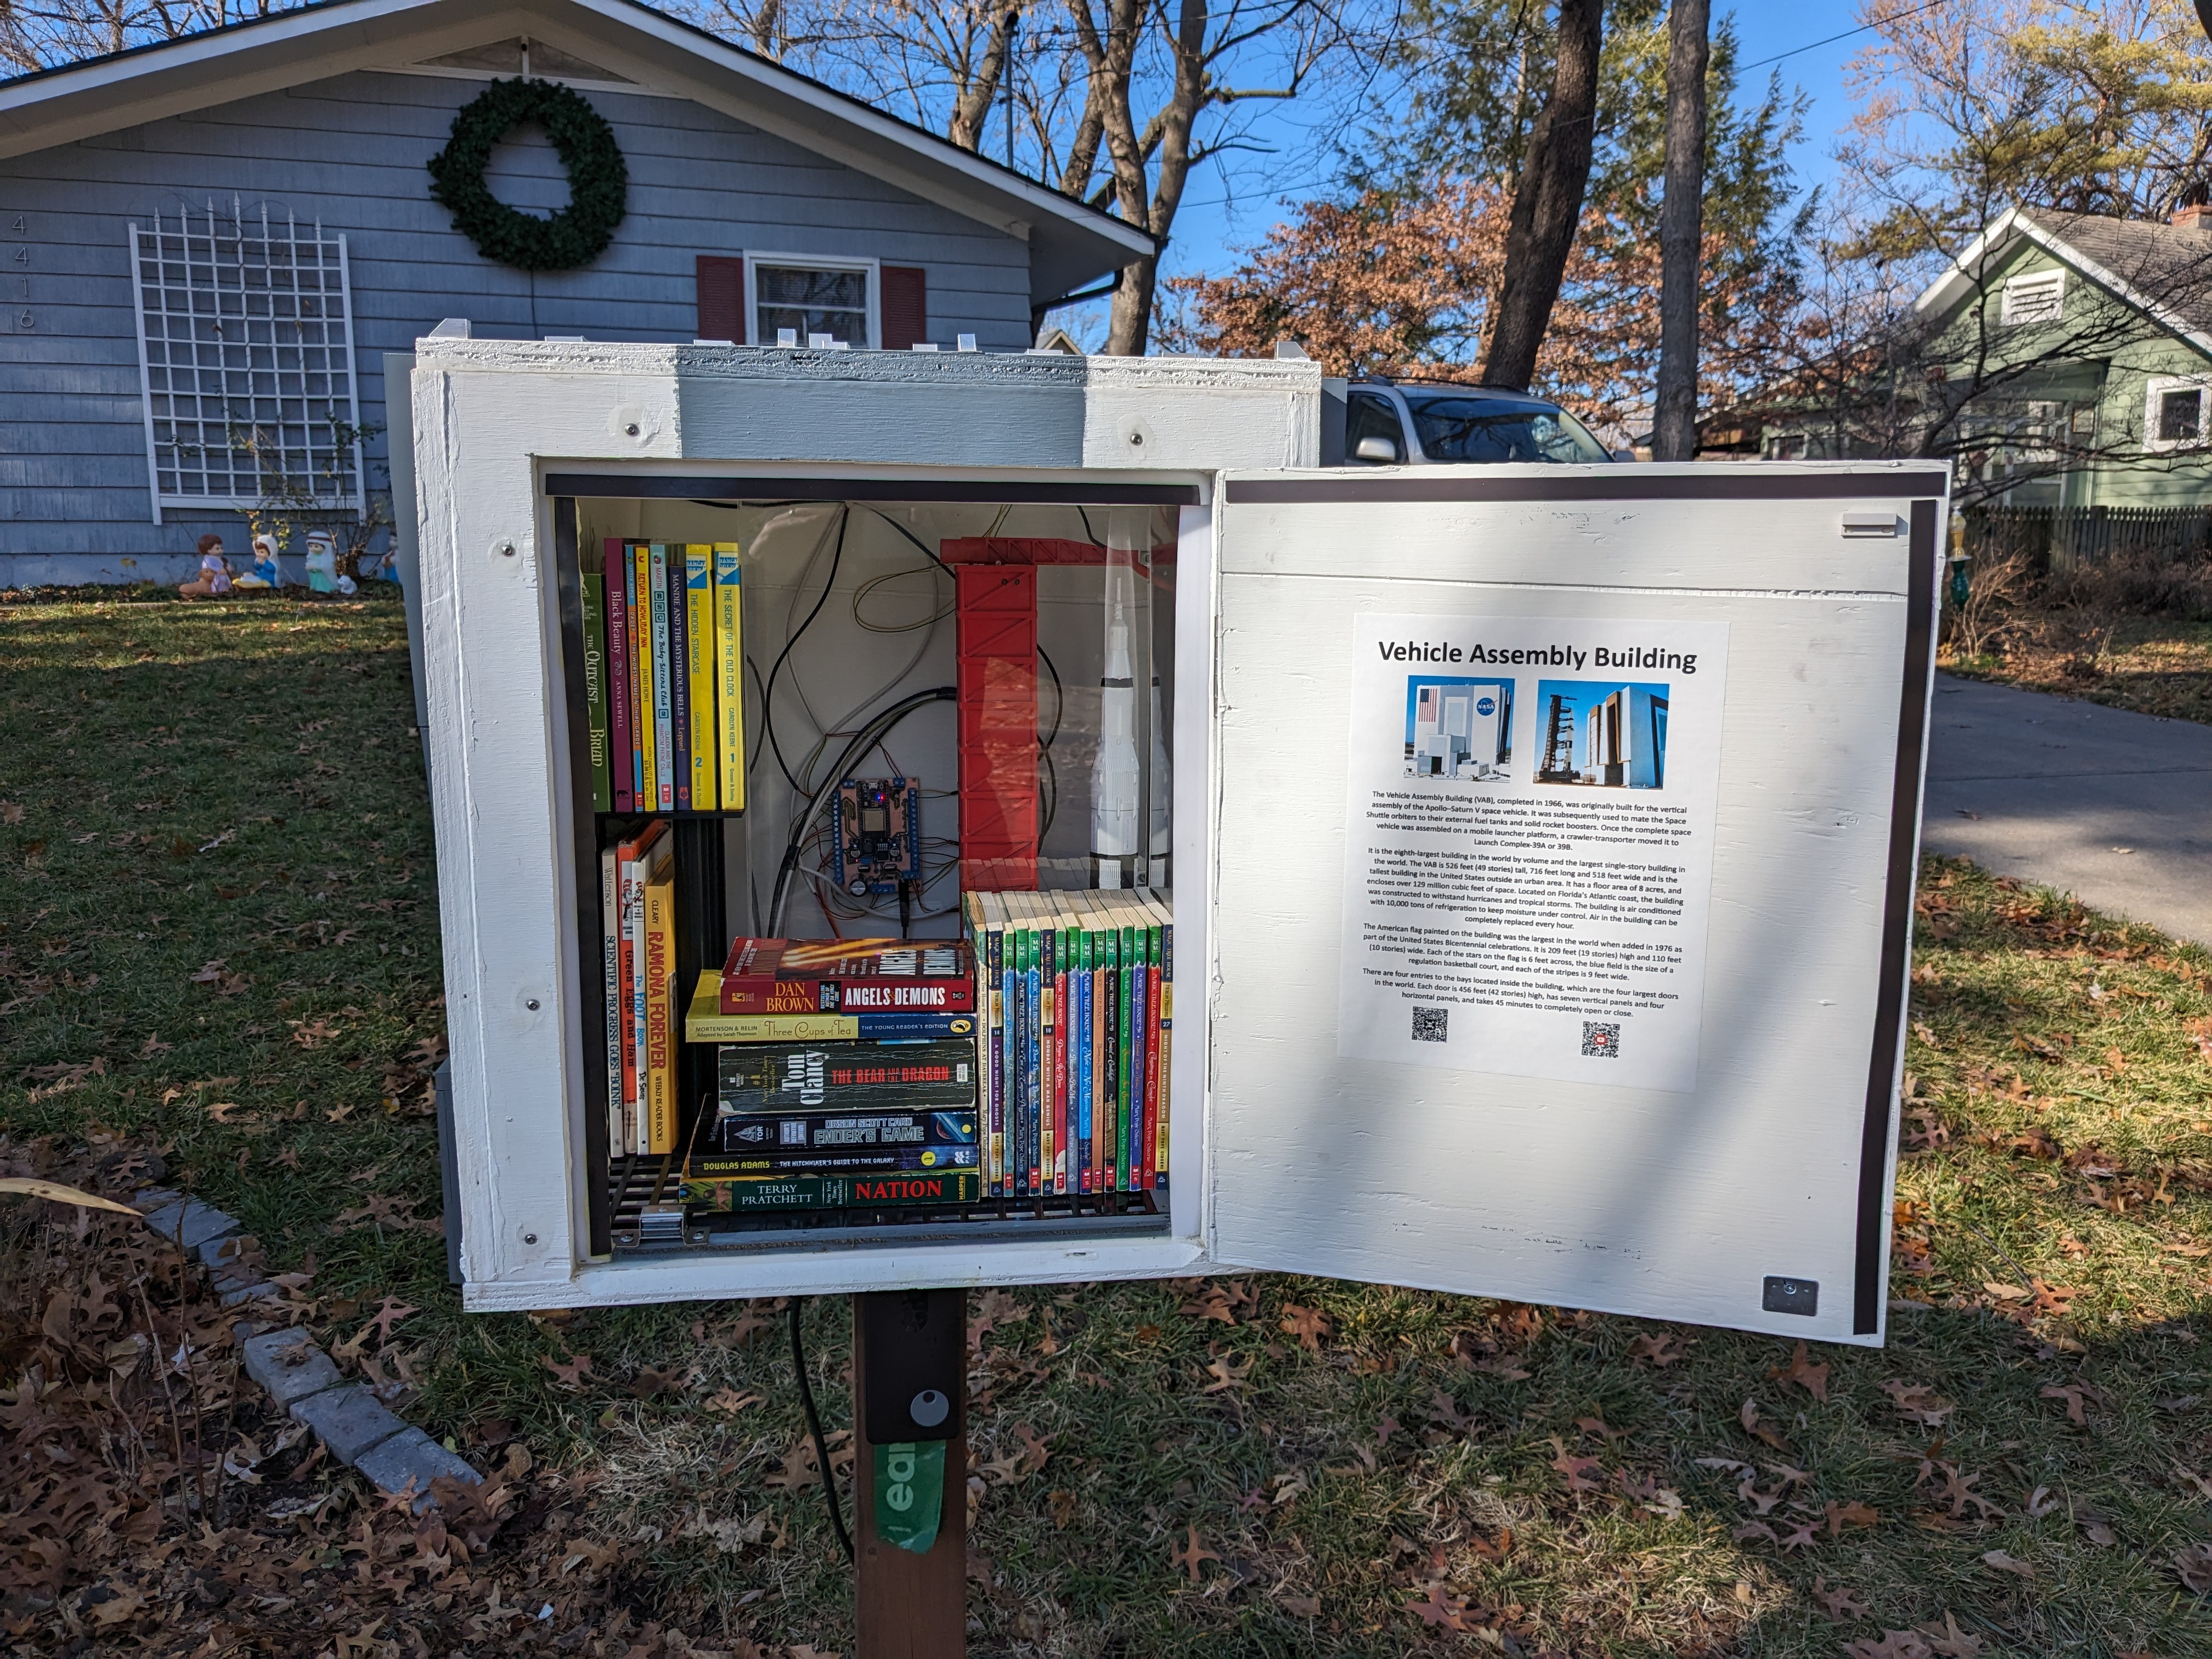

Since most people have no idea what the VAB is, I also put together a small factsheet and placed it on the inside of the door of the library. It’s mostly copy-pasted from Wikipedia with some minor editing and formatting:
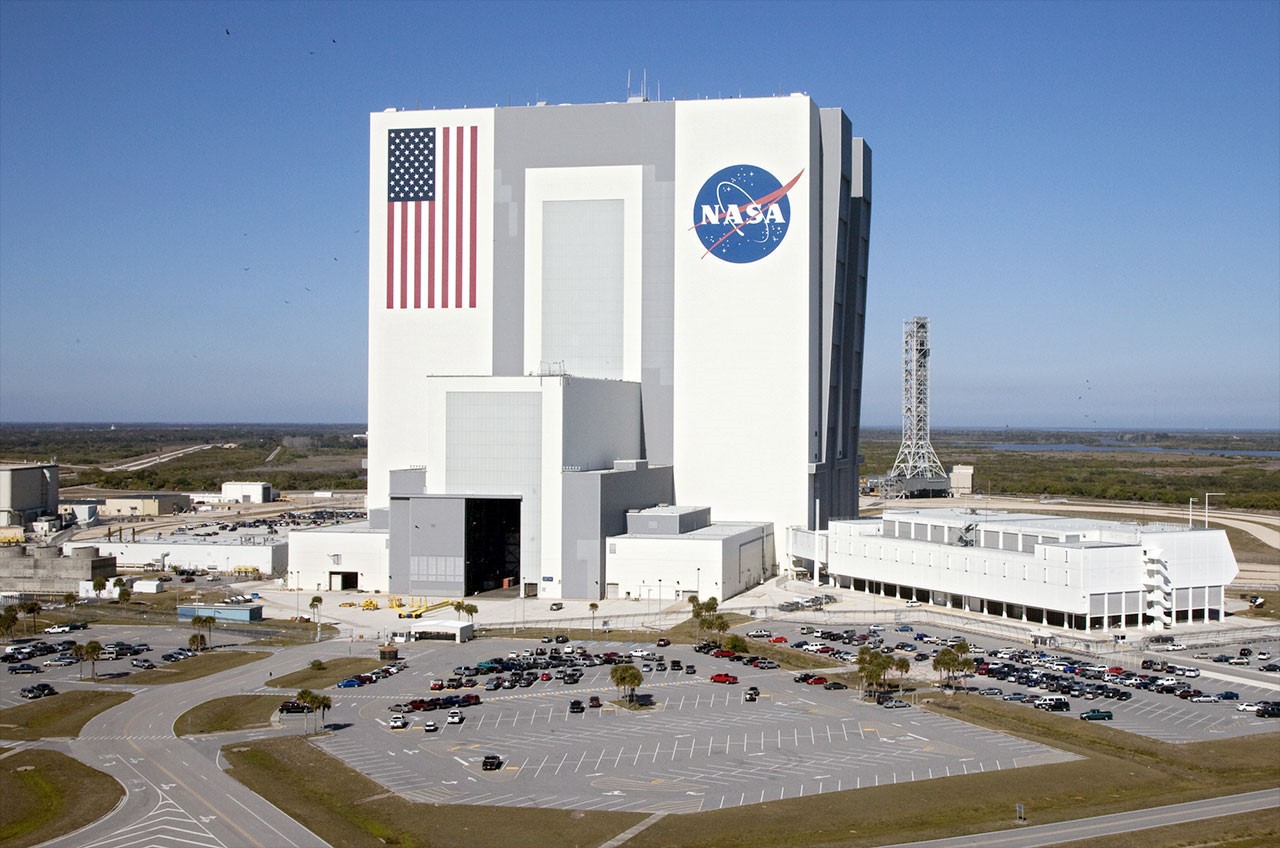 | 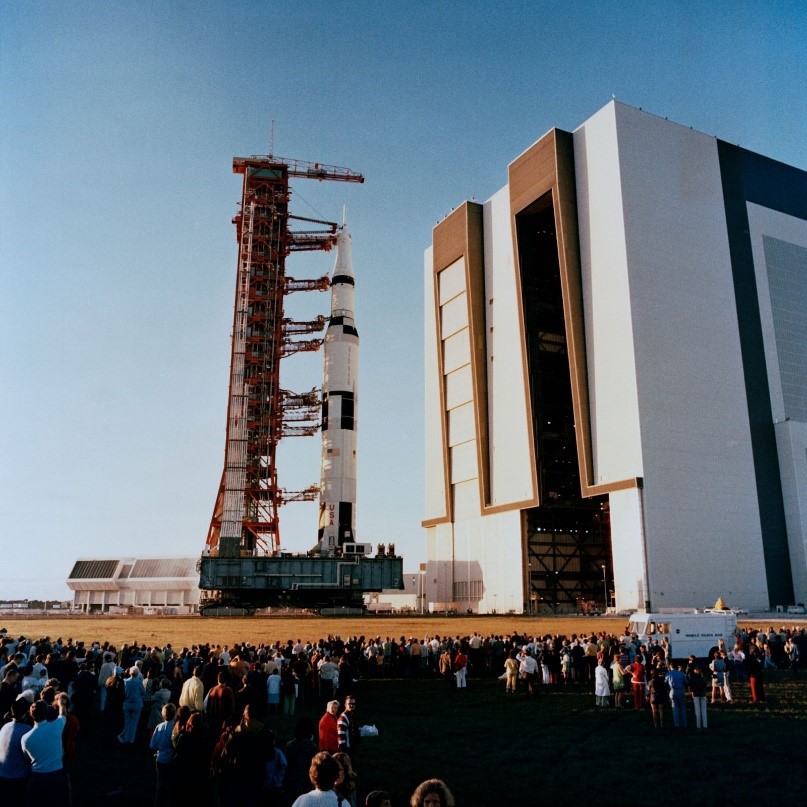 |
The Vehicle Assembly Building (VAB), completed in 1966, was originally built for the vertical assembly of the Apollo–Saturn V space vehicle. It was subsequently used to mate the Space Shuttle orbiters to their external fuel tanks and solid rocket boosters. Once the complete space vehicle was assembled on a mobile launcher platform, a crawler-transporter moved it to Launch Complex-39A or 39B.
It is the eighth-largest building in the world by volume and the largest single-story building in the world. The VAB is 526 feet (49 stories) tall, 716 feet long and 518 feet wide and is the tallest building in the United States outside an urban area. It has a floor area of 8 acres, and encloses over 129 million cubic feet of space. Located on Florida's Atlantic coast, the building was constructed to withstand hurricanes and tropical storms. The building is air conditioned with 10,000 tons of refrigeration to keep moisture under control. Air in the building can be completely replaced every hour.
The American flag painted on the building was the largest in the world when added in 1976 as part of the United States Bicentennial celebrations. It is 209 feet (19 stories) high and 110 feet (10 stories) wide. Each of the stars on the flag is 6 feet across, the blue field is the size of a regulation basketball court, and each of the stripes is 9 feet wide.
There are four entries to the bays located inside the building, which are the four largest doors in the world. Each door is 456 feet (42 stories) high, has seven vertical panels and four horizontal panels, and takes 45 minutes to completely open or close.