 D. Smith
The Jar:
When I originally designed this project in 2020, I chose to house the virtual fireflies in a plastic Mason jar with a plastic lid. Although it looks more attractive in a glass Mason jar (see pics and vids), I was making it for my son and wanted it to be able to survive being dropped without causing a safety hazard. I built all of the circuitry on a protoboard small enough to fit in the lid of the jar along with the rechargeable LiIon battery. A capacitive touch sensor placed under the center of the lid detects a hand "press" to control turning the jar on and off. A built-in LiIon charger allows the battery to be recharged by connecting a USB charger via a micro-B connector when the lid is off of the jar. Once the jar is powered on, it is configured to operate for 1 hour before automatically powering off (if not manually powered off sooner). This is long enough to allow it to be used as a calming nightlight while children (or adults) are drifting off to sleep.
Virtual Fireflies:
I wanted each virtual firefly to be unique, so I define a firefly by characteristics that determine its illumination patterns. The frequency of flash, duration of flash, and amount of randomness to apply to each creates a unique virtual firefly that is different from the others in the jar. I also wanted the effect to appear organically analog rather than discretely digital, so I controlled the brightness over the entire flash effect to more closely mimic fireflies in nature.
Design Requirements:
- Self-contained, rechargeable power source
- Easy for user to power-on and power-off
- Device able to self-power-off after specified run time
- Device mimics the appearance of a jar of real (biological) fireflies
The Electronics:
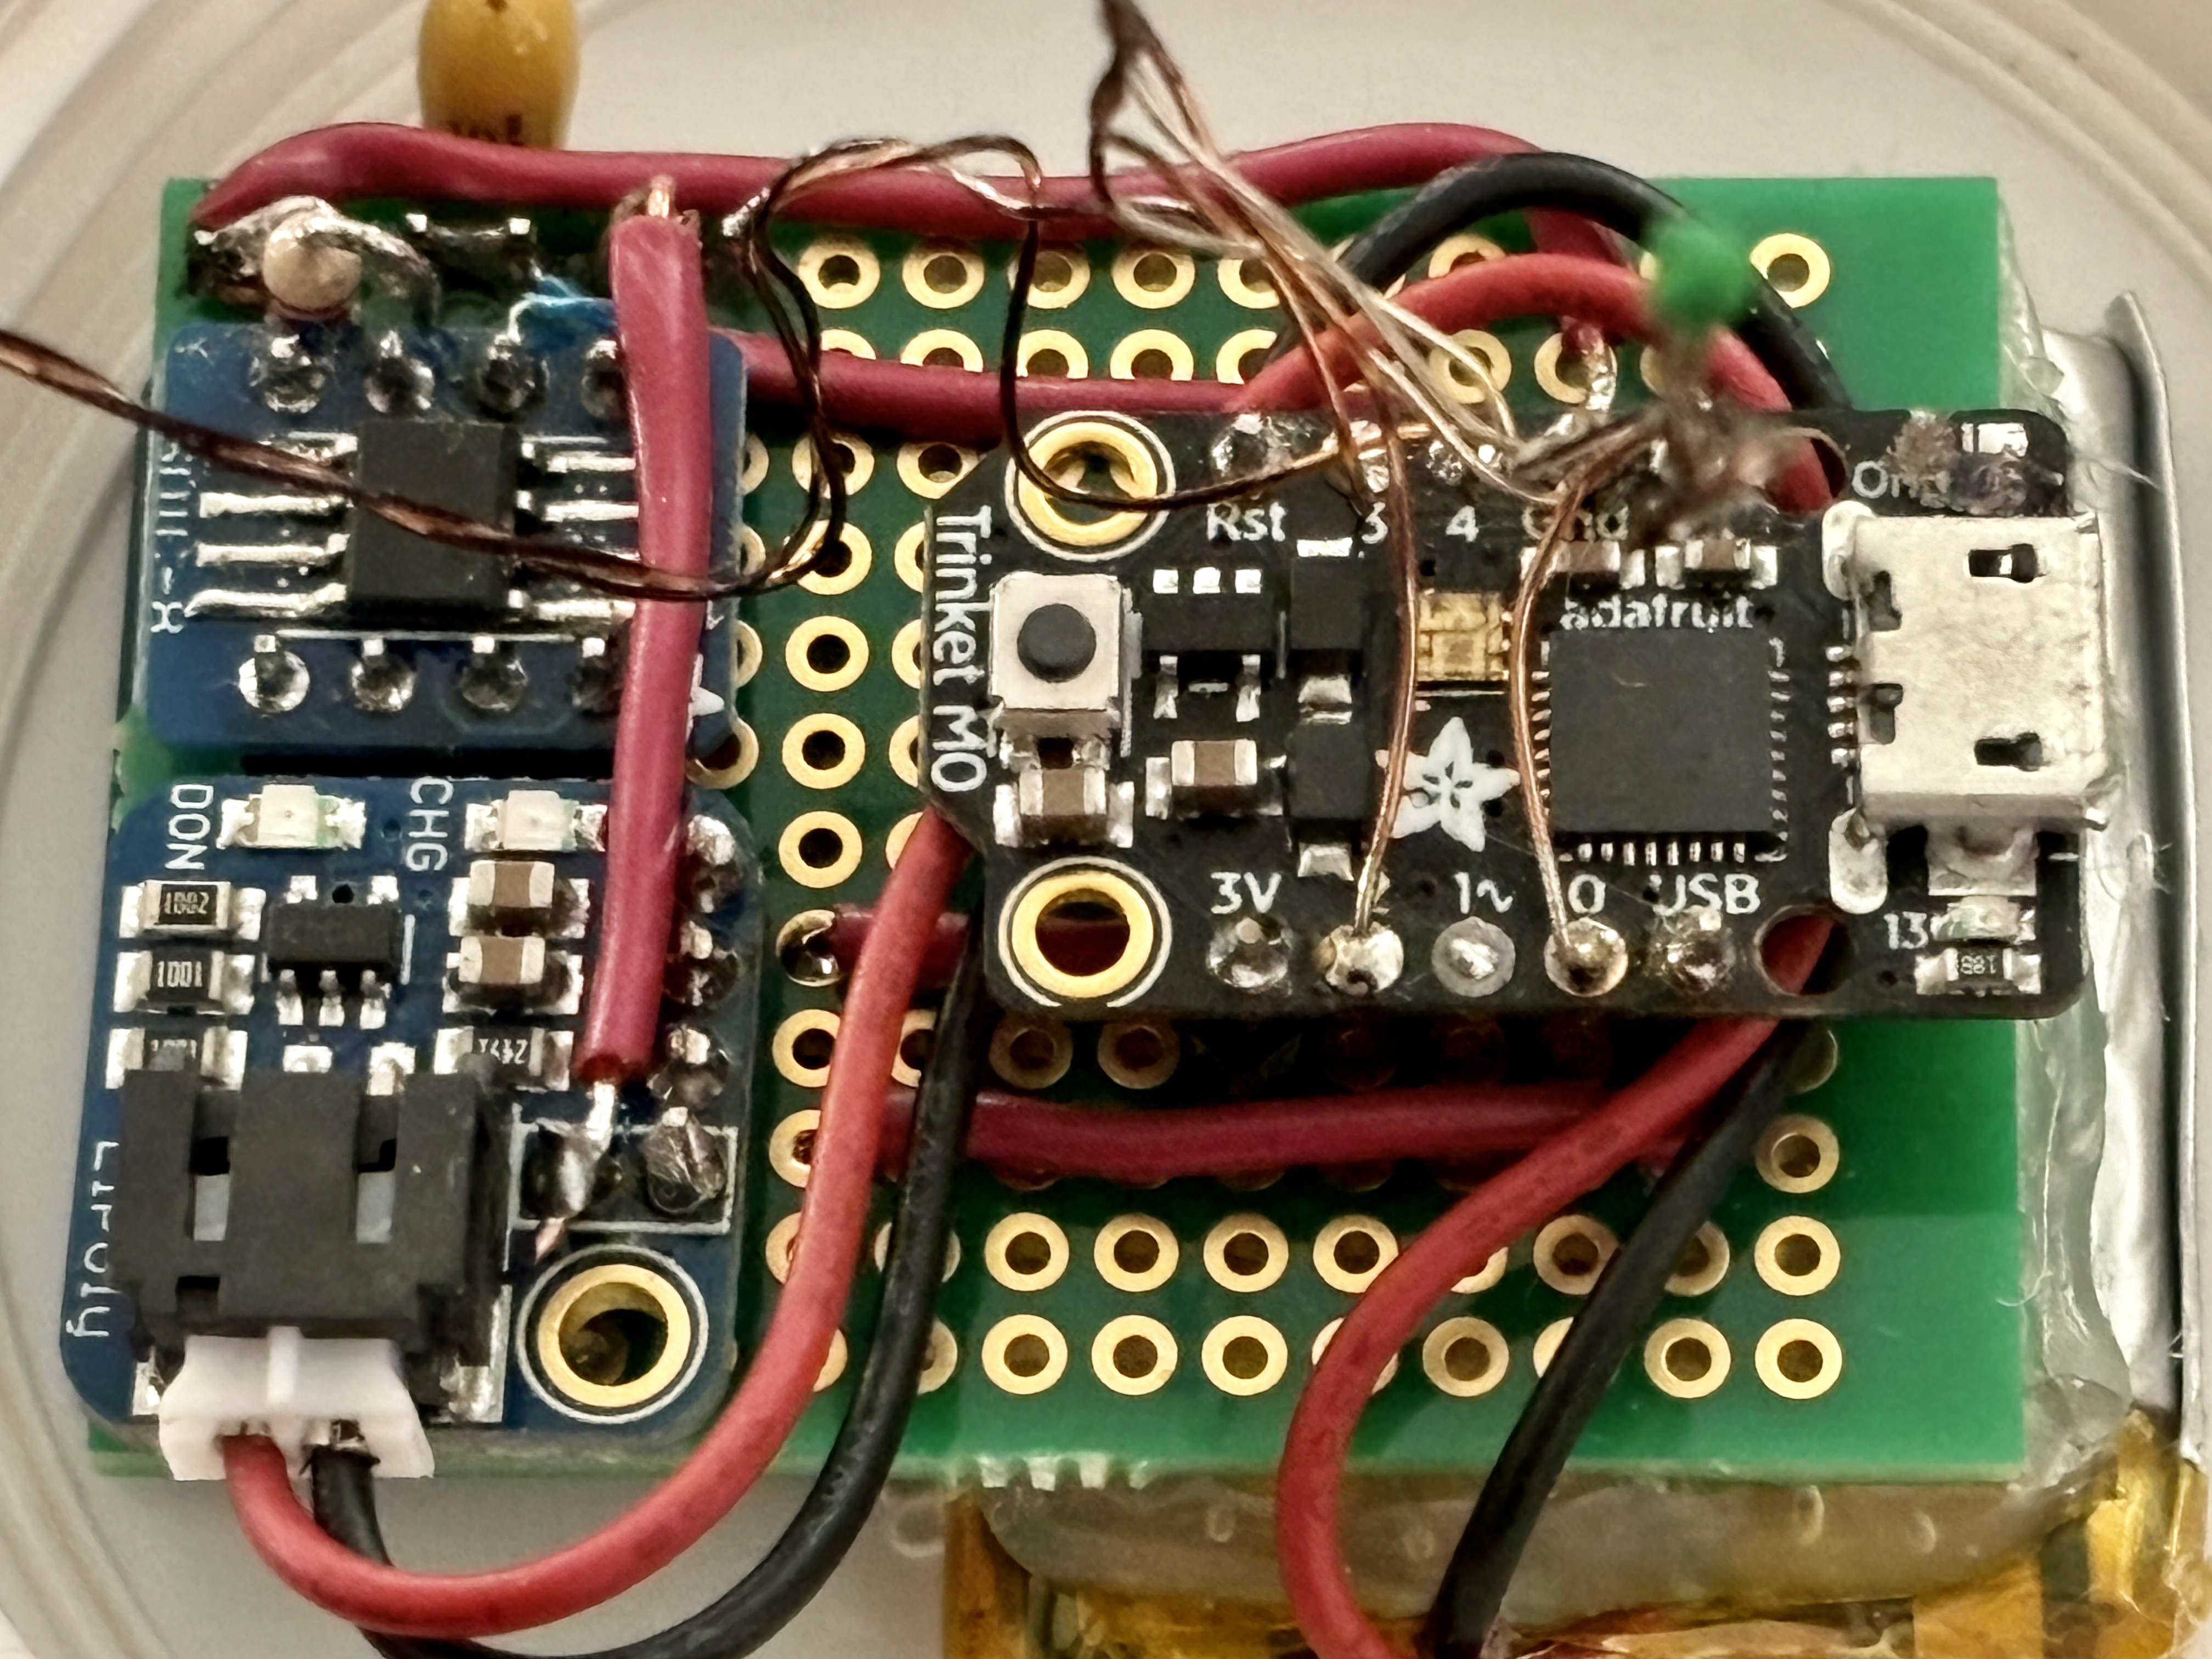
The electronics behind the "Jar of Fireflies" project consists of a combination of COTS (commercial-off-the-shelf) components -- largely from Adafruit -- and some custom "glue" electronics tied together on a protoboard. I chose to use a Lithium-Ion (LiIon) single-cell battery as the power source for the project because I wanted the jar to be rechargeable. To make it self-contained, I included a LiIon charger control board. To simplify the ability to turn the jar on and off, I decided to use a capacitive touch sensor on the underside of the lid. As a result, a plastic lid was required for the touch sensor to be able to reliably detect through the lid. For the main controller, I chose a small, inexpensive CircuitPython board - the Adafruit Trinket M0.
To create the light of each firefly, I used 4 surface mount LEDs that came pre-soldered to 10cm lengths of enamel-coated wire (aka magnet wire). The magnet wire has the benefit of being rigid and shape-able, so I could bend it to position the LEDs at various locations in the jar and they would remain there.
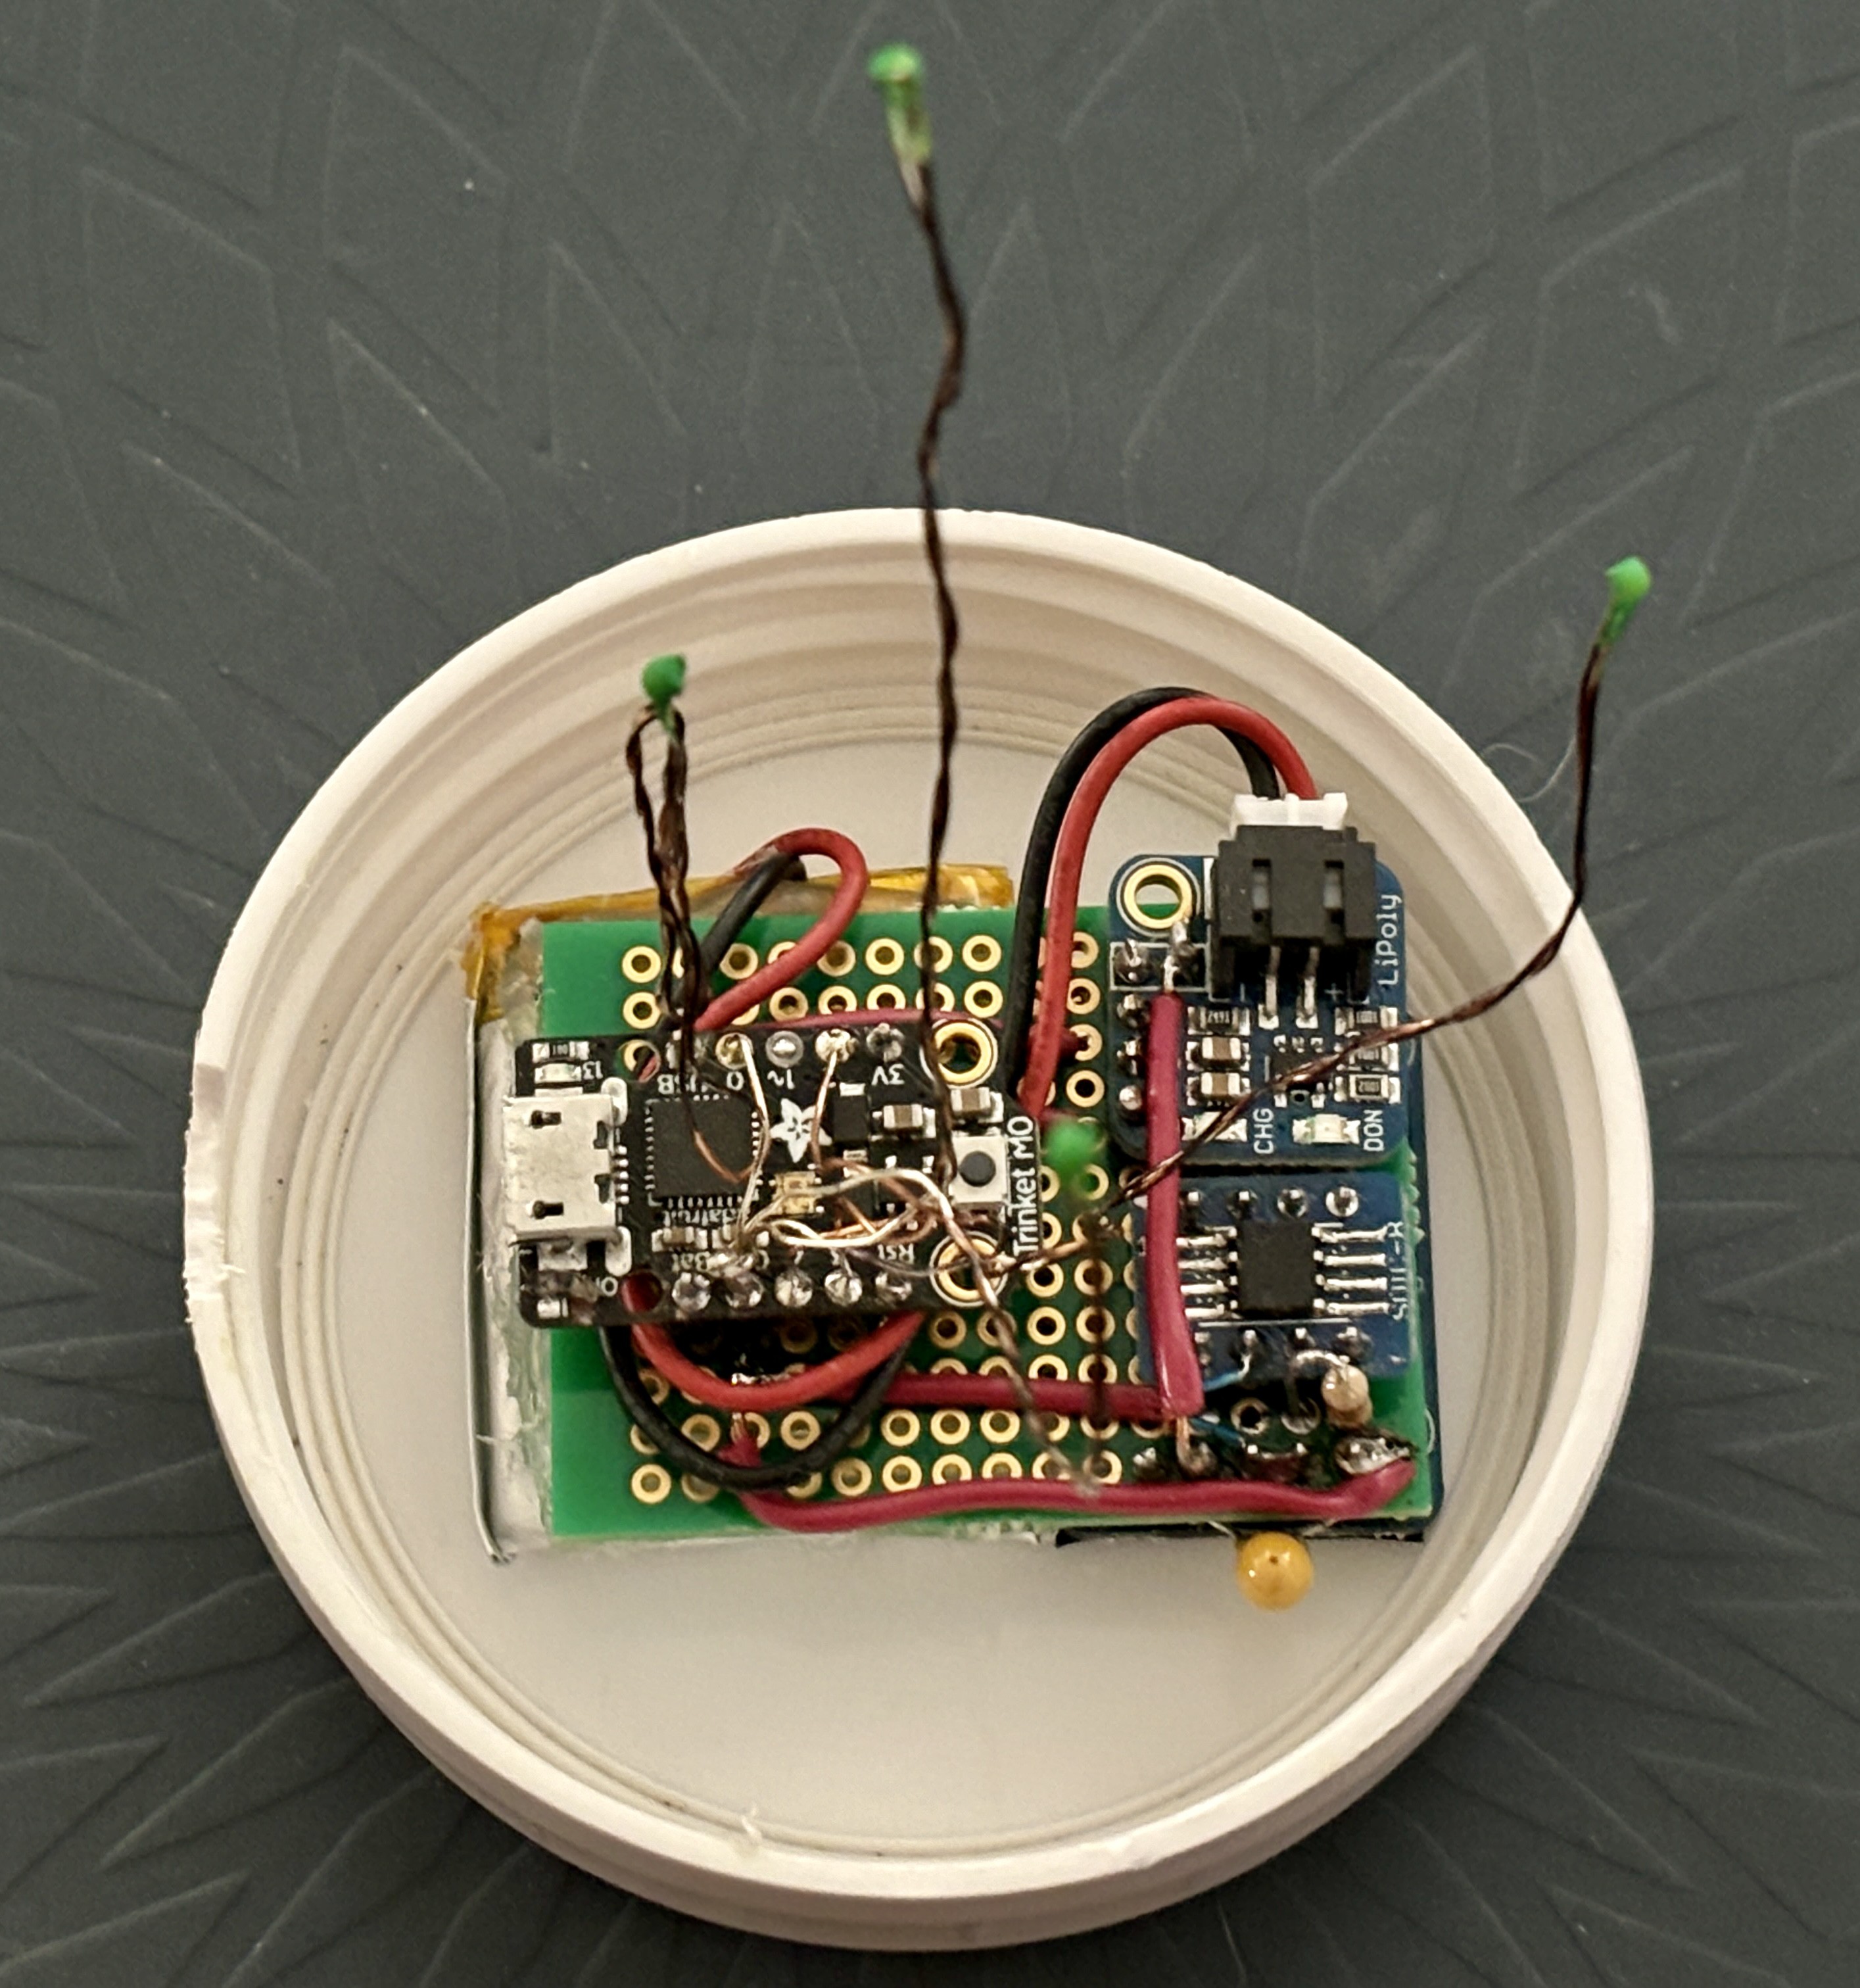
I assembled the electronics in a stack with the battery and capacitive touch board closest to the underside of the plastic lid. The next layer of the stack was the protoboard which was hot-glued to the battery and capacitive touch board beneath it. The protoboard in-turn held each of the other boards which were soldered to it. Next, the LEDs were soldered to the Trinket M0 and bent to various lengths and angles to position them at desirable locations within the jar. Finally, the entire stack assembly was hot-glued to the underside of the plastic lid.
As visible in the photo, I added a small cut-out to the edge of the plastic lid to allow a USB micro-B cable to be easily inserted into the USB port on the Trinket M0 for charging. To charge the battery, the lid is unscrewed from the jar and a USB cable is connected to the port on the Trinket.
The Schematic:
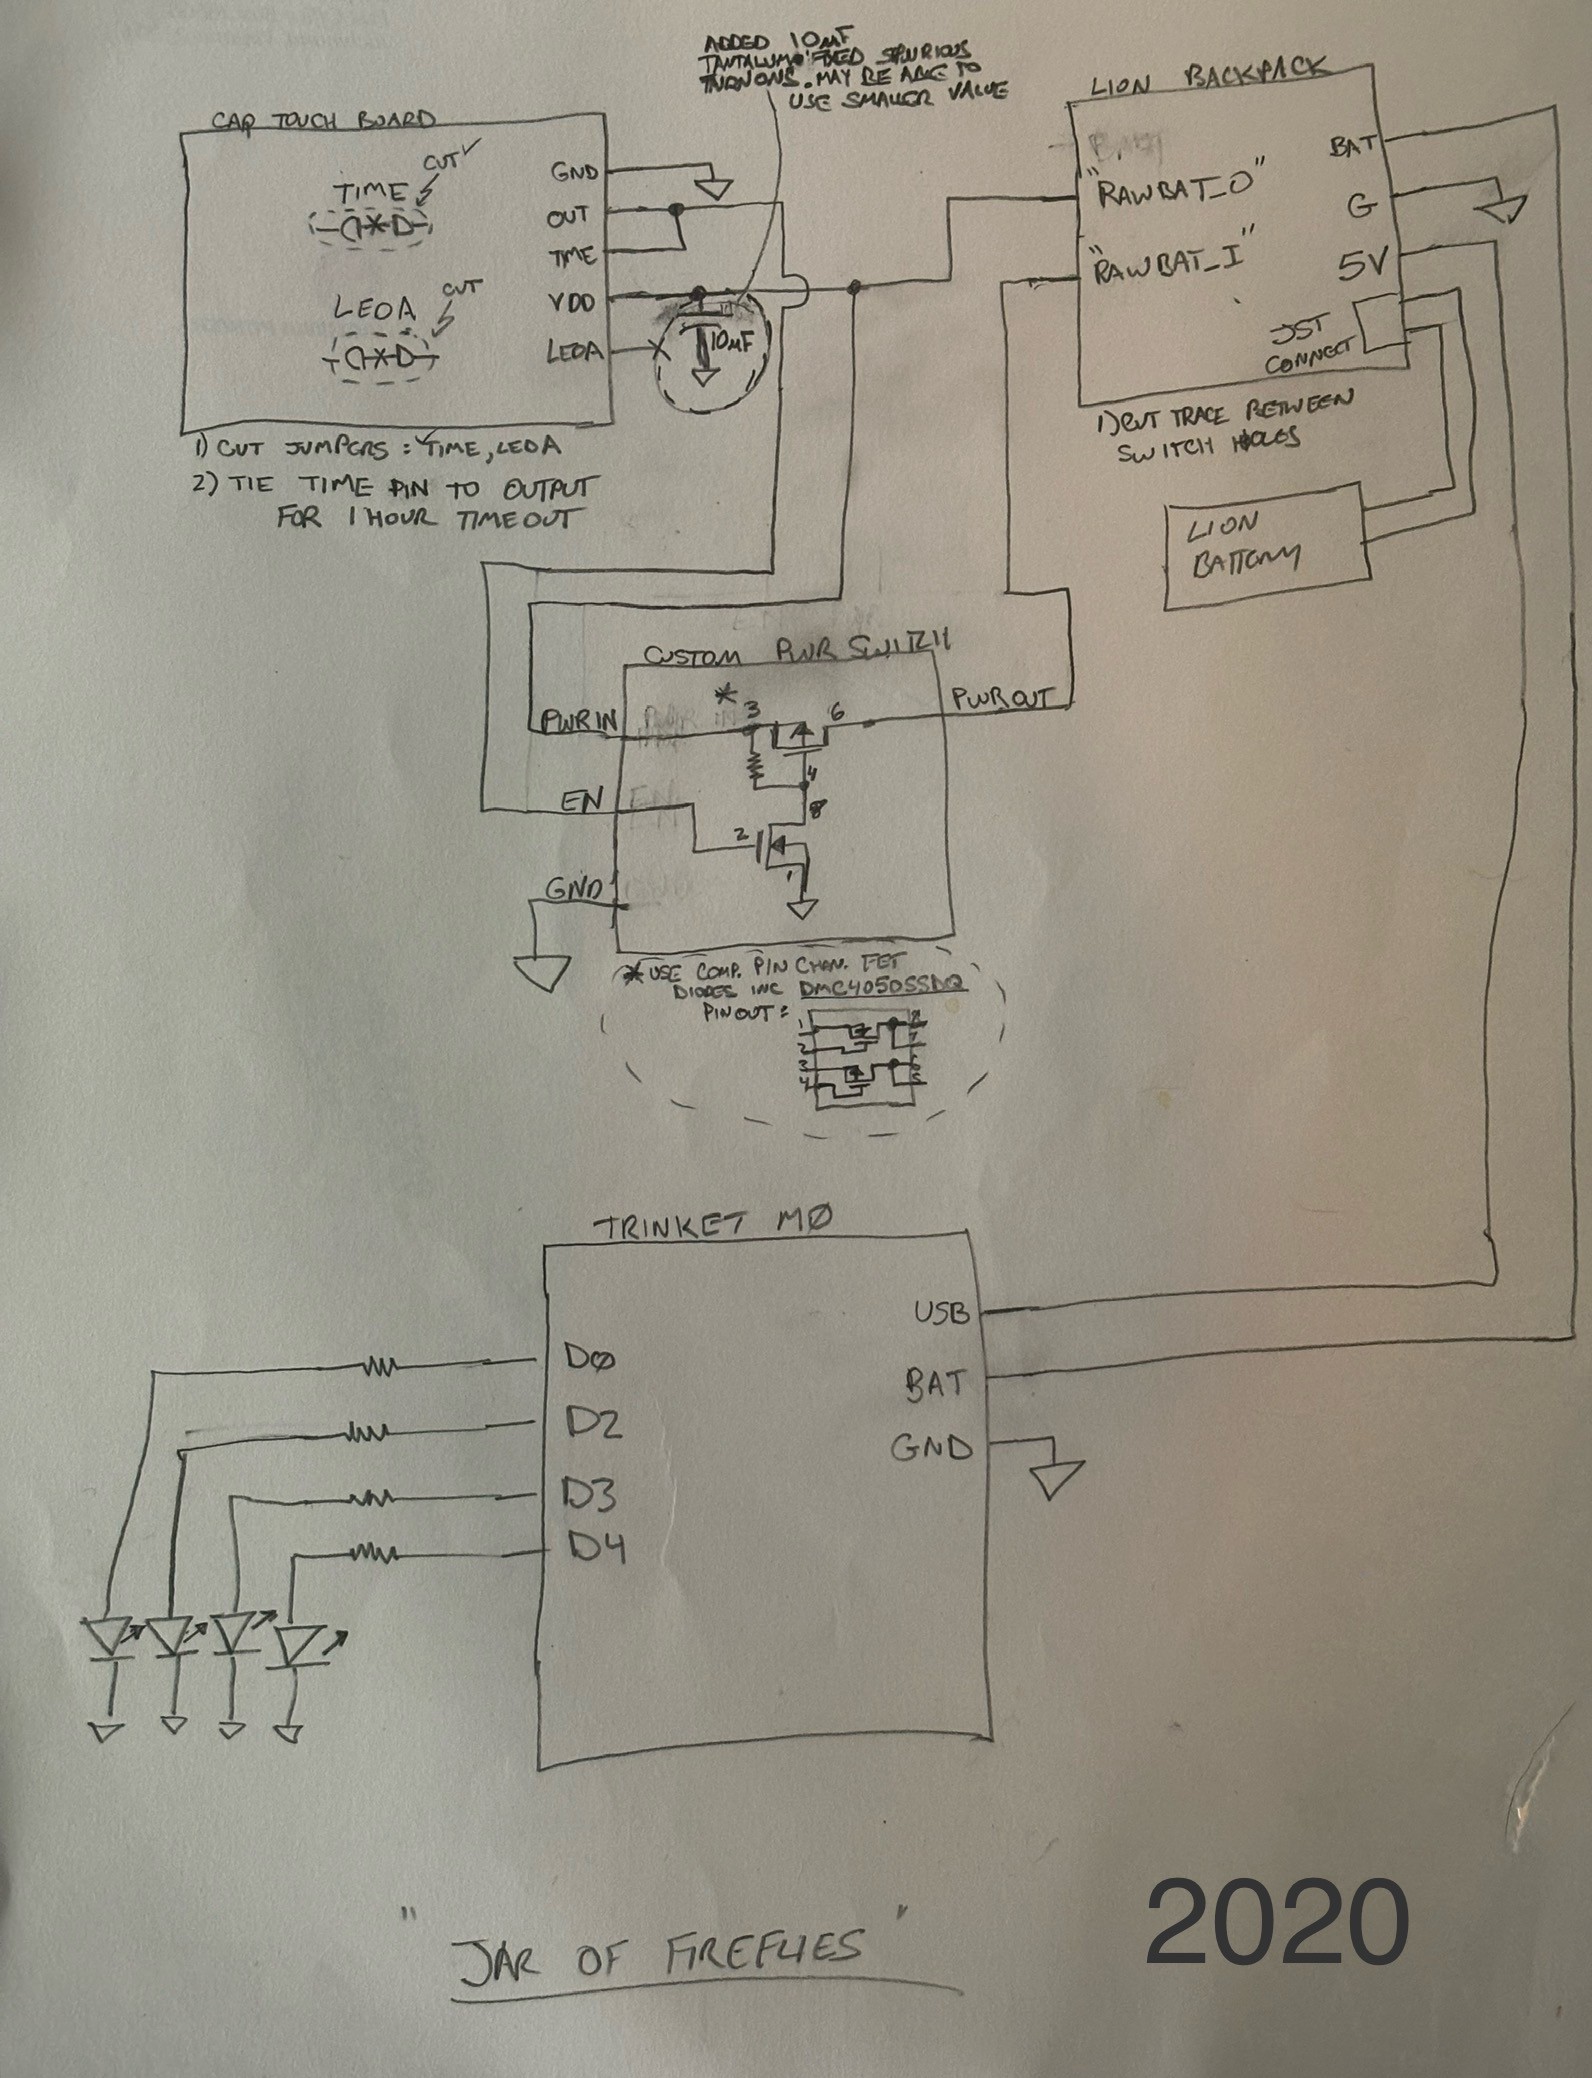
I've included a photo of my original hand-drawn schematic for additional bench-cred ;). It shows the interconnections between and configuration selections of the various COTS boards.
 Sean
Sean
 facelessloser
 Jared
Jared
 Dan Julio