The enclosure for the Photo booth consists of 4 sides made of acrylic and top and bottom caps 3D printed in ABS that hold the whole thing together. It’s not glued or screwed together, just held together by firmly pressing the sides into slots into the top and bottom caps. This makes it less robust than it could be, but it’s easy to take apart for documentation!
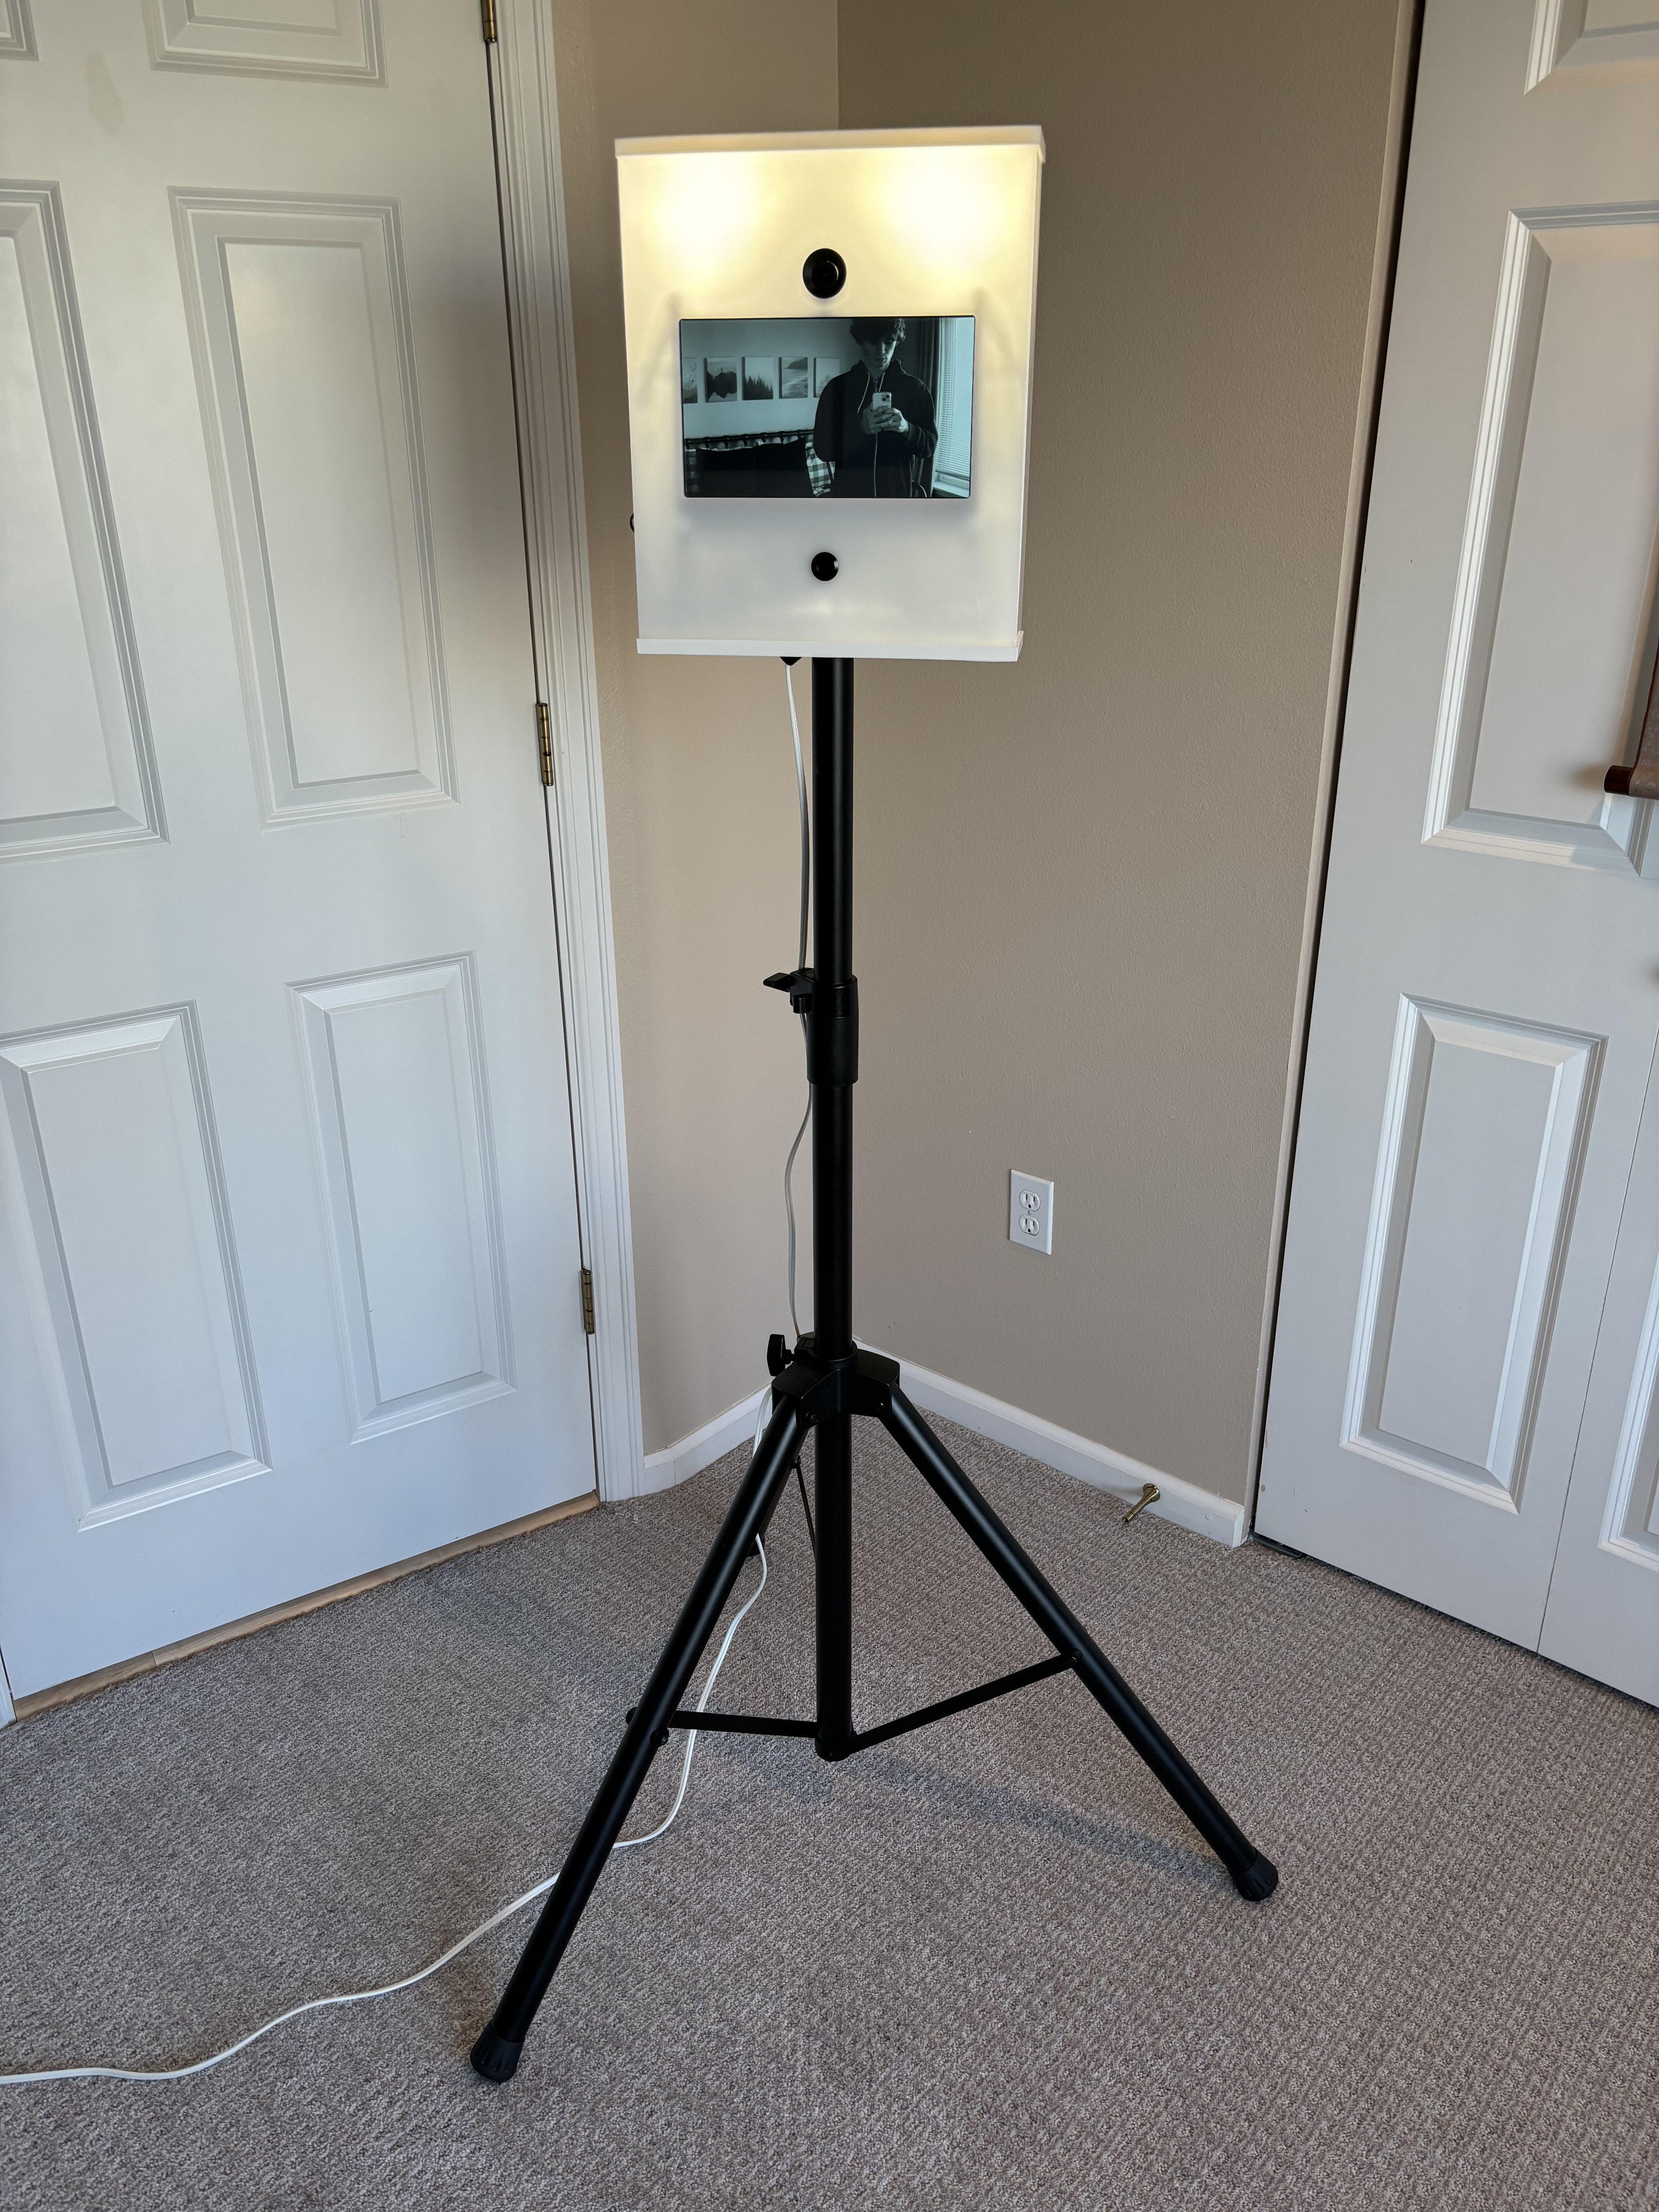
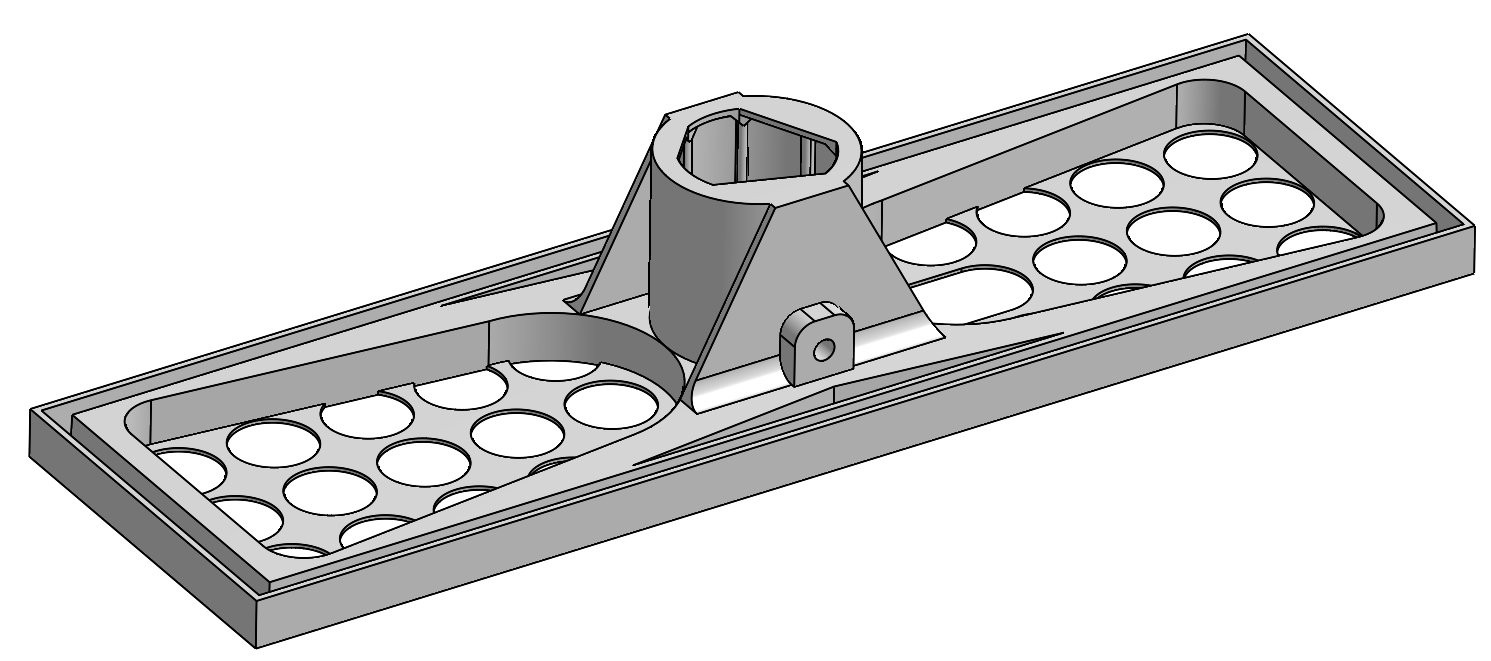
The bottom of the enclosure is a big old 3D printed piece of ABS with a hole so it can sit on the tripod, which is a surprisingly sturdy and cheap monitor stand from Monoprice. I didn’t install the monitor bracket so the photo booth just sits directly on the pole.

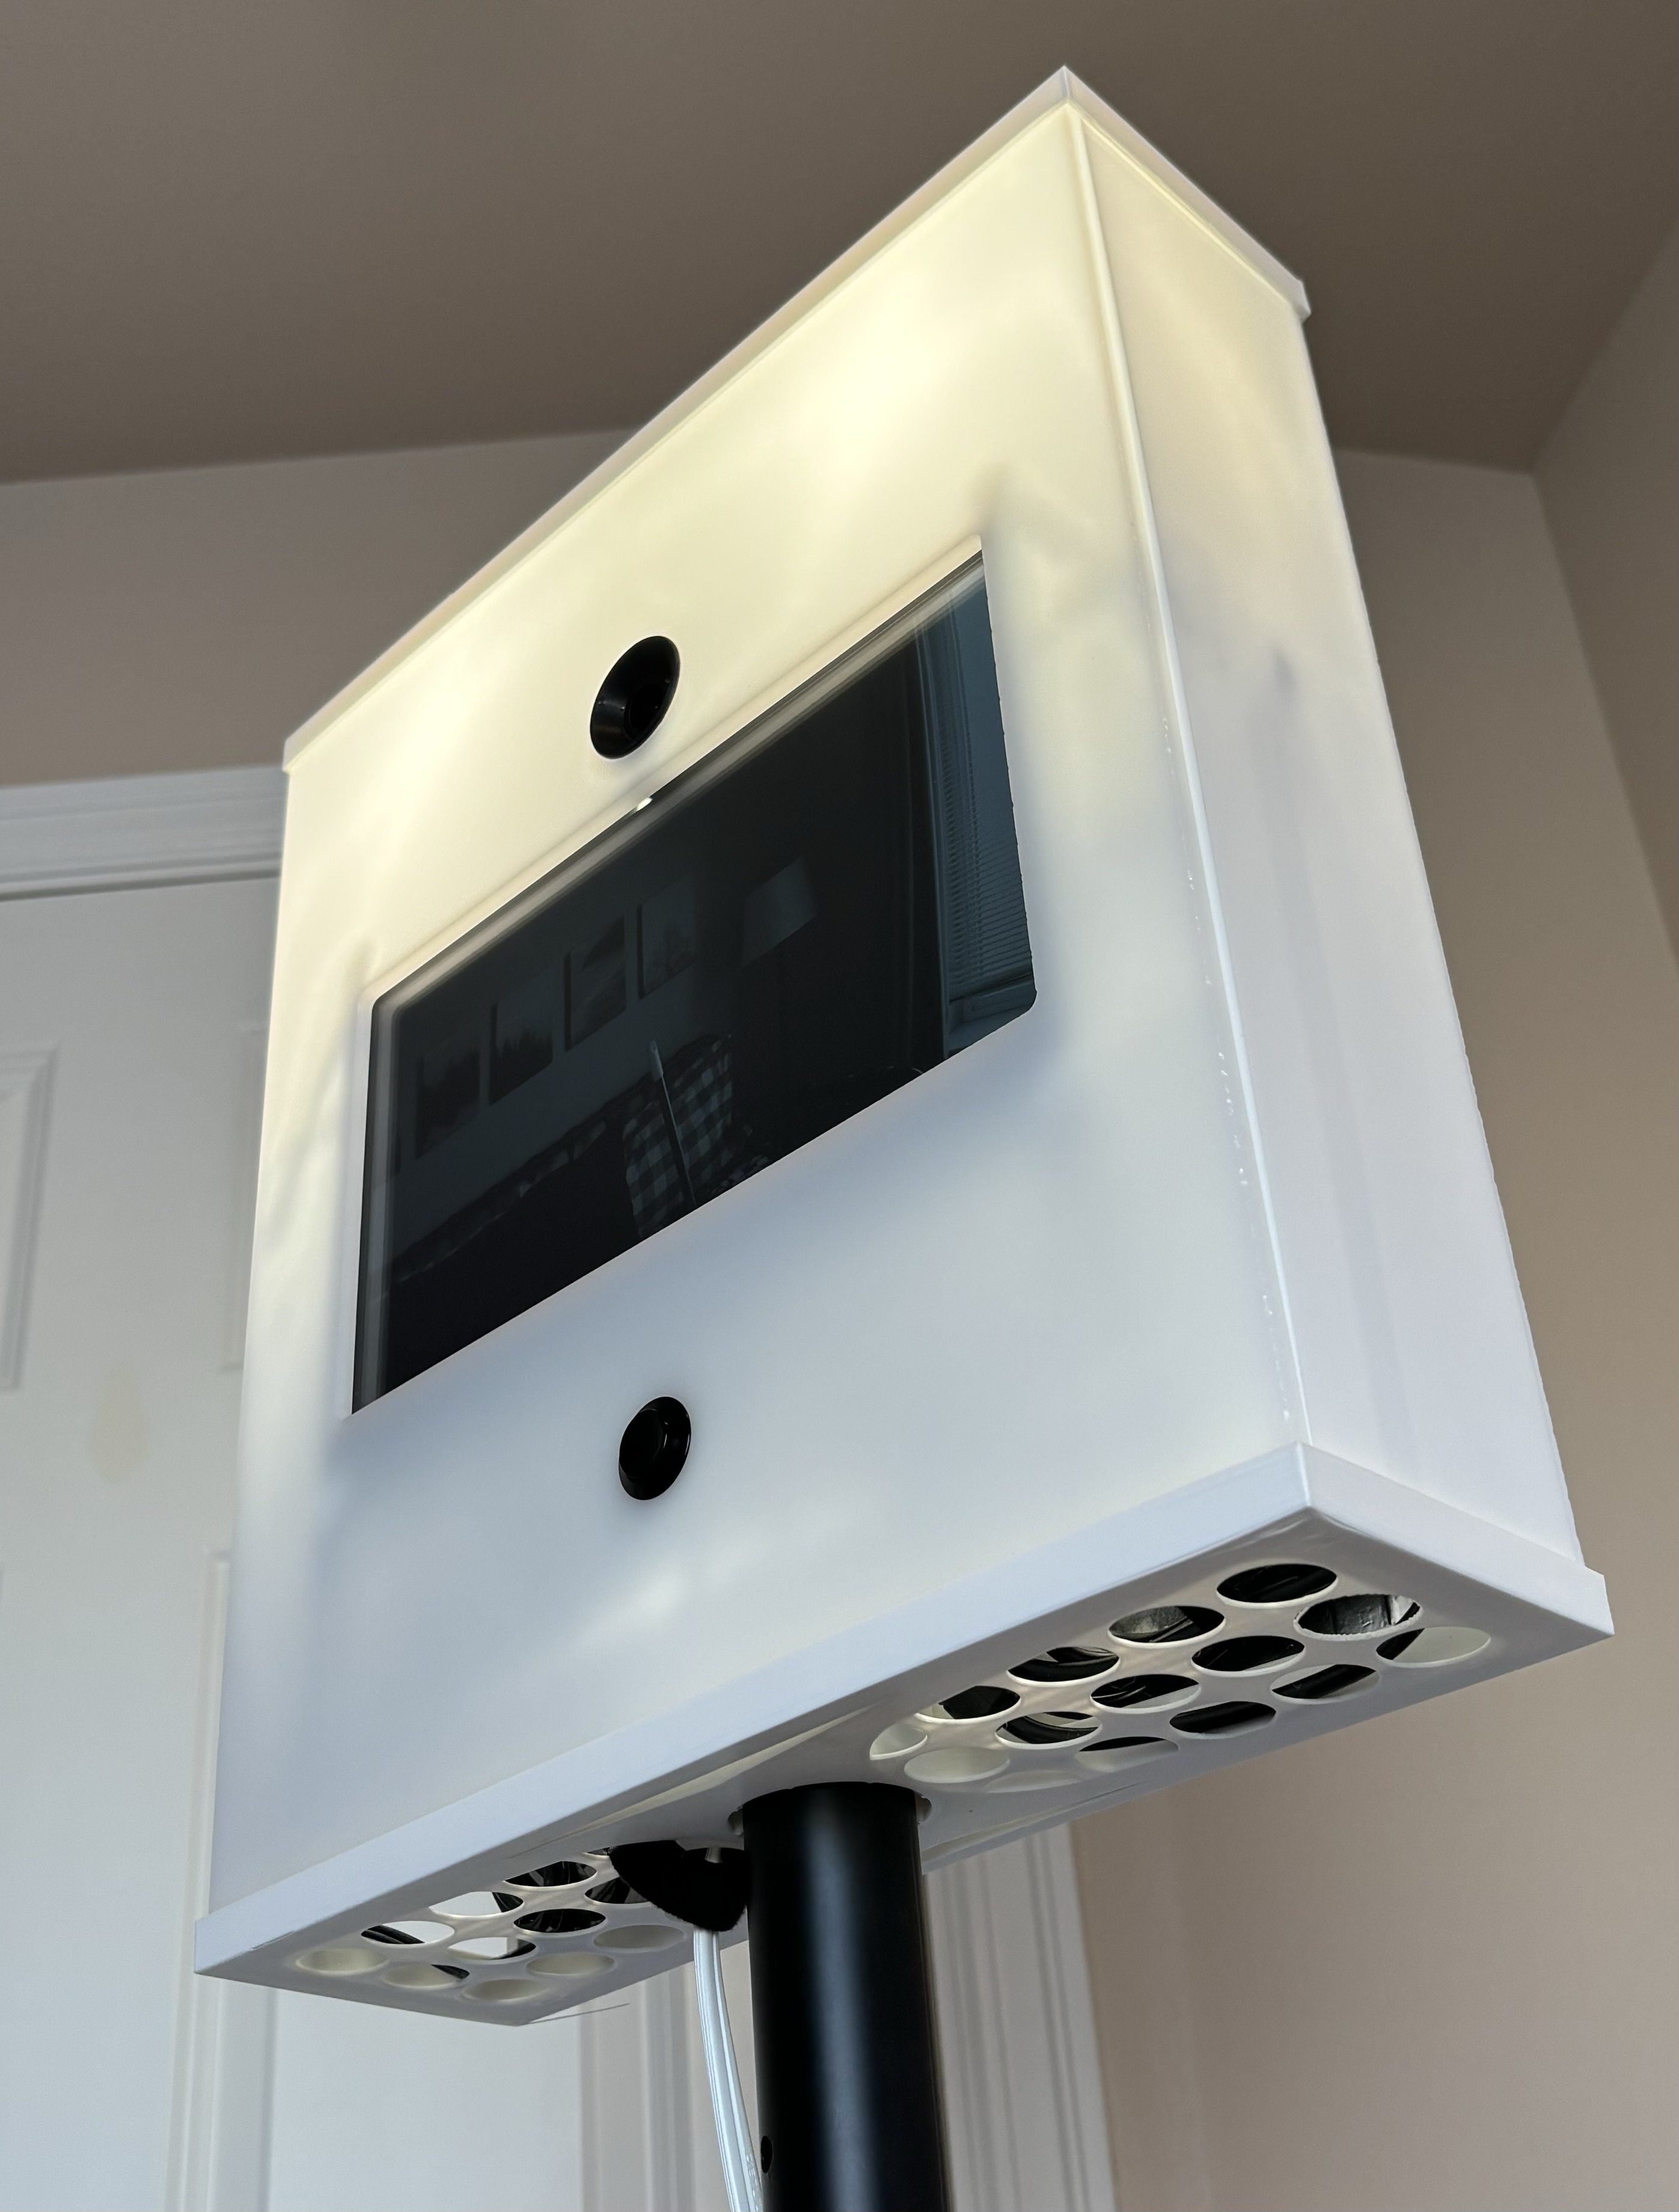
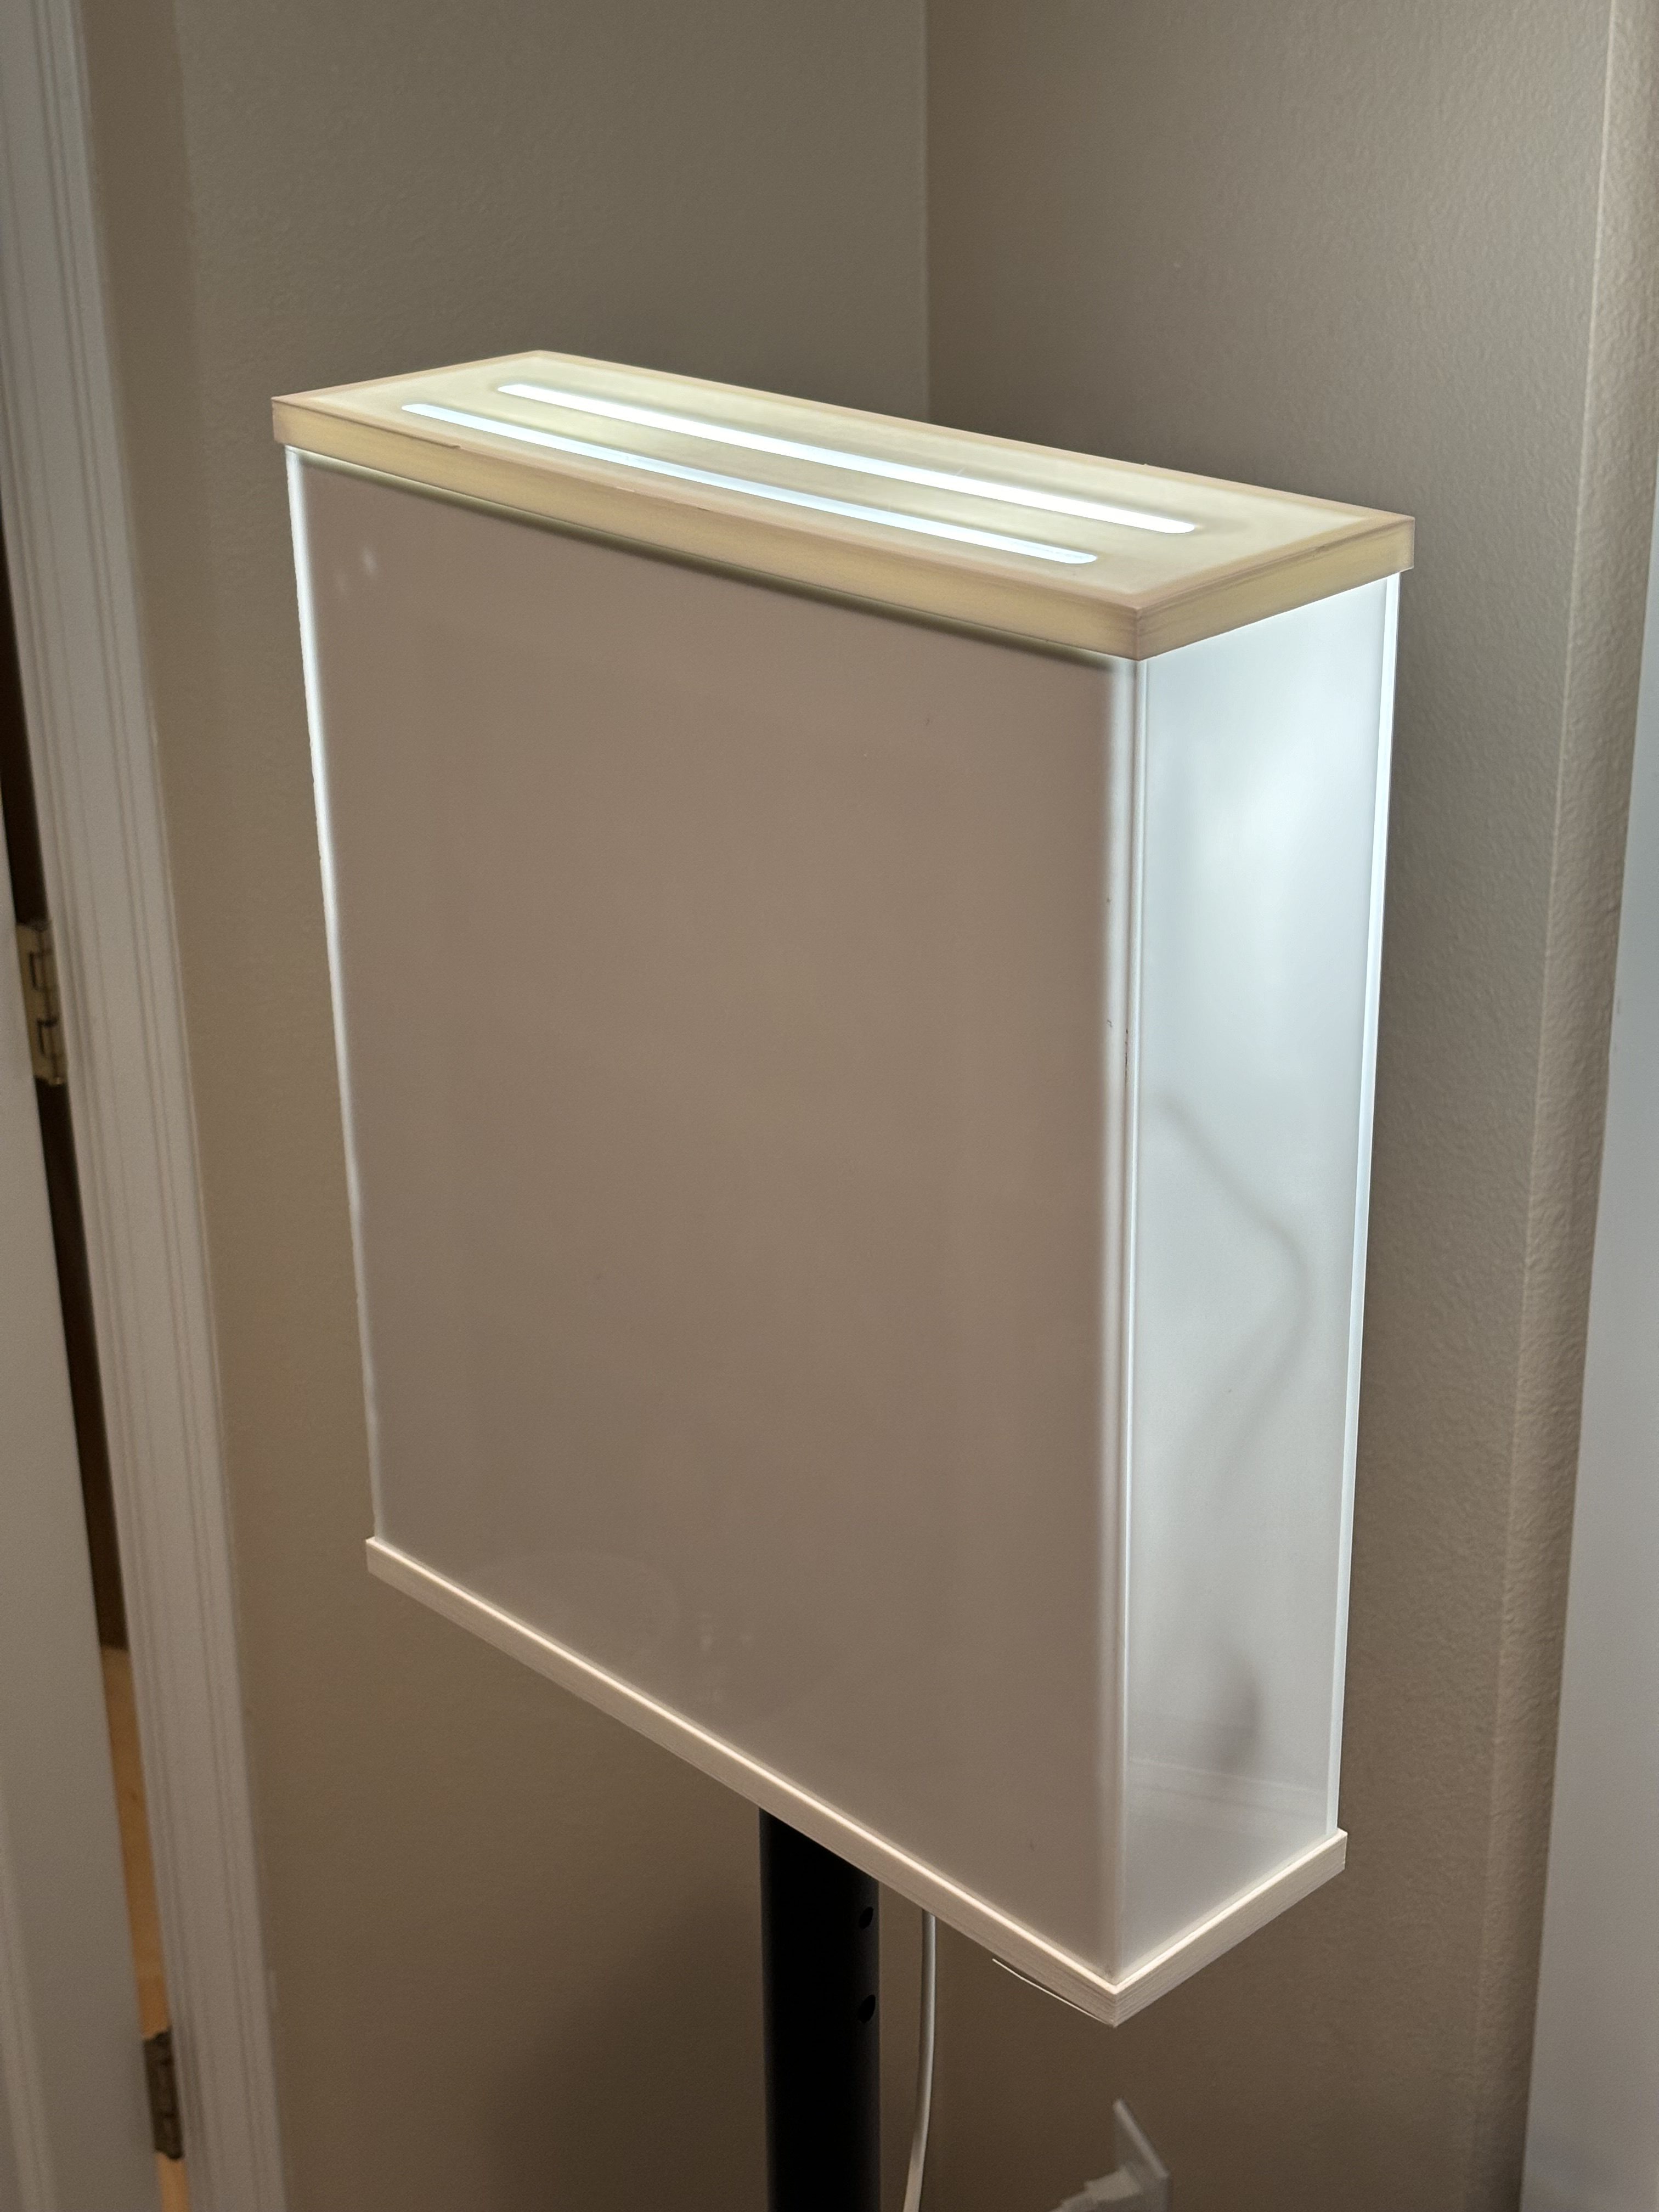
The front face is a 12”x14” piece of 3/16” 45% cast Acrylic from TAP Plastics. The holes for the button, display, and camera are laser cut. It’s only 45% transmissive, so 55% of the light gets bounced back into the case, but it gives a nice diffused glow without excessive hot spots from the LEDs. The sides are 3/16” 9% and the rear panel is 1/8” 9%. The sides and rear are just plain rectangles so they really don’t need to be laser cut, but if you have a laser cutter, might as well use it, right?

The above photo is a rear view of the front panel sitting in the bottom panel, with all other sides of the enclosure removed. There’s also a transparent acrylic panel mounted to the display on standoffs that just keeps the wires to the Pi from getting pulled out, and prevents wires from sitting against the front panel and creating dark shadows.
The cables dangling from the bottom are an extension cord with the 24V supply for the LEDs and the 5V supply for the Pi, as well as the USB wifi adapter for the ad-hoc network. They’re normally inside the case but I moved them out of the way for better visibility.

The LCD display already has a handy mounting spot for the Pi. You can see the Pi camera above the display, in its 3D printed holder, and the button below the display. The display itself is held to the front panel by 4 3D printed standoffs that I glued on with a slurry of acetone and ABS. I created a sketch to laser etch a template to help me glue on the standoffs so the display wouldn’t end up slanted or tilted.

The Pi HQ camera is mounted with the help of this little holder that kinda looks like Sputnik that I printed from black ABS. It’s just an interference fit into the hole in the front plate. It’s intentionally angled a little bit downward to make our photo subjects look just a little bit better.
Discussions
Become a Hackaday.io Member
Create an account to leave a comment. Already have an account? Log In.