 Ted Yapo
I couldn't get Slic3r to generate really nice segmented bezels at this scale, so I wrote a python program to generate g-code commands to send to a 3D printer directly. As a result, I can make cells with exact 1-extrusion-thick walls and minimal blobbing. The code is checked into the GitHub repo, but you might need to tweak it to match your printer/filament settings - oh, and be prepared to yank the plug if you got anything wrong :-) Here's the result:
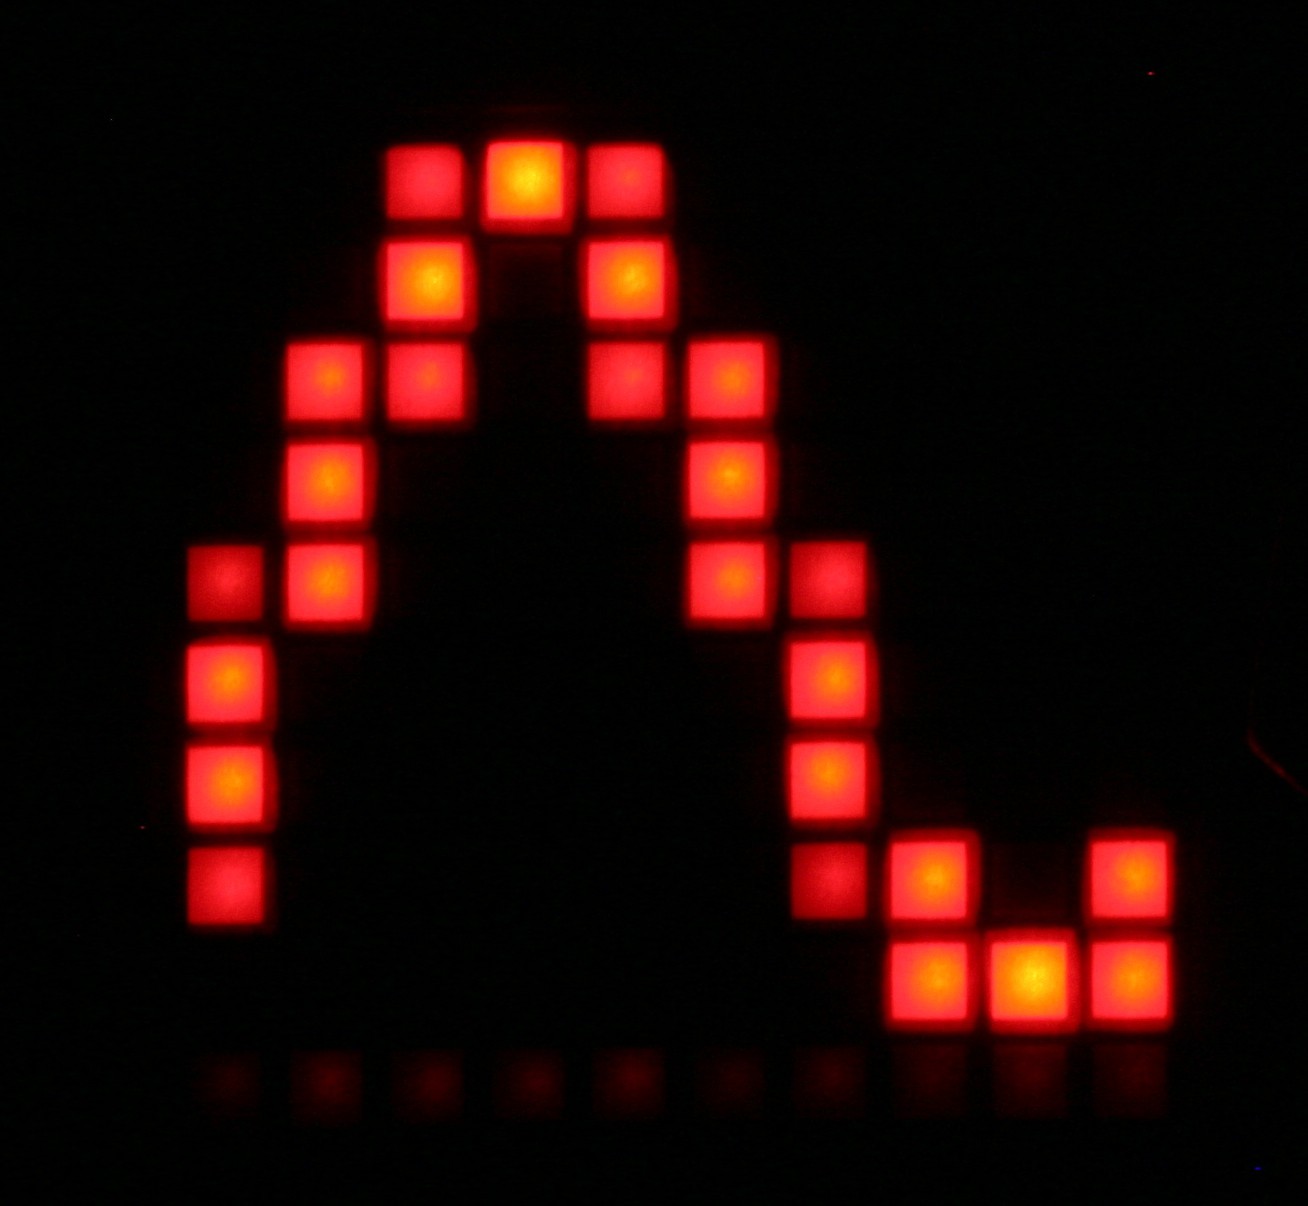
This display uses the new 3D printed bezel, the Rosolux 116 tough white diffuser, Roscolux 26 red filter, then a black mask laser printed on overhead transparency stock. At some point I will gather enough courage to run the Roscolux sheets directly through the laser printer and see what happens - they are intended for theatrical lighting, so are heat-resistant, but I'd hate to screw up a laser printer. No guts no glory, I guess (but also no goop in my printer). I suspect printing directly on the diffuser or red filter (or both) might fix some of the bleeding around the pixels.
The python code is pretty simple; it just generates a grid of 1-extrusion wide cells. For the printer I used, this means 0.42 mm wide walls. The code uses alternating zigzag patterns in the horizontal and vertical. Even though there is theoretically twice as much material deposited at each corner, this doesn't produce too much of a blob. You might be able to improve this by slowing the extrusion right at the corners, but I'm not sure if that will introduce other issues.
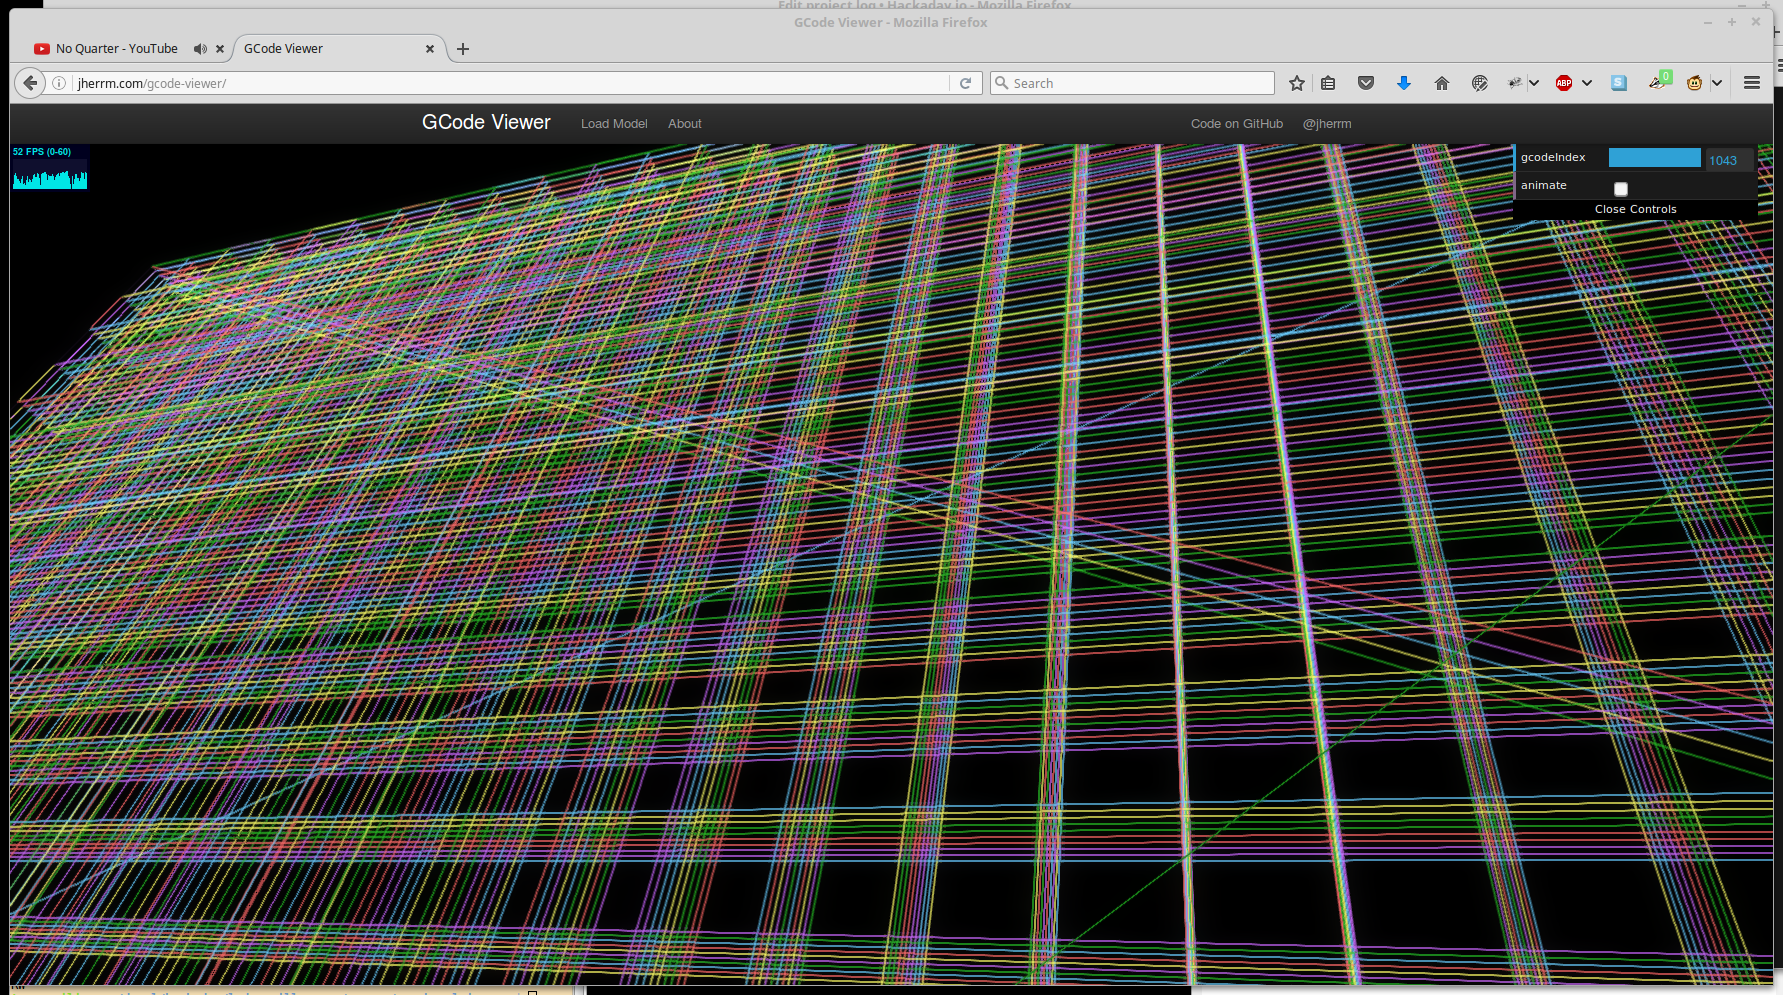
The output of this program can be sent directly to the printer, which is a little scary. I have a kill switch on the power supply from previous experiments like this. I didn't need it this time, but maybe I just got lucky. One way to be safer with this kind of thing is to use a g-code previewer. There are a few on the web - I've started to like this one, which rendered this preview of the 16x32 bezel:
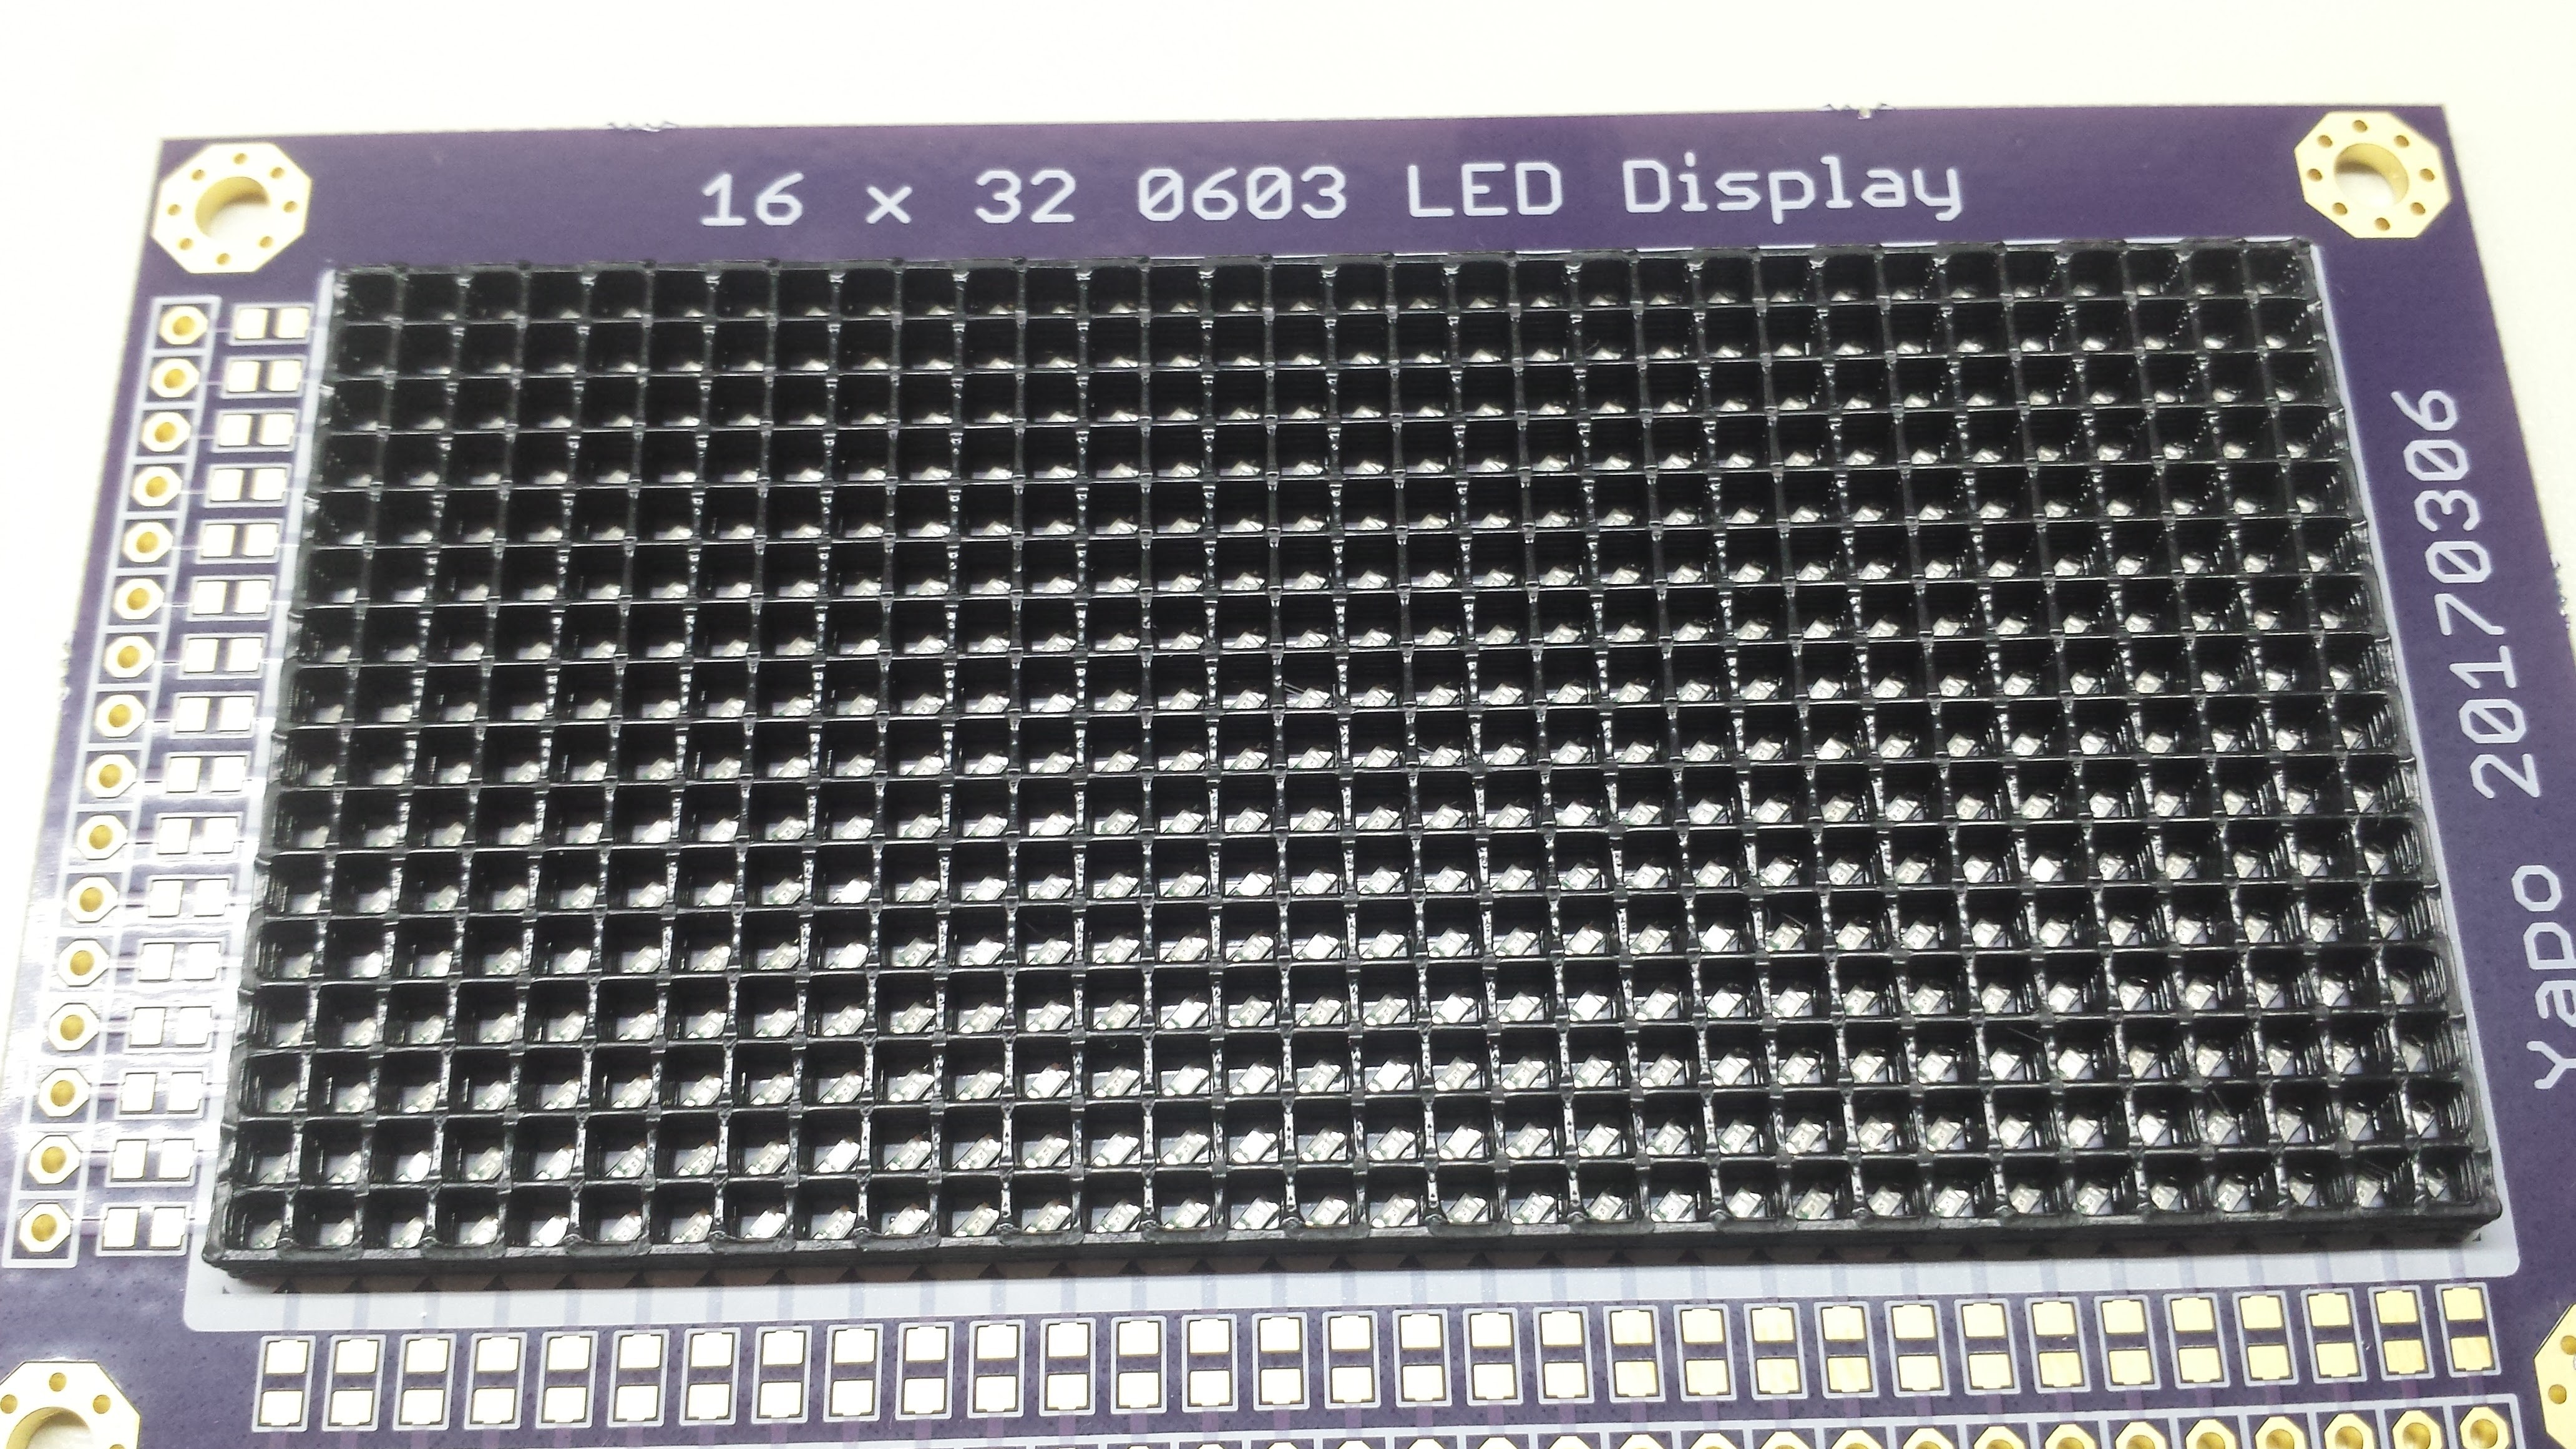
Here's the printed result for the 16x32. I still haven't built anything to drive the display yet :-)
EDIT:
I'm going to try putting a sheet of the diffusing material on the 3D printer bed to see if I can get the bezel printed directly on to it. That might work out really well...
Discussions
Become a Hackaday.io Member
Create an account to leave a comment. Already have an account? Log In.