Silícios Lab
Introduction
An energy saving system for cutting electrical energy in machines is a fundamental piece not only to reduce operational costs, but also to promote sustainable and efficient practices in the most diverse industrial sectors. This system is designed not only to interrupt the energy supply, but also to optimize consumption, bringing significant economic and environmental benefits.
The applications of this system are varied and impactful. In industrial production lines, for example, the implementation of this system allows not only the efficient shutdown of machines during periods of inactivity, but also the precise control of energy consumption during manufacturing processes. In the automotive industry, it is possible to adjust energy use in robots and assembly equipment, reducing waste and optimizing operation.
Furthermore, in environments such as commercial buildings and public facilities, energy saving systems are essential for managing consumption during times of low demand, turning off non-essential equipment and reducing the use of electrical energy when it is not necessary.
In summary, an energy saving system for cutting electrical power to machines not only contributes to reducing operating costs, but also plays a vital role in preserving natural resources by promoting sustainable and efficient practices across a wide range of industrial and commercial sectors.
In this article you will learn how to create an electrical power cut circuit for machines when a door is open. This project was a system that I developed for a customer and I will show you how it can be useful for you. The client allowed me to present the project in the communities.
Now, let's understand the complete functioning of this practical project.
Project Electronic Circuit
First, let's start presenting the electronic schematic.

Next, we will understand how each block of the circuit works. To start, let's present the power circuit block.
Power supply circuit
The purpose of this circuit is to receive an input voltage between 110V and 220V from the electrical network to power the control system. See the circuit block shown in the figure below.

The first stage of the circuit consists of a fuse (connectors U4 and U5) and a varistor R8. The purpose of this circuit is to protect the input of the power supply circuit and prevent possible damage from overload or short circuit of the electrical network.
After that, we have the Hilink U1 AC-DC converter, which is responsible for converting the input AC voltage to a value of 5V direct current. This direct voltage will be used to power the entire electronic direct current circuit of the system.
Note that we use component B0505S, represented by U2. It is an isolated DC-DC converter and its purpose is to receive an input voltage of 5V and provide an isolated voltage of 5V at its output.
Its purpose is to create an isolated and dedicated 5V voltage just to power the ATTINY85 Microcontroller circuit.
The 5V voltage, which comes from the Hilink source output, will be used to power the relay drive circuit. This way, if any noise occurs at this source, it will not pass to the Microcontroller, as they are completely isolated.
Next, we will present the ATTINY85 circuits and energized board signal.
Power Signaling Circuit and ATTINY85 Circuit
Every electronic project needs signaling to indicate that it is energized. This circuit has two purposes: to indicate circuit energization to avoid accidents and to facilitate the identification of possible problems in power supply circuits.
In the figure below we represent a resistor in series with an LED. The LED will be activated every time the board is energized and the HiLink converter provides 5V voltage.

The ATTINY85 circuit is quite simple. The CHIP is made up of 8 pins. Of these pins, 2 were used for power supply, 2 I/O pins were used to connect the sensor and the relay drive circuit, and the reset pin.
... Read more »
 kamalkedin123
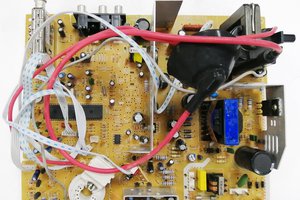

 DIY GUY Chris