 gokux
gokuxIntroduction
Some special applications often have to measure the voltage from several parts at the same time for example electronics repair, scientific and experimental purposes.if you're building a battery pack it can also show the voltage of each cell simultaneously.
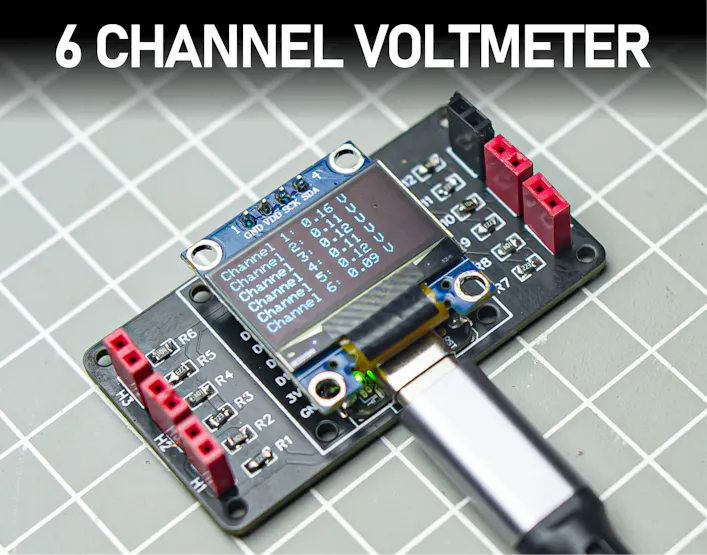
In this project, we are making a 6-channel voltmeter that has 6 voltage dividers and an OLED screen that will show the reading from the different voltage channels . All of this is controlled by Seeed Studio XIAO SAMD21
Supplies

6* 22K 0805 SMD
6* 2 pin Hedderpins male and female
Cables
Heat shrinking tube
Step 1 : How i measured the voltage using xiao
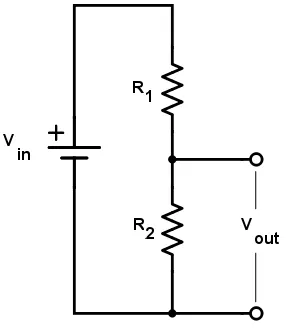
Actually xiao only can measure the voltage up to 3.3v more than that will damage the mcu , so we need to use a voltage divider for that. As the name suggests, a voltage divider will help us to divide higher voltage into smaller voltage which can be measured using Xiao.We are using 100k and 22k resistors to build our voltage divider with this we can measure up to 0v to 18v. More than this limit will fry your mcu.
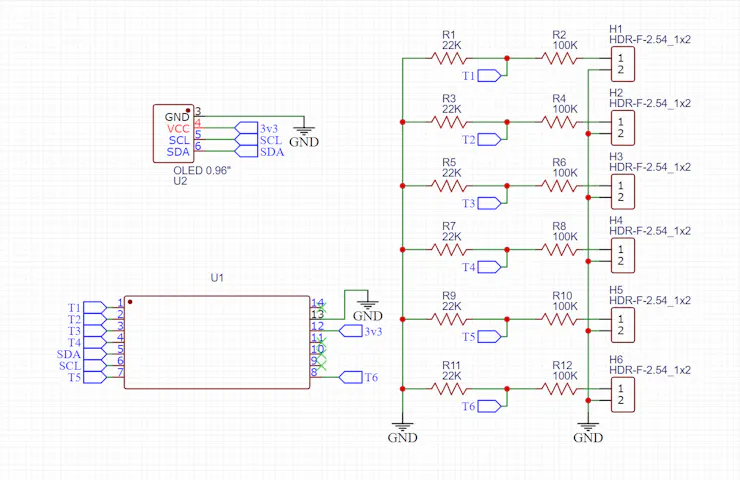
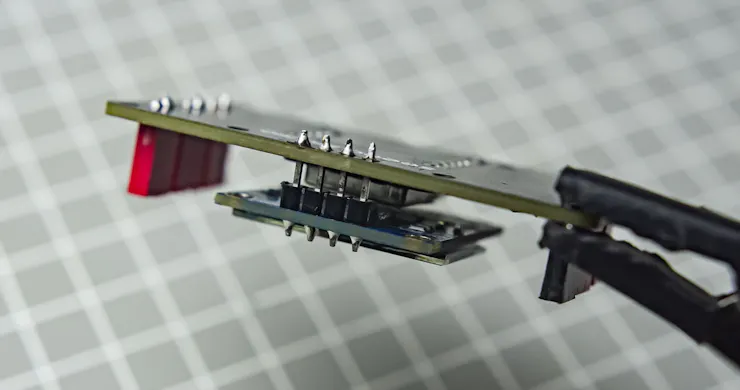
Step 2 : Schematics and pcb design
So we just need 6 voltage divider and 6 output of the is connected to GPIOs of the xiao. I designed the circuit and pcb EasyEDA then i exported the gerber file from it

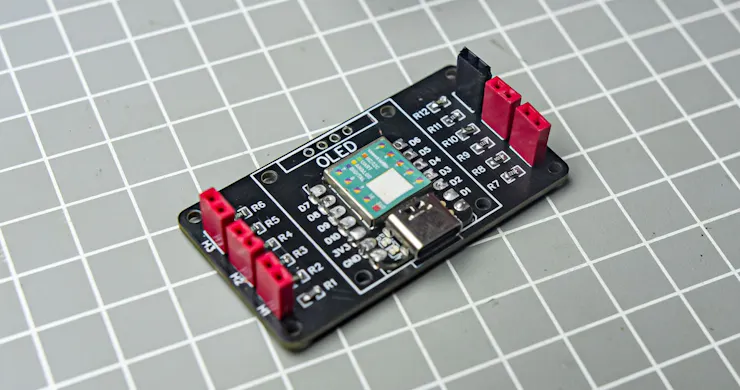
Step 3 : PCB Fabrication
I used SeeedStudio Fusion service for ordering this PCB, it turned out to be better than I expected
Seeed Fusion offers one-stop prototyping for PCB manufacture and PCB assembly, and as a result, they produce superior-quality PCBs and fast-turnkey PCBA within 7 working days.


Step 4 : Assembly
Pcb assembly was straightforward. I just used my soldering iron to solder all the components. It was easy to solder the wire terminals, xiao, and OLED.


Step 5 : code
Upload this code to xiao using arduino IDE
#include <SPI.h>
#include <SPI.h>

#include <Wire.h>

#include <Adafruit_GFX.h>

#include <Adafruit_SSD1306.h>

#define SCREEN_WIDTH 128 // OLED display width, in pixels

#define SCREEN_HEIGHT 64 // OLED display height, in pixels

#define OLED_RESET     -1 // Reset pin # (or -1 if sharing Arduino reset pin)

#define SCREEN_ADDRESS 0x3C ///< See datasheet for Address; 0x3D for 128x64, 0x3C for 128x32

Adafruit_SSD1306 display(SCREEN_WIDTH, SCREEN_HEIGHT, &Wire, OLED_RESET);

const int voltagePin[] = {A0, A1, A2, A3, A6, A7};

const int numChannels = 6;

const float R1 = 100000.0; // 100k ohms

const float R2 = 22500.0;  // 22k ohms

void setup() {

  Serial.begin(9600);

  // SSD1306_SWITCHCAPVCC = generate display voltage from 3.3V internally

  if(!display.begin(SSD1306_SWITCHCAPVCC, SCREEN_ADDRESS)) {

    Serial.println(F("SSD1306 allocation failed"));

    for(;;); // Don't proceed, loop forever

}

  display.clearDisplay();

  }

void loop() {

  display.clearDisplay();

  for (int i = 0; i < numChannels; i++) {

    float rawValue = analogRead(voltagePin[i]);

    float voltage = (rawValue / 1023.0) * 3.3; // Convert to voltage (assuming 3.3V reference)

    // Apply voltage divider formula

    voltage = voltage * (R1 + R2) / R2;

    display.setTextSize(1);

    display.setTextColor(SSD1306_WHITE);

    display.setCursor(0, i * 10);

    display.print("Channel ");

    display.print(i + 1);

    display.print(": ");

    display.print(voltage, 2);

    display.println(" V");

  }

  display.display();

  delay(300); // Adjust the delay based on your desired refresh rate

}
tep 6 : connection wire
Now we need make...
Read more »
 Open Green Energy
 Thomas Van den Dries
 Sagar 001
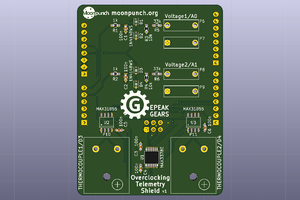
 Gergely Imreh