 CiferTech
🎯 Features & Components
Explore the impressive features of our wardriver:
- • Real-time detection and recording of Wi-Fi networks while in motion.
- • Integration of GPS technology for accurate location tracking.
- • Utilization of an SSD1306 OLED display for a clear and intuitive interface.
- • Incorporation of a micro SD card slot for efficient data storage.
- • User-friendly controls include FLASH, RESET, and navigation buttons.
- • Comprehensive hardware setup including SMD components, lithium battery, and USB Female Type C Connector.
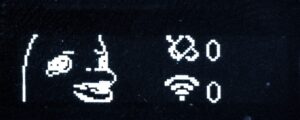
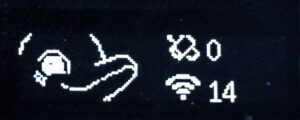
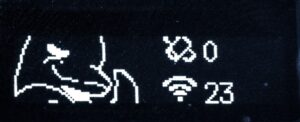
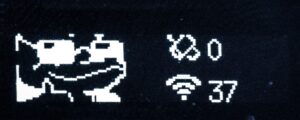
In this project, there is a small character displayed on the screen that changes based on the number of Wi-Fi networks detected. Additionally, two icons display the number of available satellites and available Wi-Fi networks in the area.
• When the number of available WiFi networks is zero, the following character personality will be displayed.
• In cases where there are between 10-20 available WiFi, the following character personality will be displayed.
• the following character personality will be displayed when we have 21-30 available WiFi.
• and 31- 40 available WiFi.
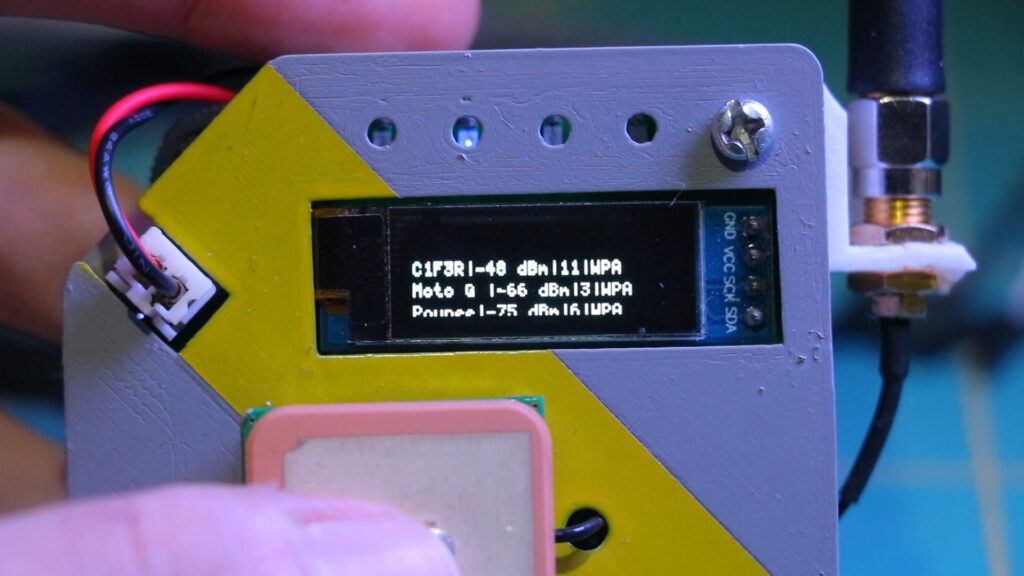
When we hold the navigation button, the available WiFi networks, along with their channel number and encryption type, become visible.
🧰 Getting Started
Embark on your wardriving journey with ease:
- Assemble the necessary components including ESP32, SSD1306 OLED display, GPS Neo 6m module, and micro SD card slot.
- Follow the provided schematic to configure the hardware setup accurately.
- Upload the Wardriver software onto your ESP32.
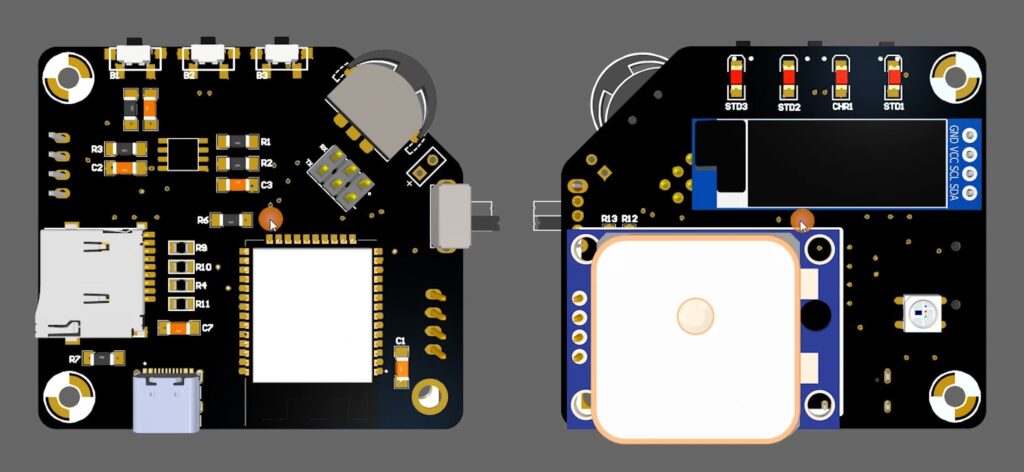
🔌 Schematic
Refer to the detailed schematic diagram to understand the intricacies of the hardware setup.The provided PCB design has its flaws, hopefully, in the future, I will design a better model, but for now, it works.
👀 Usage
Discover the practical usage of our wardriver:
- Monitor real-time Wi-Fi network detection and display on the OLED interface.
- Utilize the navigation button to access detailed information about detected networks, including channel numbers and encryption types.
- Experiment with antenna configurations to optimize network range and performance.
- Test the wardriver's resilience against high network traffic scenarios, ensuring reliable performance under various conditions.
Code & PCB
If you’re interested in building this project on your own, the code is available on GitHub. Simply go to the GitHub repository, and download the code.
GitHub repository: github.com/cifertech/wardriver3000
🚀 Conclusion
With my wardriver project, we embark on an exciting exploration of Wi-Fi network scanning while on the move. From its inception to its practical usage, every aspect of the project reflects a dedication to innovation and functionality.


 Platinenmacher
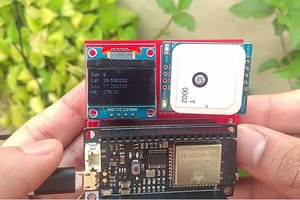
 dwuhls
 puddletowntom
It's a very interesting project but please provide the schematic and PCB as KiCAD files.