I redesigned the way the LCD module and its companion module interface together. Entirely.
The LCD can still technically be used by itself, but the companion module is now attached to the LCD enclosure with screws when in use.
The reason for doing this is that taking it off and putting it on is a precarious and risky maneuver that puts a lot of strain on the USB and HDMI ports on the driver board.
The new setup means that it (all 6 pieces) can be put together off of the frame with a totally-sane 22 screws and slotted on in one collective piece.
before, even the LCD module on its own had just a few thin PLA pins to stop it bending in the middle at the join, potentially cracking the LCD.
Now the LCD module halves bolt together, and as mentioned before the companion module assembly bolts onto that.
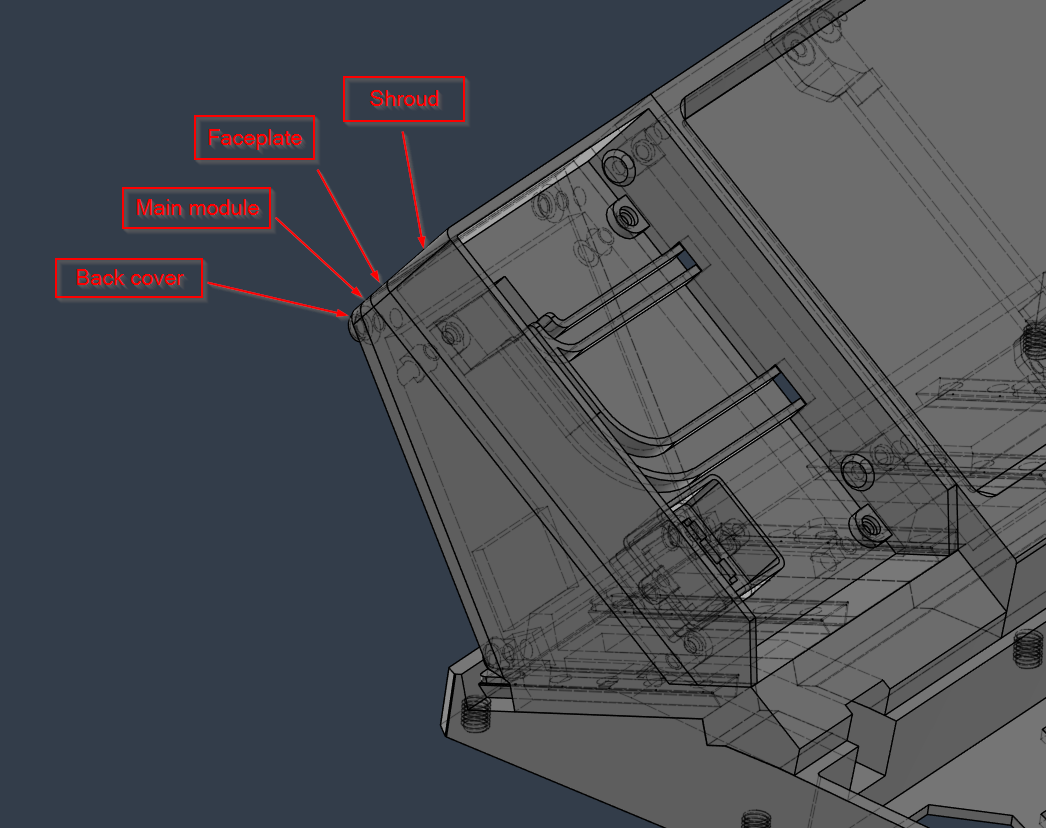
Also, the changes to the companion module mean it can have the shroud removed from the faceplate, rather than the shroud being a whole separate, alternative faceplate. I've even removed a lot of the material from the base of the companion module, allowing for (hopefully) future faceplates with extended / different functionality to just drop into place.
When the pogo pins finally arrive (thanks customs), some of this will need to change.
It'll just be a pogo pin connector at the back of the companion module for the USB, and another specialized one for the HDMI, rather than the hole it currently has which isn't a huge change and (I think) will only need a modify and reprint of the back cover of the whole assembly.
The only piece of the puzzle remaining to get the LCD fully going with pogo pin connectors is the HDMI pogo pin connector, which I still need to order. Still, worst case scenario the frame-side pogo pins can be developed independently to the LCD assembly.
Discussions
Become a Hackaday.io Member
Create an account to leave a comment. Already have an account? Log In.