 savant42
In 2023, Home Depot released its annual line of Halloween and Christmas seasonal animatronics, and this year’s lineup included a Master Yoda (from the Star Wars series, if you somehow did not know), wearing a Santa hat and holding a lightsaber behind a cartoonish faux wooden sign. The expression on his face was considered a bit… off-putting… to some.

However, when I saw it in person, I was impressed with the expressiveness and the amount of articulation! His eyes move! They blink! He speaks! He ignites his lightsaber and waves it (sort of) as he goes on and on about… the Seasons?!
Yes, because this Yoda animatronic is MULTI-SEASONAL!
Yes, it comes with a… witches hat, and a different sign? Yoda’s speech actually directly avoids mentioning any holiday by name, or anything other than… good feelings, I guess.
This would be in an effort to make it a multi-holiday decoration, that you could leave up, from October to January maybe. I don’t really get it.
Well, apparently, neither did anyone else. Because the holiday decoration that began at a completely reasonable $199, and the prices were slashed, eventually settling at $50 each at Home Depot.
A traditional “talking skull”, where a user can provide their own audio to a prop skull and appears to talk is expensive to buy outright, with many of them ** beginning at the $300 ish price range ** for some of the nicer ones.
Then the price shoots upward when you add the ability for the skull to turn its head and nod/tilt, also known as a “3-axis” skull.
As of this writing, a 3-axis skull from a more reputable haunt site is over $1,000 USD, and then climbs up once you add in theming, such as a silicone “skin”, clothing etc.
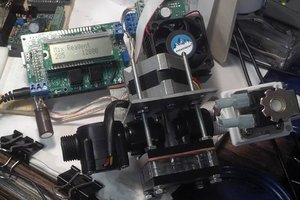
So, $50 for a life-size (honestly, probably slightly larger than full scale) Master Yoda animatronic with 3+axis? With 8 servos, 2 DC motors, a “lightsaber”, and various brick a brack. That is a deal! No, that might even be a steal!
And at that price point, I felt that I could fail at this project and still have gotten my money’s worth.
(Note: Prices vary, $50 is the lowest I’ve seen for new in box, with prices averaging $100-$150 on eBay)
The Challenge: Could I reprogram this animatronic to do my bidding?
(Spoilers: Yes.)
 James Newton
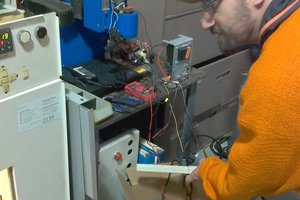
 Ross Bochnek
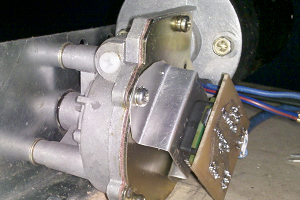
 Alastair Young
 Guy Winterbotham