Close
0%
0%

[Nite|Nuke] Light

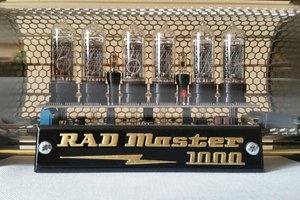
Upcycled X-Ray warning light gets turned into a night light to give atmosphere, as well as spike in intensity with radiation events.

Similar projects worth following
Upcycled X-Ray warning light gets turned into a night light to give atmosphere, as well as spike in intensity with radiation events. Some model of Russian Geiger-Mueller tube (SI-22G currently being evaluated) will provide event detection.

Never played Fallout, but I'm guessing it's in the spirit of a game prop from that franchise, if not in the exact visual styling.

Someone literally handed me this x-ray warning light and said it was either going to me or the landfill. What else could I do?

A solution looking for a problem; I guess this site and the Sci-Fi contest solves *that*. The idea of intensity spikes with radiation or radioactive particles comes from various particle physics demos I've seen over the years. Phillip Stearns also gets some of the credit via his chandelier, using smaller Soviet GM tubes:

http://www.boredpanda.com/chandelier-responds-to-radioactivity-installation-phillip-stearns/

The basic idea of my GM tube drive comes from a GM tube power supply I had to design at work, where I decided on using CCFL transformers. Where this design diverges is in how the logic/MPU power is handled with respect to the high voltage supply, and in that we're displaying the events qualitatively (and maybe even a bit artistically) rather than quantitatively (e.g. as counts per interval).

The Digispark-esque MPU board should be able to handle the processing requirements of this project.

True to the nature of upcycling in this project; the current batteries are reclaimed from a Sony laptop pack. They should be able to store enough charge to let this thing run for hours if I don't go too crazy with the HV supply.

SI-22G results.pdf

incoming test results of SI-22G GM tube... happily I had access to a Cobalt-60 source, but didn't even need to remove the lead lid to get crazy counts :)

Adobe Portable Document Format - 50.21 kB - 03/07/2017 at 21:19

Preview
Download

base.stl

STL export of the light base, seen above in the pictures, and at the OnShape link...

Standard Tesselated Geometry - 2.36 MB - 03/06/2017 at 04:14

Download

diffuser_single_shop_drawing.pdf

"As-built" Solidworks pdf output for the acrylic LED diffuser, meant to be turned from 5/8" rod stock. Corners are broken and surface (including the inside of the LED pocket) is made matte using 400 grit wet/dry sandpaper, wetted with water-based cutting fluid. Prob more generally useful than the Solidworks SLDPRT file posted earlier.

Adobe Portable Document Format - 51.95 kB - 02/17/2017 at 20:17

Preview
Download

diffuser_single_render.pdf

"As-built" Solidworks pdf rendering output for the acrylic LED diffuser. See drawing file for details.

Adobe Portable Document Format - 77.42 kB - 02/17/2017 at 20:06

Preview
Download

View all 13 components

  • SI-22G testing

    nrrdzilla03/09/2017 at 21:26 0 comments

    Incoming testing of the SI-22G tube was done, at work, using a Co-60 source in addition to background measurements. An off-the-shelf GM-tube supply was used, in order to get the bias low enough for this (giant) tube. Please see the files section for the incoming test data. There's also a photo up, now, that shows the slightly-dodgy wiring setup that was needed to bench test this tube.

    Bottom line is that it seems to work happily, and I now have a bit more of a push to get testing with the CCFL-transformer-based HV supply.

    Note: I'm starting to think that a different transformer might be a bit more sane with such a low bias voltage. I'm much more used to the 750~800V devices, like those made by the usual suspects like LND, Philips, Saint-Gobain, etc. which are much closer to the typical output voltages of these CCFL transformers.

    PS I'd completely forgotten, until yesterday, that I'd recently intercepted a coax cable heading for the recycling depot, with MHV connectors already on it. Photo of that critter is also posted.

    -Does it count as dumpster diving if it hasn't actually been tipped into the dumpster? Splitting hairs... ;)

  • fun with 3D prints

    nrrdzilla03/05/2017 at 21:57 0 comments

    So... the latest picture attests to the fact that I had a 3D print test run. A few issues were high-lit, and there's an updated file on OnShape (see link above). I'm still working with Slic3r to try and improve the print, given that there's a bit of support needed around the perimeter, when printing upside down, and the screw holes need a good deal of extra plastic around them. But the batteries fit nicely... hehehe.

    This is great reading for anyone looking at this project:

    http://hackaday.com/2017/02/19/an-electronic-90v-anode-battery/

    http://www.dos4ever.com/battery/battery.html

    I was looking at driving my CCFL transformer using a TTL counter chip, because it's a state machine, and so I have control over valid states. That said; his ring oscillator stuff is so elegant :)

    So there :)

  • base piece model underway

    nrrdzilla02/18/2017 at 08:59 0 comments

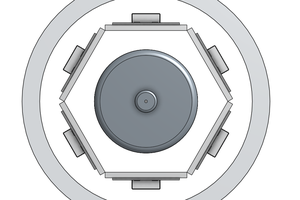
    Here's the base piece... this part is still a work in progress:

    https://cad.onshape.com/documents/16f7d96e75fbf5ac5831daa7/w/67b7b3a8fe5e4762c436ad20/e/7f3751909f21b9045d0211f7

    The intention is to have it 3D printed, so I can include slots to hold battery terminals for the 18650 battery (or stack of 2)

    This is the negative terminal I'm probably going to use:
    https://cad.onshape.com/documents/c25da064e829ff49b4182c16/w/1f7ff295f5cdafe13c14b472/e/854bc82a685523a38a3620c1

    More as time permits...

  • Starting to throw stuff together...

    nrrdzilla02/18/2017 at 08:13 0 comments

    Ordered Russian SI-22G / SI22G Geiger Tube. Expected delivery around the beginning of March...

    Also pulled Solidworks model files, since most users prob won't have access to that. Will likely transition this project onto OnShape, here's the diffuser as a start:

    https://cad.onshape.com/documents/cc162031441e680698595b2a/w/eaa2b5ab492bdde8eaa25799/e/3cf96559478af369a68cae4b

    If someone could please check to make sure this opens OK, that would be great :)

View all 4 project logs

  • 1
    Step 1

    The diffuser is made from a piece of 5/8" clear acrylic rod stock. For details, please refer to the provided file diffuser_single_shop_drawing.pdf for clarification of the steps below.

    The rod is turned down to a diameter of 14mm in a lathe using either a 3-jaw or a universal chuck. You probably want to use a properly profiled HSS (high-speed steel) lathe bit for plastic. I used a triangular carbide cutter in a holder, instead, because it: a) was there, b) was sharp, c) had a nice radius, and d) it saved me re-grinding one of the old (beater) HSS tool bits until I was happy with its edge and profile.

    The nose was then angled and the entire machined end is given a quick sand with 400grit silicon carbide wet/dry sandpaper, soaked with water-based cutting fluid, to frost the finish and radius the corners at the nose end. The neck region is then turned down to 10mm diameter, and parted-off so as to leave the neck just over 8mm long.

    The rod is now wrapped in a *single layer* of note paper and put into the chuck with the parting surface exposed. Don't over tighten the chuck -- it will leave dents in the nice, frosted finish you've made. The neck can now be turned down to 8mm long using end-facing techniques.

    The faced end needs to have a starting dimple put in with a centre drill. After that; the 5.2mm (I think I used a 13/64" bit) is hole bored into the end to a depth of approximately 8.5mm. This hole is then internally polished to a nice diffuse frost, using a strip of the 400grit sandpaper wrapped around a piece of 1/8" drill rod. Remember to apply cutting fluid regularly to keep the sandpaper from clogging.

    Test fit you LED and your base *before* removing from the chuck. Modify as required to achieve the fit you desire.

    Wash the part with soap and water and leave to air-dry.

    PS Be kind - clean the lathe after you're done ;)

View all instructions

Enjoy this project?

Share

Discussions

Similar Projects

Does this project spark your interest?

Become a member to follow this project and never miss any updates