 Metalnat
I have always had the need to take things apart and see how they work... imagine the most curiously destructive 2 year old. That may be close to how i was and still am. Although now i know electricity can hurt, and one can accidentally weld multimeter probes to objects. And since a lot of this project is going to be not only replacing what we define as a button and actually educating people how to observe what already exists, it's about time I do a tear down with intent to educate.
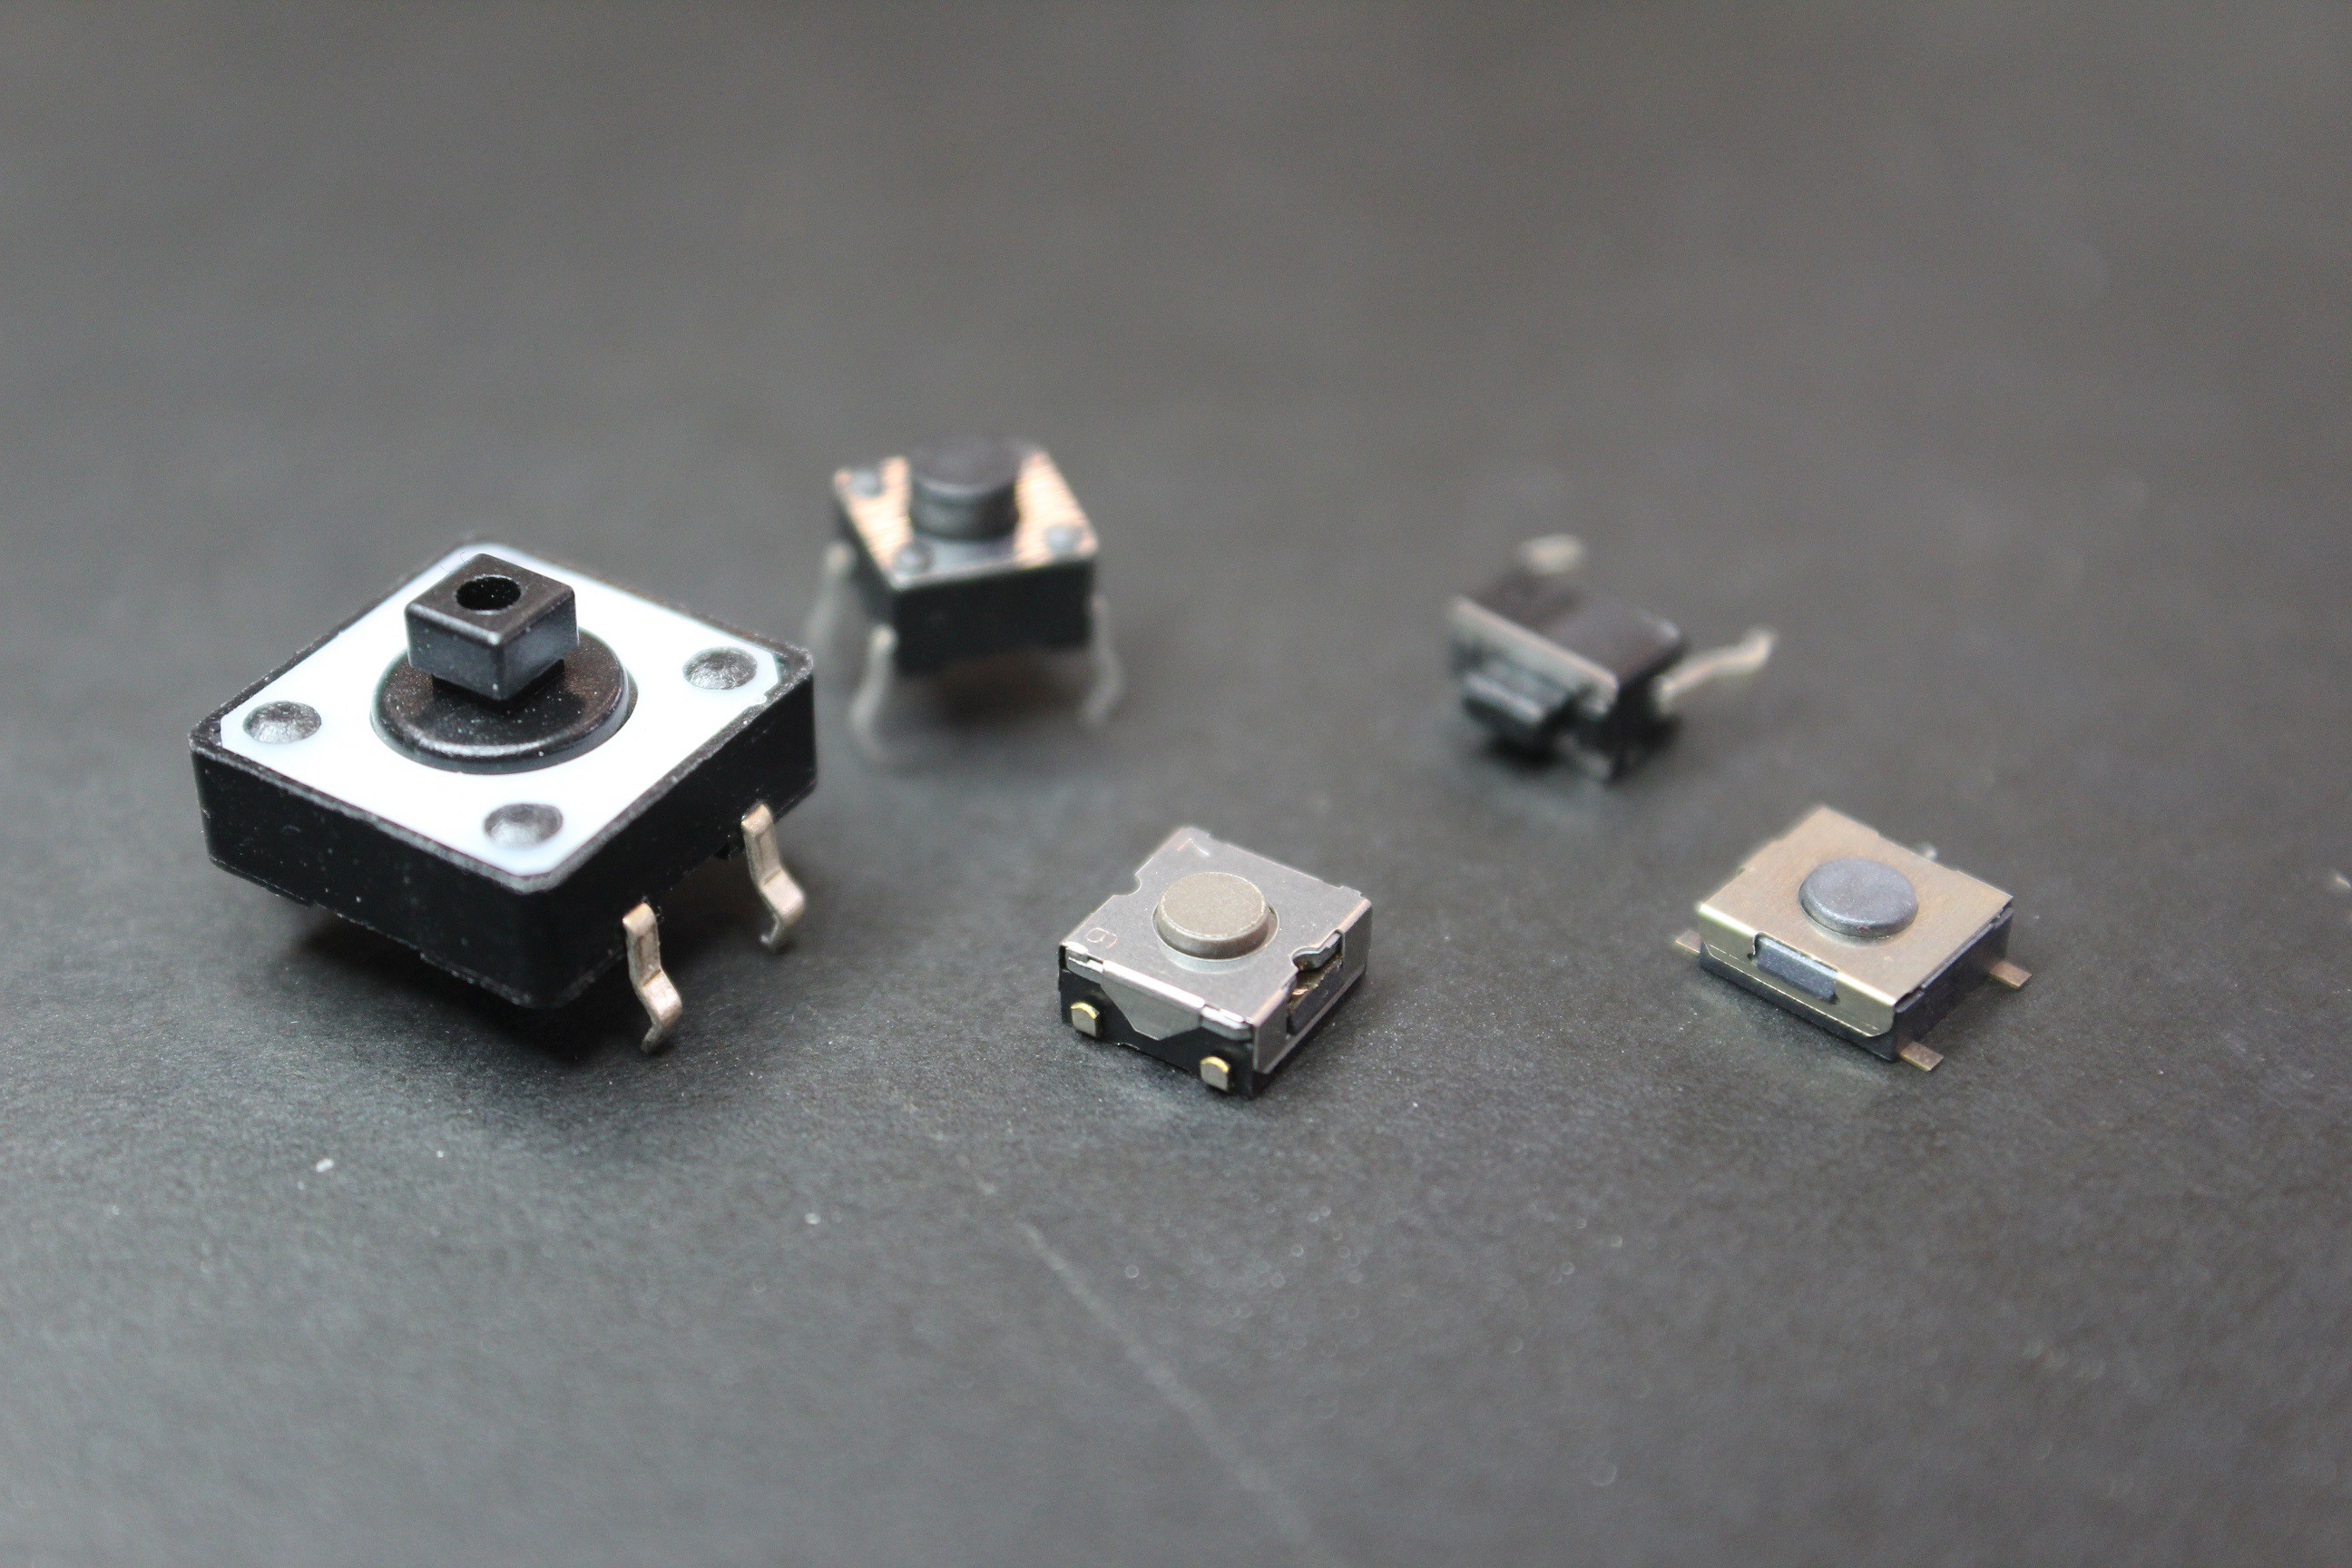
Below we see a few buttons. Different shapes, sizes, and mounting methods yet all of these have the same purpose. To momentarily compete a conductive path across the legs of the button when the top it pressed down. (i hate saying depressed... sounds silly even when talking about buttons). All of these buttons happen to be "Normally Open" which means that the legs are not all connected when no force is applied to the button. Thereby making an "open" circuit.
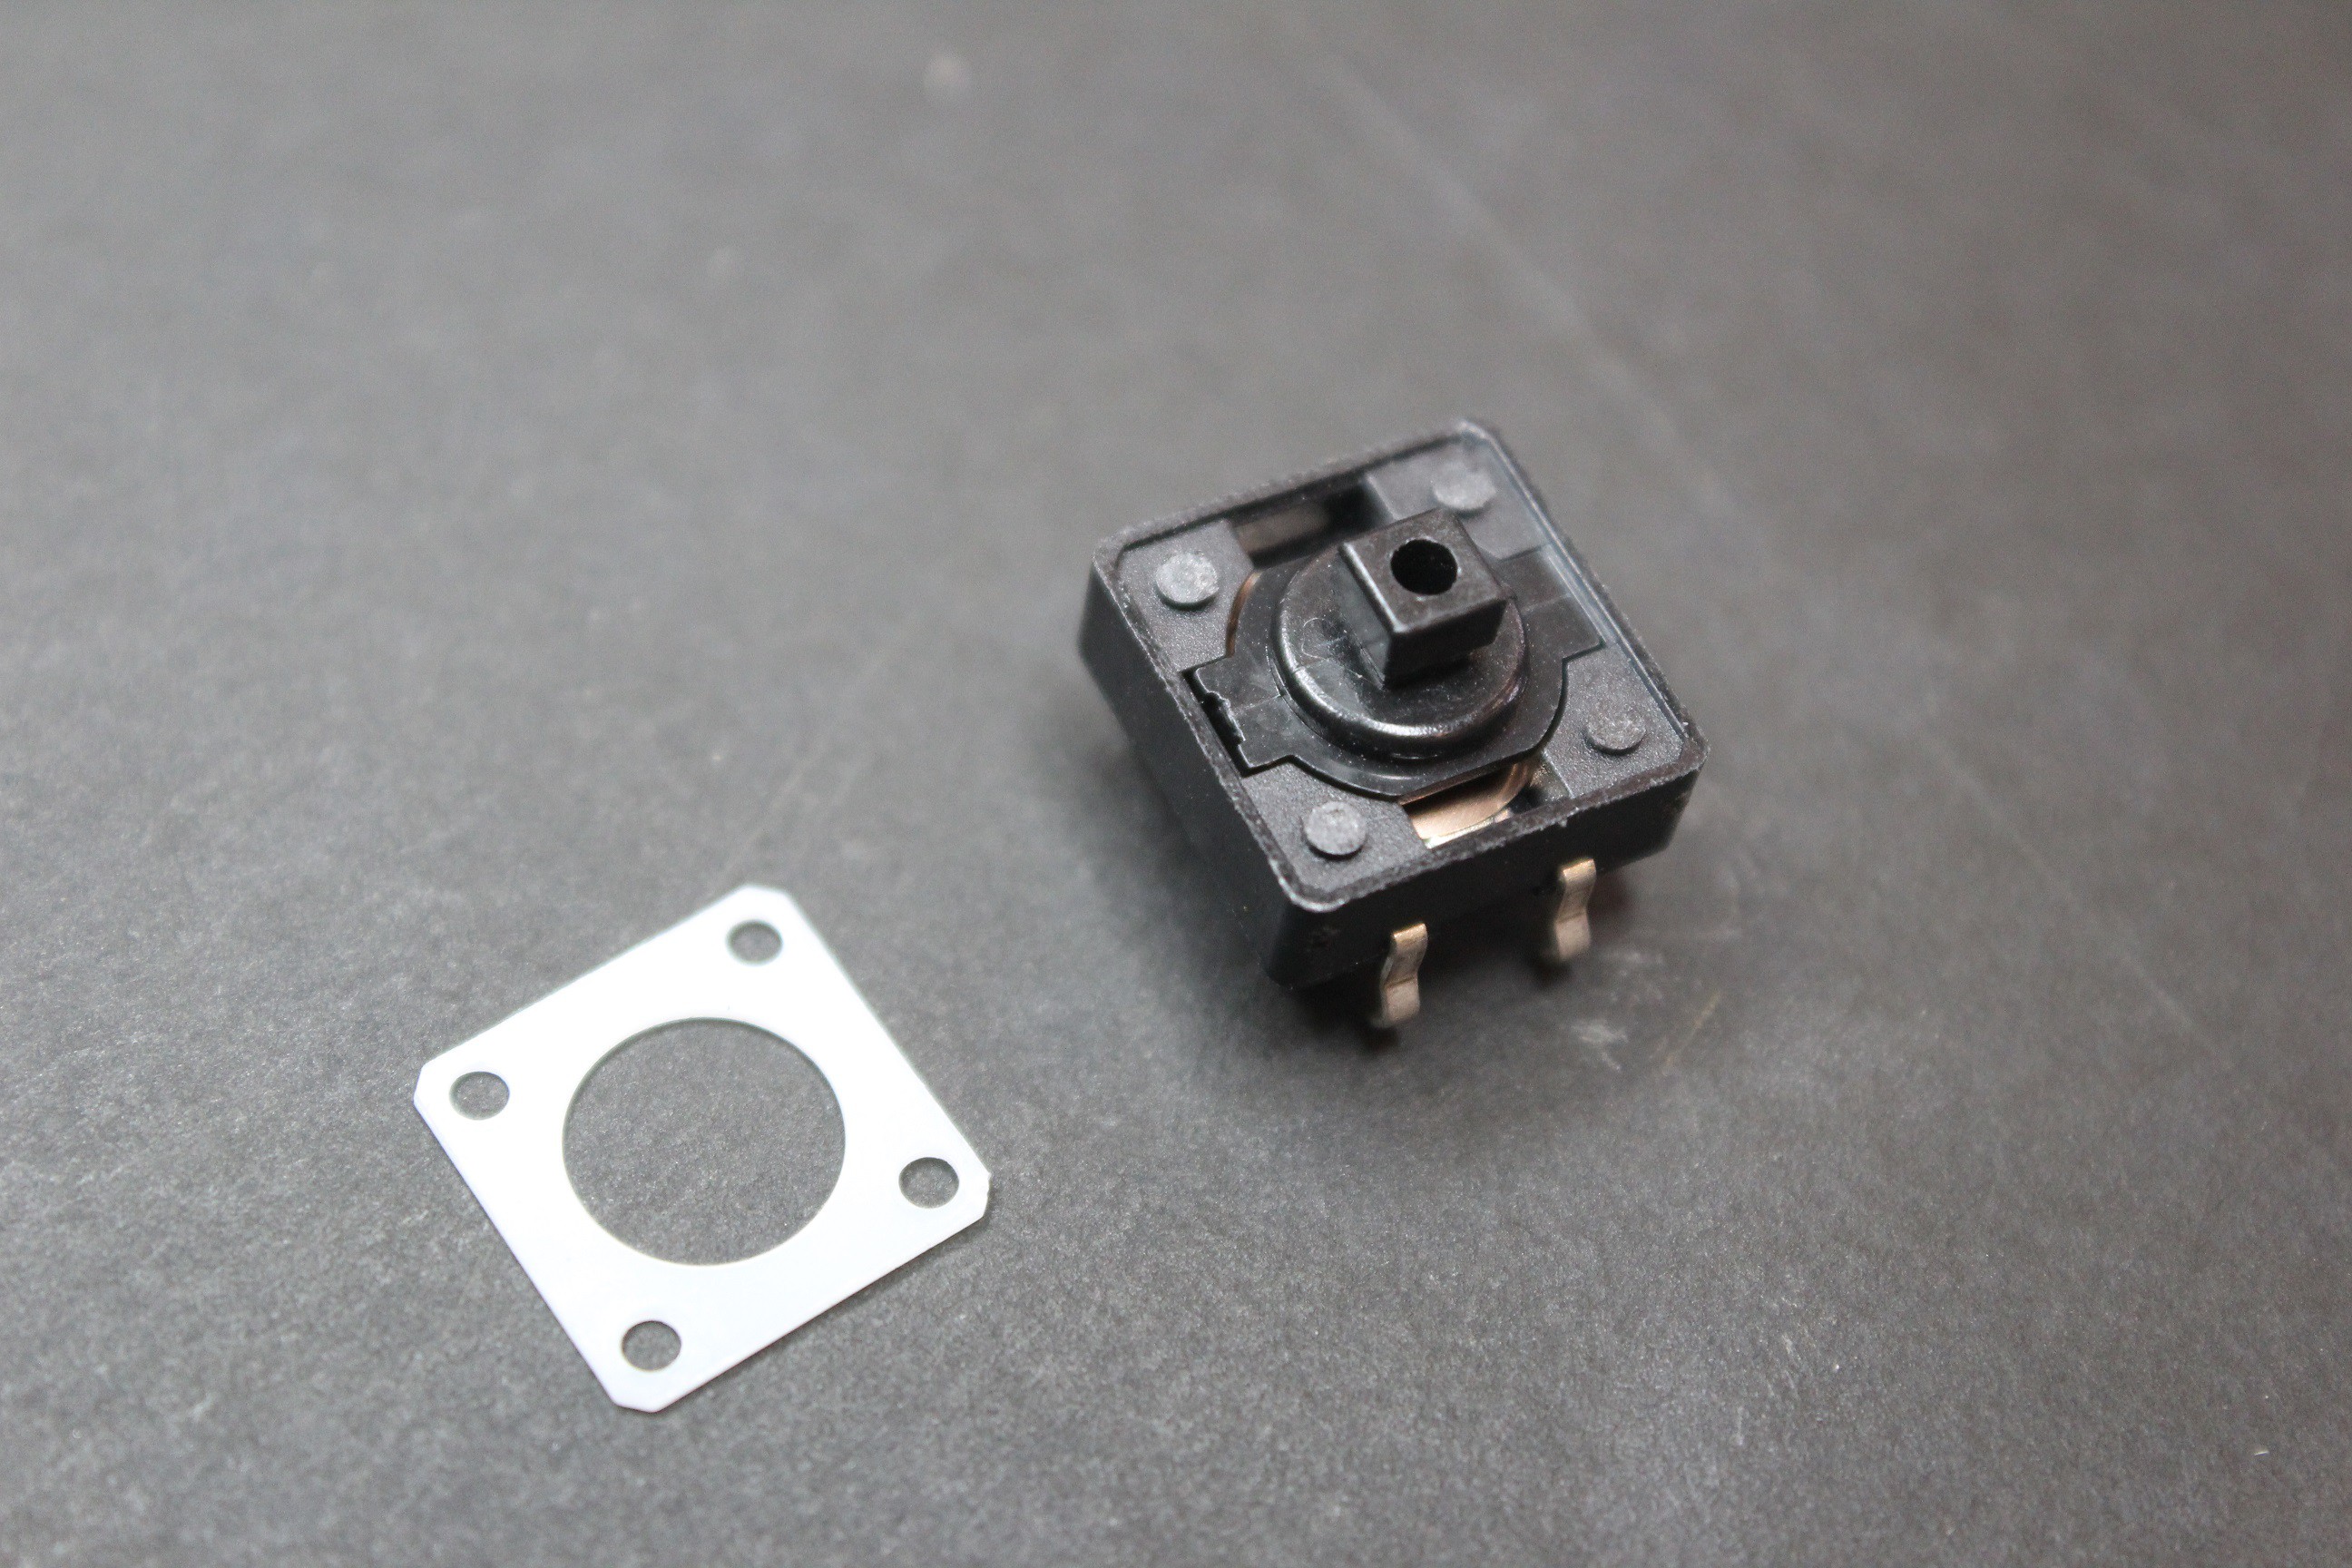
Now to see how this works mechanically we need to open one up and try to take note of nearly every detail. It's not super import to note everything as long as we note the important parts, like how connections are managed between pushed and not pushed, and maybe what pushes back to return to a open state when not pushed. After all those are the features of this particular component that define it's usefulness. First thing we do is cut the plastic rivet tabs on the top holding the white piece in place so that we can pull it up and off.
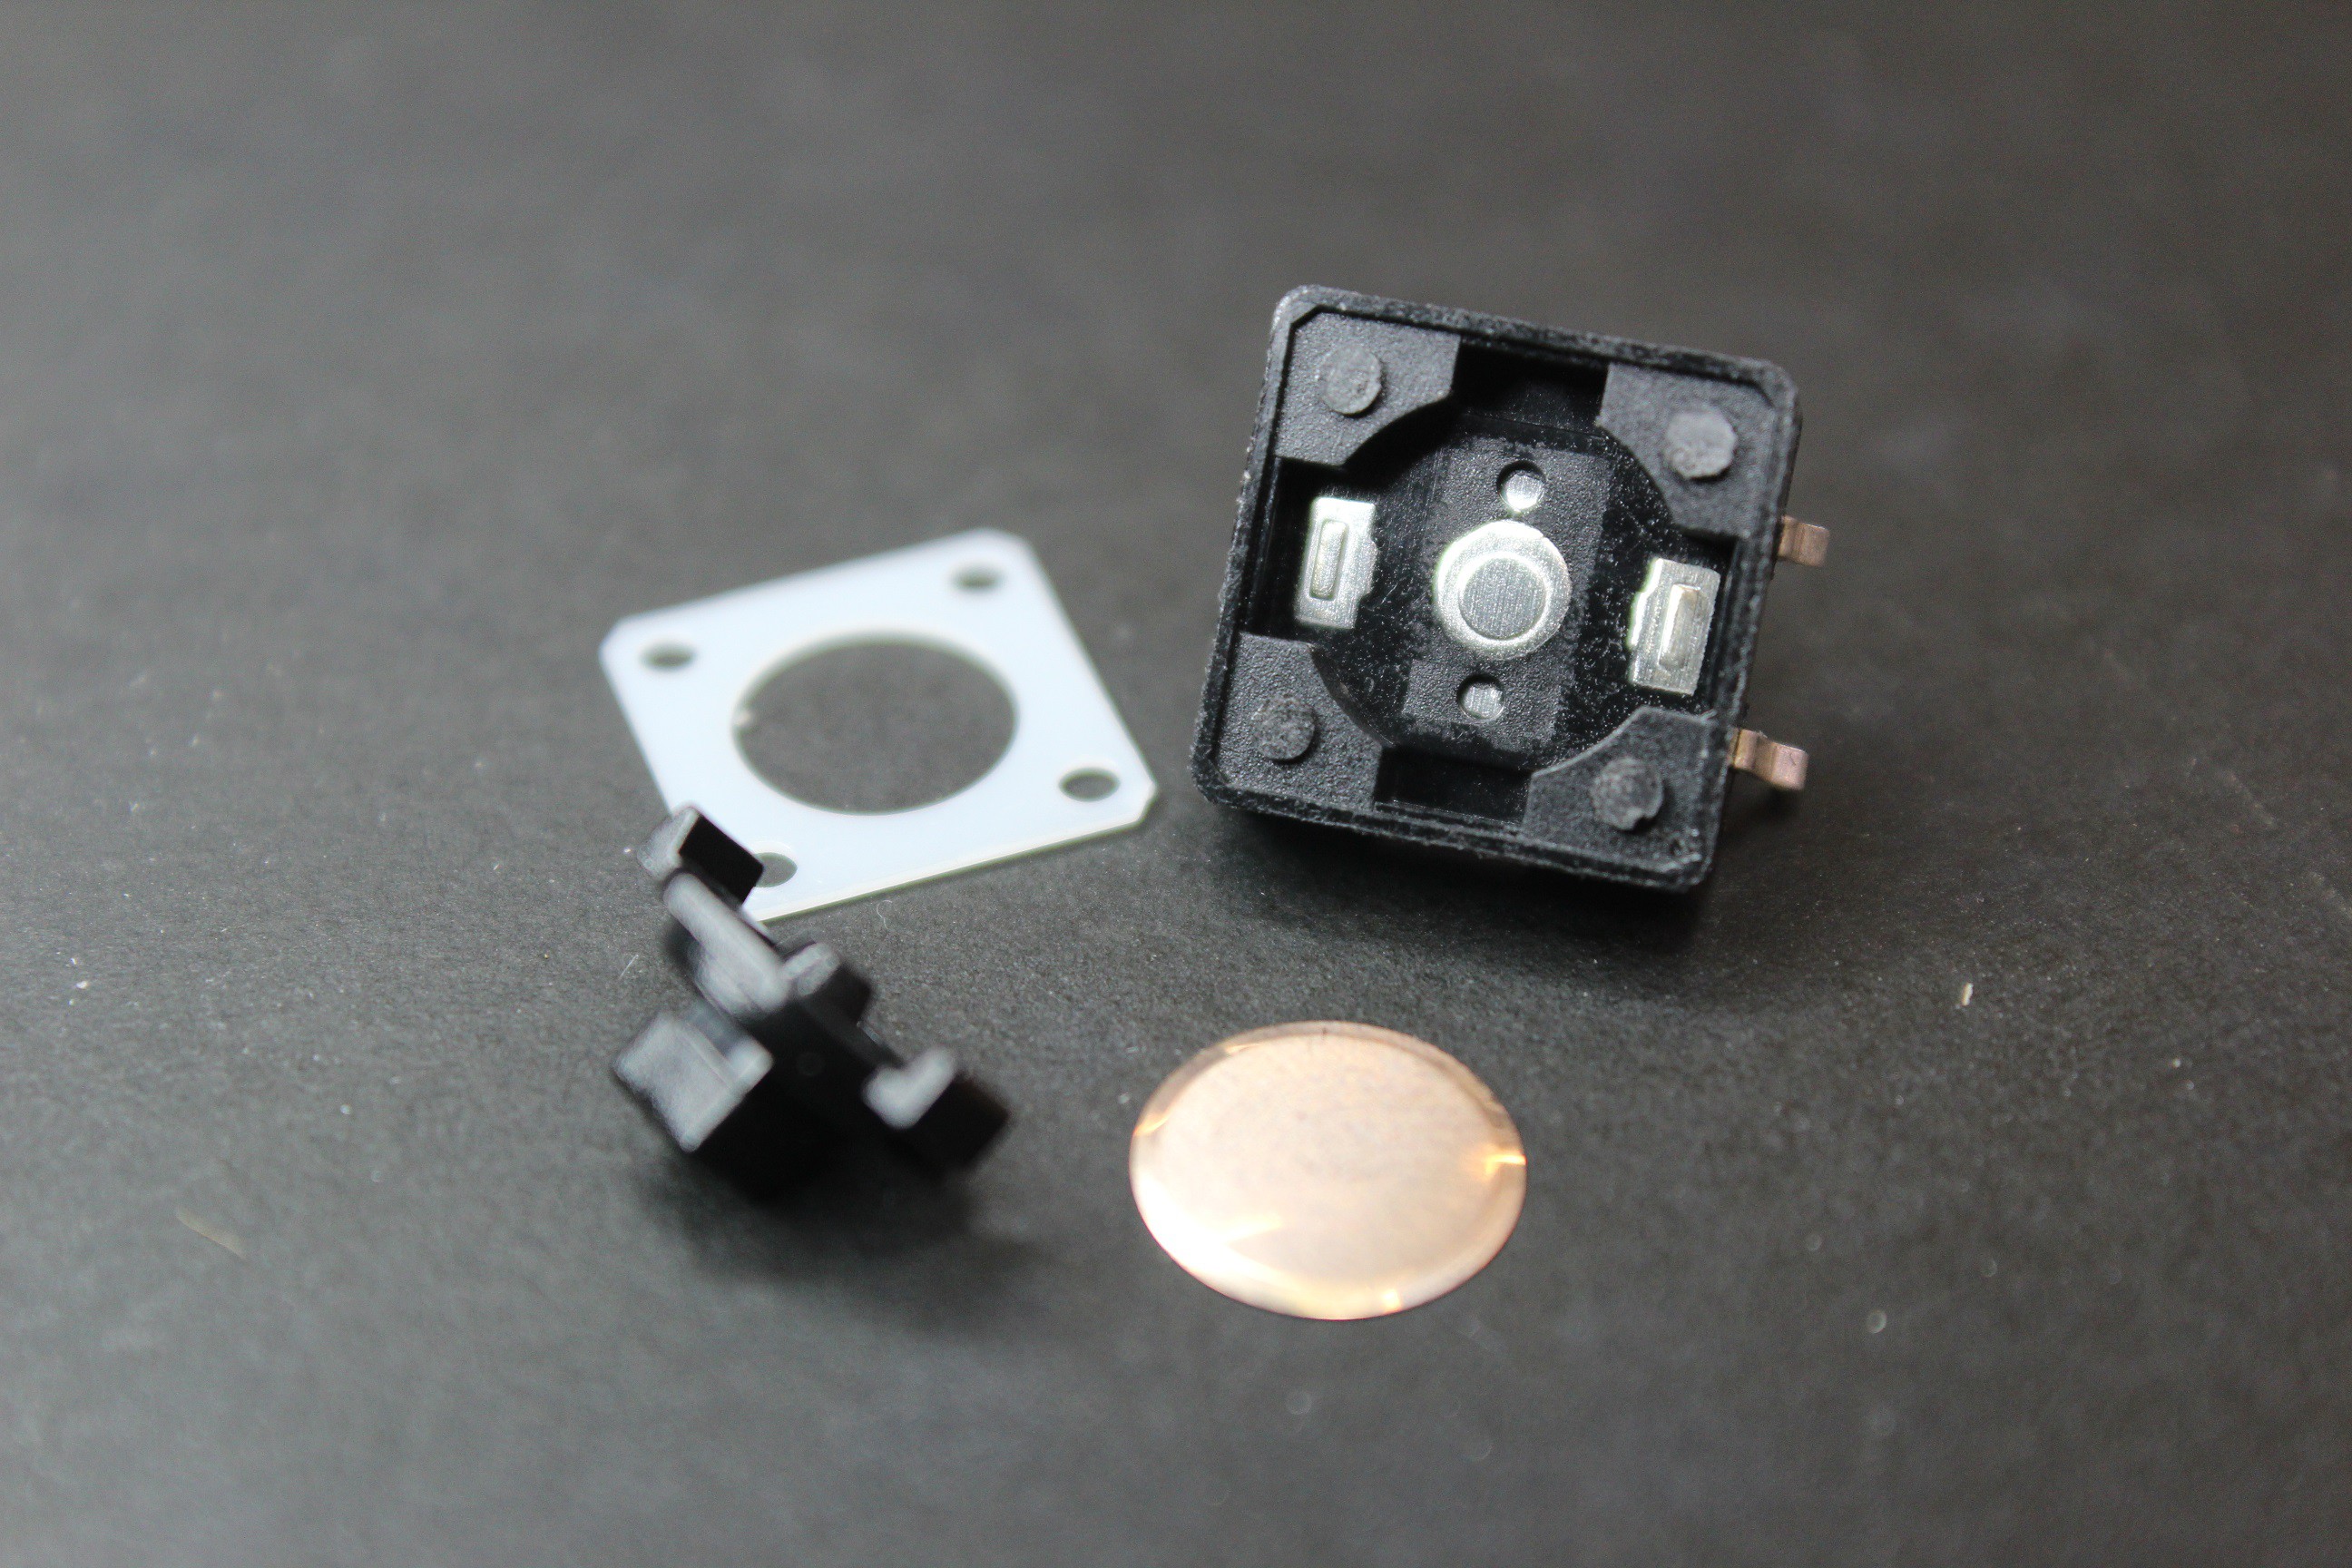
This then make it possible for us to simply pull the part of the push button that we make contact with out. Take note of the shape of this piece because it gives us info on how it distributes force when we press down on it. There is a center piece that extends right below where we press, as well as two legs on the sides of the button as well. The legs are slightly longer than the middle piece. Just an interesting observation at the moment.
After we pulled the button we also notice a round piece of metal. One immediate thing to note is the shape. it is not flat, it's dome shaped facing upward towards the plastic piece we just pulled. This means that at rest the dome piece of metal pushes upward on the button contact and when we press down we are in fact making the dome piece of metal invert. At least in the center. Since we can see a slight change in the dome's edge I would make the assumption that the edge itself might very well not invert, but only the center. Reason i say that: with all of the things I've taken apart, it's very rare that some detail has not reason or history for being there. This is no exception.
Now it gets to the fun part. I can either melt away the plastic in a potentially harmful out gassing process (curious how i'm still alive with all the experiments) or I can lean on another skill plus the use of a multimeter to do what is called continuity testing to find out where all conductive surfaces are, and then with the use of calipers and my favorite modeling tool Blender, model out observations. We'll save that for my next lengthy post.
See you then!
~Metal
Discussions
Become a Hackaday.io Member
Create an account to leave a comment. Already have an account? Log In.