 Markus Leutwyler
NUI Drone Development
While researching soft body dynamics and gesture recognition for various applications, it seemed for us a natural and interesting challenge to start with the NUI control of a drone. As part of the development journey we thought of which connected devices we would like to interact with, and flying a drone was one of our first inspirations. We were looking for something we could play with, and a small Parrot drone already almost feels like a pet bird or dog rather than a flying computer. So we set out to connect our wearable sensor to the Parrot Mini Cargo drone.
We chose the Parrot Mini drone since it is relatively small (can be flown indoors) and also includes an SDK and a Bluetooth Low Energy receiver, which made it ideal to fly in combination with our Arduino hardware prototype via a JavaScript program.
Wearable Sensor Technology
At the core of the smart strap is a Soft Condensed Matter Sensor (SCMS), essentially a conductive polymer composite material developed at Empa in Switzerland. The SCMS allows us to measure the strain on the skin continuously, so we can actually detect the moment of tendons as the hand creates different gestures. It’s based on a high tech combination of nano-textured conductive carbon particles mixed with a highly elastic thermoplastic elastomer. Research has shown the SCMS can measure strain related to hand gestures and is even sensitive enough to measure the pulse-wave of blood.
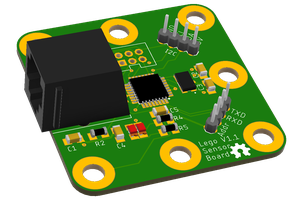
Arduino Prototype Hardware
For the prototype board, we decided to go with easily available and flexible components, to ensure that anyone could repeat our findings and improve on them without costing too much. The microcontroller of choice was the ESP2866 from Espressif, which is compatible with the Arduino IDE and has Wifi integrated. The Huzzah Feather Board from Adafruit integrates it into a nice package, adding a LiPo Charger and Port and and USB-Bridge for easy programming. It’s a powerful board but also small enough to be mounted on the arm for wearables prototyping. Since the Feather Board only has analog input channel to the ADC (Analog-to-Digital), we decided to add an external ADC. We went with the ADS1015, a 12-bit ADC with adjustable gain that can be accessed via I2C, making it easy to integrate with various microcontrollers. This enabled us to add a second wearable sensor (integrated in the watchband) and to increase the sensing resolution from the 10-bit ADC included on the Feather.
Having an adjustable gain means to keep the measured voltage between 0 and 1 Volt. A voltage divider circuit was used to bring the input voltage of 3.3v down to around 0.5v. The two main components and two voltage dividers (one for each sensor) were then placed on a breadboard.
Software
For software, we decided to go with a split model: have the reading of the ADC values done on the ESP2866 (coded via the Arduino IDE) and the rest on the host-pc, using JavaScript (node.js). This gave us flexibility in development and allows future expansion in the node.js ecosystem. JavaScript is already one of the most used programming languages and node.js has over 350000 installable packages. This made it very easy to add in the Parrot minidrone control using one of the available libraires (such as parrot-rolling-spider).
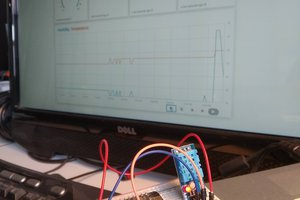
Microcontroller Program
The microcontroller program was developed in the Arduino IDE. It runs in a loop and does the following:
- gets a timestamp
- reads the ADC value of channel 0
- gets another timestamp
- reads the ADC values of channel 1
It then combines timestamps and adc values to a string and outputs that to the serial port via serial.writeln
Node.js Program
The serialport npm module allows for access of the serialport from node.js. That way, data written to the serialport on the microcontroller can be easily be accessed by a javascript program.
The serialport module works with parsers to recognize the pattern of the incoming data. In our case, we're using writeln on the sending side, which just adds a return character...
 StanislavJochman
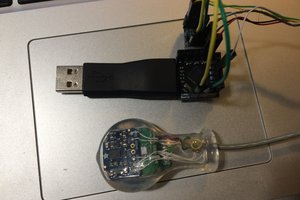
 oneohm
 Cloud4RPi