 David Spinden
Overview
Problem: A ringing doorbell at the wrong time can wreck meals, naps, or a once in a life time moment (queue dramatic music). Furthermore, when you're away, how can you know whether you've had any visitors, packages, or neighbors stop by.
Solution: You need a way to route the switch off the doorbell, but still know if someone is delivering the pizza. Don't just cut the doorbell cord, leaving your friends hanging out in the cold, make it smart enough to send you a text or email you when they arrive. All while the baby is still sleeping upstairs.
Brilliant yet ingenious, I think so.
Final video:
First video (look how far we have come):
The Plan
Here is the plan getting the open source iDONT project off the ground:
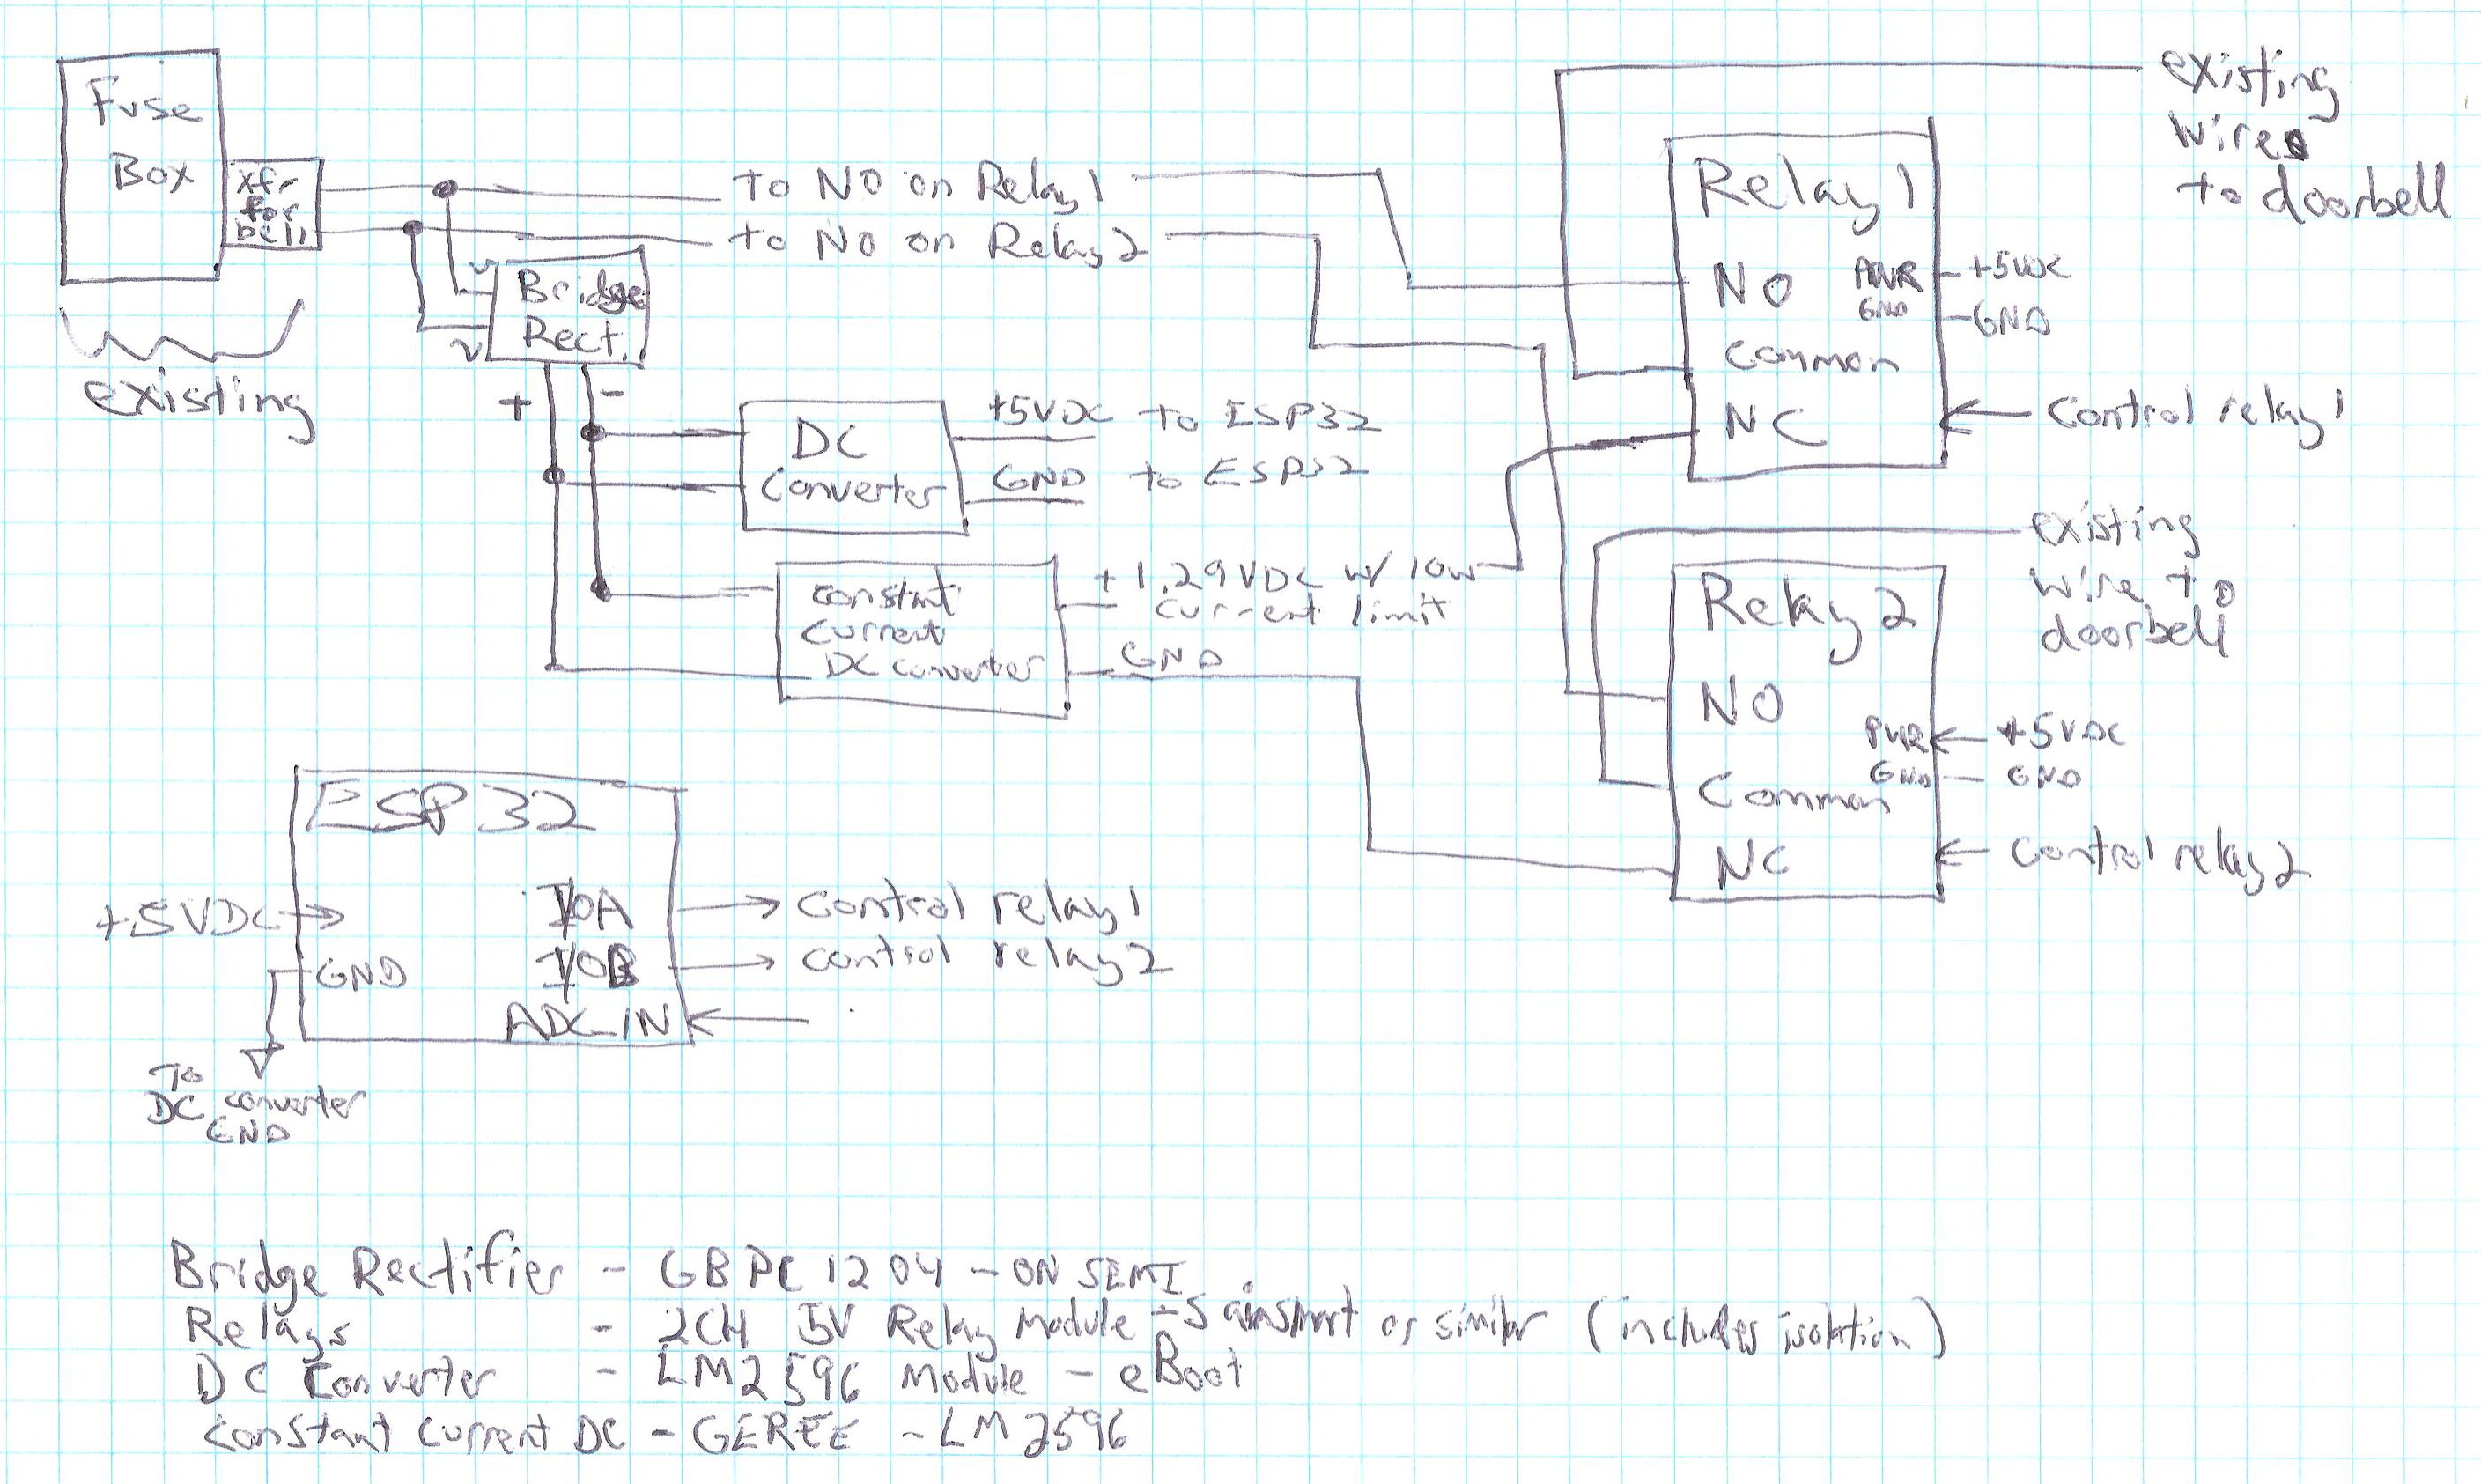
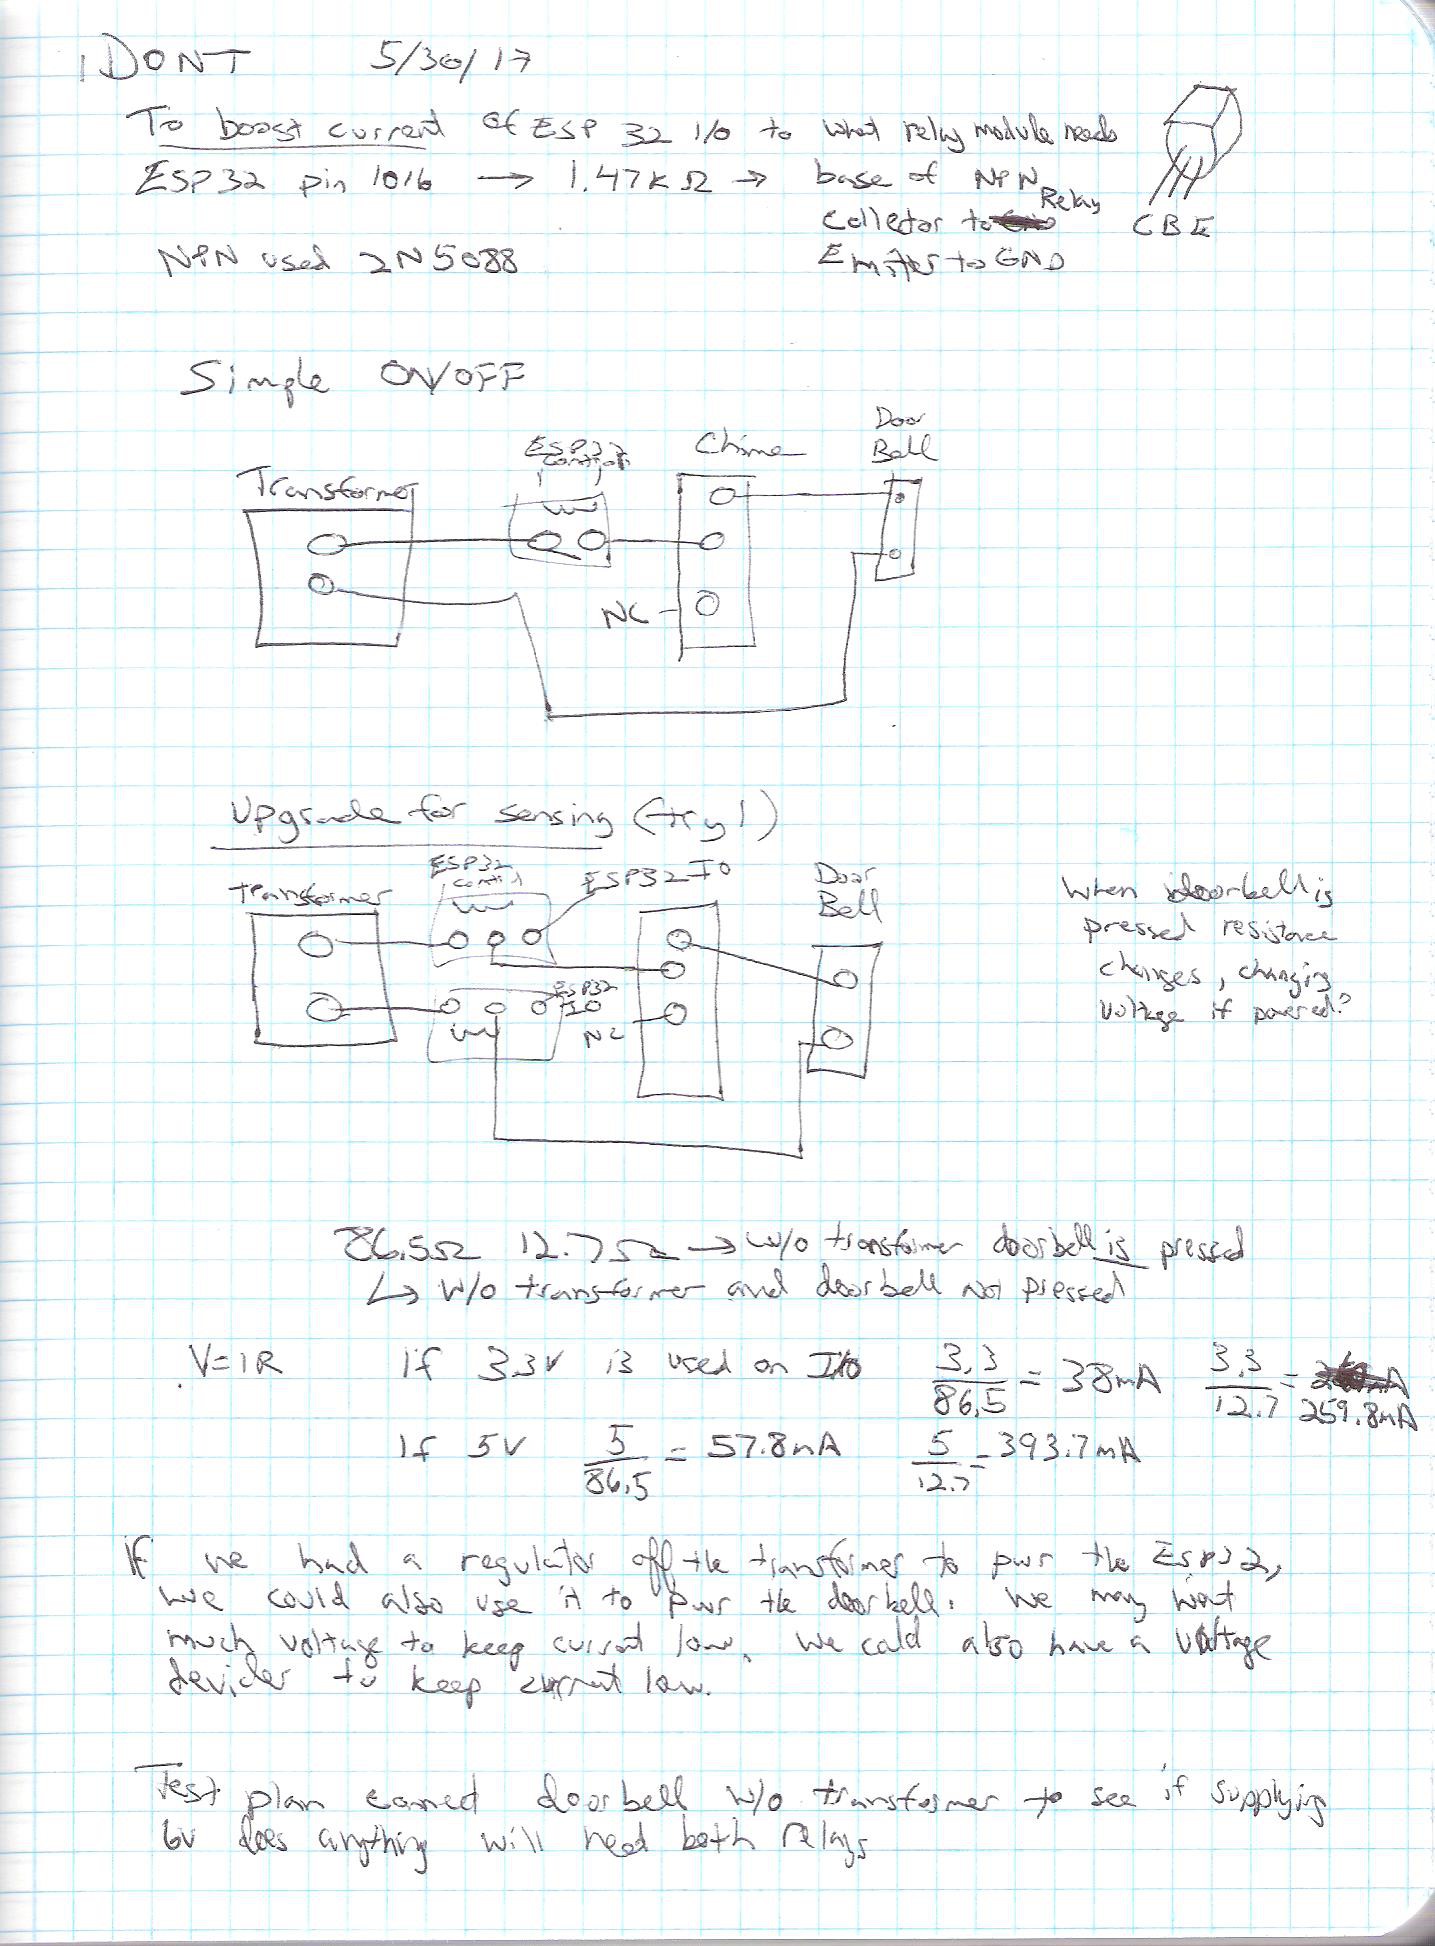
Take the current doorbell system and break the connection after the 16-24VAC transformer. Relays controlled by an ESP8266 connect:
- The doorbell and bell/ringer to the ESP8266 for logging and sending information to a phone OR
- The doorbell and bell/ringer to the transformer for normal operation
The advantage of having the smarts at the transformer is that the system is powered off of the transformer...no full time battery operation and thus recharge.
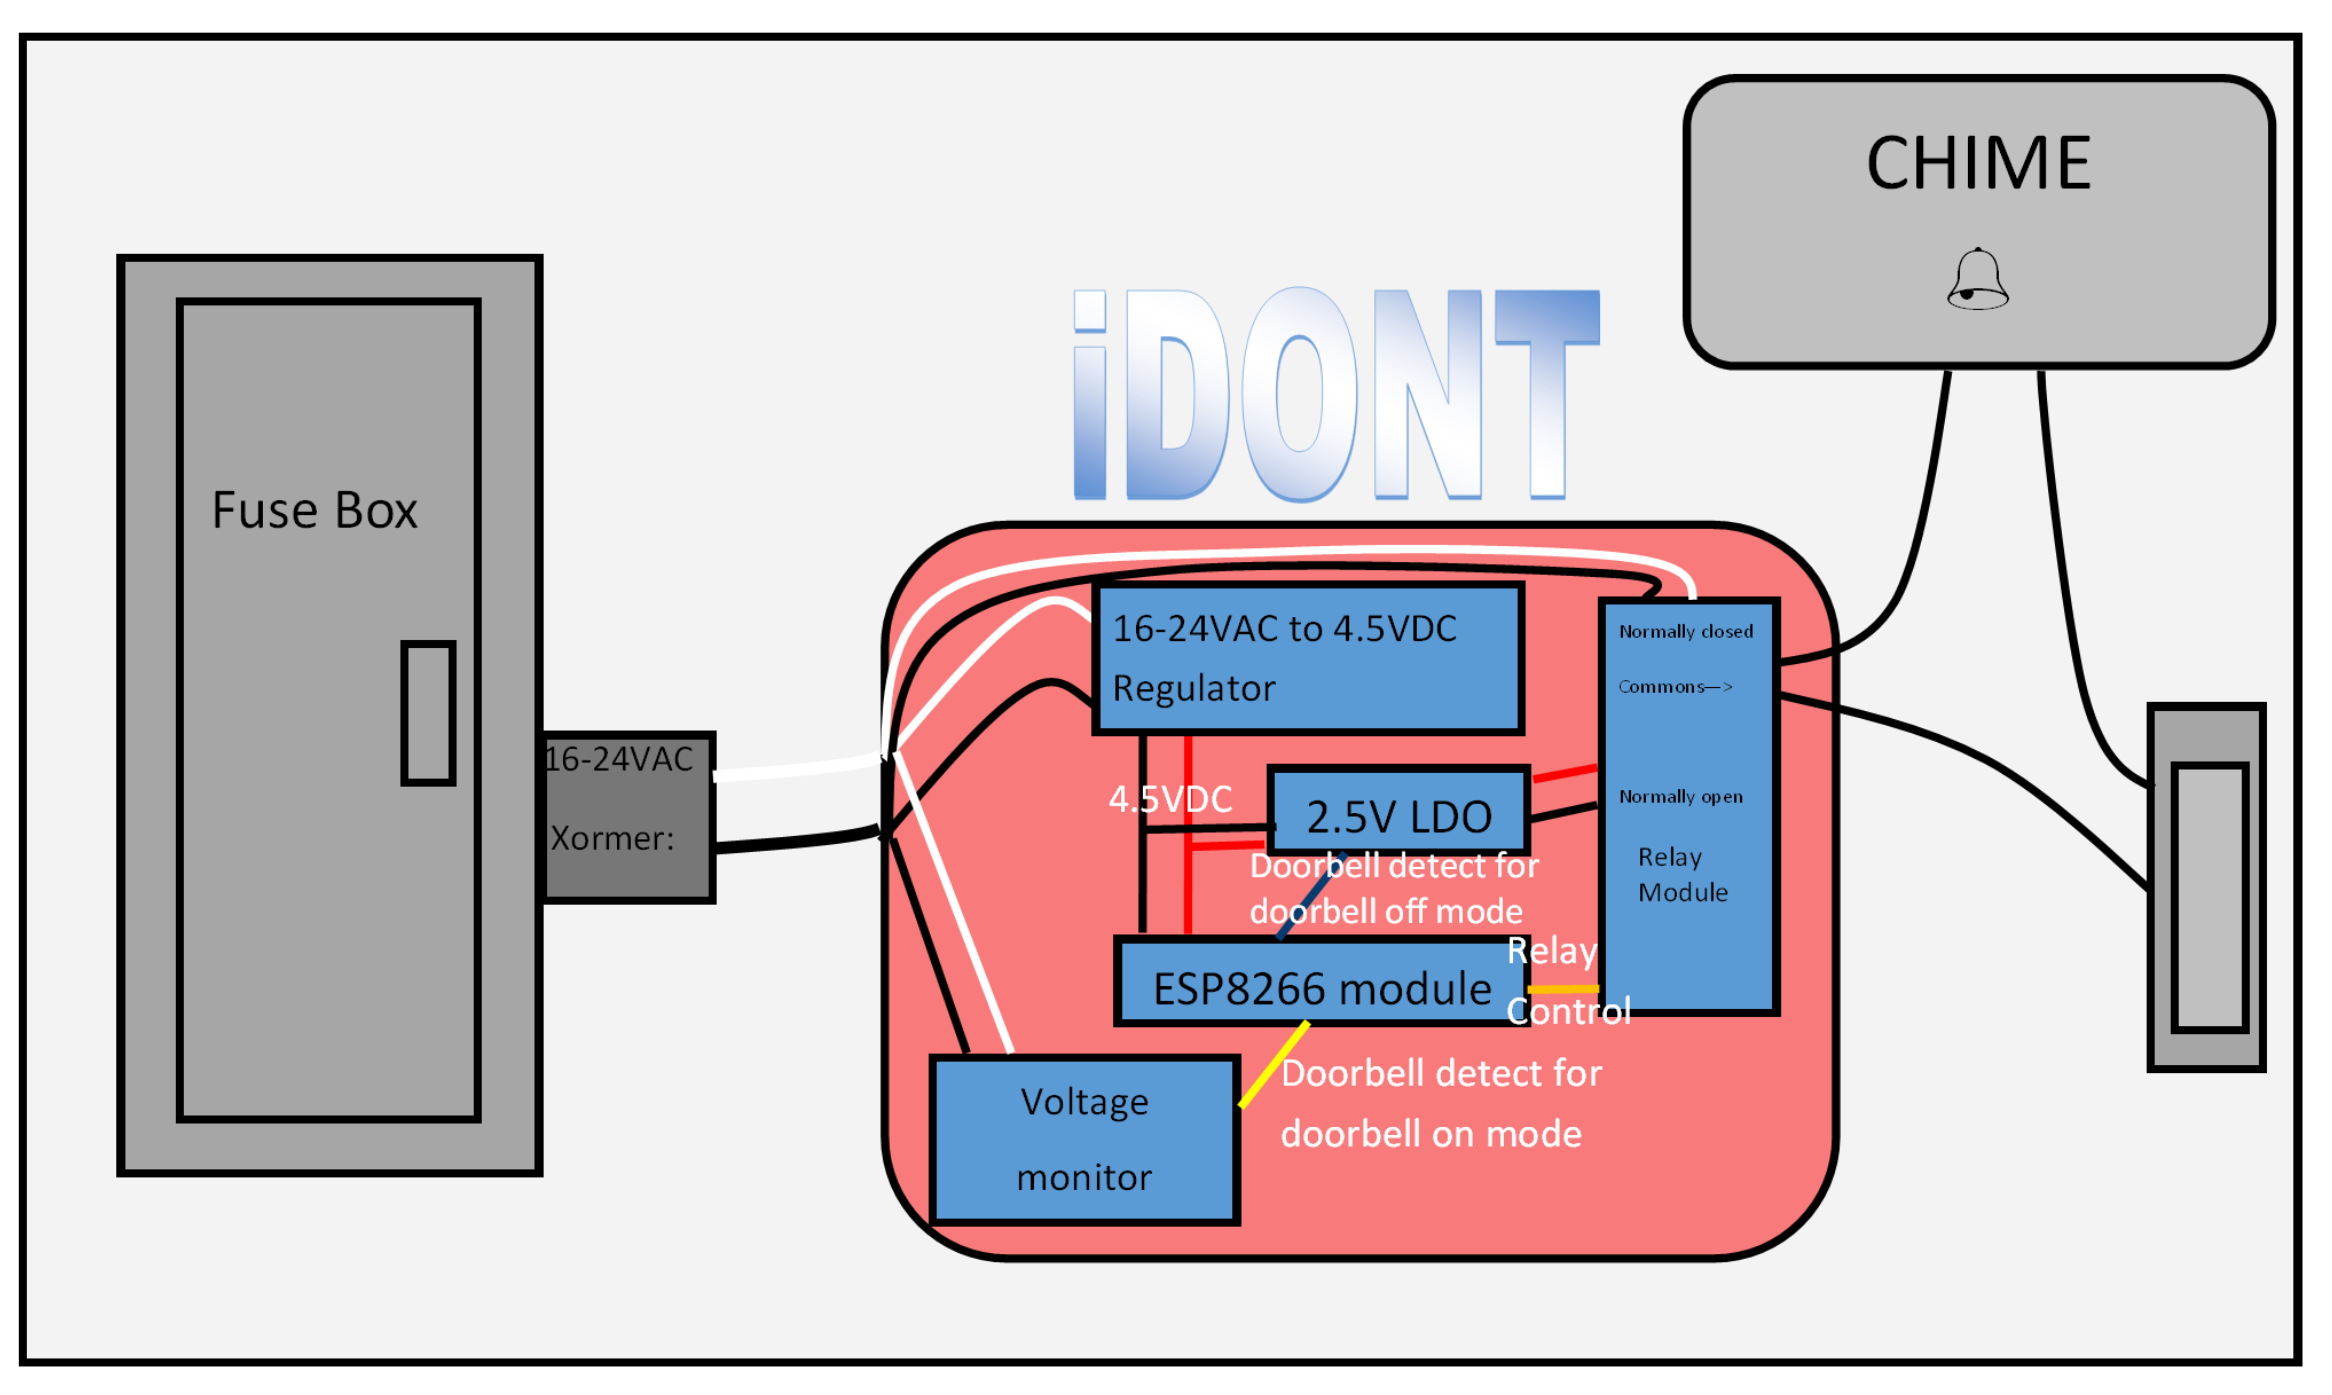
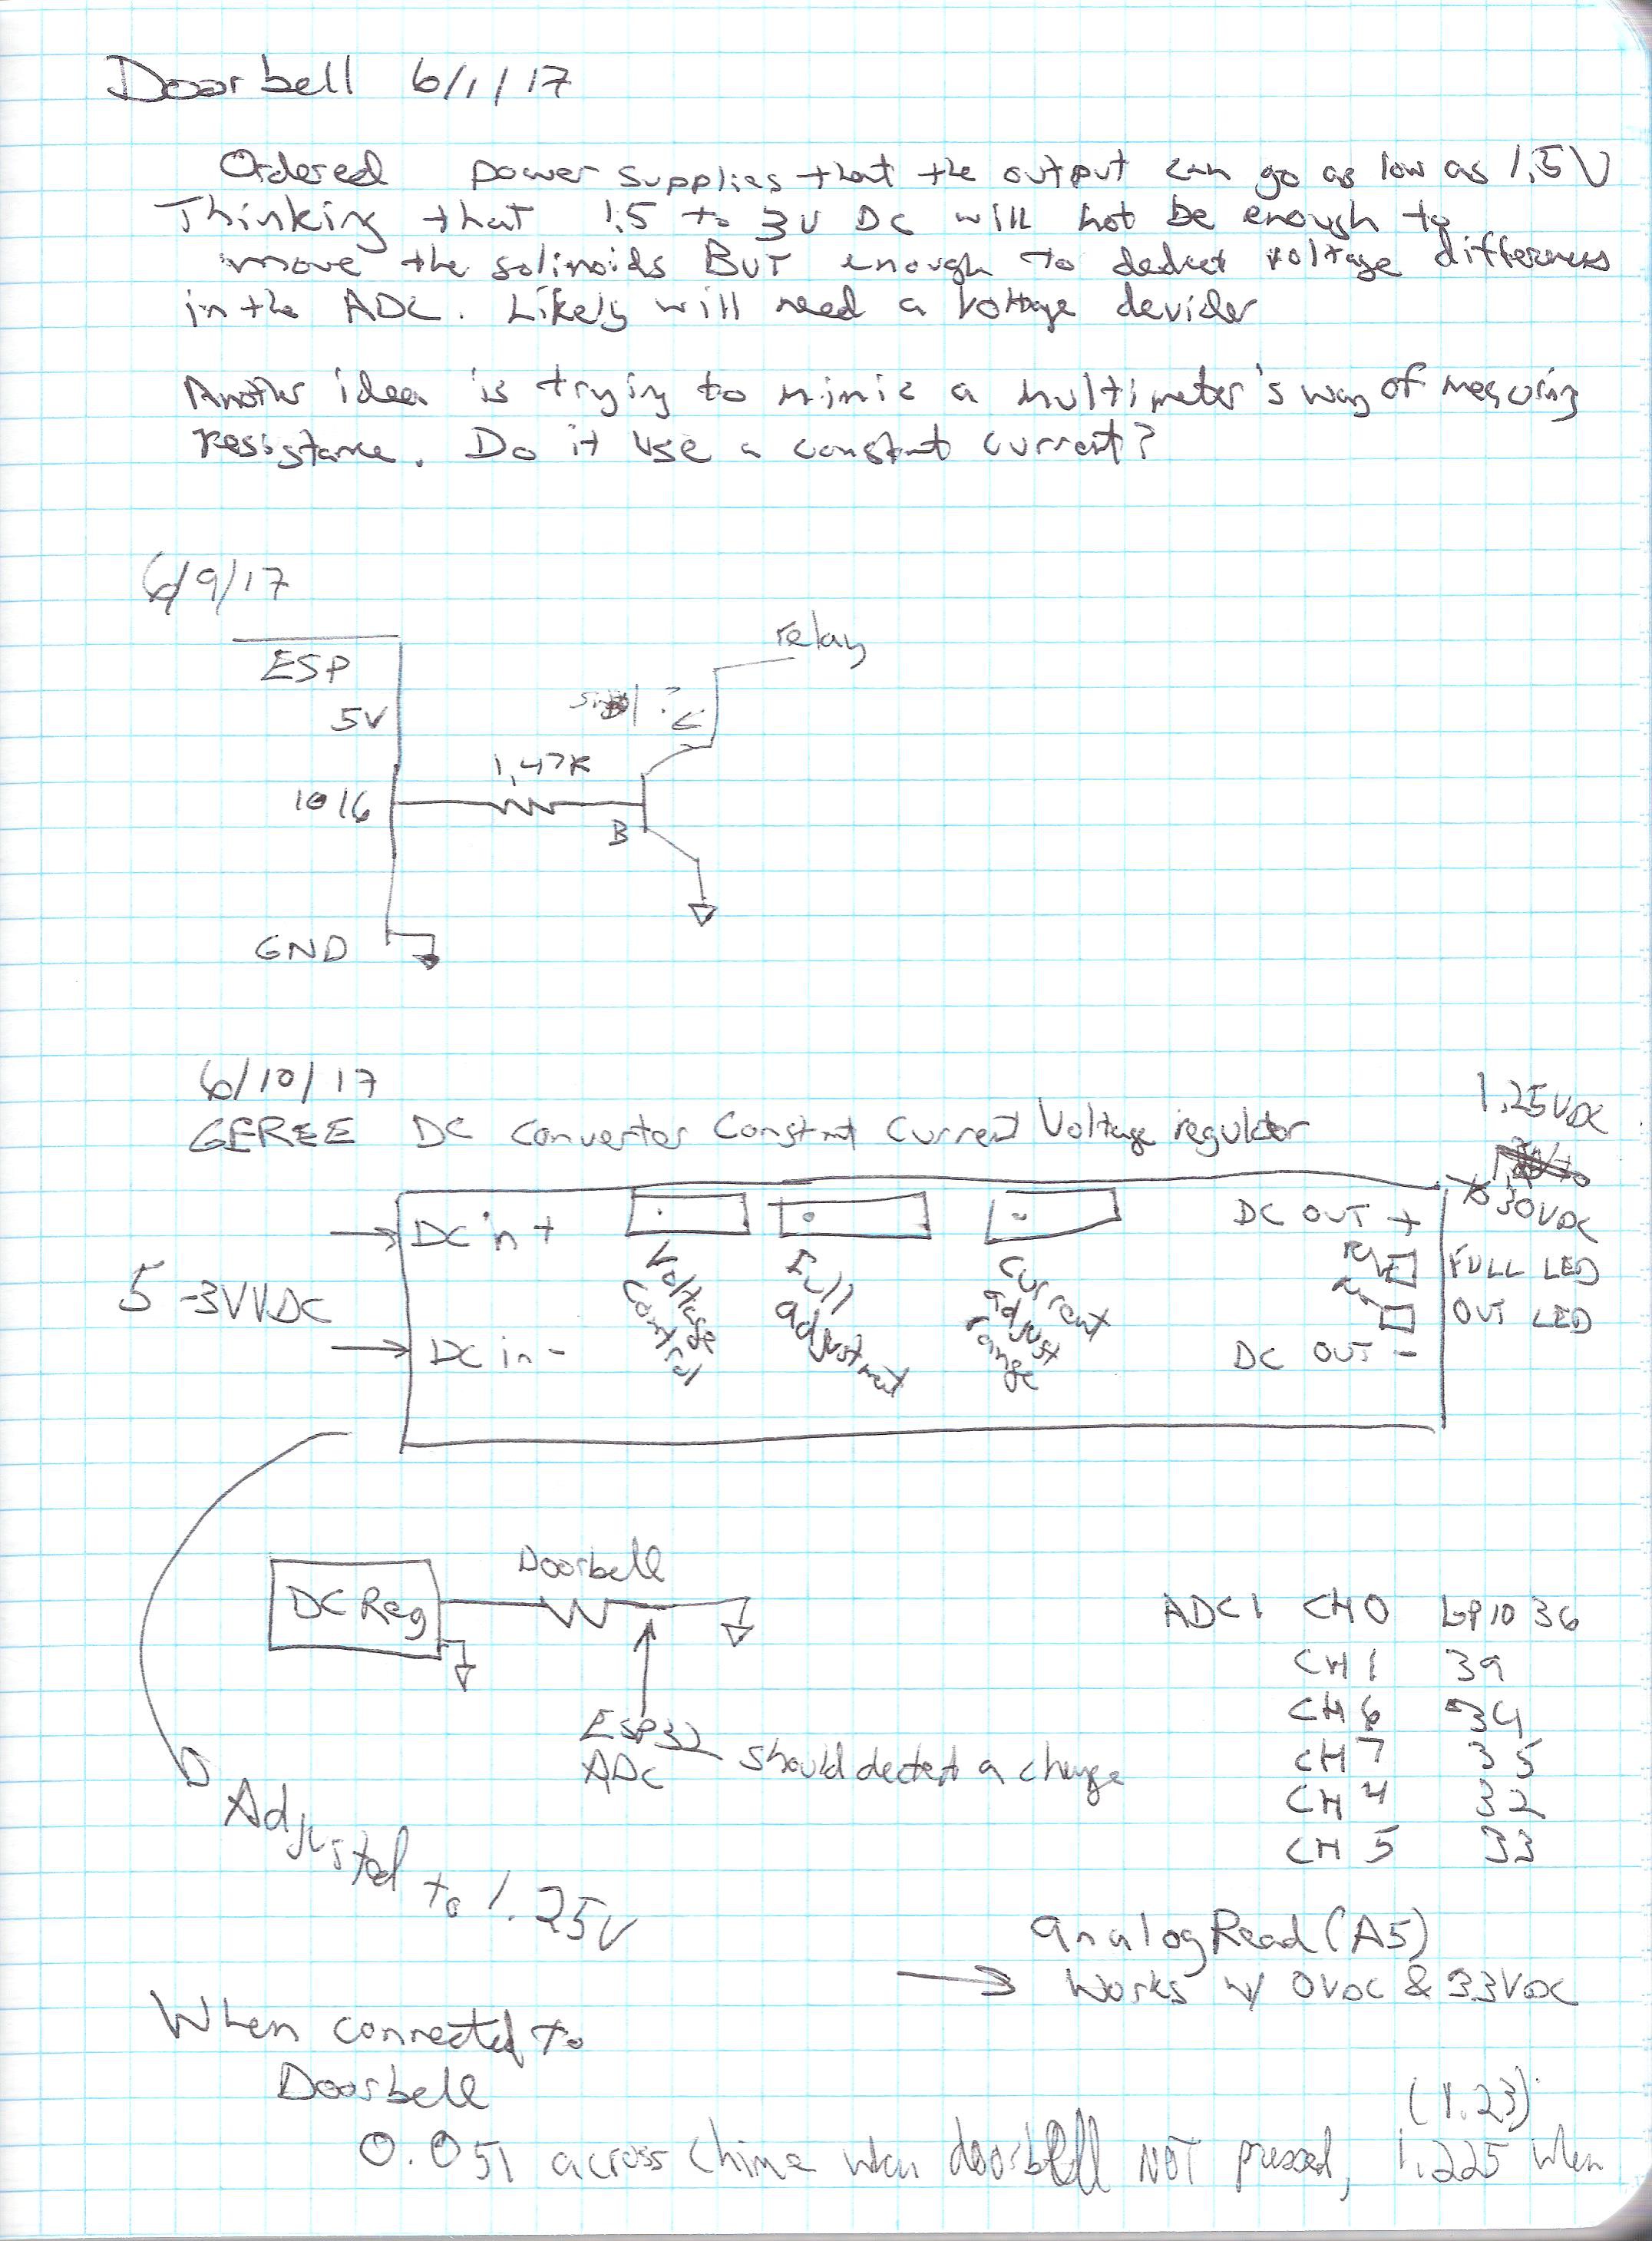
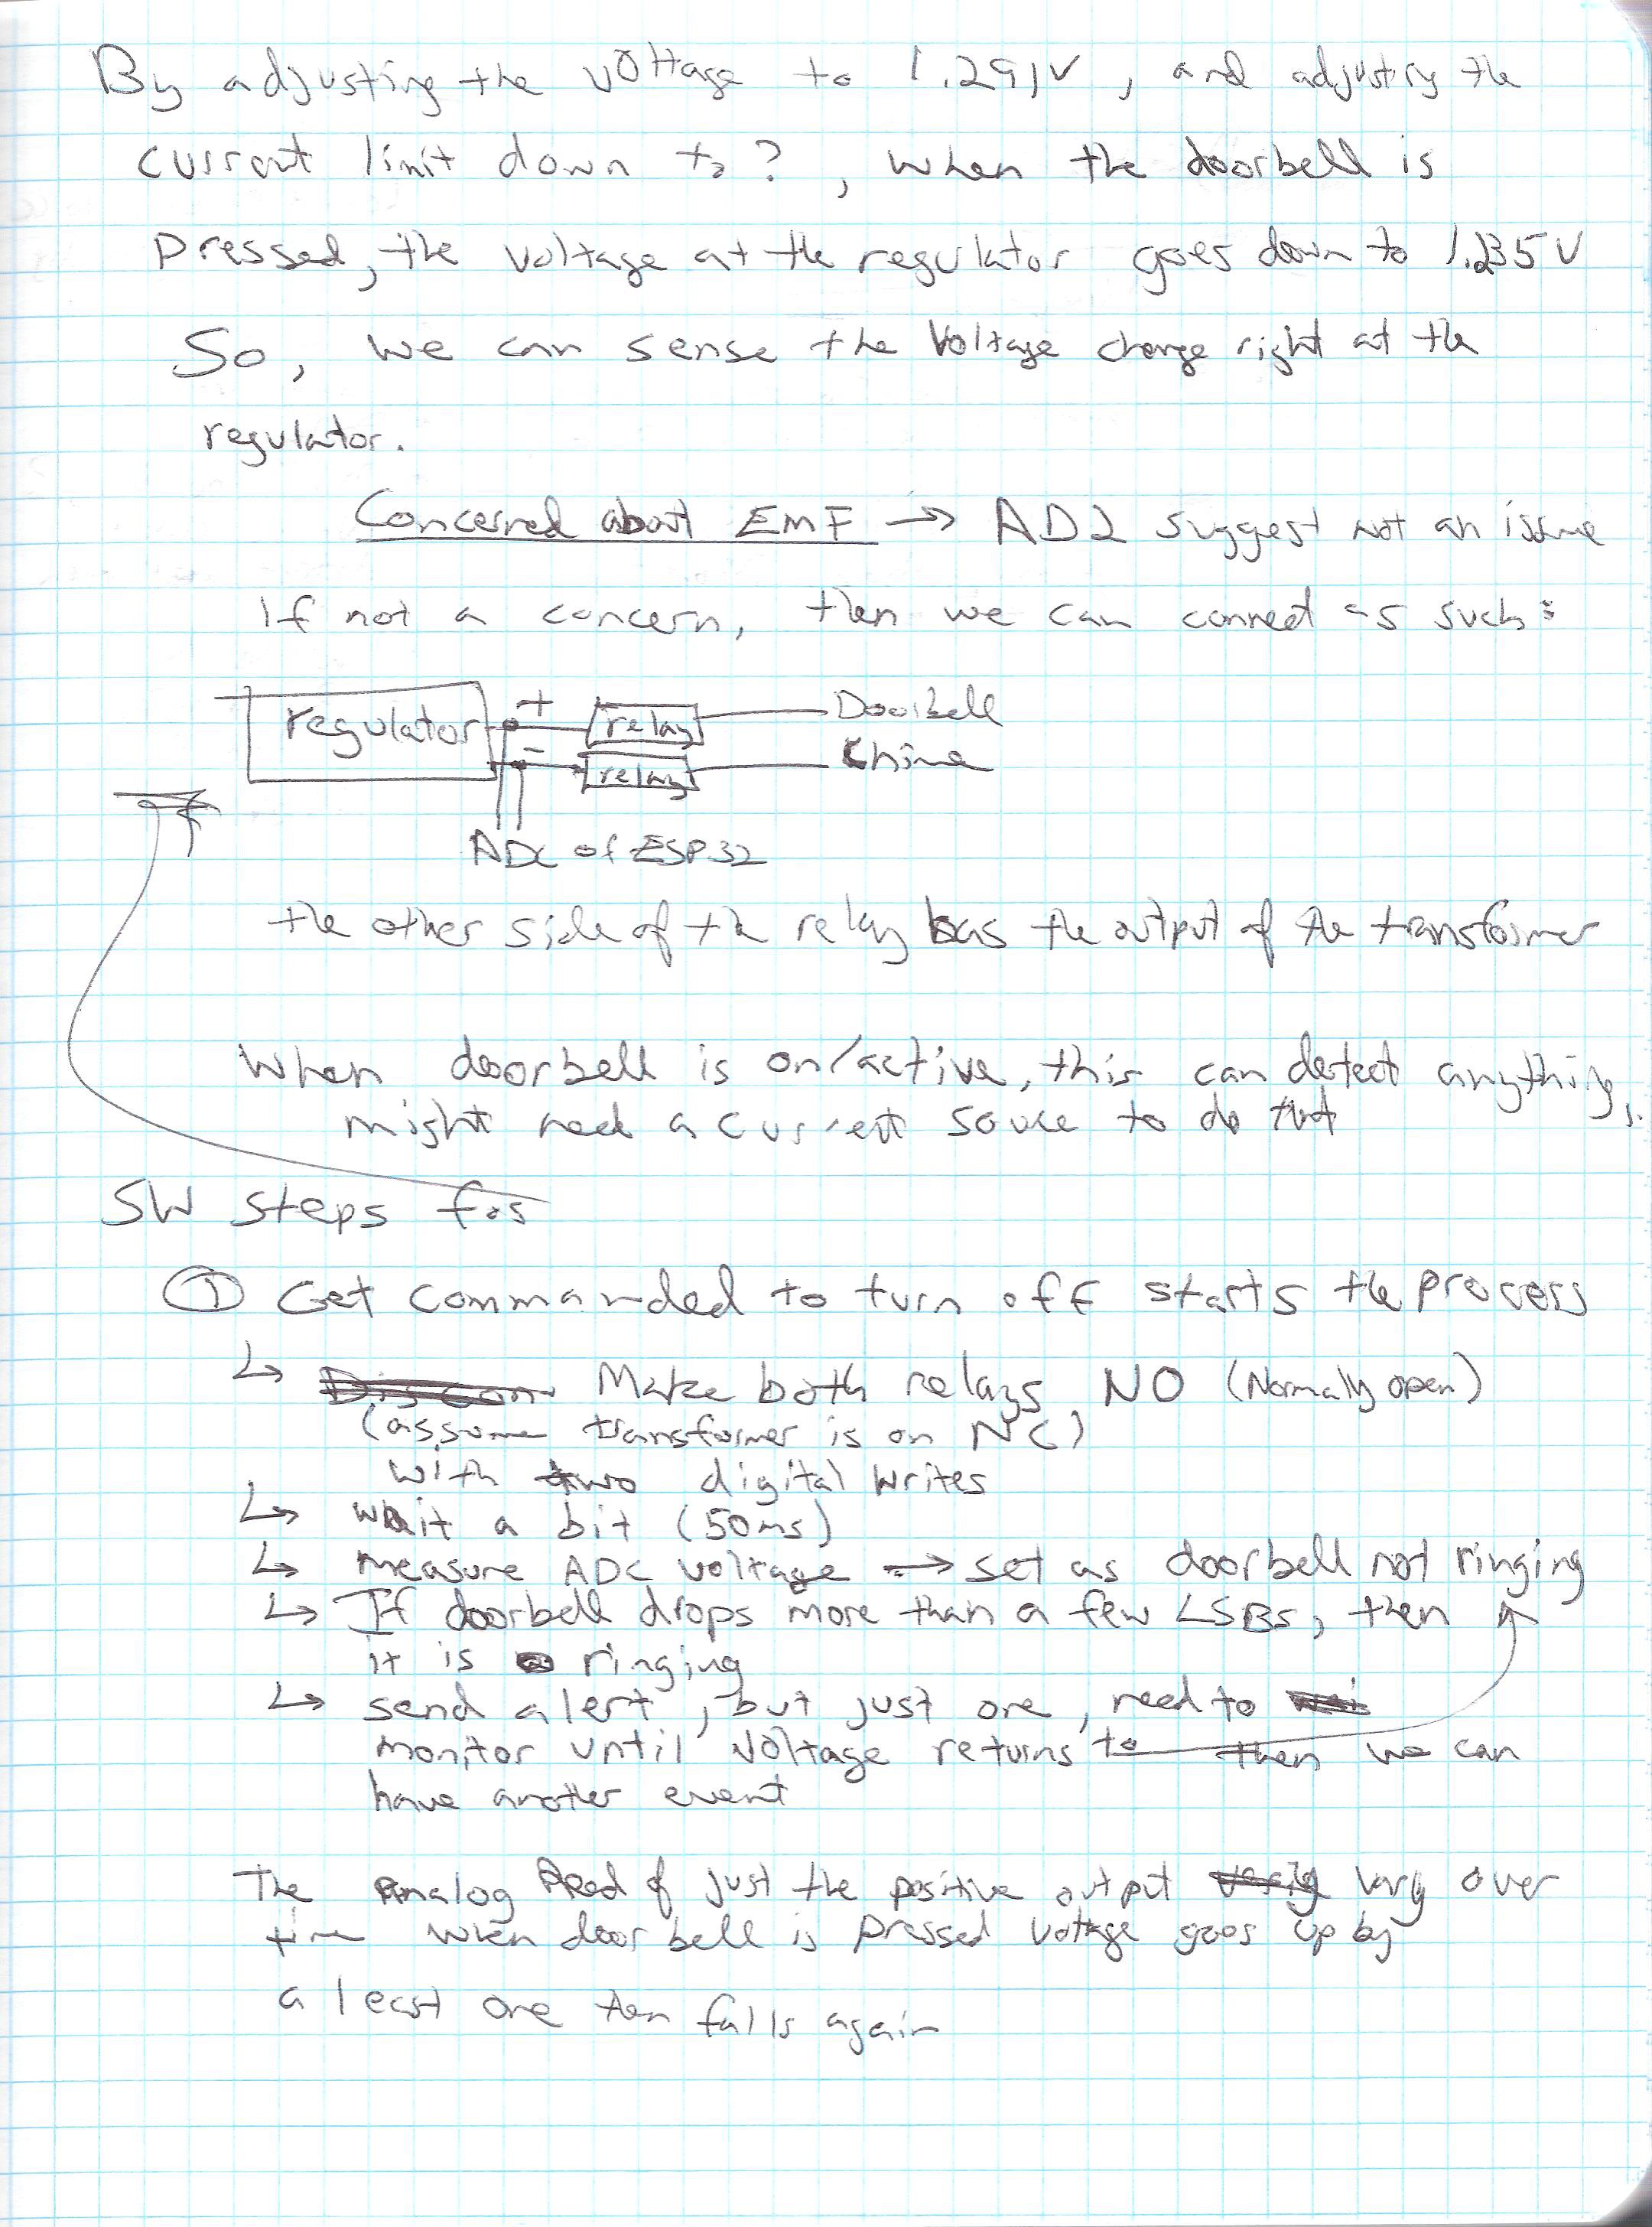
By using a double pole relay, I can either connect the doorbell to the AC transformer (normal operation) or to a 2.5V voltage regulator (LDO). In normal operation, the voltage drops on the doorbell transformer, so a voltage monitor detects the drop and an input pin of the ESP modules goes from 3.3V to 0V. In "off" mode, the 2.5V LDO is connected to the chimes and doorbell. When the doorbell is pressed, the LDO current limits and it's power good signal that is connected to the ESP module drops from 3.3V to 0V. All of this takes only five ICs plus a ESP8266 module and a relay module.
The cost of the prototype is be under $25 (IC costs is under $20 is quanties of 1 plus additional Rs and Cs and mechanicals) on top of the existing doorbell, chime and transformer. If this were to go to production, I would guess that the hardware would be under $10, given how few components are needed for a iDONT, but more for all the features I might have. Hackaday.io user Cdon raised the concern about the ESP's WIFI signal strength. So, I may need an external antenna for some people's setups...more costs.
The following flow diagram describes the basic architecture of the software:

A captive portal is an easy way to setup the iDONT. It allows any smart device or computer to control it without having to write an app for Apple, Android, and computer devices. The ESP8266 gets configured for the WiFi settings and setting message service to send a text alerting a person of the doorbell ring. The ES8266 also serves up a webpage to enable and disable the iDONT and config it.
That said, security still is concern. Given that a person has to be on the same network to interact with the iDONT, and the device is only connected to the doorbell it is a low risk item. Additionally, the iDONT has no way of making the chimes trigger, so there is no way to prank residents with this.
The Business Plan: See this log.
License: MIT Open Source
Milestones
The following shows my plan to build the iDONT. This will be fun mixture of hardware and software.
Software Milestones
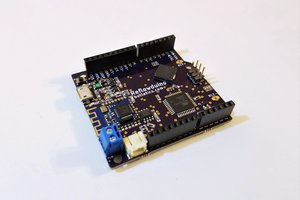
- Install software to add the ESP32 to the Arduino IDE (done 4/1/17)
- Get the classic Blink example working (done 4/1/17)
- Control some relays (done 6/7/17)
- Build a hello world webpage and wifi setup (done 6/7/17)
- Build a webpage that controls the relays (done 6/7/17)
- Add email and/or texting to when the doorbell is pressed and in off/silent mode. (done, SMS and IFTTT working)
- Add logging abilities (bonus, did not add to ESP as with SMS/IFTTT your phone can store the messages creating a log)
Hardware milestones
- Get Blink LED example working (done 4/1/17)
- Get any old relay switching (done 6/7/17)
- Find and buy the right relay (done)
- Find and buy a doorbell kit to prototype with (done 6/7/17)
- Find and buy a AC to 5VDC power supply (not...
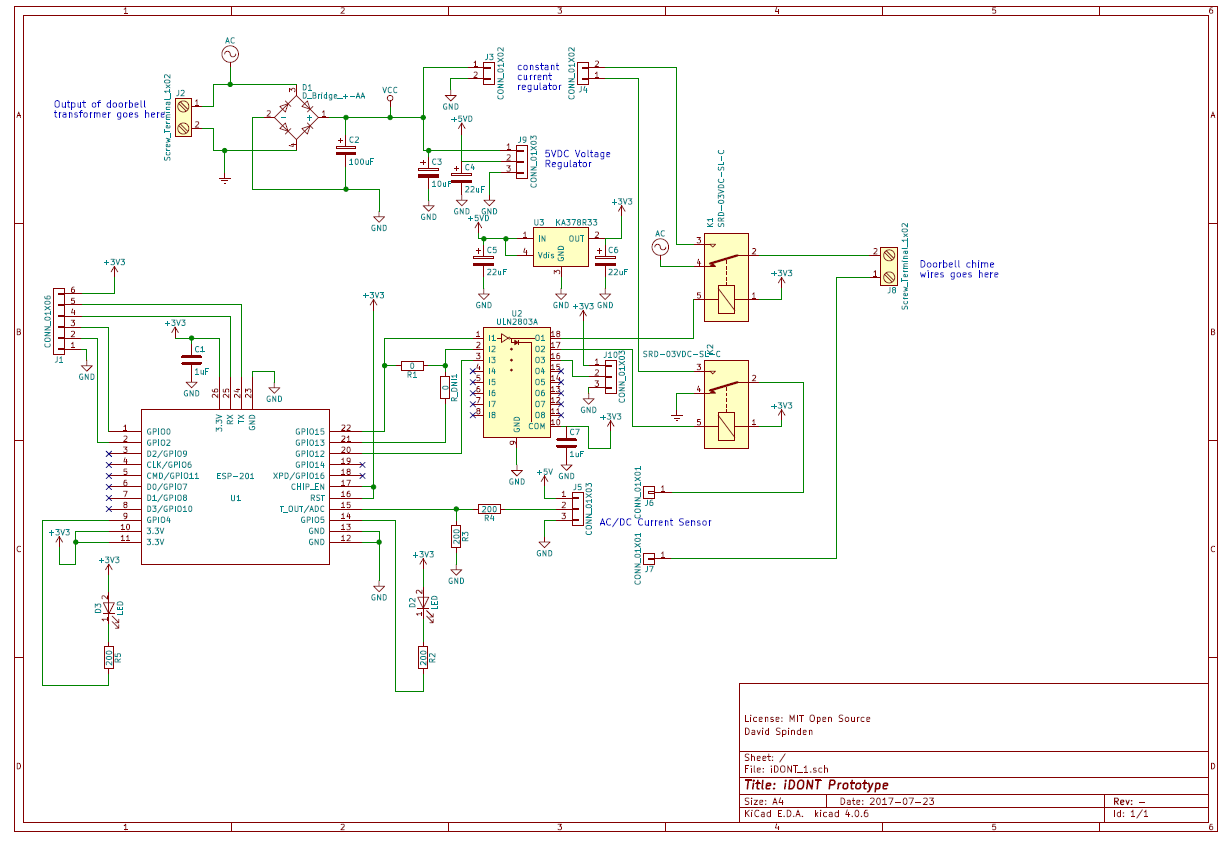 I have also pushed all the KiCAD files to project's files. I hope to figure out version control with git soon.


 Timothy Woo
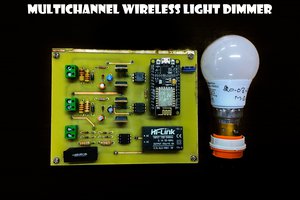
 Benjamin Broce
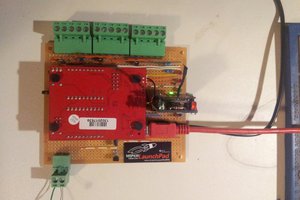
 PK
PK
Hi Doug, thanks for the suggestions. I think I follow...
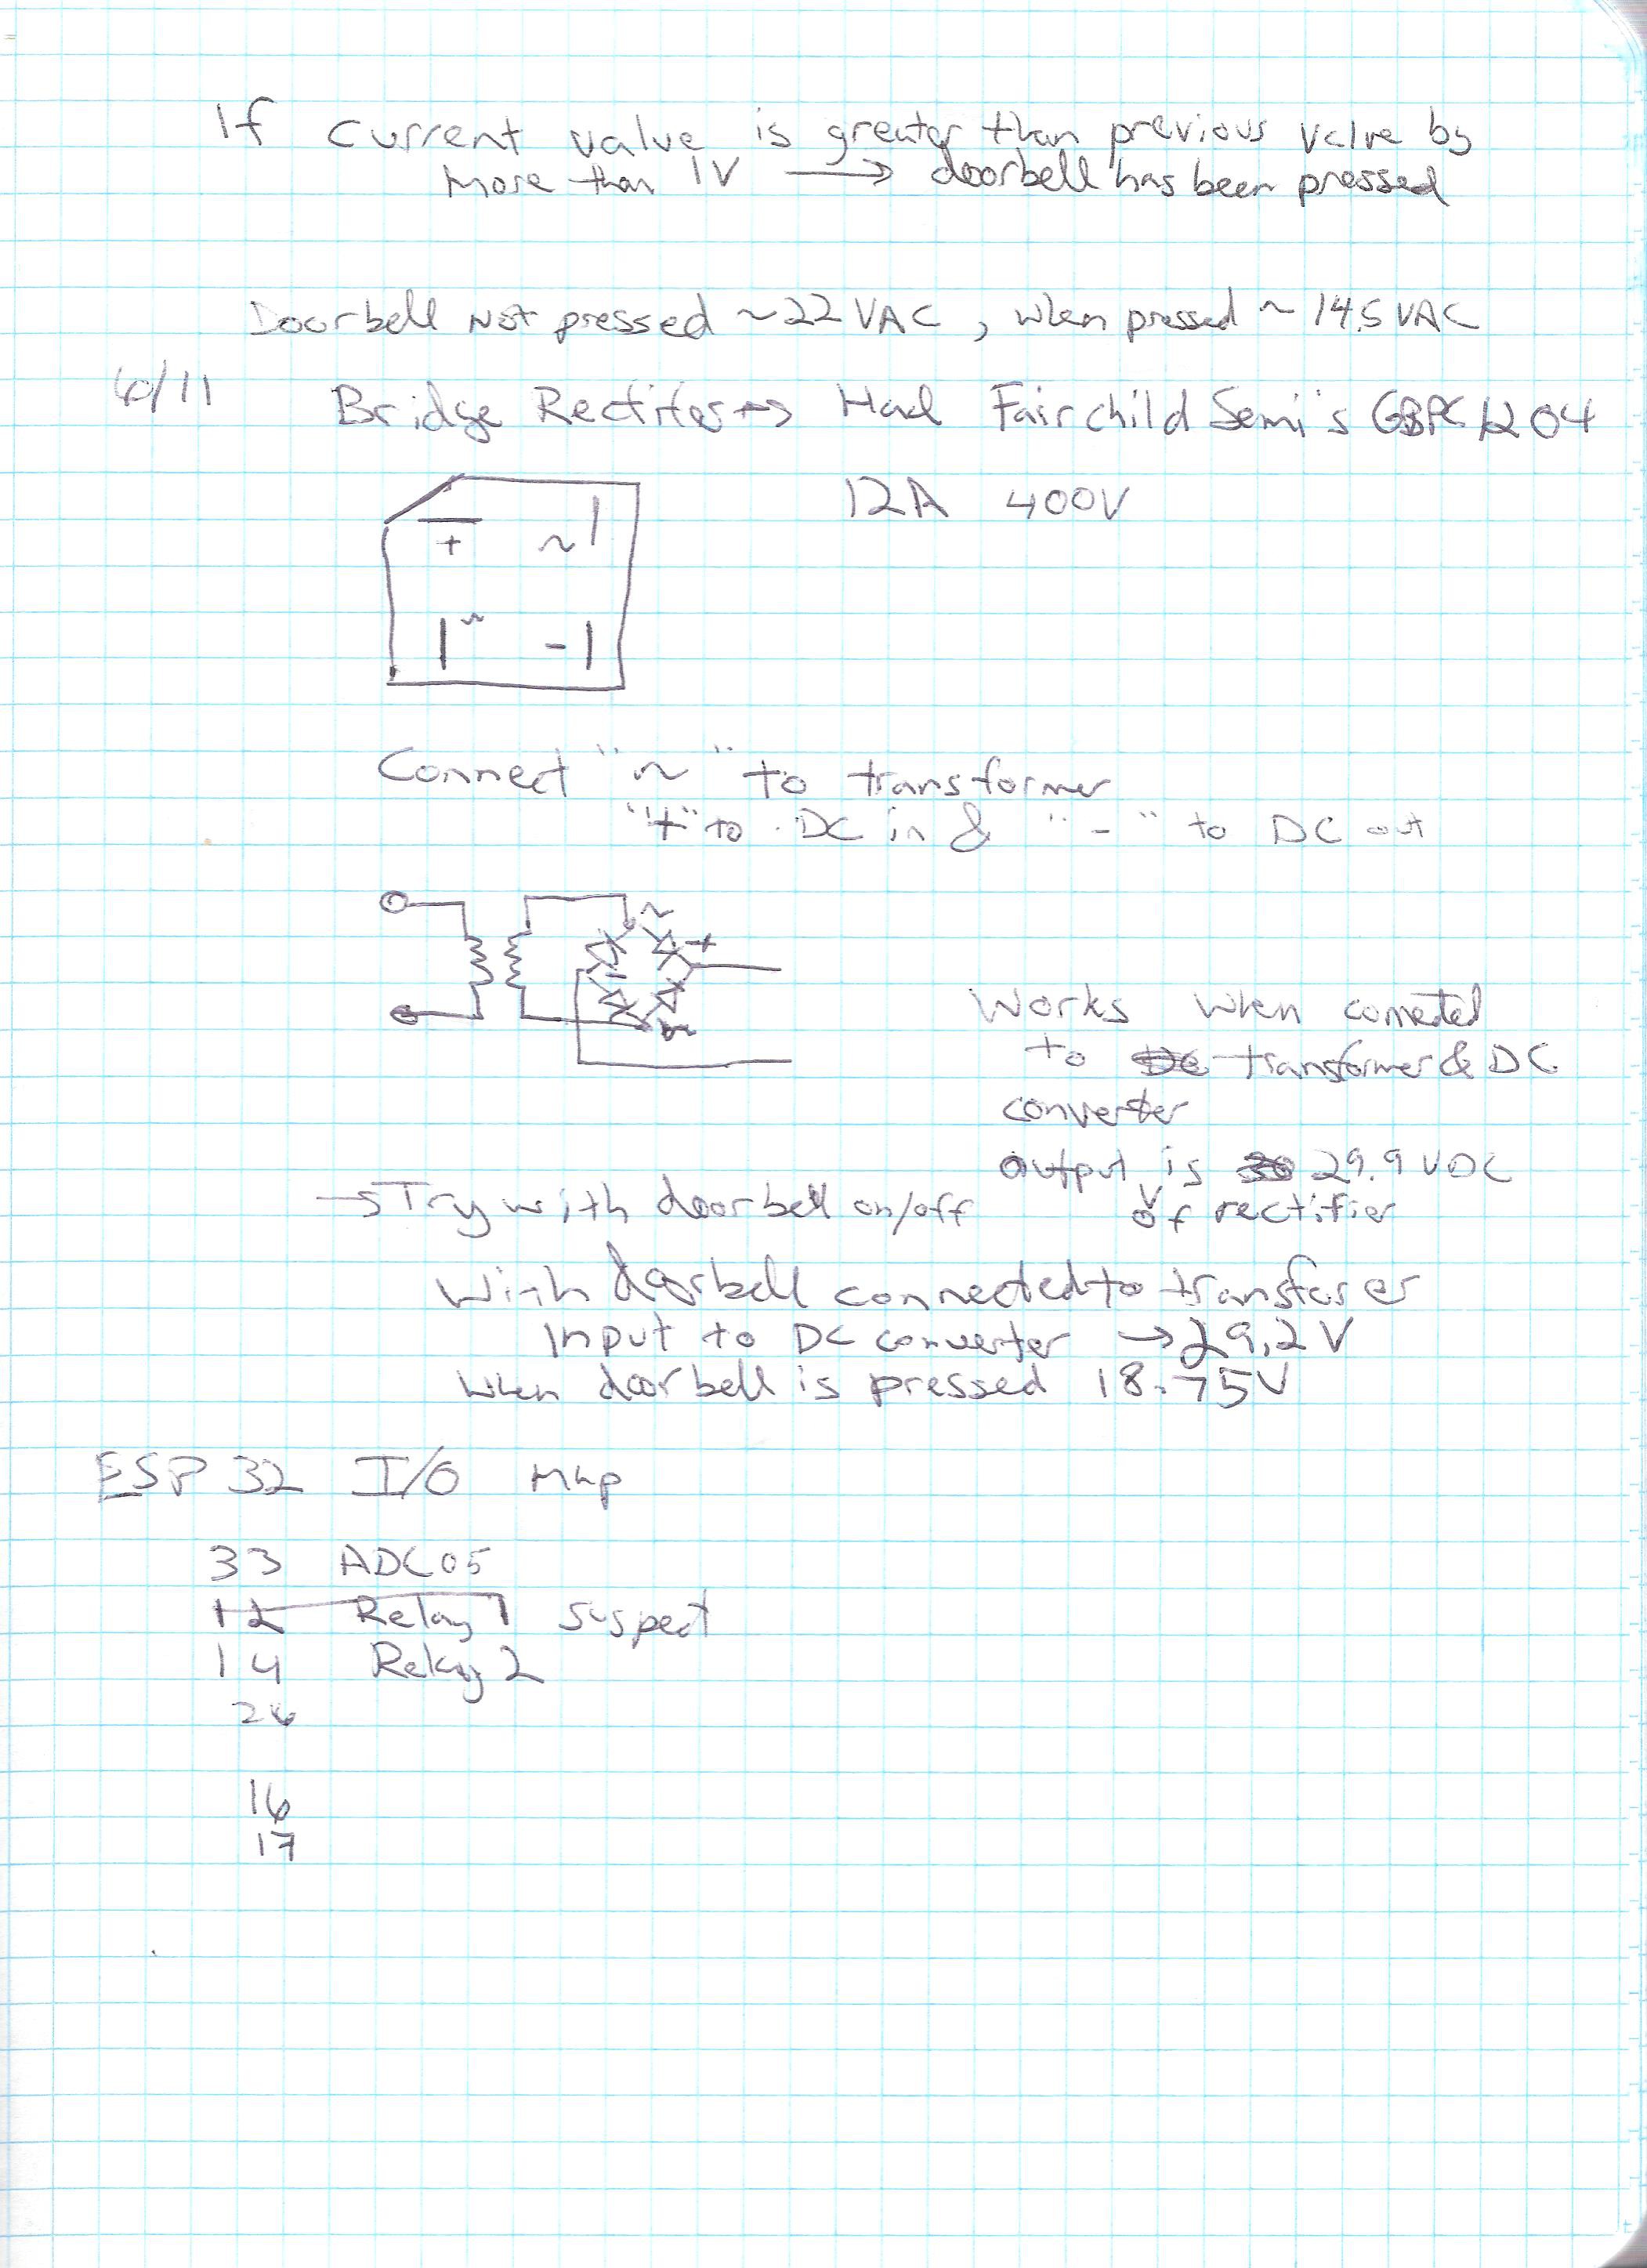
The main issue with this project is dealing with AC voltage and an ESP32 that only can handle 3.3V IO. I am hoping to be able to detect a doorbell press when the doorbell is enabled or disabled. I have not discussed yet that I plan on using a current sensor when the doorbell is enabled.
I also may not have been clear that I want the iDONT to be a self contained box that all a person has to do is remove existing wires off the transformer that go to the doorbell and connect the iDONT to the transformer and doorbell wires. This goal makes it an easy project to install, but harder to design the iDONT box. I agree there are other ways to do it, but I wanted to challenge myself.
Regards,
David