Close
0%
0%

Plug and play connected devices

Plug an arduino on any USB port to connect it.

Similar projects worth following
What if you could control sensors, power outlets, leds, lamps with easy to build USB devices ?

I made LibreConnect, a python application that will scan your USB ports and generate a websocket when you plug an arduino.

This application doesn't need to be install or to be setup and works the same on any platforms (Windows/Linux/Raspberry Pi/NAS etc...)

You can control your devices from a phone/computer using a web page without the need of a server.

Devices can be connected as USB only, network, internet devices.

To demonstrate how this could be used, I made examples at http://madnerd.org/interface :
- Control leds
- Control milight lamps/power outlets
- Display temperature/humidity
- Control a buzzer with a midi keyboard

All the instructions are made to be easily replicate, and are translated in french.
Anyone can make their own open source devices and share it with non-technical people.

Demo: http://madnerd.org/interface
Download demo: https://github.com/madnerdorg/libreinterface

All demos works without a server, you can modify it and use it on any devices, just open/edit the html files.
LibreConnect: https://github.com/madnerdorg/libreconnect
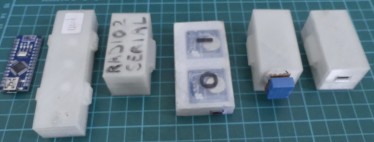
USB devices

You can control arduino, from a web browser or a client, with little modification on your sketches.

Here are the devices available,

  • test : turn on/off a led on the arduino
  • leds : control neopixels leds
  • radio433 : turn on/off 433Mhz appliances
  • openlight : control Milight bulbs
  • buzzer : alarm / sound notification
  • temphum : DHT11

Each device repo is provided with

  • Instructions in English and French (in Markdown)
  • Schematics / video (with sources for fritzing/inkscape)
  • A bill of materials with keyword-friendly term for searching its on ebay/etc.
  • 3D printed case (with source for blender)
  • Arduino code/libraries compatible with arduino/platformio.

Once you have downloaded a device repo and libreInterface, you don't need an internet connection to build your device.
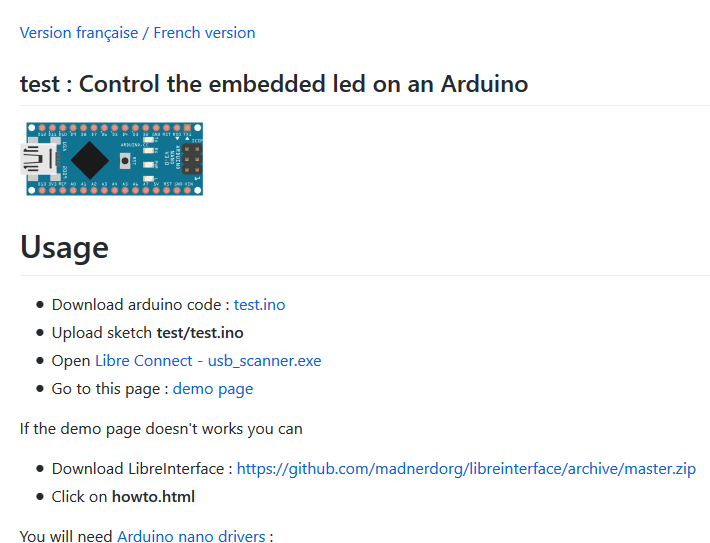
All contents are licensed CC-By, so anyone can reuse it to bootstrap their own devices
Since everything is stored on a git server, code / documentation can be easily share and modify and can also be used offline.

I tried my best to use permissive licences and cheap easy-to-find components, so as many people as possible can make/fix/improve these devices.

Test it on your web browser

Go to madnerd.org/interface or download it here : https://github.com/madnerdorg/libreinterface


Demos are tested on Firefox/Chrome.
This won't work on Microsoft Edge as it disallows the use of cross zone connection.

How does the connector works:

Each element is independent from another :

  • Electronic technician can make a device without worrying about security/connectivity
  • Network admin doesn't need to know how the arduino/interface works and can focus on security.
  • Web designers can use the device without understanding network/electronics.

Websocket Server

I split the websocket server in two parts, usb_scanner and connector.
There are written in python and use autobahn/twisted/pyserial
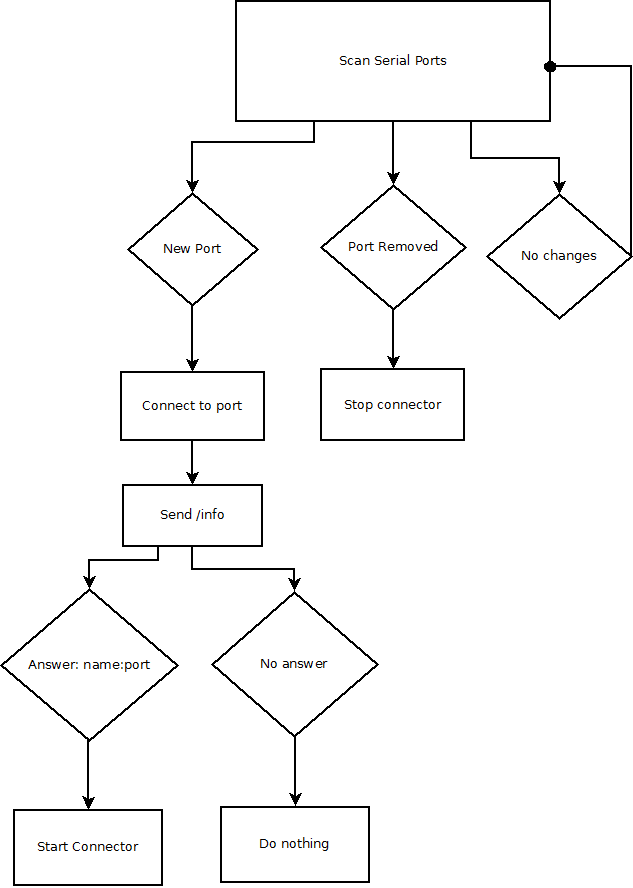

usb_scanner

  • usb_scanner search for new serial devices
  • send /info
  • If an arduino send name:websocket_port (for example : test:42000), connect it.

Example: https://github.com/madnerdorg/test/blob/master/test/test.ino

Here is a sketch that connect your arduino to a websocket.

//name / websocket port
const String usb_name = "name:42123";
String readString; //Serial string buffer

void setup() {
  Serial.begin(115200);
}

void loop() {
  serialManager();
}

//Convert characters sent by serial to string
void serialManager() {
  //Get Serial as a string
  while (Serial.available()) {
    delay(3);
    if (Serial.available() > 0) {
      char c = Serial.read();
      readString += c;
    }
  }

  if (readString.length() > 0) {
    if (readString == "/info") {
      Serial.println(usb_name);
    }
  }

  //We clean the serial buffer
  readString = "";
}

connector

You can directly use connector , but you will need to specify serial port and lose automatic reconnection

For example, upload Examples/Basic/AnalogReadSerial and start connector with these arguments

(replace serial with the serial port)

connector.exe --serial COM10 --baudrate 9600 --port 42010
Then open ws://127.0.0.1:42010 using http://www.websocket.org/echo.html
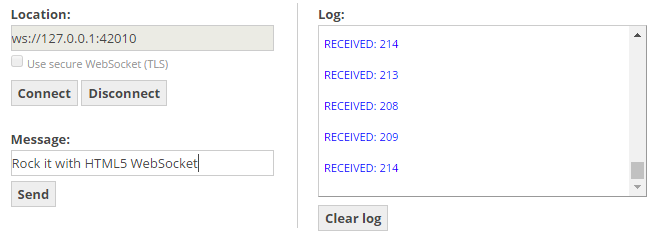
Connector is just a prototype and performance/security/test improvement are needed.

There is a basic implementation for SSL / Password / IP Ban (see arguments)

You will need to open the websocket with your browser to use a self-signed certificate and accept it first: (for example: https://localhost:42000).
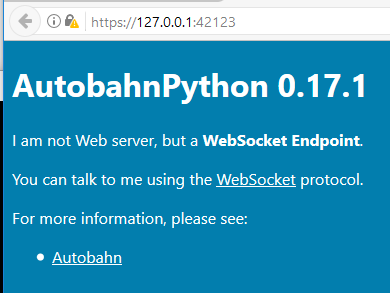
Unencrypted websocket won't work with a HTTPS page.

As for now, I didn't make any example for ssl/password, but you can use the code editor (see instructions below) to try it!

Websocket Clients

You can use any language as long as it can communicate with websocket,
Using NodeJS you can prototype your client on a web browser and then reuse the code to make it autonomous. (Example provided in the instructions)

I also made an example...

Read more »

  • 5 × Arduino nano (CH340g clone) The cheapest and easiest way to build devices using Arduino.
  • 5 × Stripboard If we have to solder multiples cables on a pin, we will need this.
  • 100 × Resistors pack It is cheaper to buy resistors in bulk quantity.
  • 1 × WS2812B RGB Leds strip These leds only required 3 pins to works, no matters how much you want to use
  • 1 × Buzzer Buzzer can be used for notifications, we can also control them with midi.

View all 10 components

  • Remake of leds devices

    Rémi Sarrailh05/24/2017 at 10:15 0 comments

    I'm currently working on the v2.0 of leds, so we can easily

    - changes the number of leds used,
    - Use different animation
    - Change color of leds using hsv
    - Save changes / load changes on EEPROM.

  • Home Automation (milight/433Mhz devices)

    Rémi Sarrailh04/19/2017 at 14:28 0 comments

    Here a small demo for radio433/openlight.

    • The 433Mhz receiver/transmitter are plugged on a Raspberry Pi Zero W
    • The nrf24l01 transceiver is plugged on my computer

    https://github.com/madnerdorg/radio433
    https://github.com/madnerdorg/openlight

    Source:
    https://bitbucket.org/fuzzillogic/433mhzforarduino/
    https://github.com/henryk/openmili


  • Offline voice commands recognition

    Rémi Sarrailh04/19/2017 at 11:44 0 comments

    Control websocket with snowboy (offline voice commands recognition)

    Snowboy is used as an Hotword Detection Engine, but it works pretty well with predefined voice commands (and really fast).

    You will need to record the voice commands on the snowboy website, you can login with a github account, once you have downloaded the model files, it will works without a network connection.

    Install snowboy on a Raspberry Pi (check documentation if you have issues)

    #!/bin/bash
    mkdir /opt/snowboy
    cd /opt/snowboy
    
    wget https://s3-us-west-2.amazonaws.com/snowboy/snowboy-releases/rpi-arm-raspbian-8.0-1.2.0.tar.bz2
    tar -xvf rpi-arm-raspbian-8.0-1.2.0.tar.bz2
    apt-get install python-pyaudio python3-pyaudio sox libatlas-base-dev
    pip install pyaudio
    
    # Generate alsa configuration for root
    
    cat > ~/.asoundrc << EOF
    pcm.!default {
      type asym
       playback.pcm {
         type plug
         slave.pcm "hw:0,0"
       }
       capture.pcm {
         type plug
         slave.pcm "hw:1,0"
       }
    }
    EOF
    
    rec test.wav
    Python Demo with test (first model file with turn on the led, second model file will turn off the led)
    import snowboydecoder
    import sys
    import signal
    import websocket
    # Demo code for listening two hotwords at the same time
    
    interrupted = False
    
    ws = websocket.WebSocket()
    ws.connect("ws://localhost:42000");
    
    def signal_handler(signal, frame):
        global interrupted
        interrupted = True
    def interrupt_callback():
        global interrupted
        return interrupted
    
    if len(sys.argv) != 3:
        print("Error: need to specify 2 model names")
        print("Usage: python demo.py 1st.model 2nd.model")
        sys.exit(-1)
    
    def turn_on():
        print("ON")
        ws.send("ON")
    
    def turn_off():
        print("OFF")
        ws.send("OFF")
    
    models = sys.argv[1:]
    
    # capture SIGINT signal, e.g., Ctrl+C
    signal.signal(signal.SIGINT, signal_handler)
    
    sensitivity = [0.5]*len(models)
    detector = snowboydecoder.HotwordDetector(models, sensitivity=sensitivity)
    callbacks = [lambda: turn_on(),
                 lambda: turn_off()]
    print('Listening... Press Ctrl+C to exit')
    
    # main loop
    # make sure you have the same numbers of callbacks and models
    detector.start(detected_callback=callbacks,
                   interrupt_check=interrupt_callback,
                   sleep_time=0.03)
    
    detector.terminate()

  • Autonomous Uploader (Platformio)

    Rémi Sarrailh04/18/2017 at 08:48 0 comments

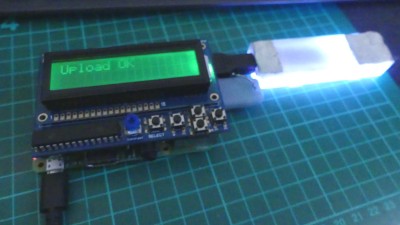
    I'm currently working on an autonomous uploader so anyone can automate the production of usb devices.

    Components

    • a Raspberry Pi,
    • a 16x2 LCD shield,
    • (optional) a usb drive with devices repo from github.com/madnerdorg
    • (optional) a smartphone/tablet to test the devices
    • (optional) a 3D printer to make the case

    Here is a prototype of this idea:

    How does it works ?

    Each github repo on github.com/madnerdorg/ have instructions for platformio.

    On a terminal (with platformio installed) we can upload a sketch with this command:

    platformio -f run -d /opt/arduino/test

    platformio.ini

    # Project Configuration File
    # Arduino IDE compatible version
    
    [platformio]
    src_dir = buzzer
    lib_dir = libraries
    
    [env:nano]
    platform = atmelavr
    framework = arduino
    board = nanoatmega328
    targets = upload
    # lib_install = 
    

    I'm using a python script that will manage the lcd/buttons and run commands for platformio.

    LibreConnect start at boot, and is stopped when a sketch is upload and then restart, once an arduino is programmed, it will be accessible as a websocket, ready to be tested.

View all 4 project logs

  • 1
    Step 1

    Tools needed

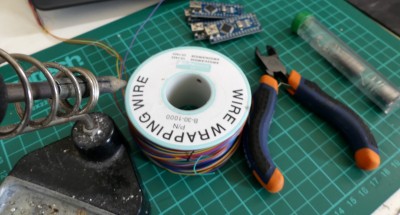
    I use as less tools as possible to build my devices and only use anything that doesn't require a workshop (for the noise or costly equipment).

    • Arduino (I recommended arduino nano ch340g clone)
    • Wires : 30AWG
    • Soldering Iron
    • 3D printer
    • Removable Adhesive (blu-tack/patafix...) / hot glue.

    All components can be reuse, replace and cases are printed in PLA which is biodegradable.

  • 2
    Step 2

    Usage

    • Download libreConnect
    • Open usb_scanner.exe (or ./usb_scanner)

    If you download libreconnect_setup.exe it will silently install arduino nano (ch340g) drivers.

    You can find more information on how to use/ build it on https://github.com/madnerdorg/libreconnect/

    Usb_scanner will send /info to each serial port at baudrate 115200, and if it received name:port (for ex: leds:42001) it will connect it.

    Arguments

     -h, --help           show this help message and exit   
      --serial SERIAL      Serial port   
      --port PORT          Websocket port   
      --secure             Add SSL   
      --power              Add power management (@reboot/@poweroff)   
      --password PASSWORD  Password for the websocket   
      --local              Websocket will only be available locally   
      --bantime BANTIME    Seconds before a ban user is unbanned   
      --retry RETRY        Number of retry before ban  
      --baudrate BAUDRATE  Baudrate for serial com   
      --keys KEYS          folders where SSL certificates are   
  • 3
    Step 3

    HTML/JS Example

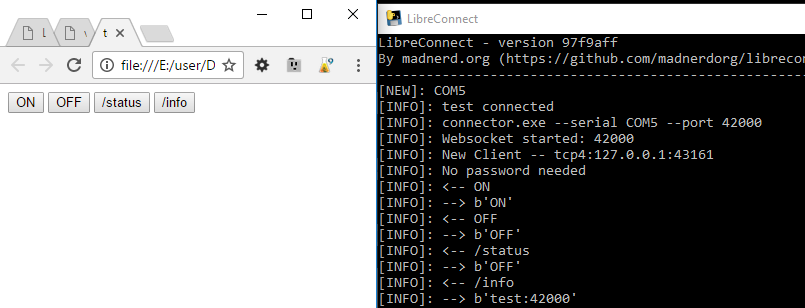
    Here is a basic example for the test device that will works without dependencies.

    <script>
    /*
    With reconnecting-websocket.min.js
    var ws = new ReconnectingWebSocket('ws://localhost:42000');
    */
    /*
     Without reconnecting-websocket.min.js
    */
    var ws = new WebSocket('ws://localhost:42000');
    ws.debug = true;
    ws.onopen = connected;
    ws.onmessage = message_received;
    ws.onerror = error;
    ws.onclose = closed;
    //When your arduino is connected
    function connected(){
    	console.log("Connected");
    }
    function error(){
        console.log("Connection: error");
    }
    function closed(){
        console.log("Connection closed");
    }
    //When an arduino send a message, do this
    function message_received(event){
           console.log(event.data);
    }
    </script>
    <button onclick="ws.send('ON')">ON</button>
    <button onclick="ws.send('OFF')">OFF</button>
    <button onclick="ws.send('/status')">/status</button>
    <button onclick="ws.send('/info')">/info</button>    
    

    You can find examples at madnerd.org/interface, be curious and look at the source code, and try to use the javascript console to modify its behaviour,

    If you don't have an arduino, you can use websocket.org echo server.

    var ws = new WebSocket('ws://echo.websocket.org');

    if you want to use semantic-ui and others useful libraries, download libreinterface and make a copy of blank.html.

View all 9 instructions

Enjoy this project?

Share

Discussions

Similar Projects

Does this project spark your interest?

Become a member to follow this project and never miss any updates