Rémi Sarrailh
Demo: http://madnerd.org/interface
Download demo: https://github.com/madnerdorg/libreinterface
All demos works without a server, you can modify it and use it on any devices, just open/edit the html files.
LibreConnect: https://github.com/madnerdorg/libreconnect
USB devices
You can control arduino, from a web browser or a client, with little modification on your sketches.
Here are the devices available,
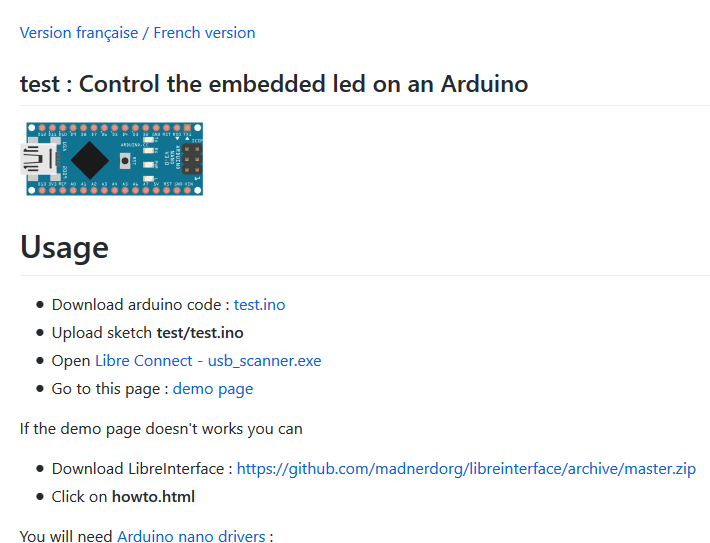
- test : turn on/off a led on the arduino
- leds : control neopixels leds
- radio433 : turn on/off 433Mhz appliances
- openlight : control Milight bulbs
- buzzer : alarm / sound notification
- temphum : DHT11
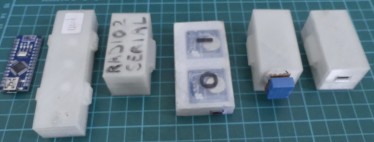
Each device repo is provided with
- Instructions in English and French (in Markdown)
- Schematics / video (with sources for fritzing/inkscape)
- A bill of materials with keyword-friendly term for searching its on ebay/etc.
- 3D printed case (with source for blender)
- Arduino code/libraries compatible with arduino/platformio.
Once you have downloaded a device repo and libreInterface, you don't need an internet connection to build your device.
All contents are licensed CC-By, so anyone can reuse it to bootstrap their own devices
Since everything is stored on a git server, code / documentation can be easily share and modify and can also be used offline.
I tried my best to use permissive licences and cheap easy-to-find components, so as many people as possible can make/fix/improve these devices.
Test it on your web browser
Go to madnerd.org/interface or download it here : https://github.com/madnerdorg/libreinterface
Demos are tested on Firefox/Chrome.
This won't work on Microsoft Edge as it disallows the use of cross zone connection.
How does the connector works:
Each element is independent from another :
- Electronic technician can make a device without worrying about security/connectivity
- Network admin doesn't need to know how the arduino/interface works and can focus on security.
- Web designers can use the device without understanding network/electronics.
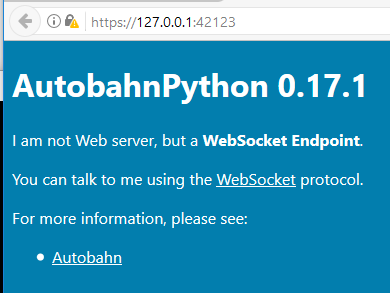
Websocket Server
I split the websocket server in two parts, usb_scanner and connector.
There are written in python and use autobahn/twisted/pyserial
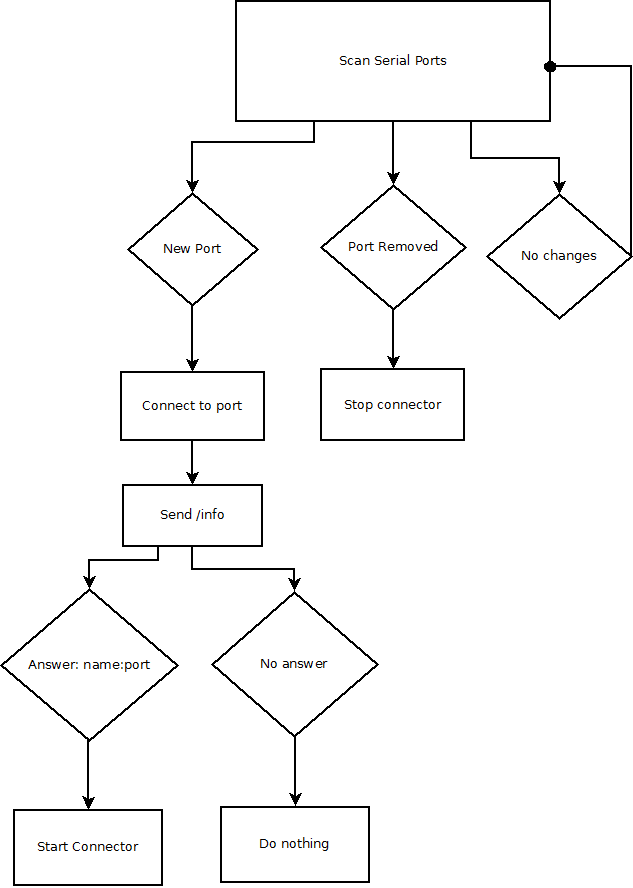
usb_scanner
- usb_scanner search for new serial devices
- send /info
- If an arduino send name:websocket_port (for example : test:42000), connect it.
Example: https://github.com/madnerdorg/test/blob/master/test/test.ino
Here is a sketch that connect your arduino to a websocket.
//name / websocket port
const String usb_name = "name:42123";
String readString; //Serial string buffer

void setup() {
  Serial.begin(115200);
}

void loop() {
  serialManager();
}

//Convert characters sent by serial to string
void serialManager() {
  //Get Serial as a string
  while (Serial.available()) {
    delay(3);
    if (Serial.available() > 0) {
      char c = Serial.read();
      readString += c;
    }
  }

  if (readString.length() > 0) {
    if (readString == "/info") {
      Serial.println(usb_name);
    }
  }

  //We clean the serial buffer
  readString = "";
}
connector
You can directly use connector , but you will need to specify serial port and lose automatic reconnection
For example, upload Examples/Basic/AnalogReadSerial and start connector with these arguments
(replace serial with the serial port)
connector.exe --serial COM10 --baudrate 9600 --port 42010Then open ws://127.0.0.1:42010 using http://www.websocket.org/echo.html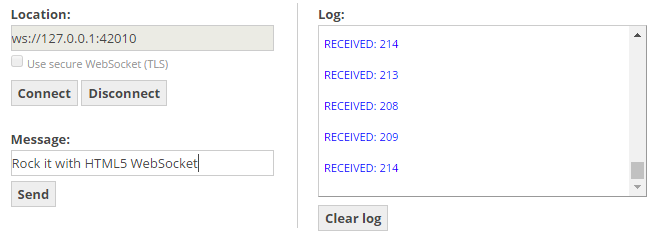
Connector is just a prototype and performance/security/test improvement are needed.
There is a basic implementation for SSL / Password / IP Ban (see arguments)
You will need to open the websocket with your browser to use a self-signed certificate and accept it first: (for example: https://localhost:42000).
Unencrypted websocket won't work with a HTTPS page.
As for now, I didn't make any example for ssl/password, but you can use the code editor (see instructions below) to try it!
Websocket Clients
You can use any language as long as it can communicate with websocket,
Using NodeJS you can prototype your client on a web browser and then reuse the code to make it autonomous. (Example provided in the instructions)
I also made an example in Python to use it with snowboy to turn on/off a led using your voice.
Low Latency
Websocket are fast and reliable, here is a video, where I plugged buzzers on 2 raspberry pi / my computer.
Buzzers are managed by WebMidi.
Using virtual midi port I connected 2 buzzers to LMMS music sequencer to play a score.
The last buzzer is directly connected to a USB midi keyboard.
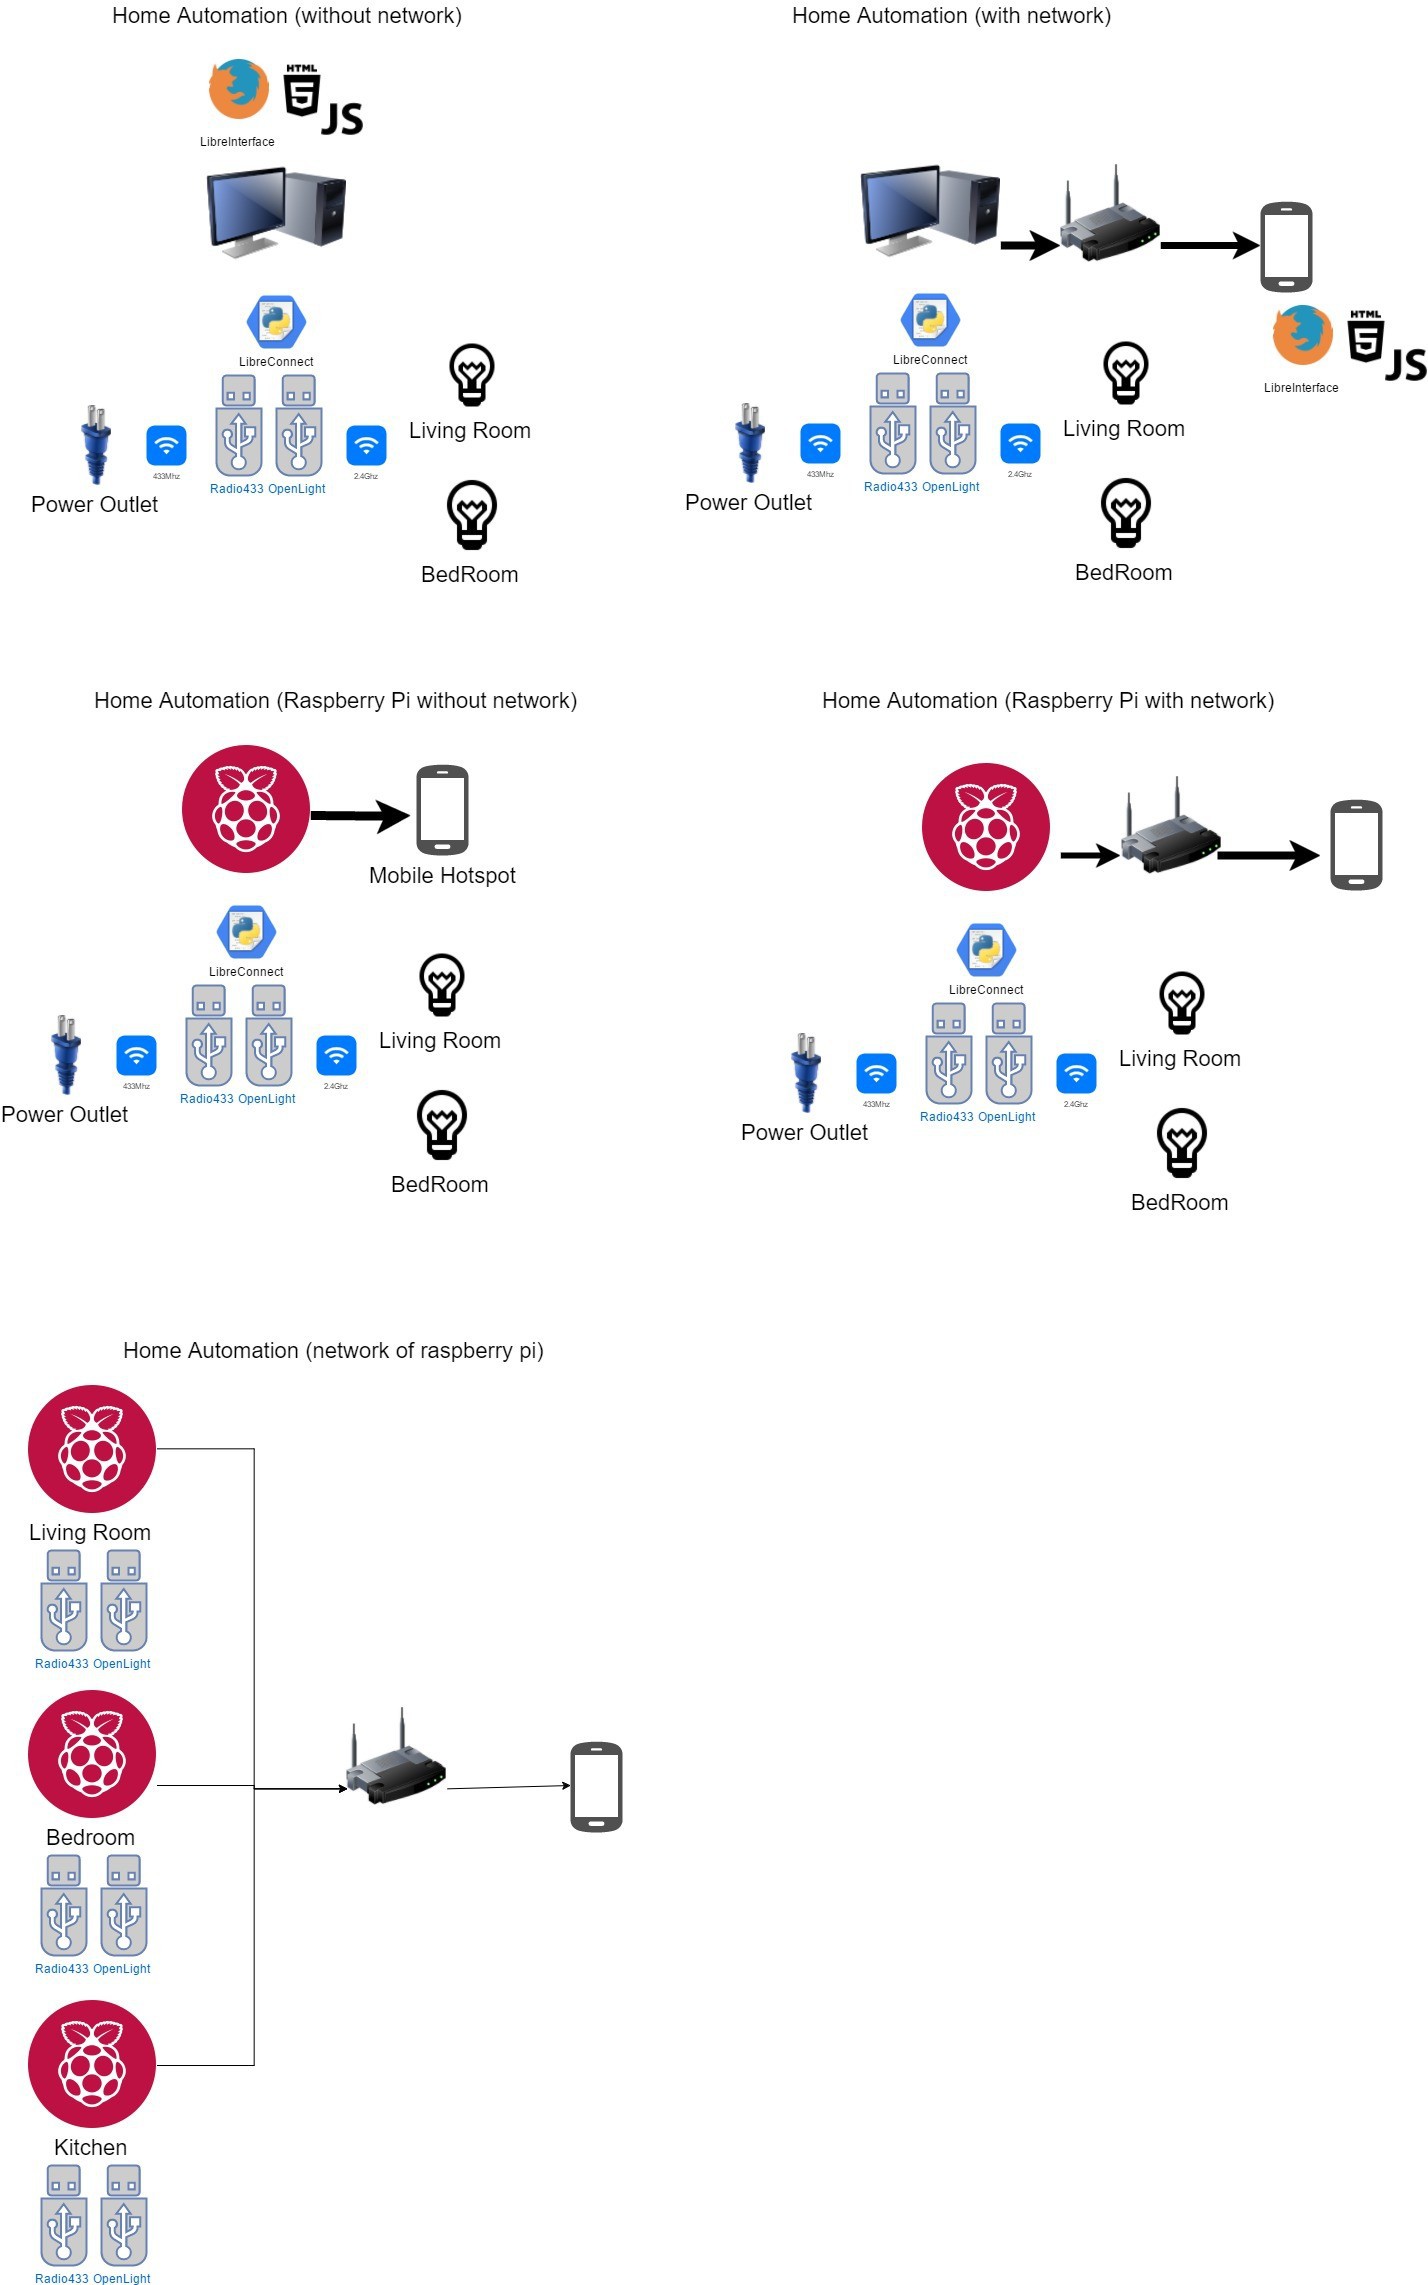
Network Topology
Since we manage websocket connections directly on the clients, it is possible to control devices plugged in different locations as easily as if it was plugged on the same computer.
In this video, I control power plug with a Raspberry Pi Zero W and I control lamps with my computer.