 ptrav
ptravInitially three boards were built: one for the thumbs and two for the fingers.
As the project is experimental, I decided to make separate components - with electrical connectors and M3 bolt holes. The pre-drilled "line" PCBs with 2.5 mm holes fit perfectly to the selected button size.
For each button, three PCB holes should be expanded, and one additional 1 mm hole drilled through the trace. The latter is tricky to do with the classic electric drill, so I've used a high-speed Dremel (wear eye protection!)
 The PCB drawings are as following:
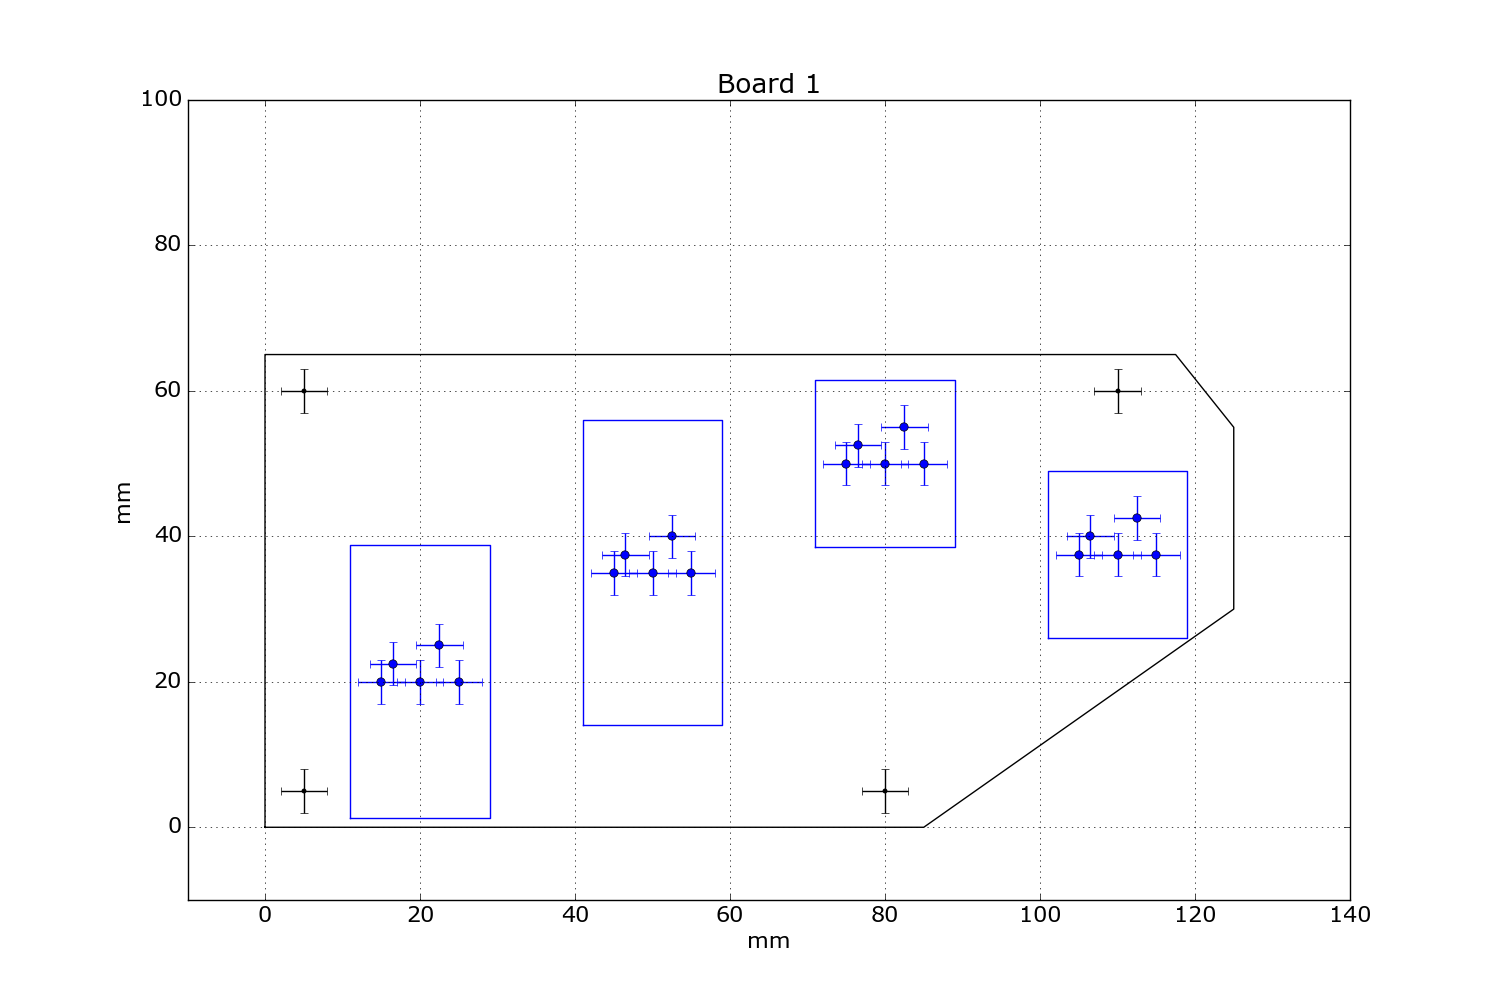 1. Left finger board
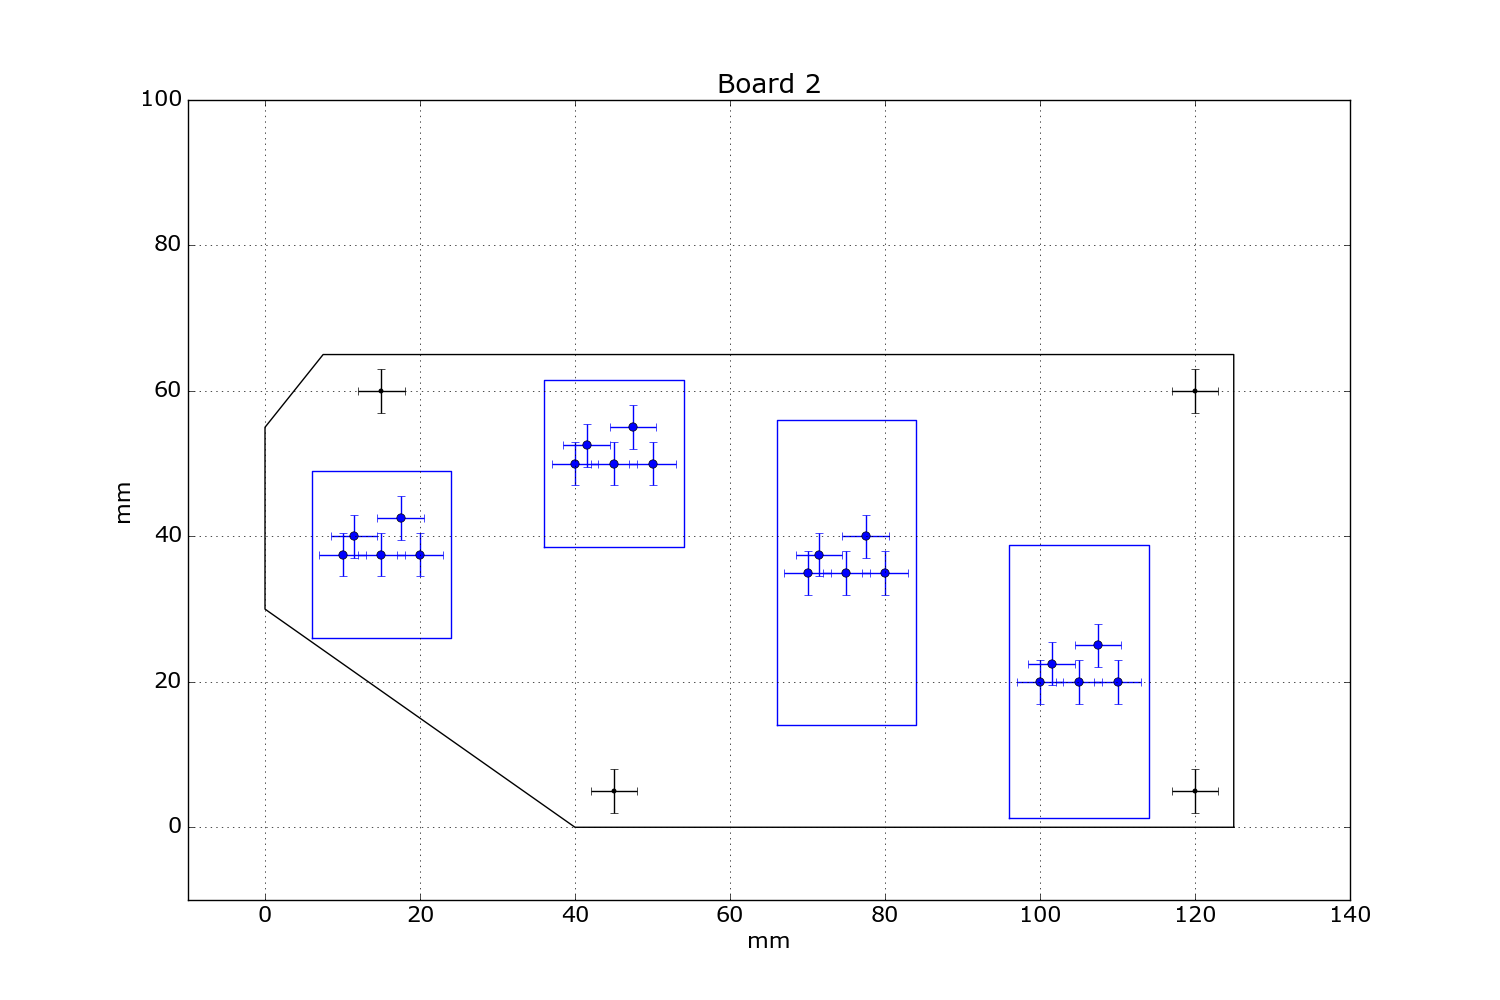
2. Right finger board (a mirror image of #1, but pins are different)
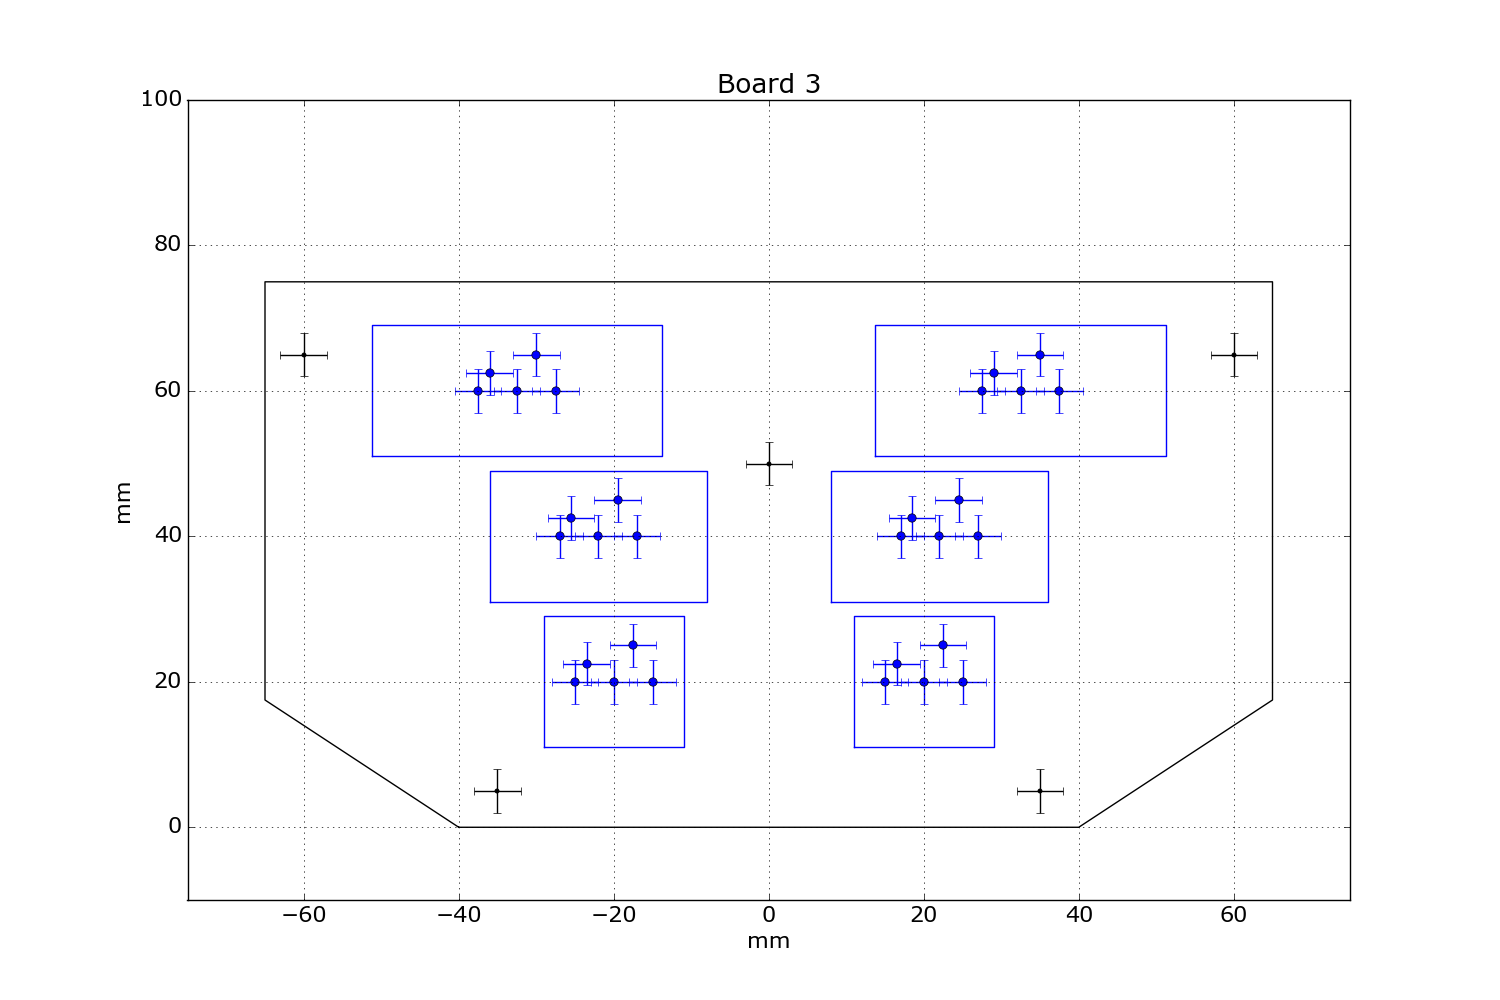
3. Thumb board
The schematics is as following (the standard approach for Arduino keyboards):

Note the diodes protecting from the false closures.
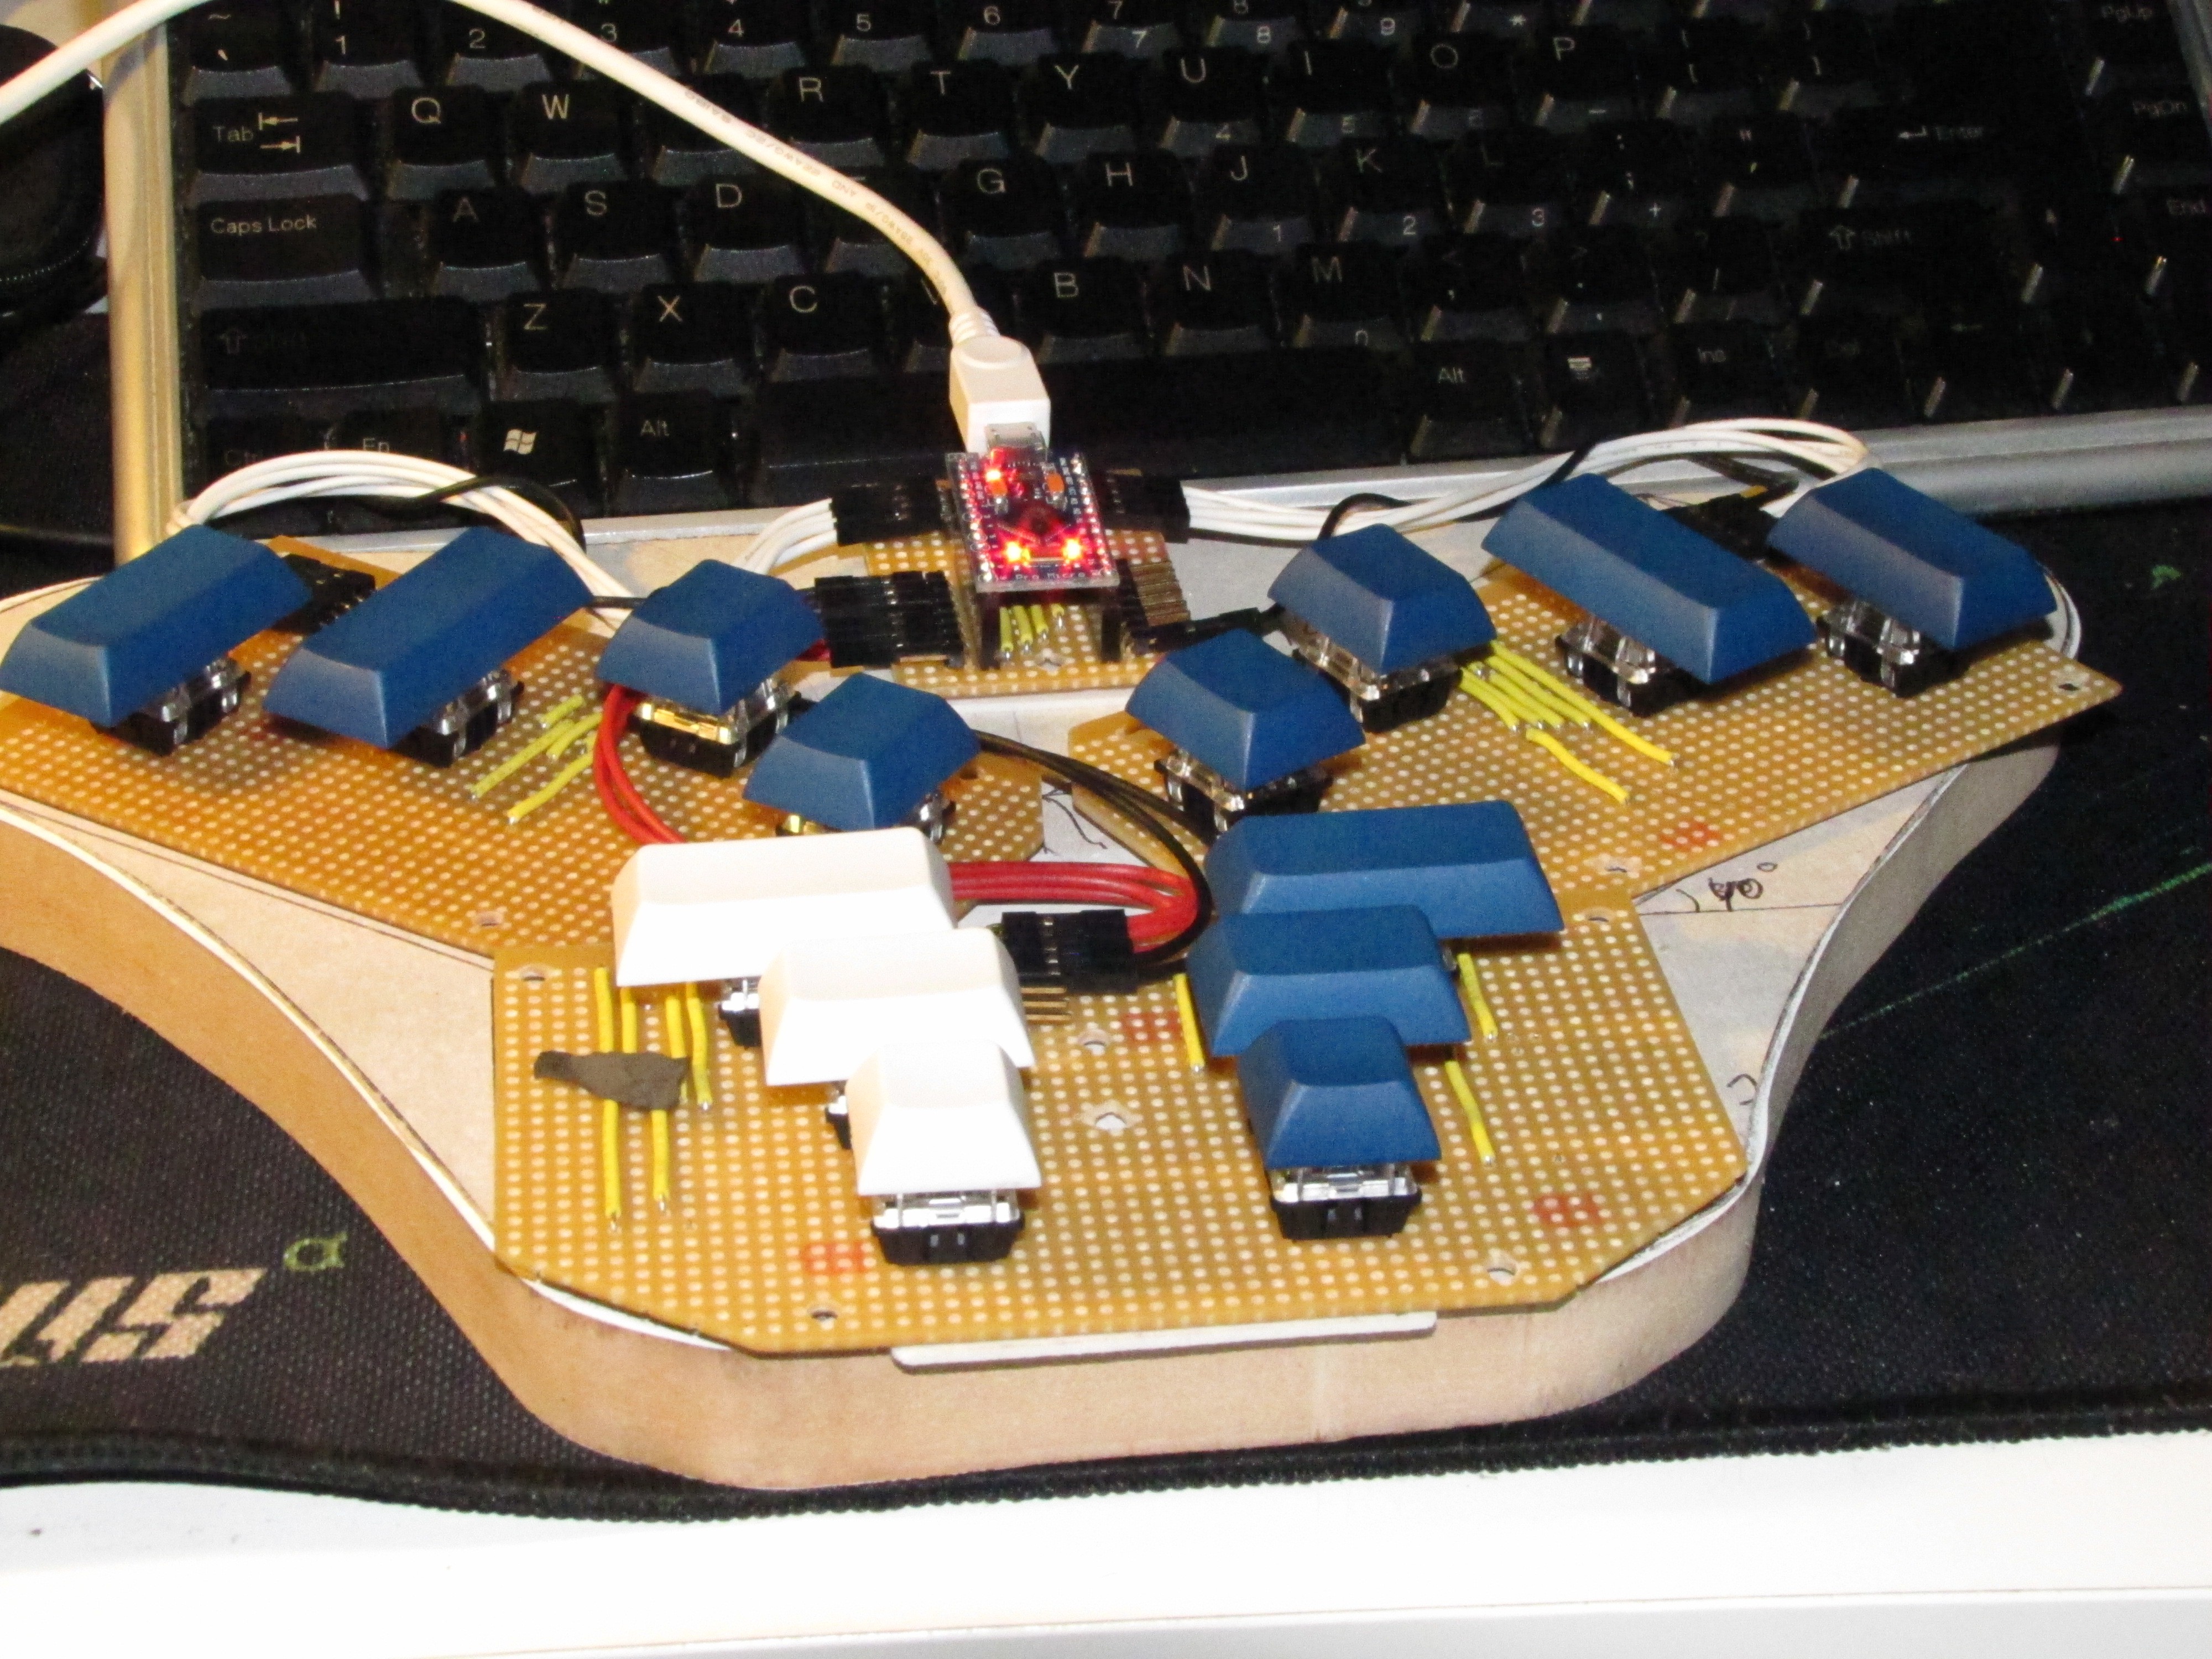
The operational mockup looked as below (the original mockup board was used for the base):
Discussions
Become a Hackaday.io Member
Create an account to leave a comment. Already have an account? Log In.