Sticky tape, double-sided tape, painter's tape, duct tape... there are a lot of rolls rolling around the average workshop so we need a storage solution. Like this tape rack.
Components:
- piece of scrap wood (length TBD)
- broken broomstick (any sort of more or less round stick will do)
- six screws
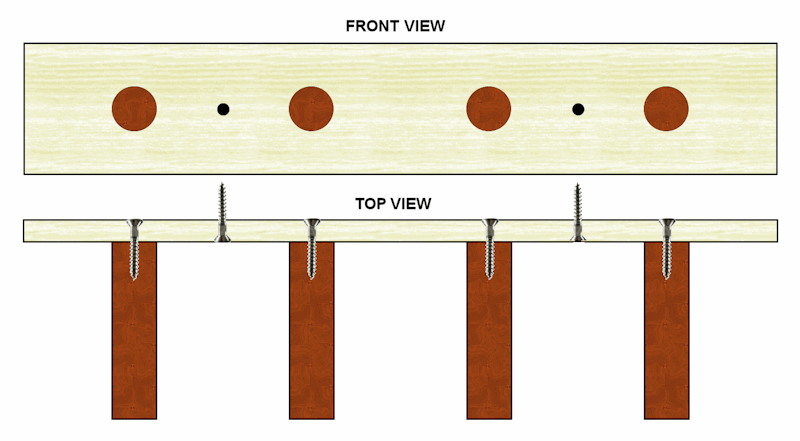
Cut four or more pieces of identical length from the broomstick. Pre-drill and countersink four evenly spaced holes in the back of the strip of wood. I spaced them approx. 10 centimeters apart to suit the size of the tape rolls.
Use an awl to puncture a guiding hole in the centre of each piece of broomstick (the pegs). Glue the peg to the front of the woodstrip and drive a screw in from behind. TIP: use a thin sharp (drywall) screw here. Remove any excess glue from the front. Repeat this procedure for all the pegs.
Now pre-drill and countersink two mounting holes in the front of the strip. Drive one screw into the rack and screw it loosely to the wall. Make sure the rack is level, drive in the second screw and tighten up the first one.
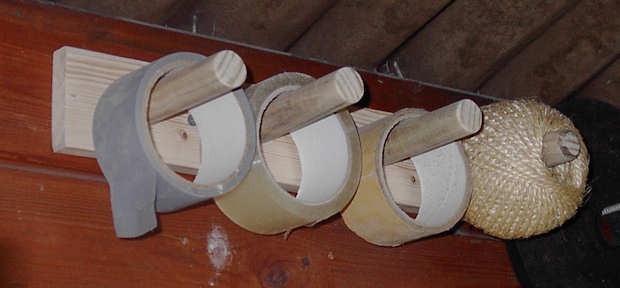
And this is the finished article:
Discussions
Become a Hackaday.io Member
Create an account to leave a comment. Already have an account? Log In.