Even though the printer is already operational, I will be posting project logs about how i have built the printer. Later i will be also posting full build instructions.
PRINTHEAD
Printheads give a 3DP printer its main functionality, so it is the most important part of said device. This way the printhead is the first thing to consider. I have been selecting between three options Xaar 128, HP45 with Ytec3D driver board (check out the forum), or HP c6602. I have chosen to use the Xaar 128 as it is very easy to use (users guide). But there is one problem with this printhead, it is quite expensive (about 250$). If you have the money i recommend trying it but be careful as powders that cure in presence of water and printheads don't go well together (this is why my Xaar 128 has half of its nozzles clogged). Because of this I will be replacing current printhead with HP45. This way it will be a lot easier for one to afford the construction of this printer. Also HP45 has better specs than Xaar 128.
CONTROLLERS
For now I have been using arduino mega 2560. I have almost finished replacing it for a stm32f103 maple mini (very cheap, but quite powerful). The controller is driven trough a serial communication with a personal computer running a python program. The idea is to use a beaglebone black, raspberry pi or any simmilar SBC as a replacement for a personal computer. This is why everything running a pc is written in python. The best controller would probably be something like the Snickerdoodle board as it is a Zynq device. This means it combines an ARM processor and FPGA. It would be very useful as ARM processor would do stuff like file management, ethernet connection, etc. while FPGA would physically control the printer.
ELECTRONICS
All of the electronics excluding the controller, are mostly stepper drivers, relay drivers and PSUs. I have used different methods of driving the stepper motors. One is using the ULN2803, one is using the L298 and the third one being Pololu A4988. I have also used a DC servo driven by arduino, L298 and 500ppr encoder. There is also one motor on the spreader, but this one is only for rotation of the said unit, so it is driven trough a relay. I will also have to add limit switches and other sensors.
MECHANICS
Printer could be divided in two parts. First one being two pistons to hold the powder, and second being gantry with a spreader and a printhead. Pistons are being moved by a two gears acting as nuts, that are being turned by a gear on 1,8° stepper. I used M6 threaded rods that give me exactly 1/200 mm move with a single step (shown on the picture below).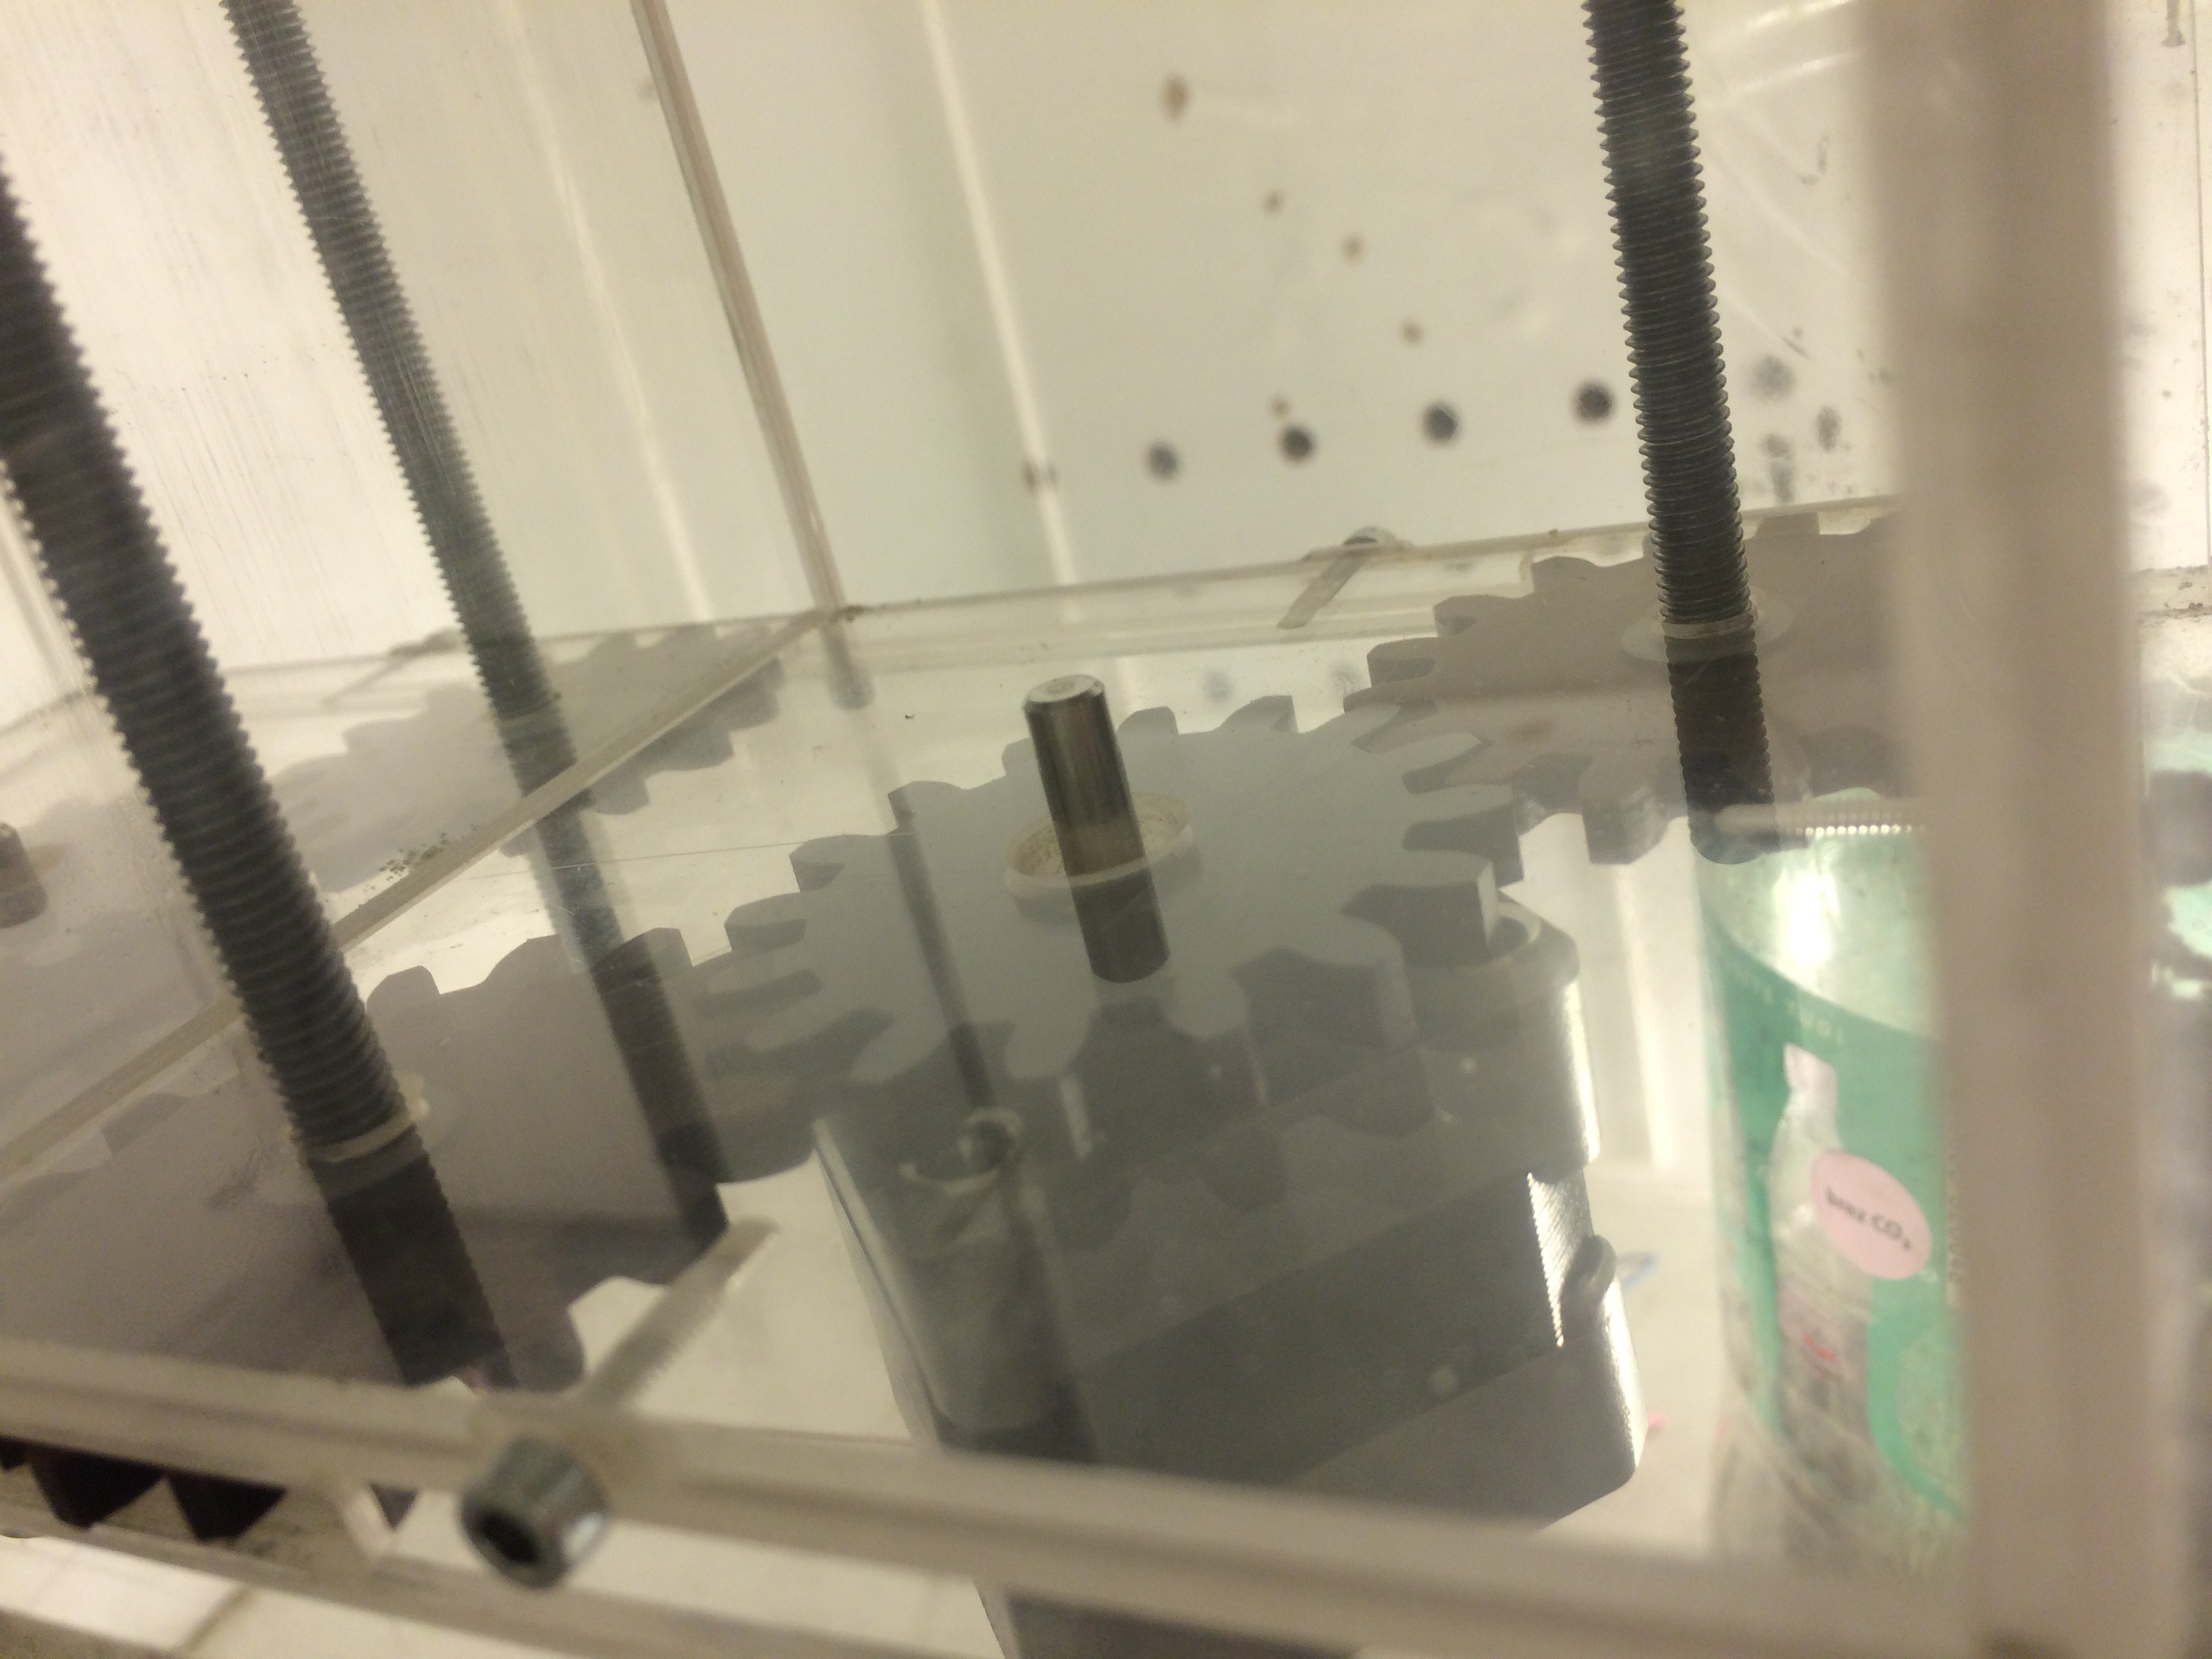 Gantry is constructed as it is shown on picture below.
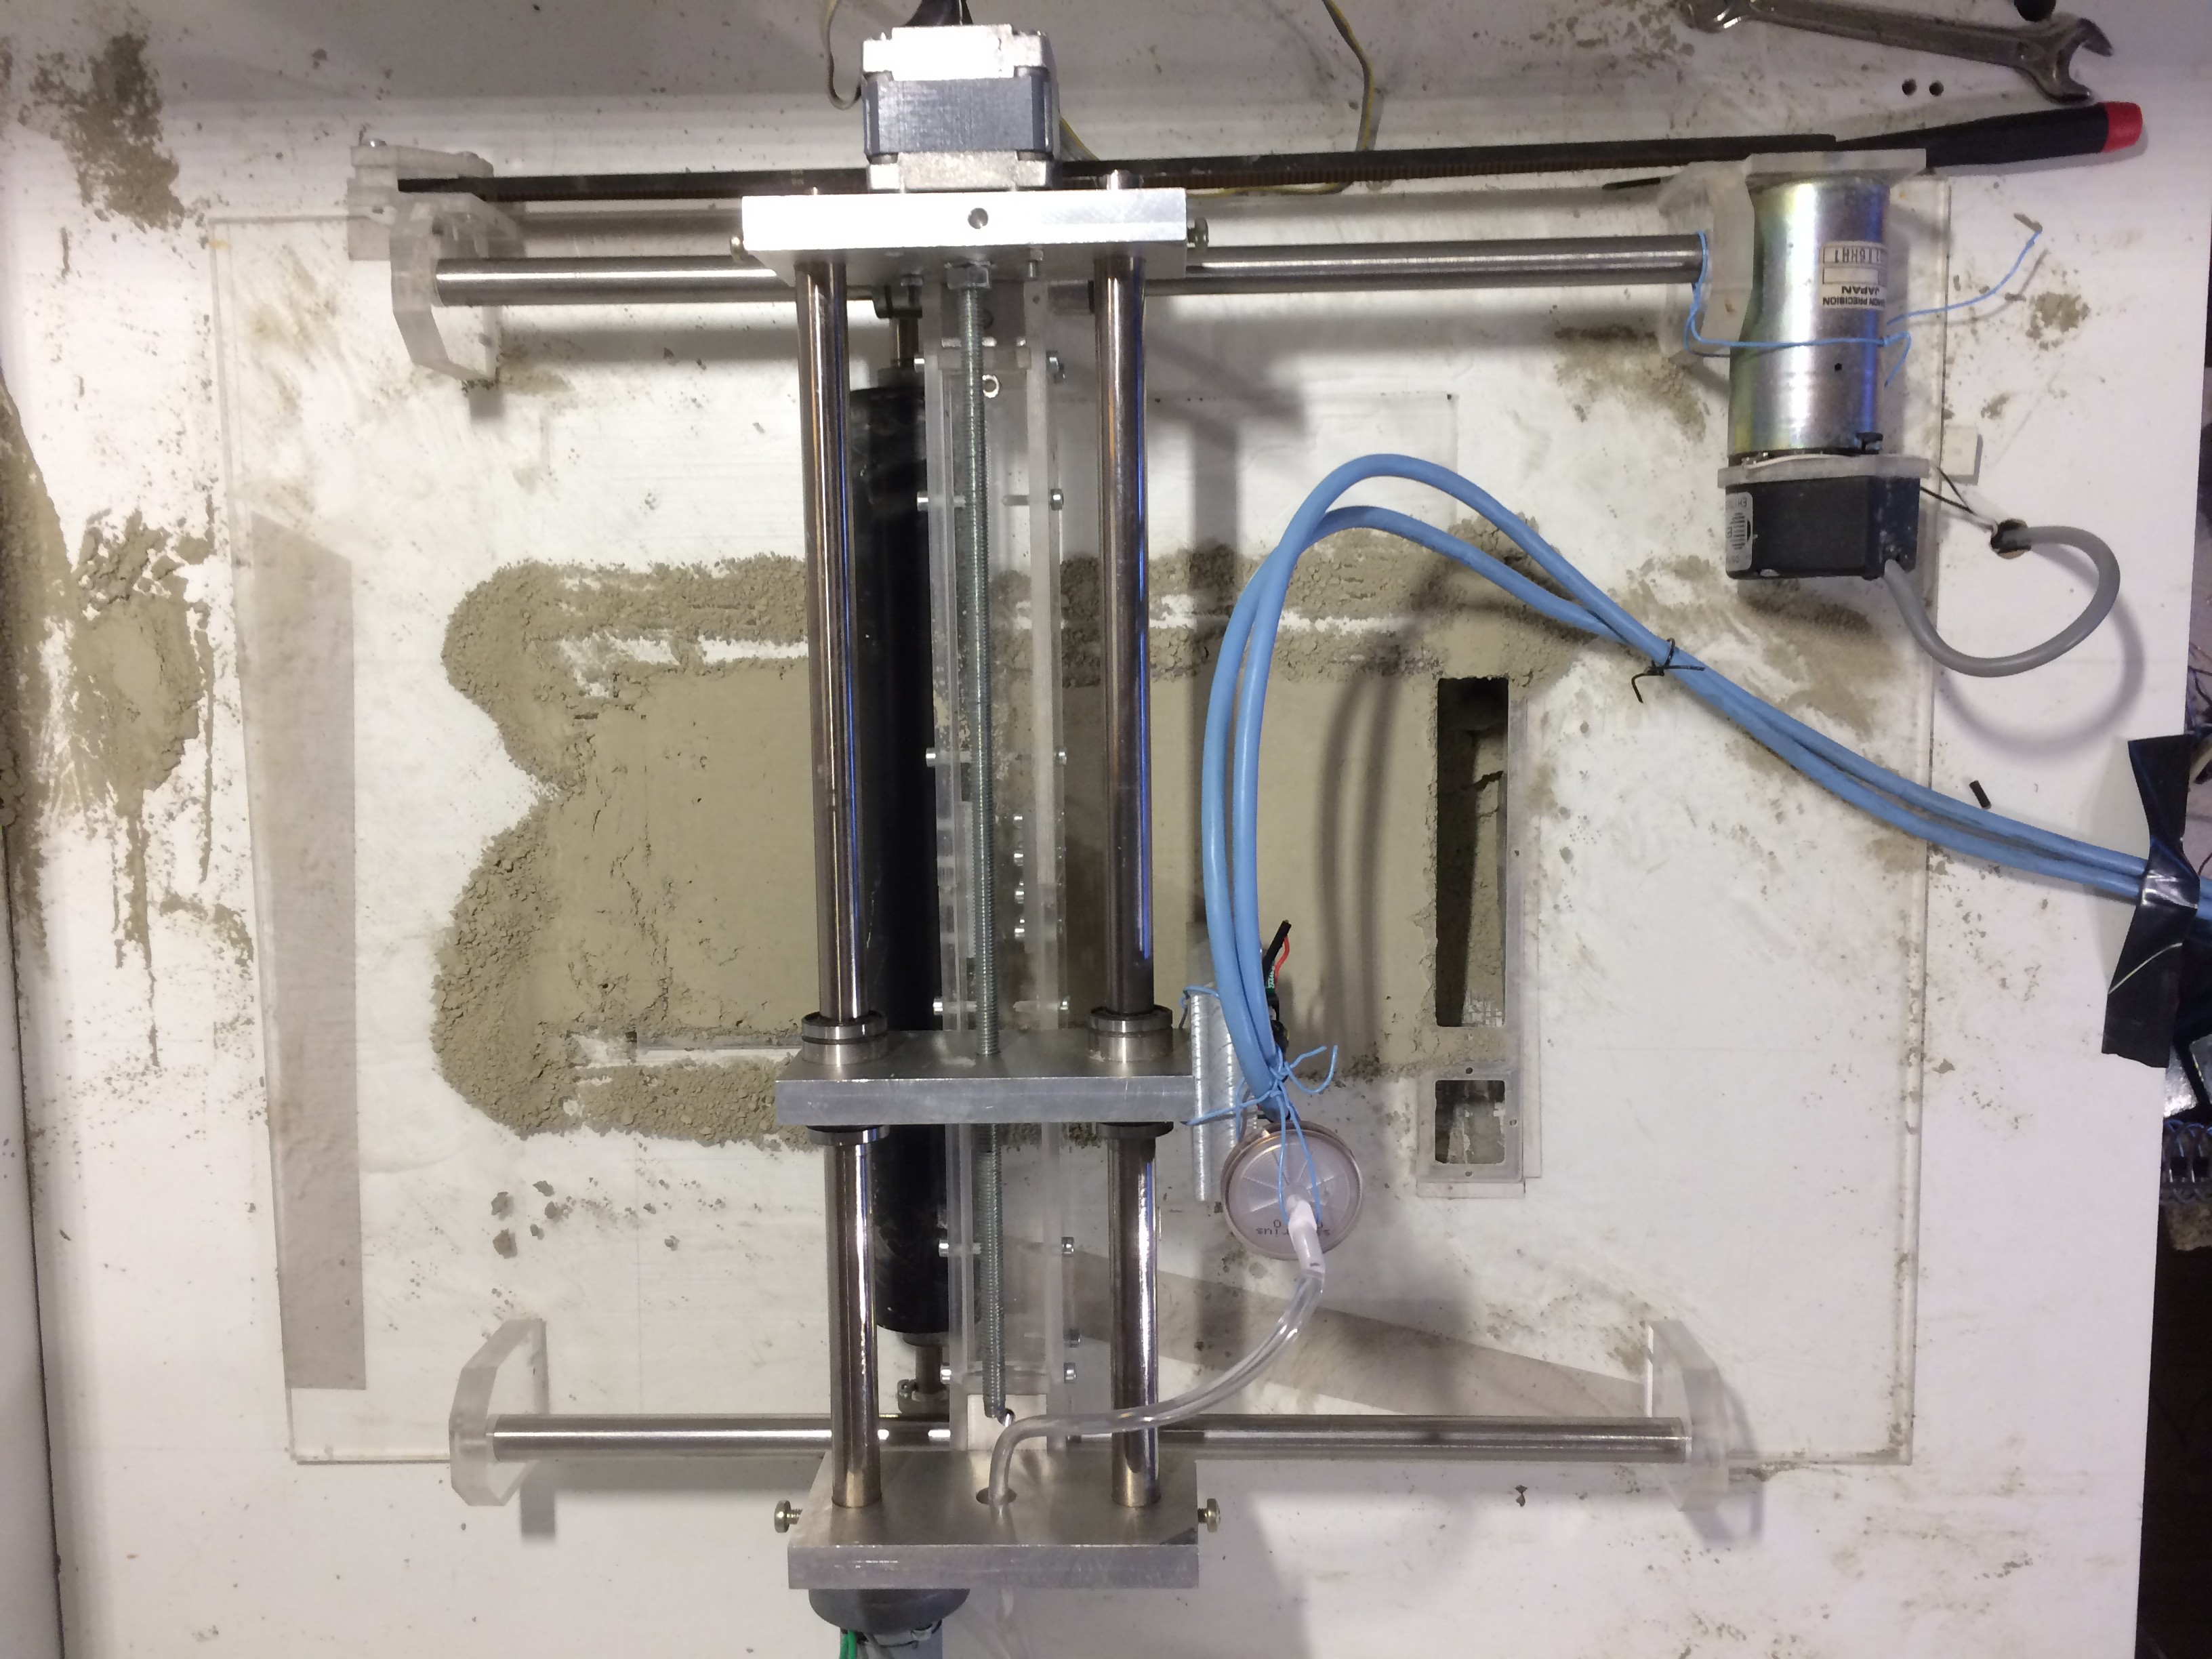 I am planning on replacing the Y axis stepper with a servo driving a slide with a timing belt.
TO CONCLUDE
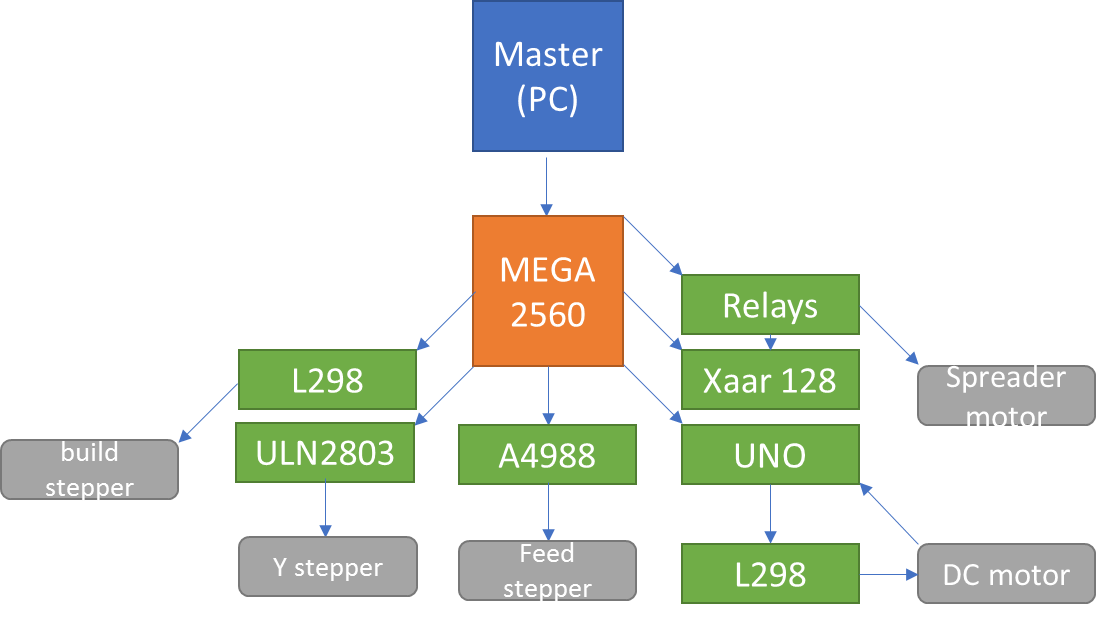
Current setup is working and uses a:
- arduino mega 2560 as a controller
- pc as a "master" to the printer
- 3 steppers and one servo
- Xaar 128 printhead
Scheme of a current system:
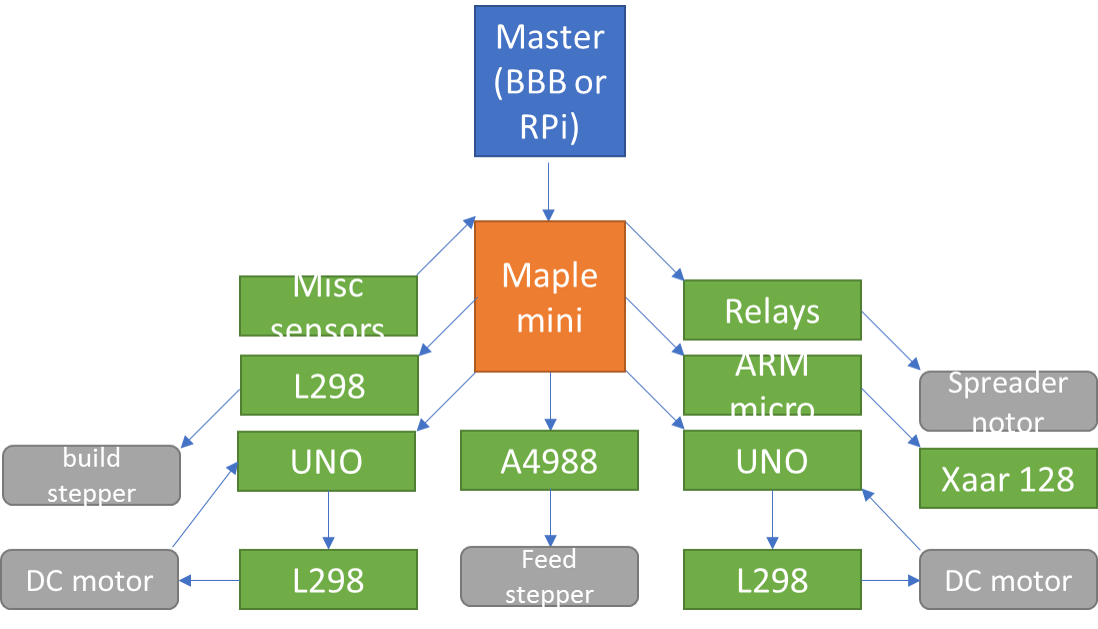
I will be trying to use a :
- ARM microcontroller or ideally FPGA (for now maple mini)
- Beaglebone black or raspberry pi as a "master" for a printer
- 2 steppers (for pistons) and 2 servos (for gantry)
- HP45 printhead controlled by a separate ARM controler
Scheme of a planned system:
Tomorrow I will be talking a bit on how to make a material. If you have any sort of questions don't hesitate just ask me.
Discussions
Become a Hackaday.io Member
Create an account to leave a comment. Already have an account? Log In.