 Matt Moses
I always thought it was kind of cool how astronomers said that a new telescope saw First Light the first time it was used. I was thinking about calling this log entry "first heat" but just to be safe I googled that term before using it, and well, you can look it up yourself if you're interested in what it means. Anyway! Light is a kind of heat and today is the first time we turned the heater on, so First Light it is!
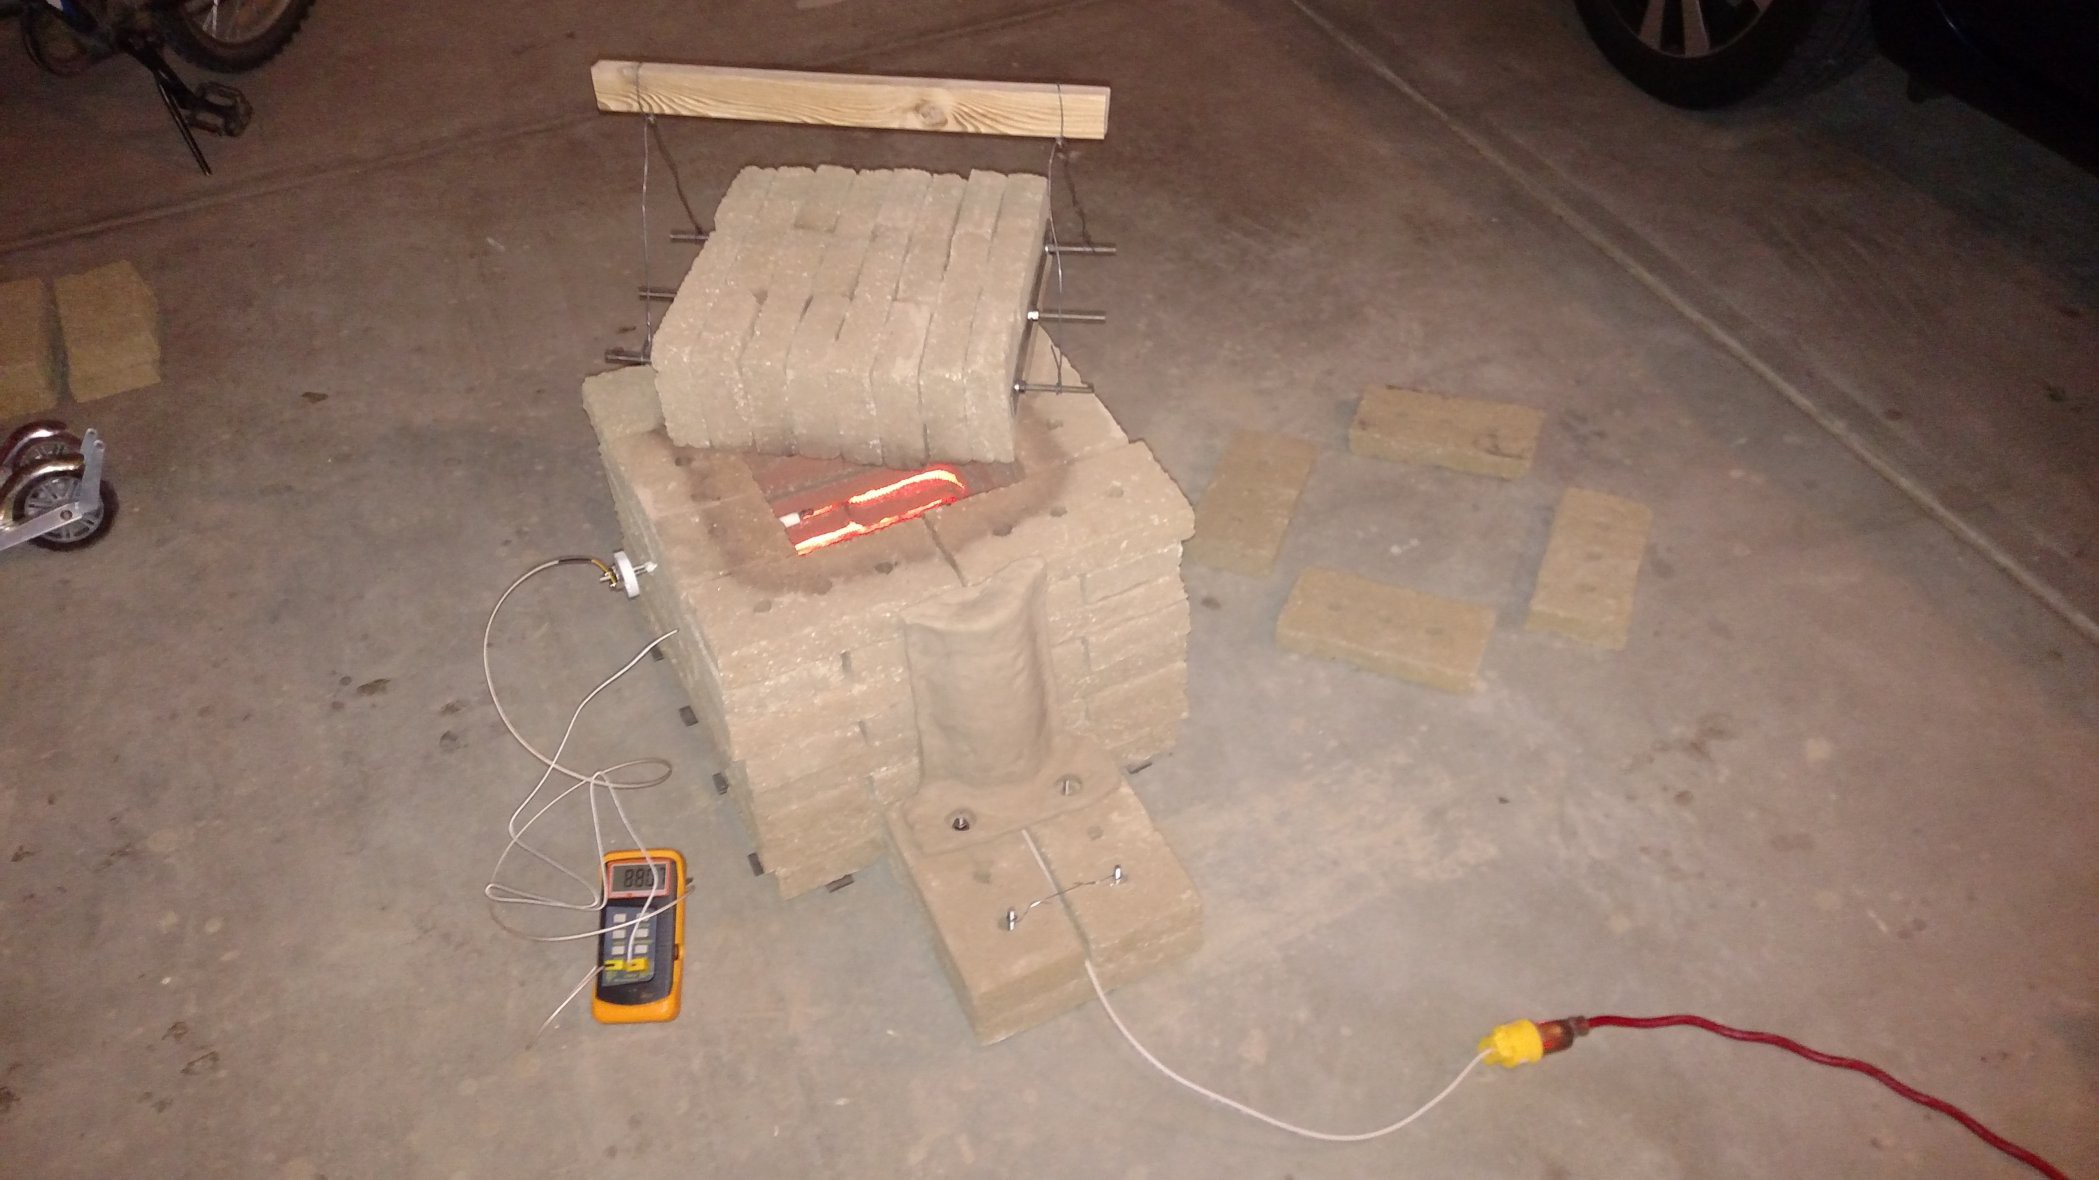
The good news is that the heater works and everything holds together and doesn't catch fire:
The bad news is that the kiln doesn't get as hot as it should:
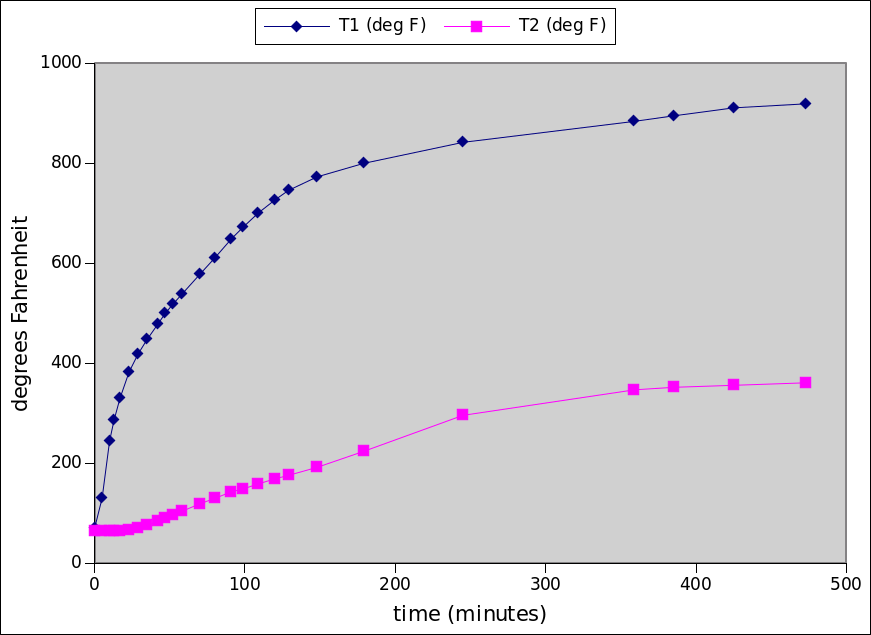
In the plot above, T1 is the inside temperature and T2 is the outside wall temperature.
The next steps to improve this are:
- Adjust the parameters in the python thermal model so it matches the experimental data
- Decide if adding a second heater set will meet requirements, and if yes then add 2nd heater
- Seal up cracks and gaps between bricks with clay
- Try again!
The rest of this log shows the steps taken for final assembly of the kiln before testing.
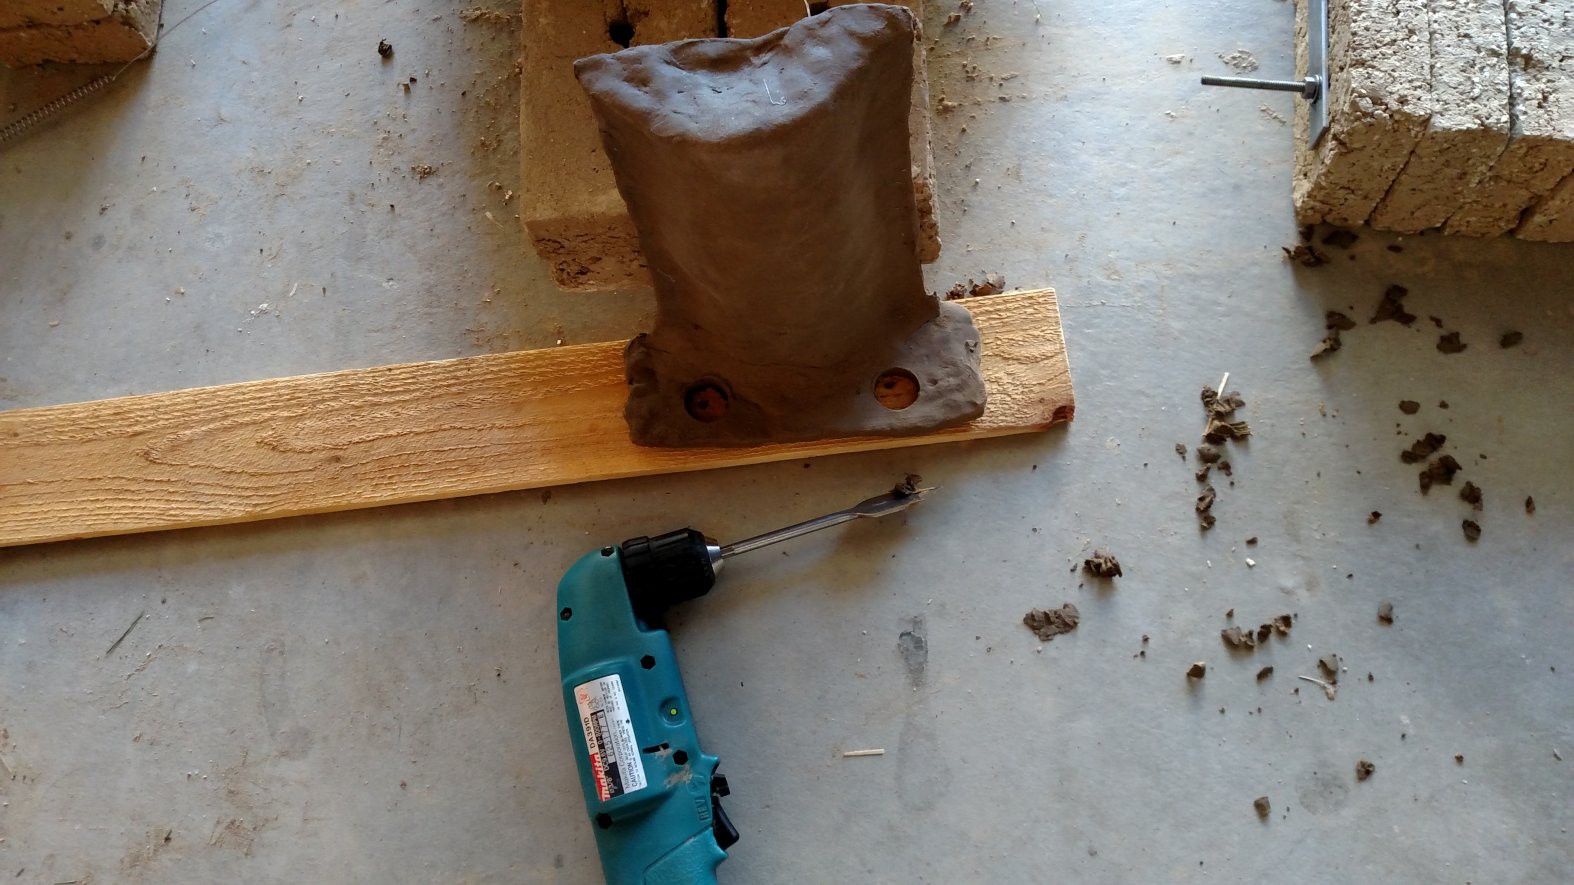
When it was time for assembly, the wiring cover had dried to leather hard. It worked pretty well to use a spade bit to cut clearance holes for the threaded rods in the base of the cover.
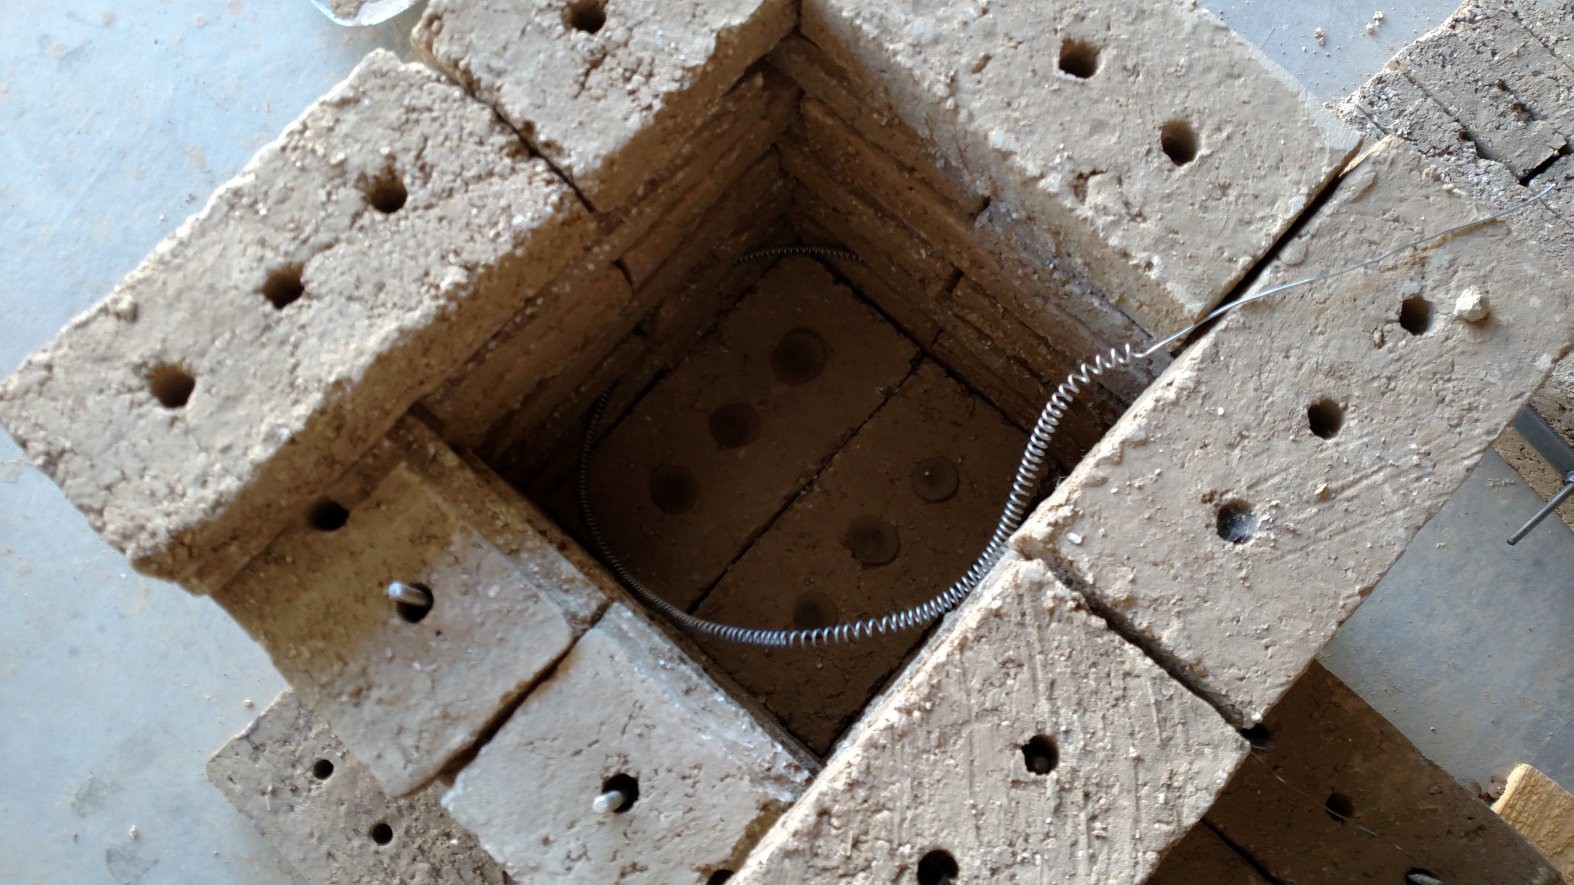
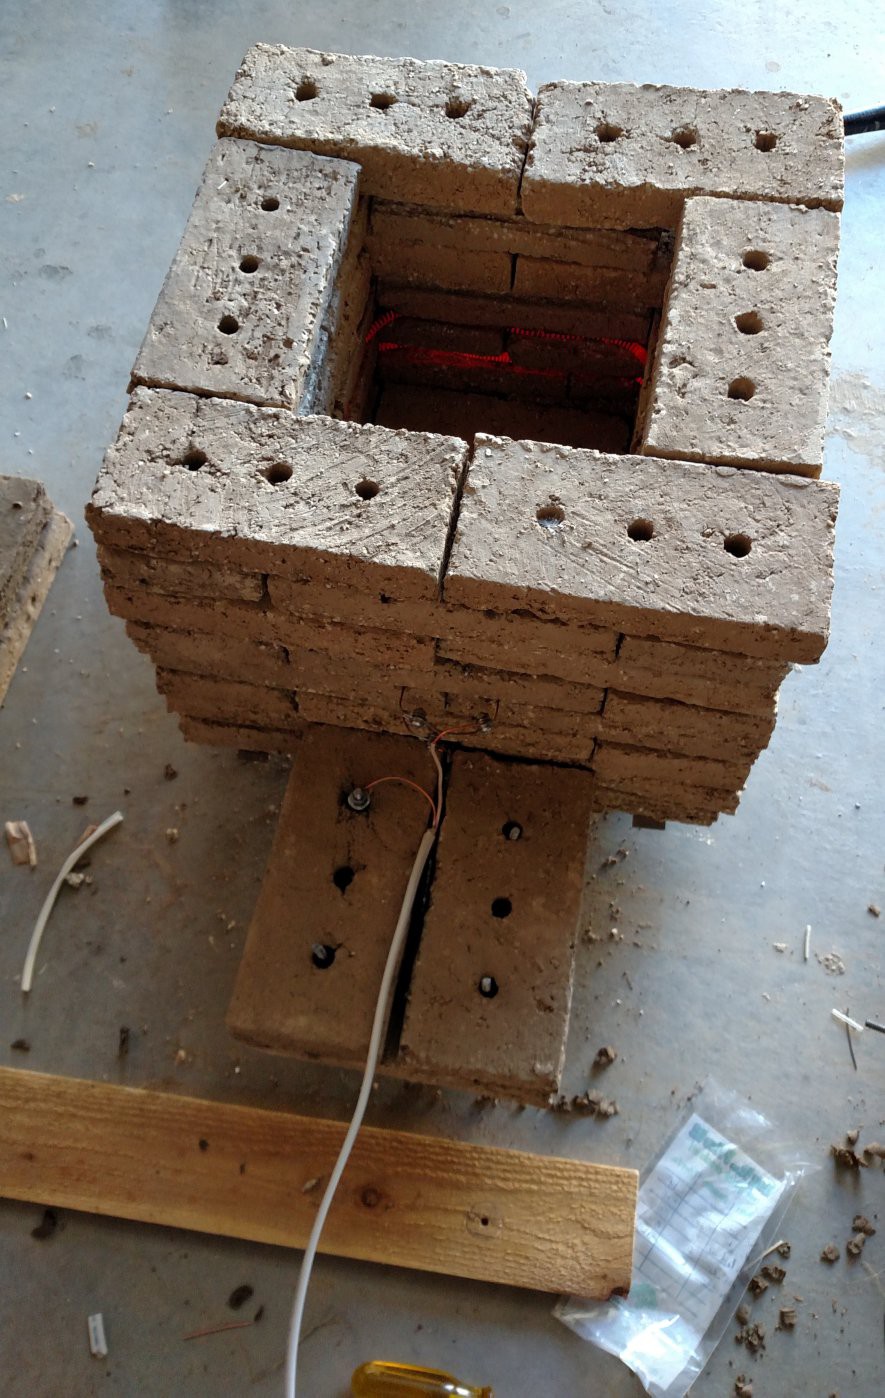
The heater coils fit fairly well into their slots in the bricks.
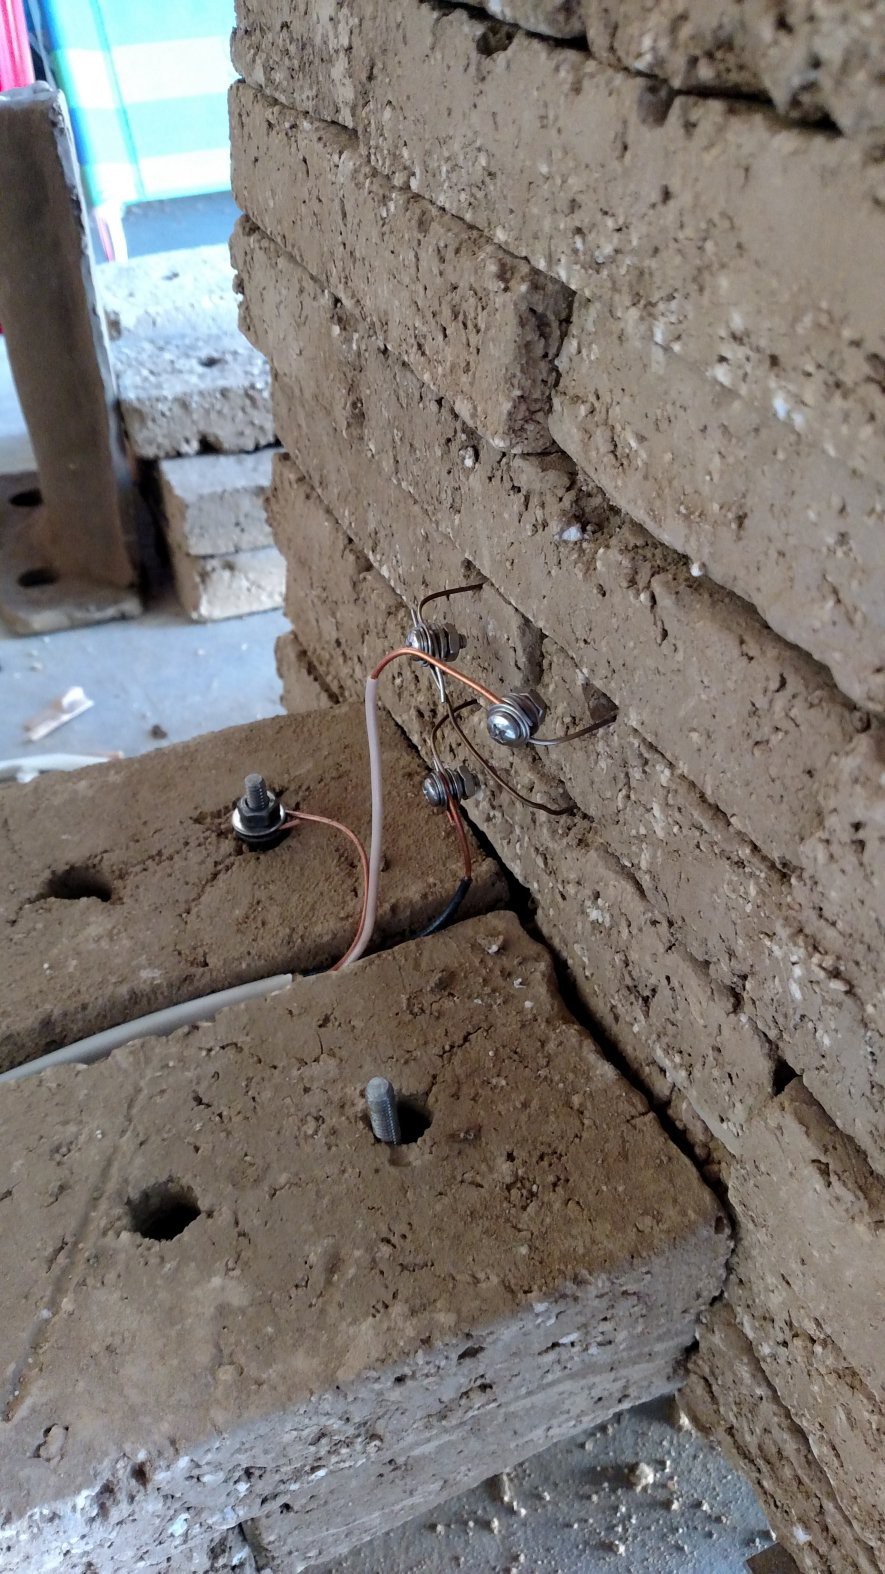
The nichrome heater wires were connected directly to standard solid household 12/3 wire (you can get this at hardware store like Home Depot, etc). The "conncector" is a stainless steel 8-32 screw and nut, with a stack of two #8 flat washers, two #10 flat washers, plus a #8 lock washer. After running for more than six hours, the plastic insulation on the copper wire was still intact, so apparently ambient cooling is OK to keep the copper side cold enough... for now.
First Light!
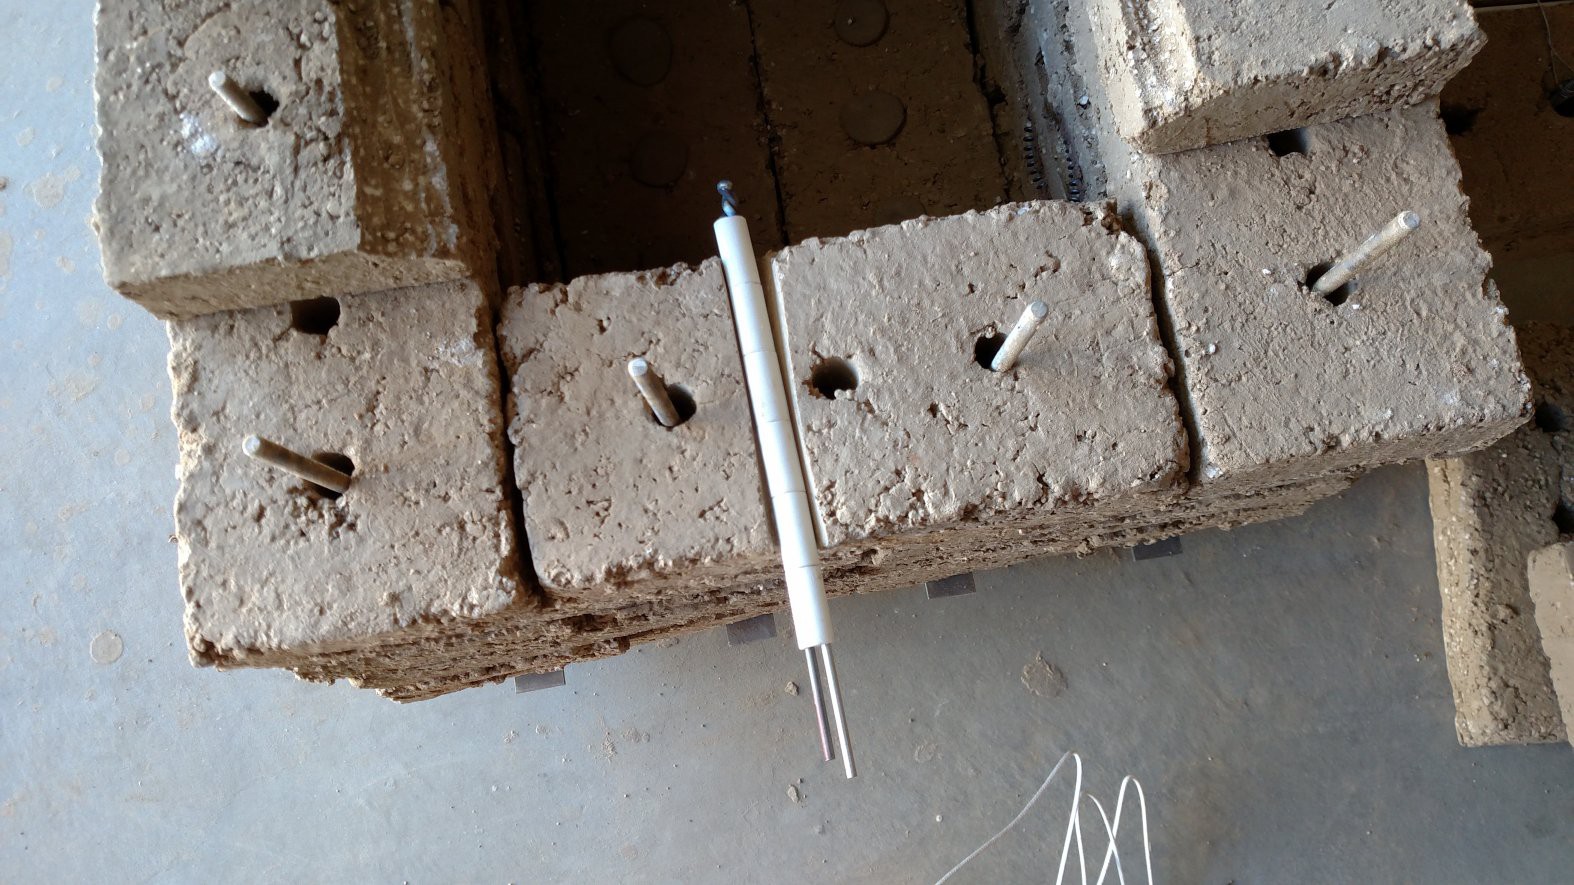
This is a K-type thermocouple from Amazon, made by MN Measurement Instruments. It is designed for kilns. It fits into a groove that was cut in the brick by using a spare chunk of 1/4-20 threaded rod as an improvised file.
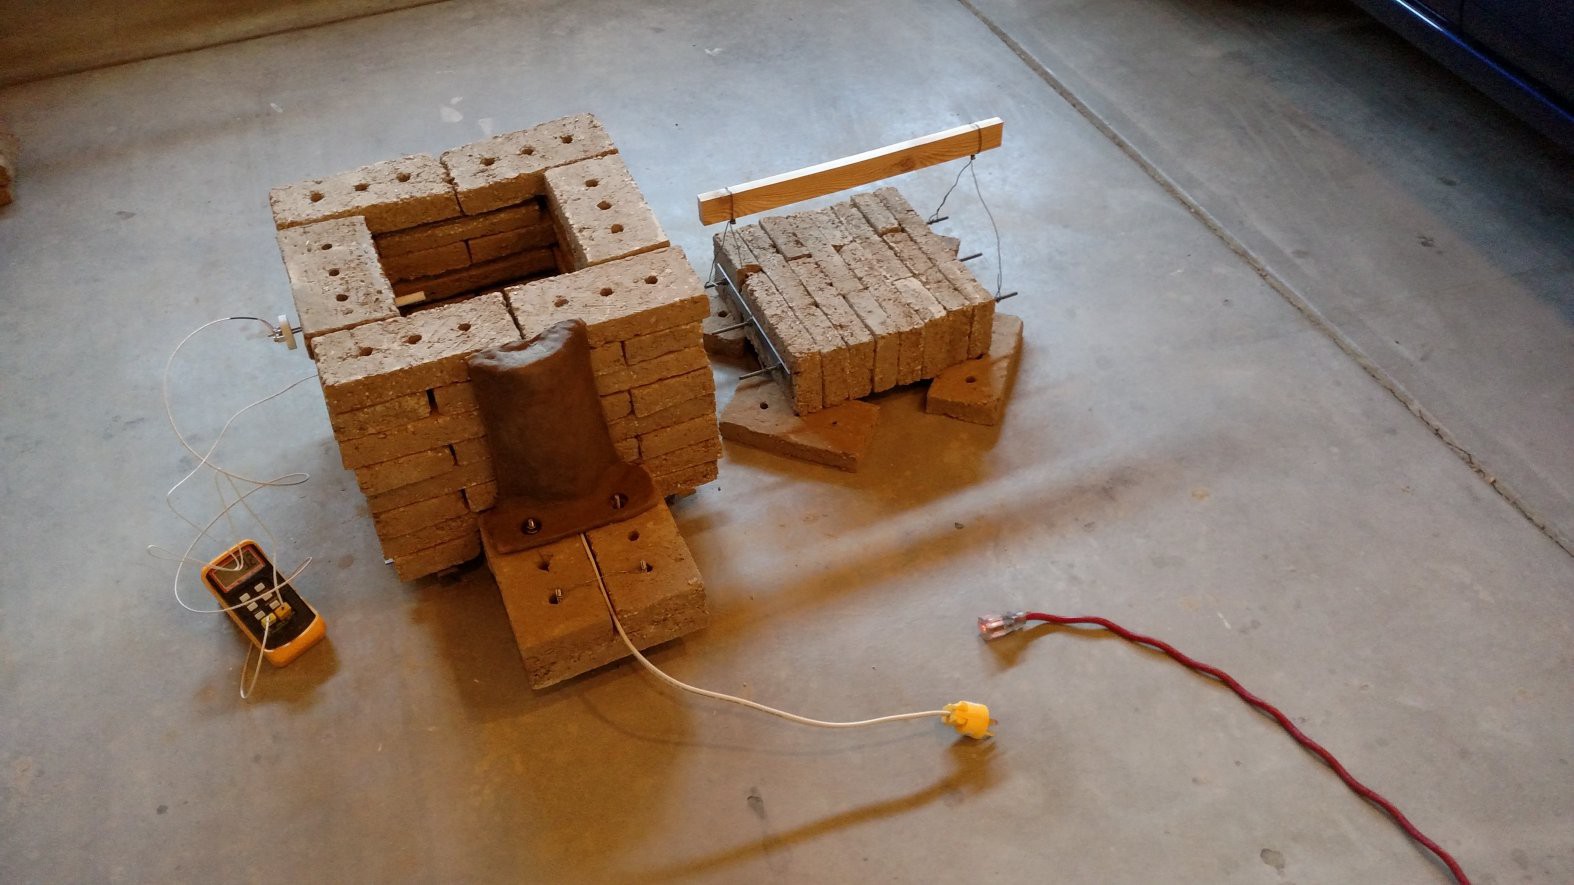
Here is the whole setup. The lid has a handle made of 1X2 and steel wire. A 2-channel thermocouple reader is connected to the internal thermocouple, and also to a small thermocouple which is embedded just inside the outside surface of the wall. The outer thermocouple was installed by drilling a small hole to a depth of about 3/8 inch (1 cm) and stuffing the thermocouple inside.
The thermocouple reader is a cheap off-brand meter that I got off Amazon in a hurry. There seem to be about half dozen different variants of these on Amazon, and a lot of the reviewers have terrible terrible things to say about them. In my experience it is indeed cheaply made, and one of the two probes it came with failed on arrival. However, it seems to be fairly accurate with the two good probes I have and it was fast and cheap! In the future I might get a thermocouple interface chip from Digikey and make a little Arduino interface for data logging.
Discussions
Become a Hackaday.io Member
Create an account to leave a comment. Already have an account? Log In.
Good to see that First Light :-) You will get it there soon :-)
Are you sure? yes | no
Thanks! I hope to be trying Second Light in the next few days...
Are you sure? yes | no