 Chris.deerleg
Simulation
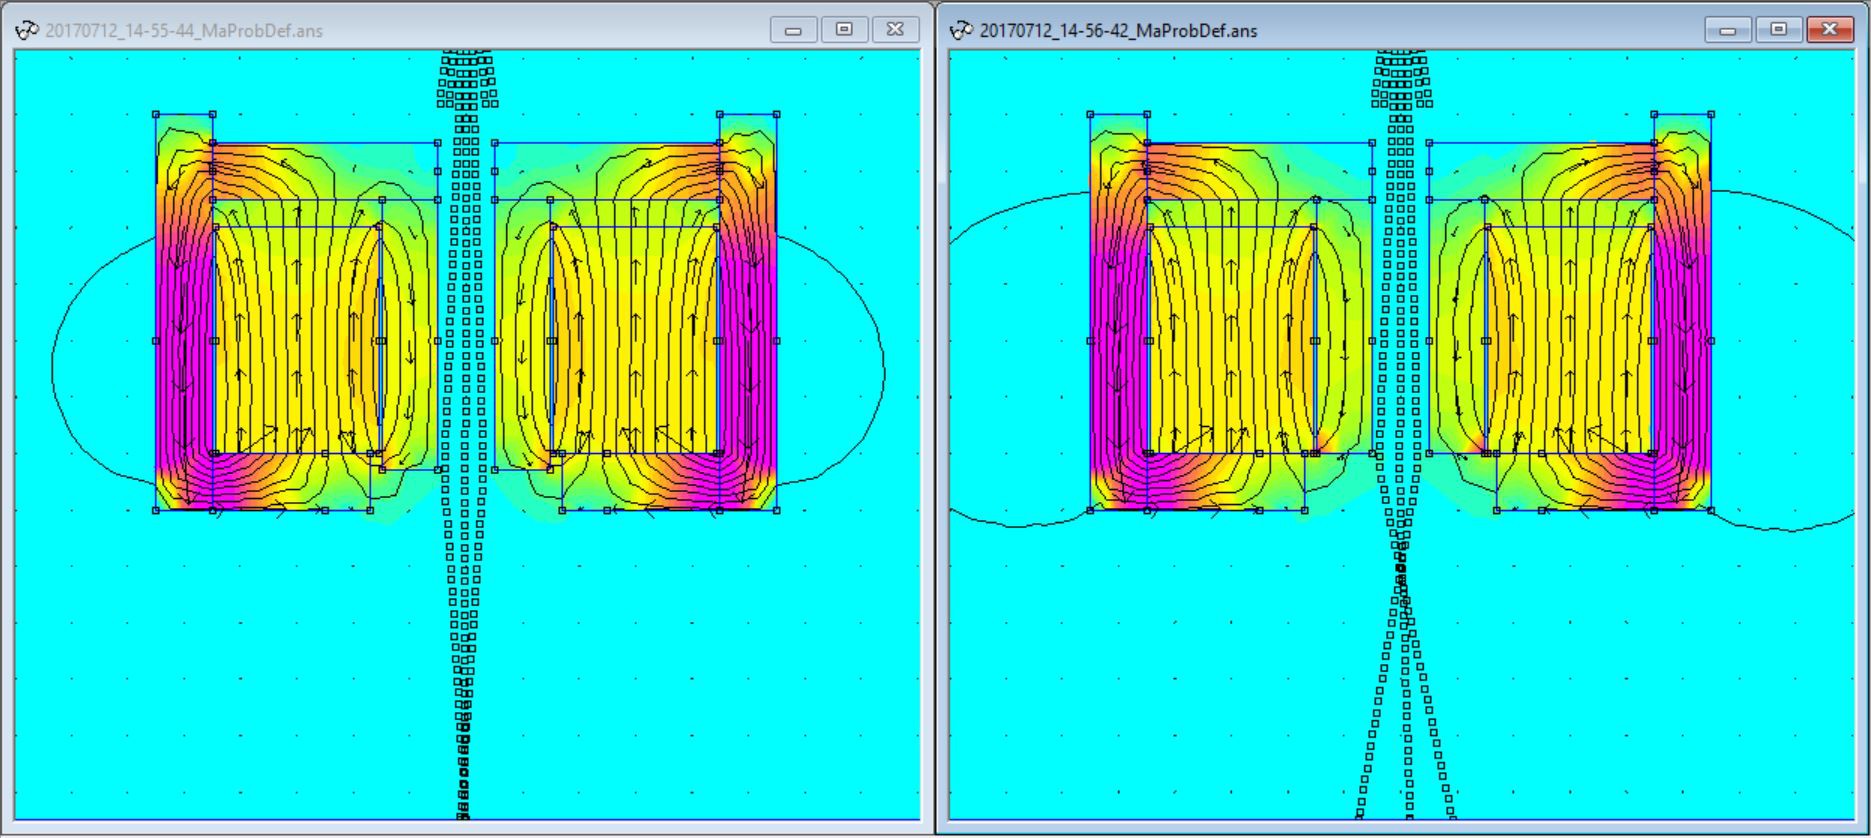
A Simulation is available since the Log 07/13/2017
Magnetic lens system Vacuum and electron beam
I have a magneticlens system since 11/06/2017
Housing
Since 12/28/2017 I have a improved housing
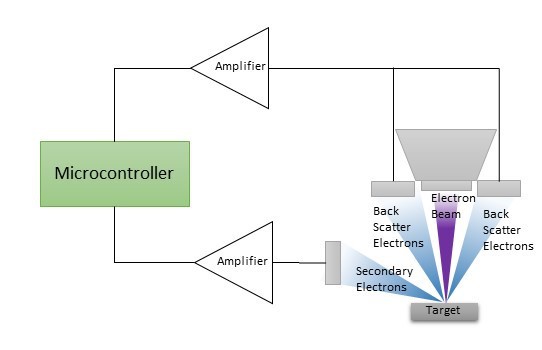
Electron detector
I have a schematic since 02/21/2018 for the detector amplifier
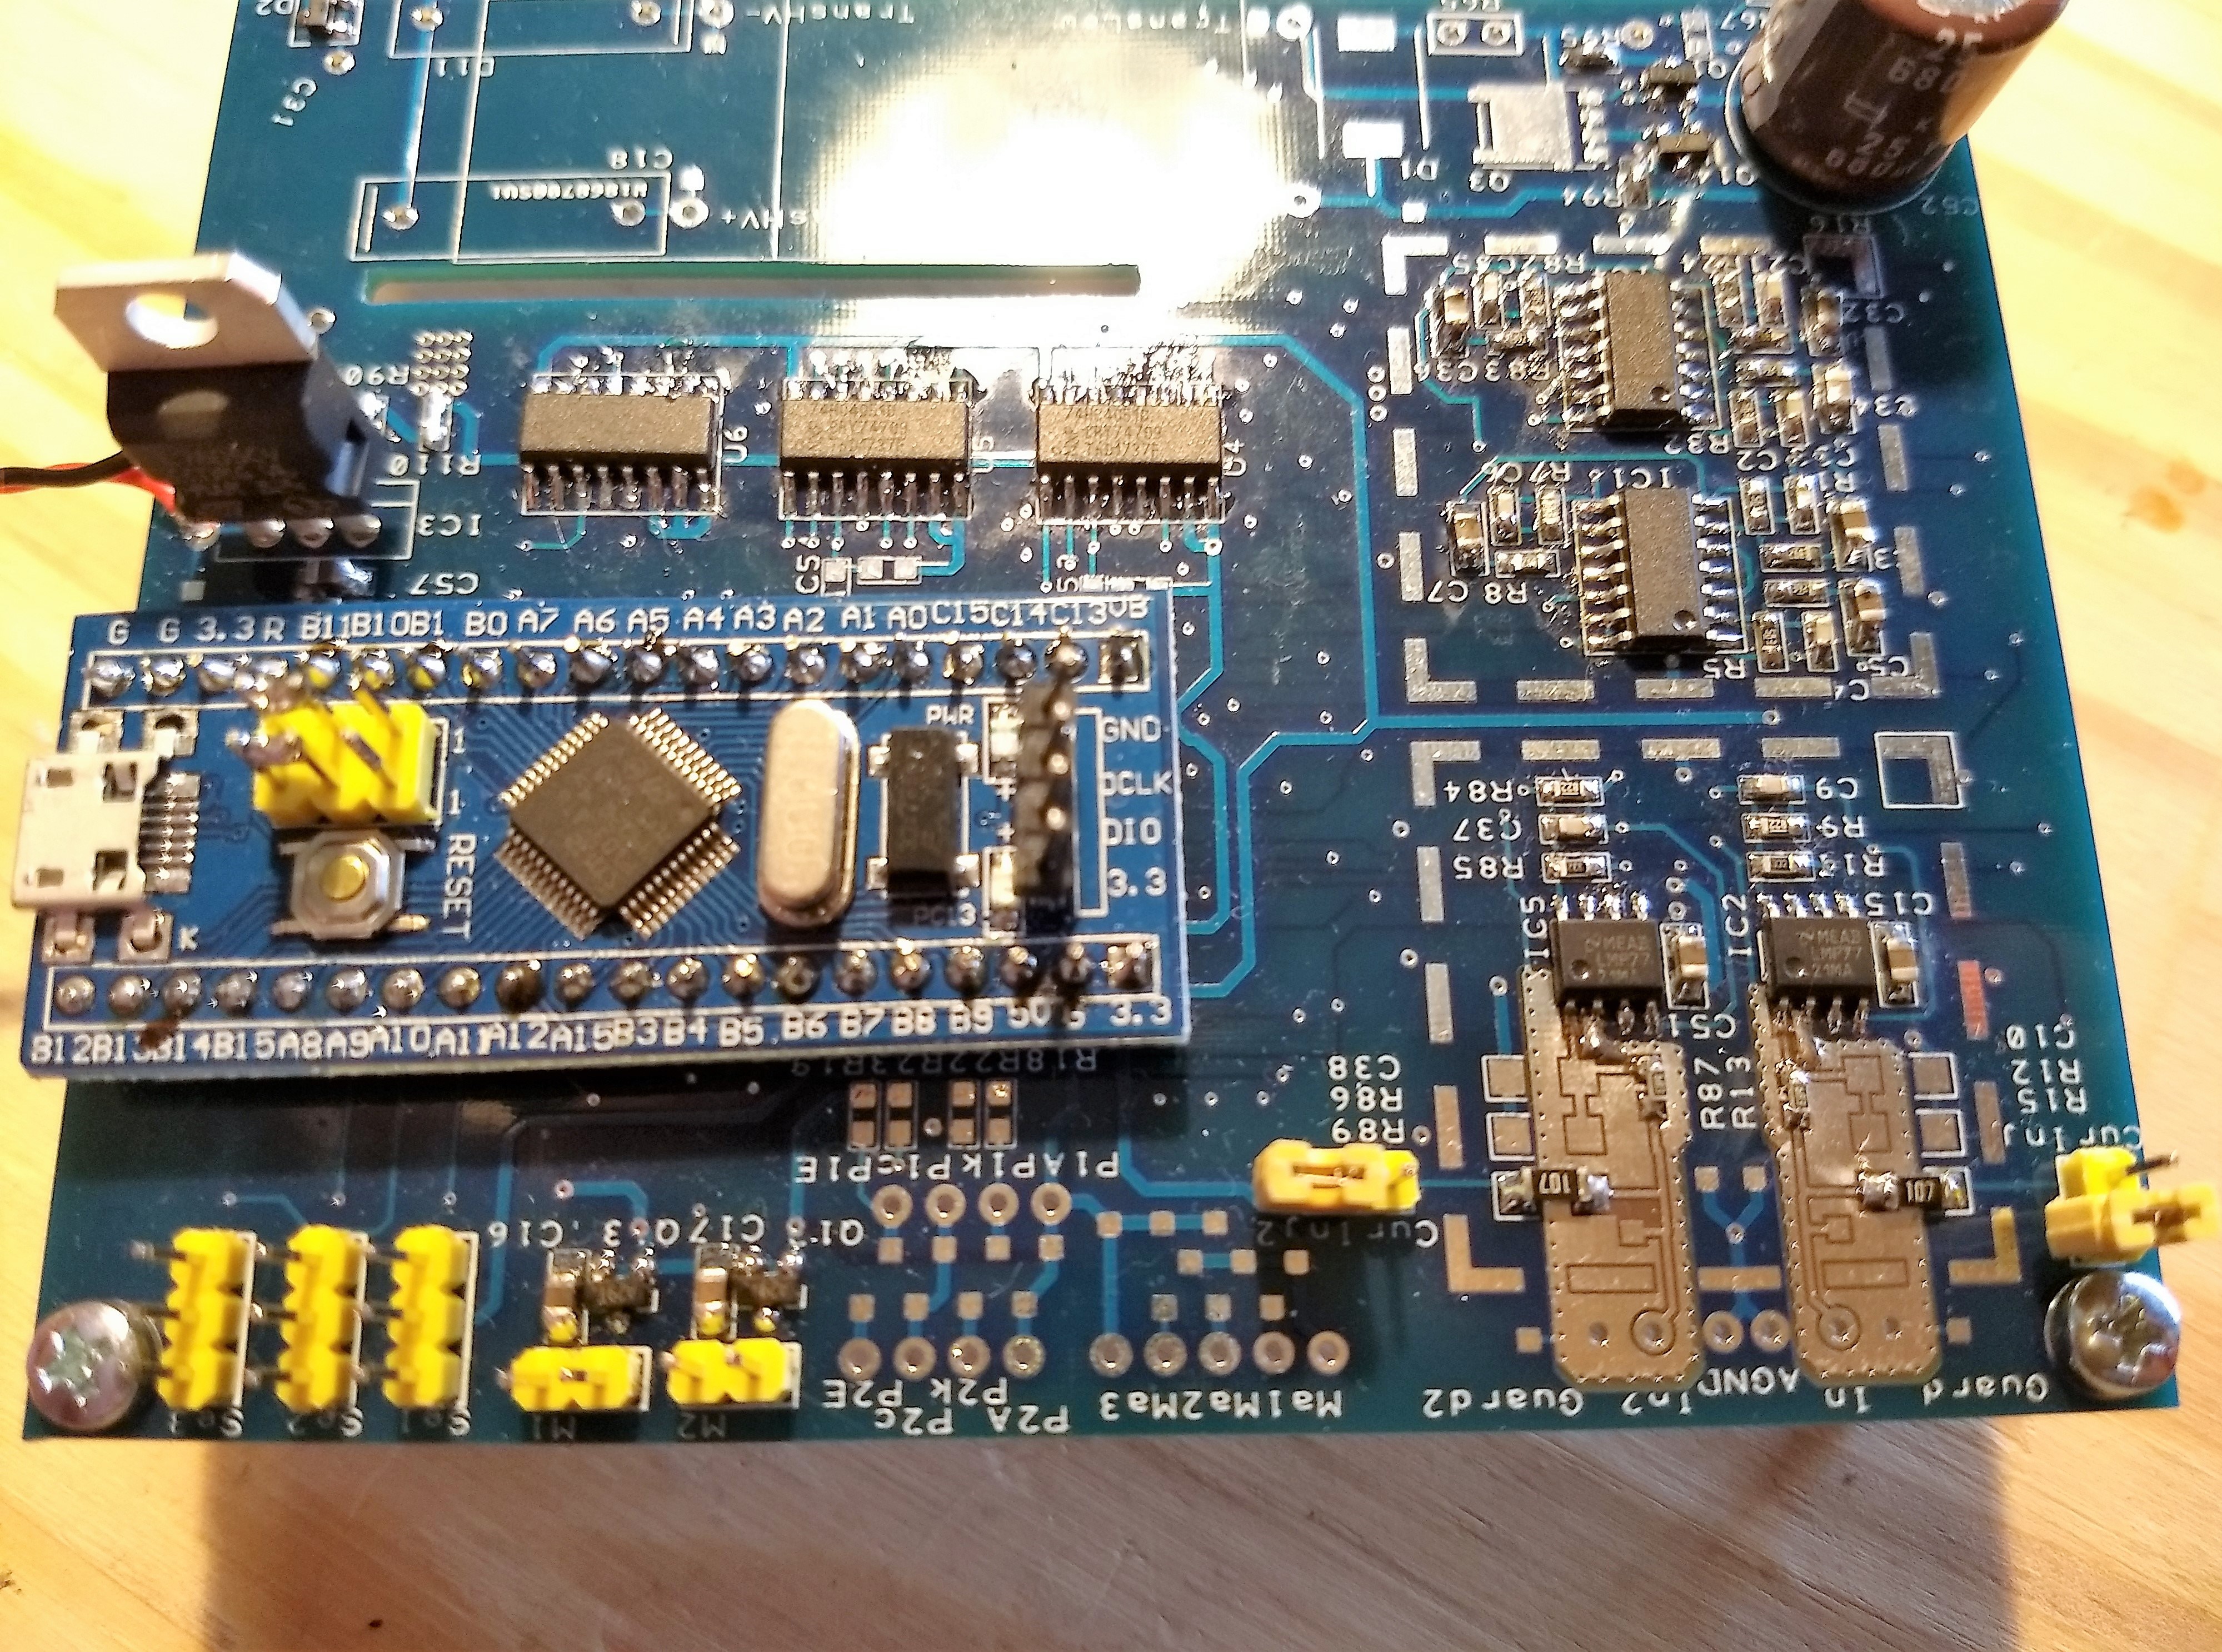
High voltage shield for Arduino
I populated the bare PCB about 03/16/2018
Overview and Introduction of SEM
1965 was the first Scanning Electron Microscope (SEM) commercially available (wiki). 2011 Ben build the first SEM at home. He used special equipment to build it. Now 2017 I start to build the first SEM with common available components. I would like to create imanges like these.


I will not explain the principles of a SEM because the explanation on the homepage of ammrf.org.au is great and I can't do it better.
Also the overview video from Ben is great for the introduction. But for a deep understanding I recommend the book Physical Principles of Electron Microscopy from author Ray F. Egerton.
My plan is to go ahead with the following steps:
- Simulation
- Vacuum and electron beam
- Housing
- Magnetic lens system
- Electron detector
- High voltage shield for Arduino
1. Build a simulation with a magnetic field simulation tool to determine the dimensions
I want use the tool FEMM 4.2. This tool is free and it is possible to create code based on Lua 4.0.
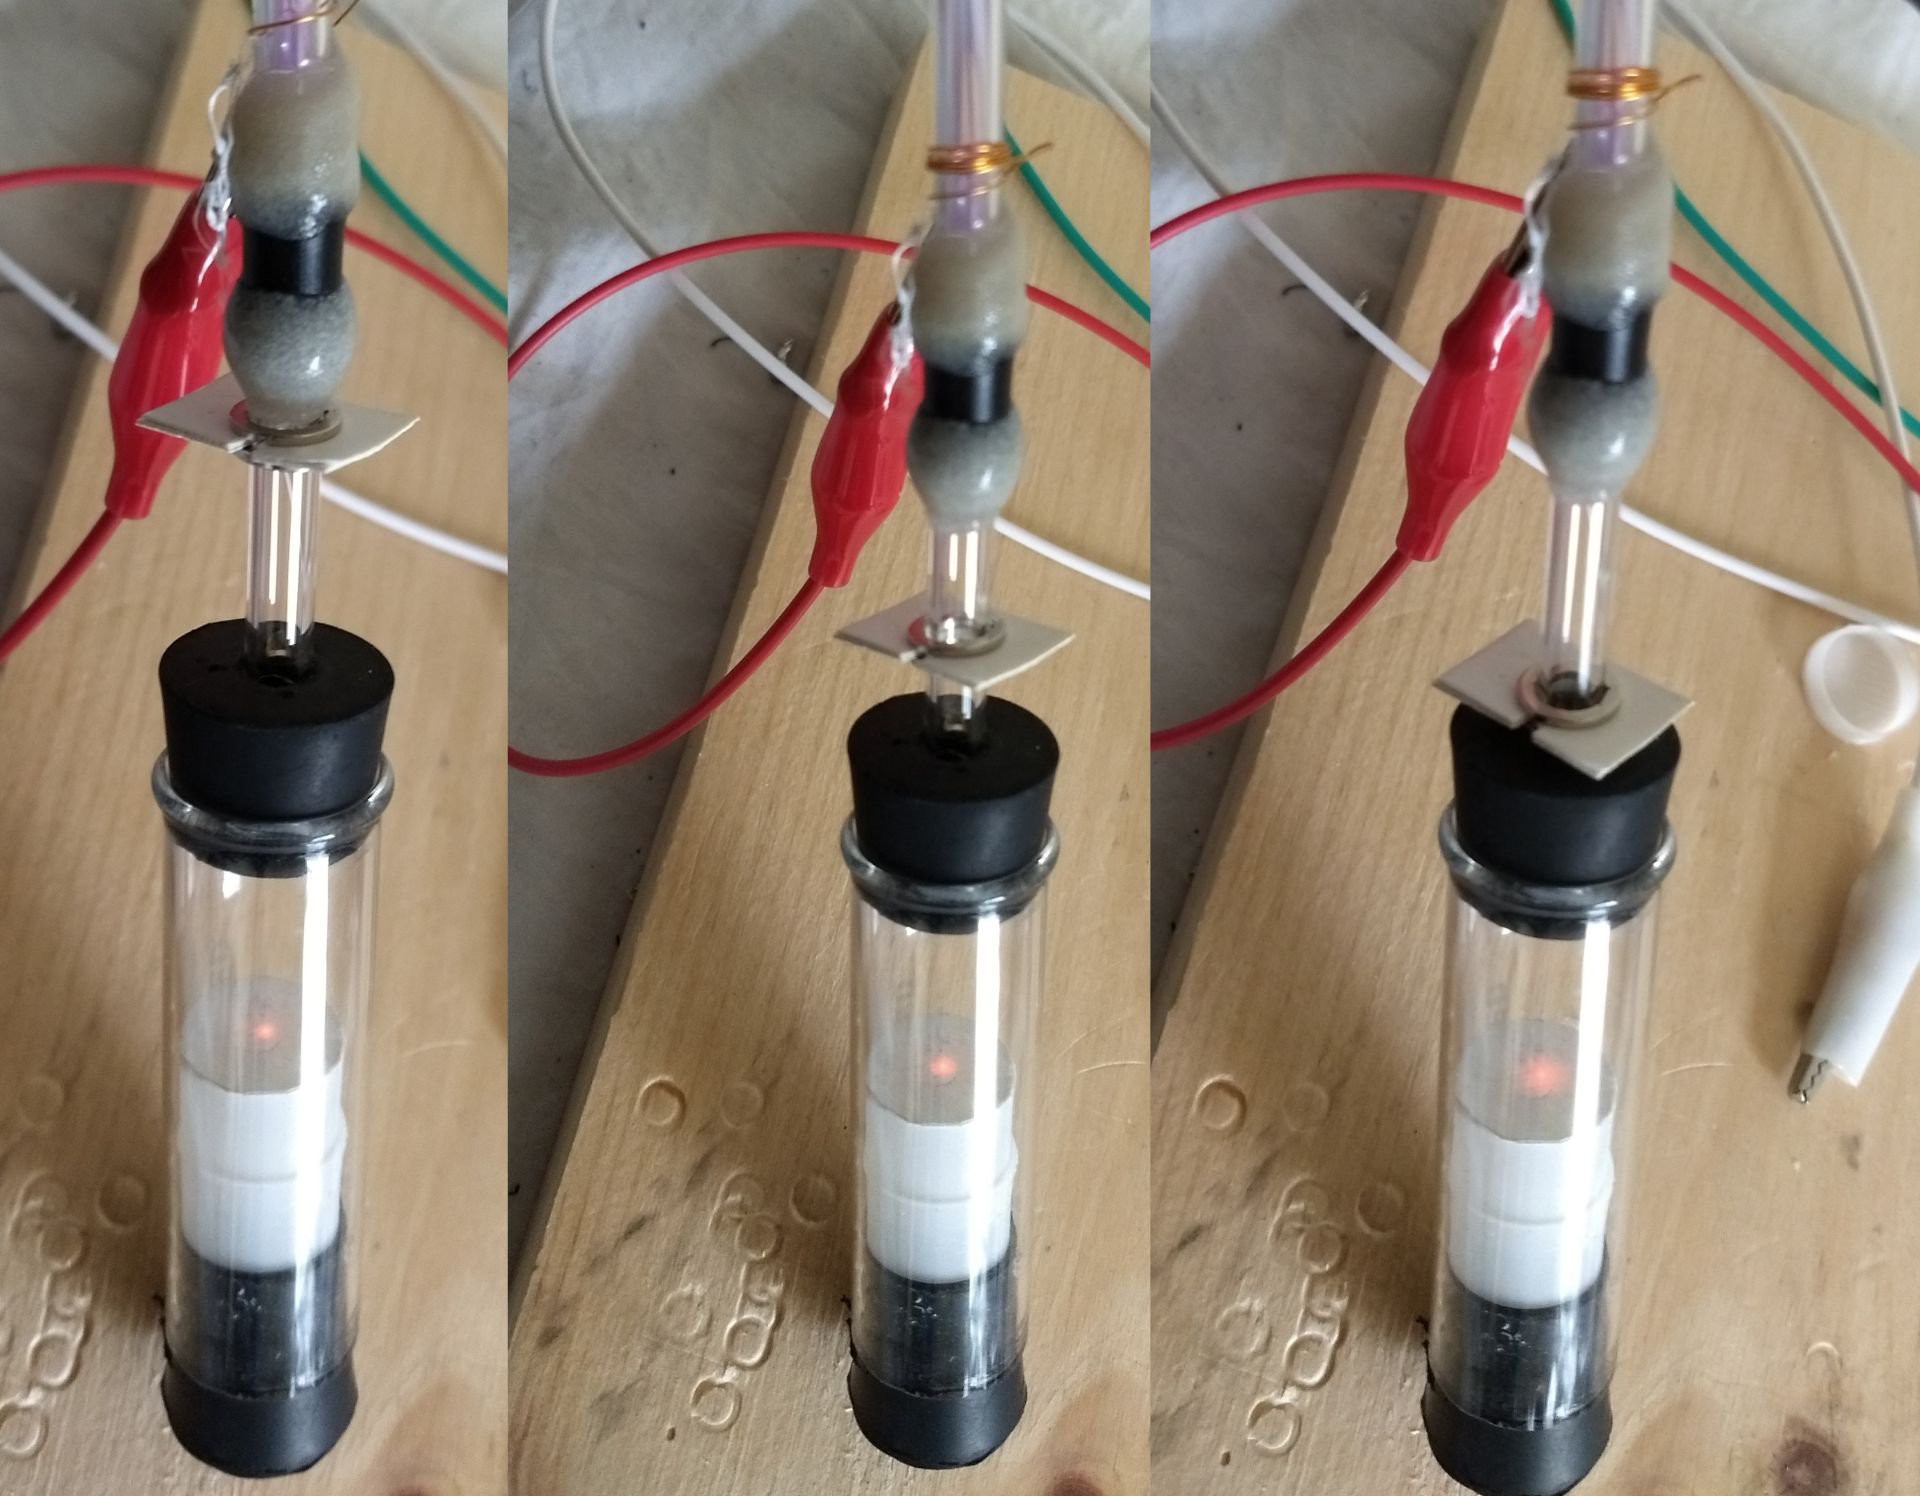
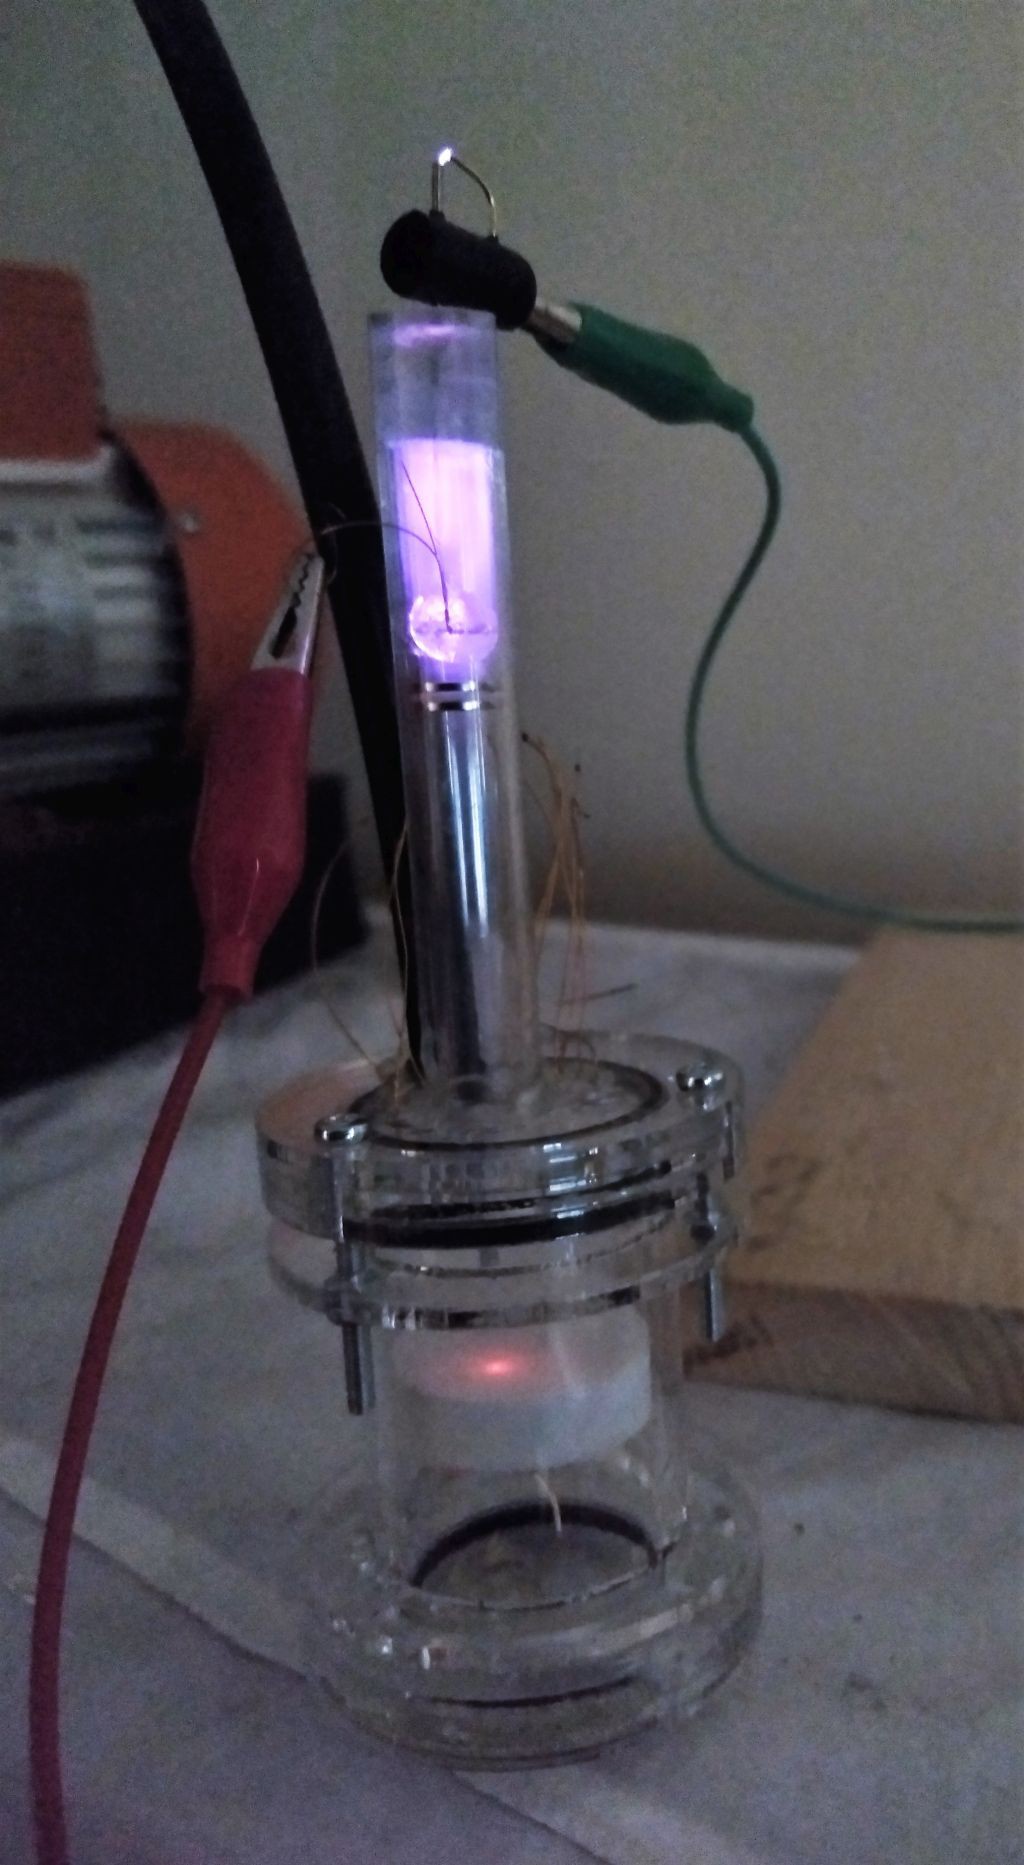
2. Build a suitable vacuum and an electron beam
My internet search shows that common SEM uses a ultra high vacuum
(UHV). This is required for function of the electron beam source. For
the creation of the UHV a
diffusion pump can be used. I plan to avoid a UHV be using approach developed by Delft University of Technology. They have shown a stable (5%) current flow in a electron beam source (tungsten field emitters) at a pressure up to 1 Pa.
3. Build the housing with a 3D printer
The housing shall consist of 2 or 3 different plastics. I want use a conductive plastic to create deflection electrodes and the acceleration electrodes. The non-conductive plastic build the insulator between the electrodes. Depending on the result of the simulation it’s might be required to have a magnetic plastic to complete the magnetic lenses.
4.Build a lens system
The lenses shall consist of a neodymium magnets. Based on the simulations result the magnets will be placed in the 3d printed housing. In above mentioned book is a example calculation shown. The result is that with a field strength of B=0.3 Tesla, a hole of a=3mm and an acceleration voltage of 100kV a focus length of f=11mm is possible.
5.Build a electron detector
Also with the conductive and non-conductive plastic I want to build the electron detector (also called electron multiplier). The university of Bristol has a good overview to electron multiplier. Actually the detector consist of several small electric conductive structures aligned to each other. I hope that here the advantages of the 3d printing are beneficial.
6.Build a high voltage shield for Arduino
I want to build a shield for the Arduino platform which creates several high voltage supplies to control the beam. Further this shield should be able to measure low currents (nA) to support the electron detector.