Close
0%
0%

small micro speakers with a rich soundstage

this is a good beginners project for everyone who wants to make small speakers with a 3D printer.

Similar projects worth following
featuring a 3D printed enclosure, 4" TB speaker driver and Dayton 20mm tweeter, in combination with a 3.5" passive radiator and some other stuff, you can create really nice sounding speakers, which are small, but have a good soundstage.

not the cheapest project though.

i came to this project from my oversized 3way floorstanding speaker design, as i thought: why not add a passive radiator and ditch the 8" woofer to create a mini bookshelfspeaker for monitor usage?

you always wanted to 3D print your own speakers?

does rich sound in a small enclosure sound good?

do you have about 250€ and some free time?

never designed speakers before, but want to get your hands into it?

then this project is a good starting point for you!

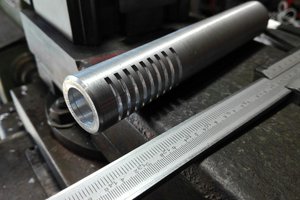
it combines modern techniques (3D printing) with some classic techniques regarding speaker design.

The soundstage is expected to be huge for a speaker this size, with a extended low frequency response thanks to a passive radiator.

the total size of the speaker enclosures (without speakers mounted) is: 13x11x17cm

some specs:

87DB @ 1W/1M (1khz tone)

20wrms/channel

frequency response: 70-25000H

8OHM nominal

microsp back.stl

print this one twice, 20% infill or more recommended

Standard Tesselated Geometry - 420.57 kB - 06/04/2017 at 12:31

Download

microsp right.stl

20% infill or more recommended

Standard Tesselated Geometry - 578.28 kB - 05/18/2017 at 22:06

Download

microsp left.stl

20% infill or more recommended

Standard Tesselated Geometry - 578.13 kB - 05/18/2017 at 22:05

Download

  • 2 × 4" fullrange: TB W4-1320SIF Mid/low frequencies
  • 2 × Tweeter: Dayton ND20FB-4 High frequencies
  • 2 × Wool filling (for 5L) Reducing enclosure resonances
  • 1 × Solder To solder the cabling and internal crossover
  • 2 × 4.7UF capacitor, 100V bipolar Highpass filter

View all 12 components

  • update 3: passive radiators!

    8bit-bunny06/04/2017 at 12:29 0 comments

    i got a ebay package of 4 passive radiators (4"), sadly they didn't include a mechanism to add weight to them easily.

    search ebay for the radiators with this term:
    4 inch Horn Radiator Woofer Speaker Passive Radiator Auxiliary Bass 105x105mm

    they cost about 8$ for a pair at max

    since i wanted to test with and without extra weight, i decided to glue a 80g 0.75mh coil on one radiator on the inside to measure the differences.

    without extra weight: a huge bump (about 10db) at 200hz and nearly no real bass response.

    then i swapped to the radiator with inductor, and found out that the radiators glued in inductor was touching the TB speaker's magnet, which meant the enclosure isn't deep enough.

    a temp solution i applied was mounting the passive radiator backwards.

    then i measured, and found out that the speakers now have a very nice bass response, especially for their size, they sound like bigger bookshelf speakers in a room of 8*12 meter, and just one speaker (mono) can easily fill the room with a very rich experience sound (almost as if you were in the recording studios), they go pretty low as well: down to 55HZ with ease (lower than i expected)

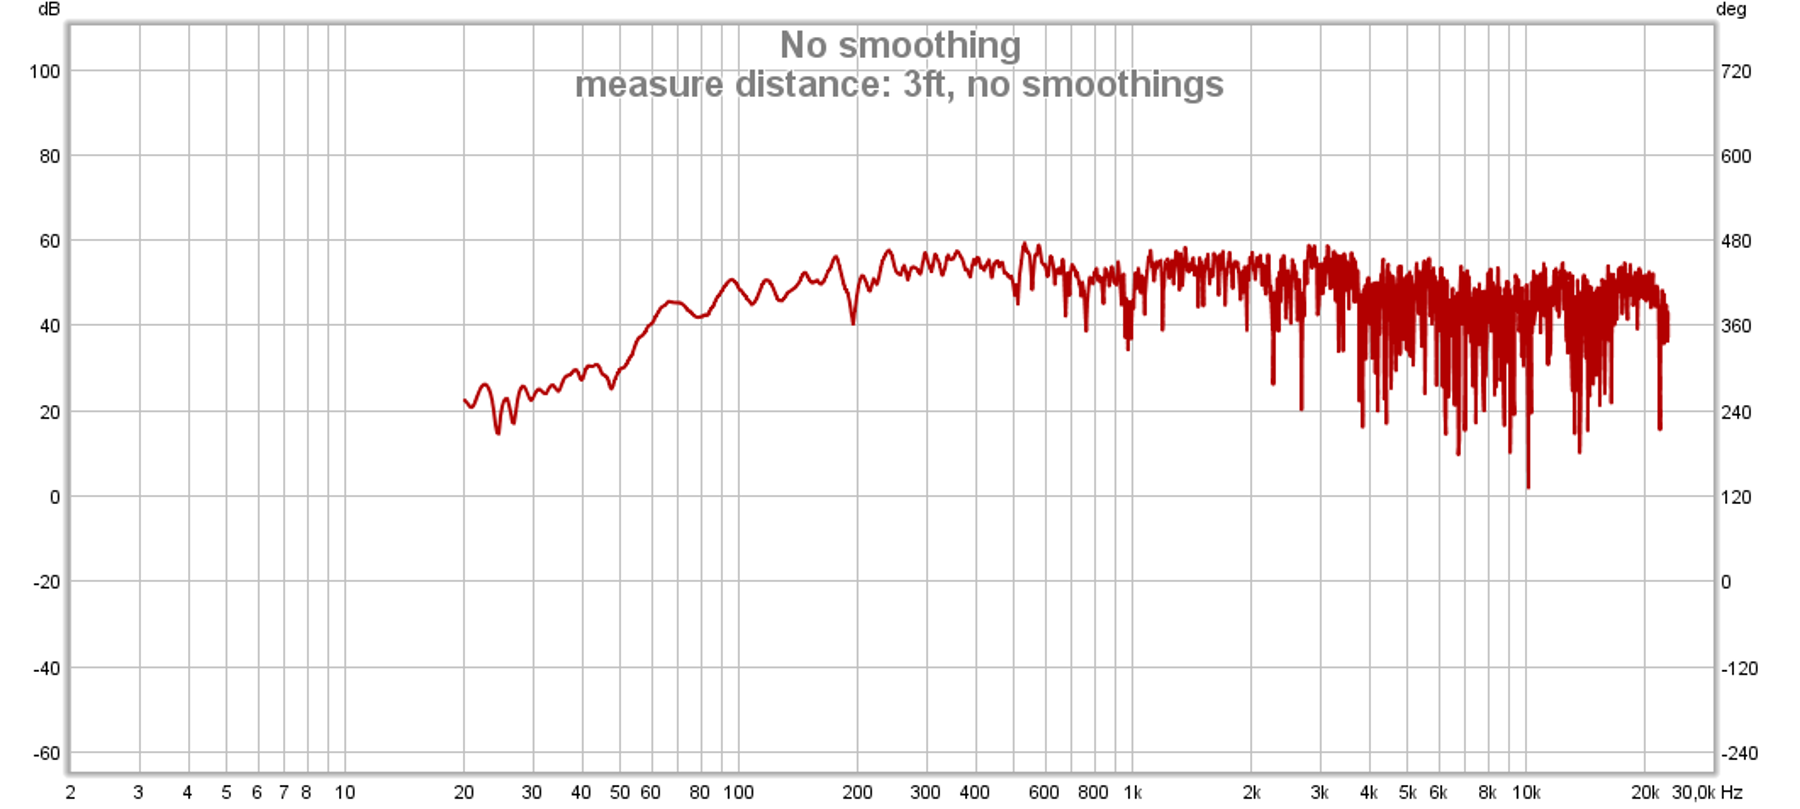
    the response at 1 meter distance, in the 8*12meter living room, please don't go lower than 40hz, as the distortion starts to increase by alot (average 10% at the rms wattage, where 45-25000hz is 2% distortion at the rms wattage)

    and for the radiator depth issue, i ordered a new backplate, one which is 12mm deeper than the original, meaning i can mount it as it's designed when it arrives :) (should be 7th of june)

    costs / speaker right now is: 160/piece (when ordering the enclosured at 3dhubs), which can be reduced alot if you're going for MDF wood instead of 3d printed (i printed the models in colorfabb ngen)

    costs would then be more like: 110 a piece.

    anyhow, i hope this'll be enough regarding this update :P

    going to update project files right now.

  • update 2

    8bit-bunny05/18/2017 at 22:28 0 comments

    i started sanding one enclosure to make it matte black instead of glossy black.
    looks way nicer now, also sanded round corners and removes sharp edges.


    i also applied the second 4" speaker to the back of the speaker to let it be a temporarily passive radiator.
    then i measured the response at 1meter away, and found out that the bass response wasn't exactly what i hoped for.


    but that's to be expected with such a small speaker in the middle of a 25 square meter room.
    the measure showed a minimal rolloff above 15k when at 1meter distance, nothing too serious luckily.


    the lower rolloff was lowered from 200hz to 100hz, but was a more steep one than the original measure (passive radiator effect?)
    still, it goes as low 80hz with ease (-6db point) with the temp passive radiator.


    overall very pleased with something as tiny as these speakers.


    next steps are:
    sand second enclosure
    wait for the final passive radiators and mount them
    screw the terminals in
    solder the internal wiring
    fill the internals a bit with dampening wool to help with possible resonances.

  • update 1: test assembly & first test

    8bit-bunny05/18/2017 at 10:37 0 comments

    So i got the enclosures in, and decided to assemble one speaker (i don't have the passive radiators yet, so i laid the rearside flat on my bed)

    luckily everything fitted in the first try, so no reprints needed! (saving costs and filament) :D

    Hooked up to a 30W rms at 8 ohm amplifier.

    Then i did a measurement from 45-20000hz, and here's the nearfield result:

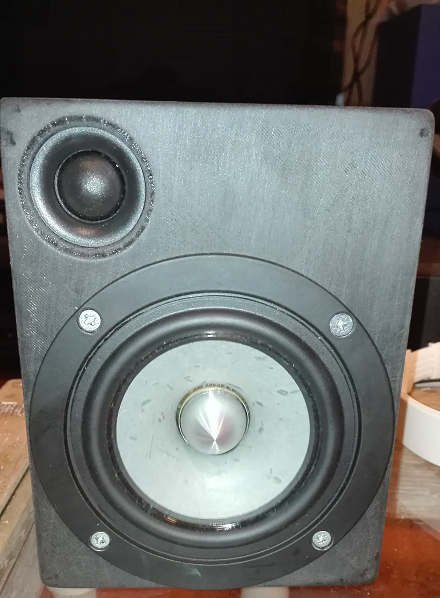
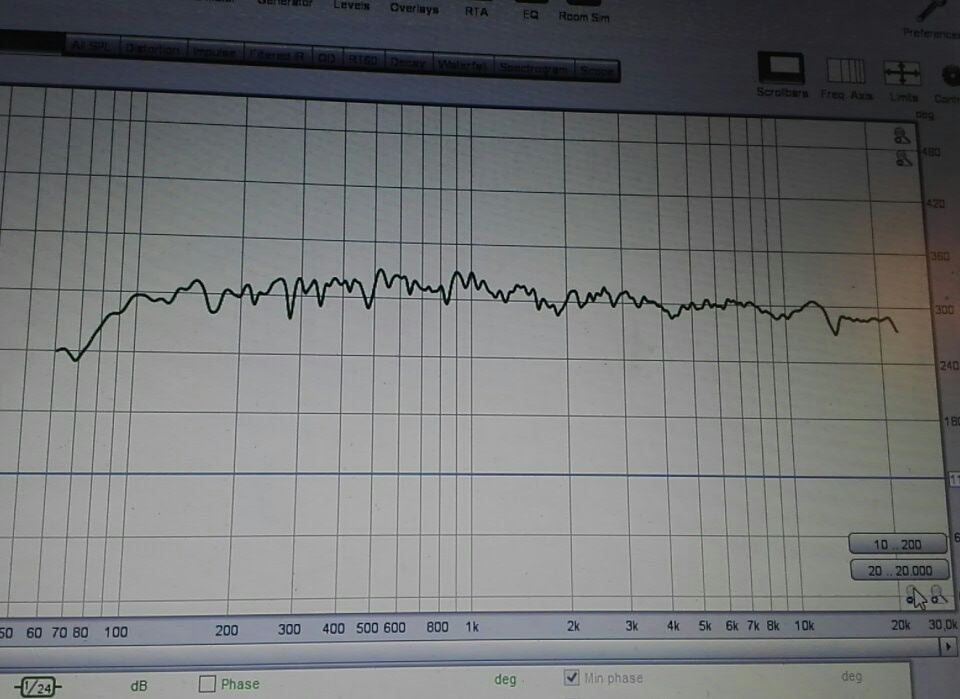
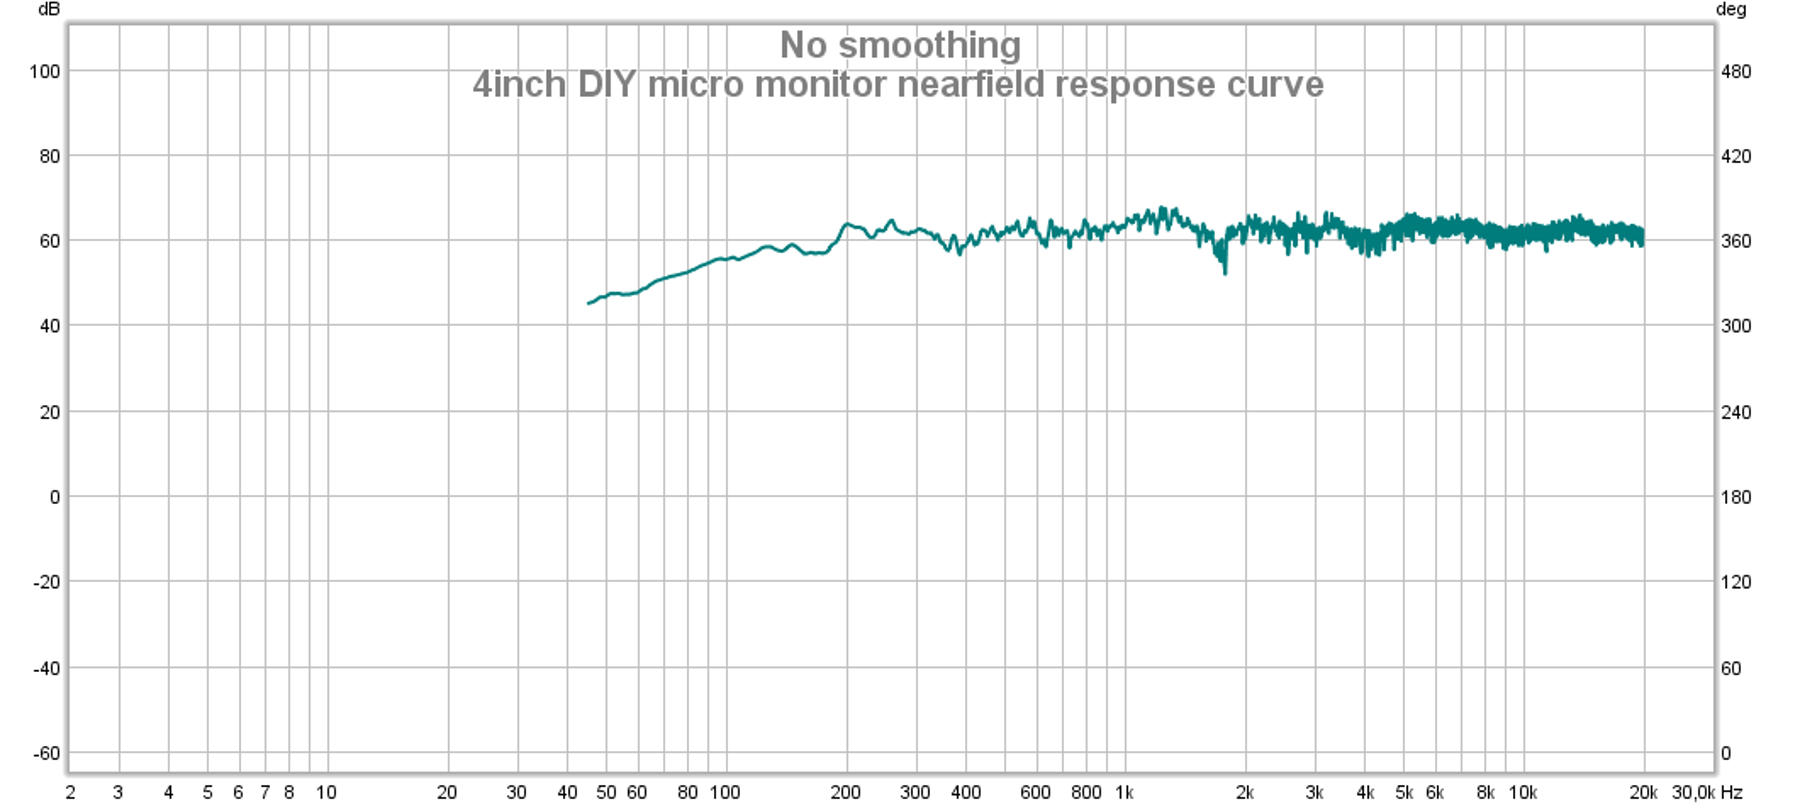
    As one can see, it starts to roll off slowly at 200hz, but it goes as low as 70HZ (without passive radiator!), the high end is very smooth and constant, no slight roll-off at all.

    Okay, they're not the loudest (about 86dB @ 1W, 1M), but for a micro monitor they do exactly what's needed: deliver rich sound at a flat response, without too much distortion and staying low cost :)

    Distortion is about 15% below 45hz on the 3rd harmonic (did a seperate 20-20000hz test). So i don't recommend them to play low at high volumes (the 4" fullrange speaker goes over it's xmax causing the distortion at those 30watts)

    There is a slight peak in the distortion at 1500hz too (2nd harmonic), peaking at about 5.3% (possibly the resonance frequency of enclosure)

    Overall the distortion stays at 2% average, which is OK.

    Next up is to wait for the passive radiators and connection terminals so i can assemble the rearside of these tiny monsters :)

View all 3 project logs

  • 1
    Step 1

    Buy all needed parts as in the components list (which is for a pair of speakers, you don't want mono, right?)

  • 2
    Step 2

    Open up your 3D slicer and load the models in (a print area of 200x150x150mm or larger is recommended), set infill preferably to 25% or more for a more solid enclosure.

  • 3
    Step 3

    print it, and once done remove all unneeded support materials., also please sand sharp corners down a bit

    note: in this project Colorfabb NGEN was used for it's rigidness, but with only 10% infill note2: uploaded the models at 3Dhubs, since i don't have the room for a 3D printer personally, price was about €88 including shipment

View all 16 instructions

Enjoy this project?

Share

Discussions

Similar Projects

Does this project spark your interest?

Become a member to follow this project and never miss any updates