Close
0%
0%

Remote temperature monitor

Provides remote monitoring of solar water heating system thru a web interface.

Similar projects worth following
NB: THIS WRITE-UP IS STILL UNDER CONSTRUCTION!

In order to monitor and log the status and performance of a solar water heating system, the water temperature and flow rate at key points in the system is logged using temperature and flow sensors attached to a Raspberry Pi.

The Raspberry Pi also runs a webserver to allow viewing of the system state through a web browser.

The Raspberry Pi (model B shown in this project) runs the default "Raspbian" OS, and the "lighttpd" lightweight web server.

The DS18B20 temperature sensors are all connected to the same 3 pins on the RPi via a custom patch panel made from terminal blocks. There is a 5K ("pullup"?) resistor between the +5V and data pin:

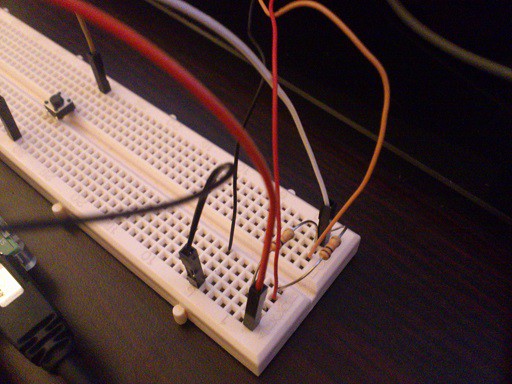
(Note: picture above shows breadboard connection, orange wire is DS18B20 data wire, which is connected to white lead running to the RPi).

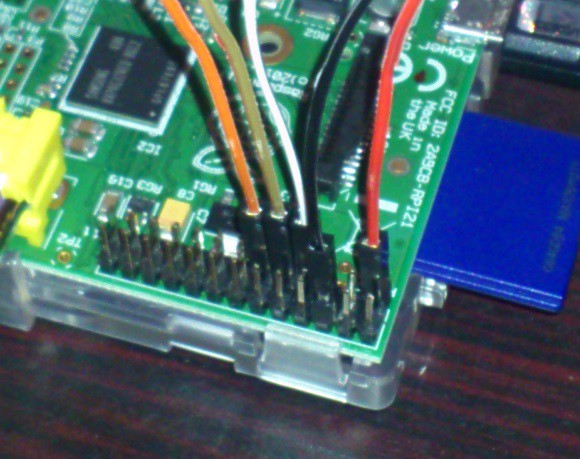
Temp sensor VCC (5V), GND and DATA wires are connected to Raspberry Pi 5V, GND and GPIO pin 7 (the red, black and white wires below):

Note that the DS18B20 temperature sensors all share the same "bus" here, but each sensor has a unique ID.

The flow sensors are connected to GPIO inputs, which are configued to detect and count pulses from the flow sensors (more... TODO)

A web page is created in the web server's public folder (var/www/). When this web page is is requested by a remote computer, a python script is run to collect the temperature and flow rate data, and return it formatted as the HTML output.

  • 1 × Raspberry Pi
  • 4 × DS18B20 temperature sensor "one-wire" temperature sensor in shielded package
  • 2 × Flow-rate sensor Hall effect pulse output flow-rate sensor
  • 1 × 5K resistor (or 2 x 10K is parallel)
  • 1 × Terminal blocks To make up a patch panel for connecting all the sensor cabling

View all 6 components

  • TODO:

    James04/14/2015 at 08:21 0 comments

    This project has kind of stalled because the originator has lost interest. However it is mostly complete/workable, so I will try to put all the info up on this Hackaday project page.

    TODO:

    1. Post picture and schematic of patch panel for temp sensors (and flow sensors).

    2. Upload web server setup info, and web page

    3. Upload python code (test program and web CGI program)

View project log

  • 1
    Step 1

    Configure Raspberry Pi:

    1. Load GPIO and DS18B20 modules at boot:

    Add w1-gpio and w1-therm to /etc/modules

    2. Install python libs for gpio:

    sudo apt-get install python-rpi.gpio

    3. Copy python scripts and web pages:

    https://github.com/james7780/TempMonitor

    test.py in the cgi-bin folder can be used to test the connected temp sensors?

    4. Install and configure "lighttpd" webserver:

    Should work out of the box, as long as you put cgi scripts in /var/www/cgi-bin folder and mark them as executable.

    www.penguintutor.com/linux/light-webserver

    5. Add python script to webserver:

    Copy contents of github repository (URL above) to /var/www

    Update the "sensorID" variable in the readtemp.py script to match your sensor's ID (when you have it, see below).

    6. [OPTIONAL] C library installation:

    Install wiringPi (for C) - wiringPi.com/download-and-install/

    (This is if you prefer to use C for you CGI "scripts" instead of python)

  • 2
    Step 2

    Build patch-panel:

    1. Glue terminal blocks to baseplate

    2. Wire up terminal blocks

    3. Solder 5K resistor between +5V and data terminals

    4. Connect to Raspberry Pi GPIO (+5V, GND and data)

  • 3
    Step 3

    Test/identify temperature sensors:

    1. Connect DS18B20 to patch panel

    2. Run test python script to check operation and identify (each DS18B20 has a unique ID)

    2. OR - test DS18B20 temperature probes manually:

    modprobe w1-gpio

    modprobe w1-therm

    cd /sys/bus/w1/devices

    ls

    cd 28-xxxx (DS18B20 serial number)

    cat w1-slave

    3. Label the sensors with their ID's so you know which is which.

    4. Update the "sensorID" variable in the readtemp.py script to match your sensor's ID.

View all 5 instructions

Enjoy this project?

Share

Discussions

Similar Projects

Does this project spark your interest?

Become a member to follow this project and never miss any updates