muzi
muziMicropython UDP on ESP8266
TCP is to establish reliable connection, and both sides of communication can send data in the form of flow. Compared to TCP, UDP aims at connectionless protocol. When using UDP, you don’t need to establish connection and only need to know the IP address and port no. of the other part. Then you can send data packets directly.
Here we will use serial/network debugging assistant. Download address is: http://www.daxia.com/sscom/sscom5.12.1.rar
Program is as follows:
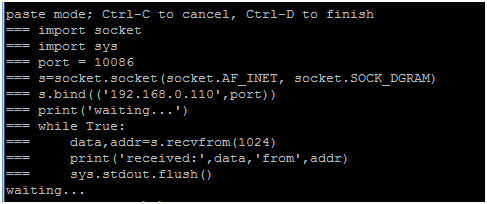
import socket
port = 10086
s=socket.socket(socket.AF_INET, socket.SOCK_DGRAM)
s.bind(('192.168.0.110',port)) #绑定端口binding the port
print('waiting...')
while True:   #接收数据receiving data
 data,addr=s.recvfrom(1024)
print('received:',data,'from',addr)
Connect esp8266 with burnt micropython to PC. Open our putty terminal in the said methods. Before doing udp, we must finish some necessary preparation. Firstly, connect esp8266 to wireless network, and then we are able to get the needed ip address.
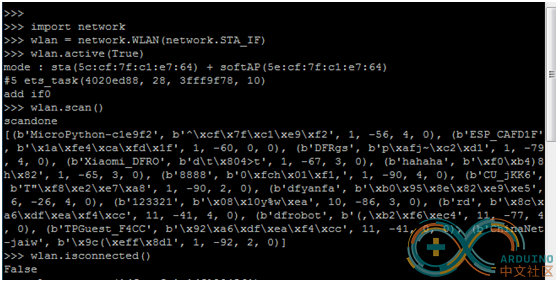
Enter the following command in the terminal until esp8266 is successfully connected to wifi. We can use wlan.isconnected to check whether it is connected. wlan.scan() is used to scan nearby wireless networks. Use wlan.connect(‘ssid’,’password’) to connect our wireless network (ssid: our wifi name. password: password of wireless network).
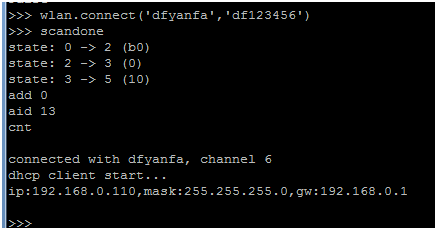
After entering command of connecting wifi, appearance of condition as shown below means successful connection to wifi. At the same time, we can see the needed ip address. Remember the ip address, which we will use in the following udpserver program.
Operate our program in the terminal in the said methods. Correct running result is shown below:
Open the downloaded serial debugging assistant.Now we can use the recorded ip address. Select udp at our port no. Enter the recorded ip address at remote. Fill the port no. of our program in the port behind remote.
Click link. You can see whether connect is successful at the bottom line.
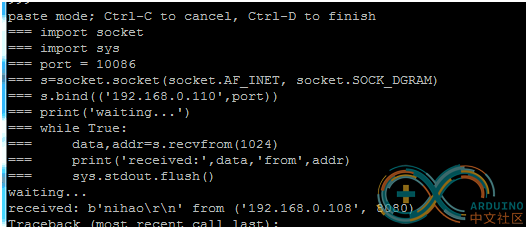
Enter nihao in the blank next to the send button, and then click send. We will receive the sent message and sent address at putty terminal as shown below:
Then our udp connection and receiving and sending message are completed.
There is a direct method to realize the function. Code is as follows:
import network[/align]import socket
import time
port=10086
wlan = network.WLAN(network.STA_IF)
wlan.active(True)
wlan.connect('dfyanfa', 'df123456')
while(wlan.isconnected() == False):
  time.sleep(1)
ip = wlan.ifconfig()[0]
print(ip)
s=socket.socket(socket.AF_INET, socket.SOCK_DGRAM)
s.setsockopt(socket.SOL_SOCKET,socket.SO_REUSEADDR,1)
s.bind((ip,port))
print('waiting....')
while True:
  data,addr=s.recvfrom(1024)
  s.sendto(data,addr)
  print('received:',data,'from',addr)
 Harsh
Harsh
 Hari Wiguna