 Stephen Harrison
The code is the same as Arduino code (.ino) with some enhancements for the Particle system and uses a few C++ drivers so should be fairly easy to understand for most. I've attached the fimware to the project as a zip file. This includes the source files and a prebuilt binary file that can be flashed onto a USB connected Photon with the Particle CLI. However this log is about getting the code into the Particle build environment to allow it to be modified and programmed OTA to a Photon.
If you've not worked with a Photon before check out the Particle.io getting started guide.
Note that the code is called "BottleBuddy", this is the project name for the hardware side of things, where Reagent Tracker is the overall project / system name.
To use the code open a new code application in the Particle Build environment (https://build.particle.io). Unfortunately at present Particle don't have a nice way to bundle applications for sharing using the build environment so this is a little messy.
Open the build environment, you will be promoted with a blank application:
Give it a name.
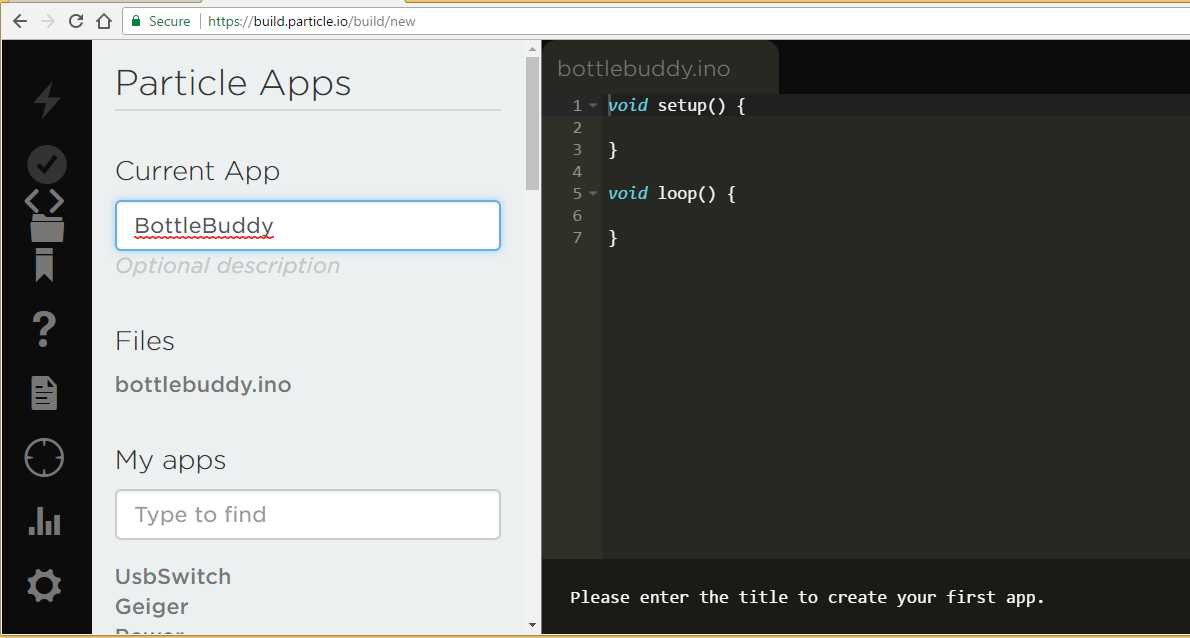
Paste in the bottlebuddy.ino code.
Add the following libraries using the Build library manager:
- Adafruit_PN532
- neopixel
- OneWire
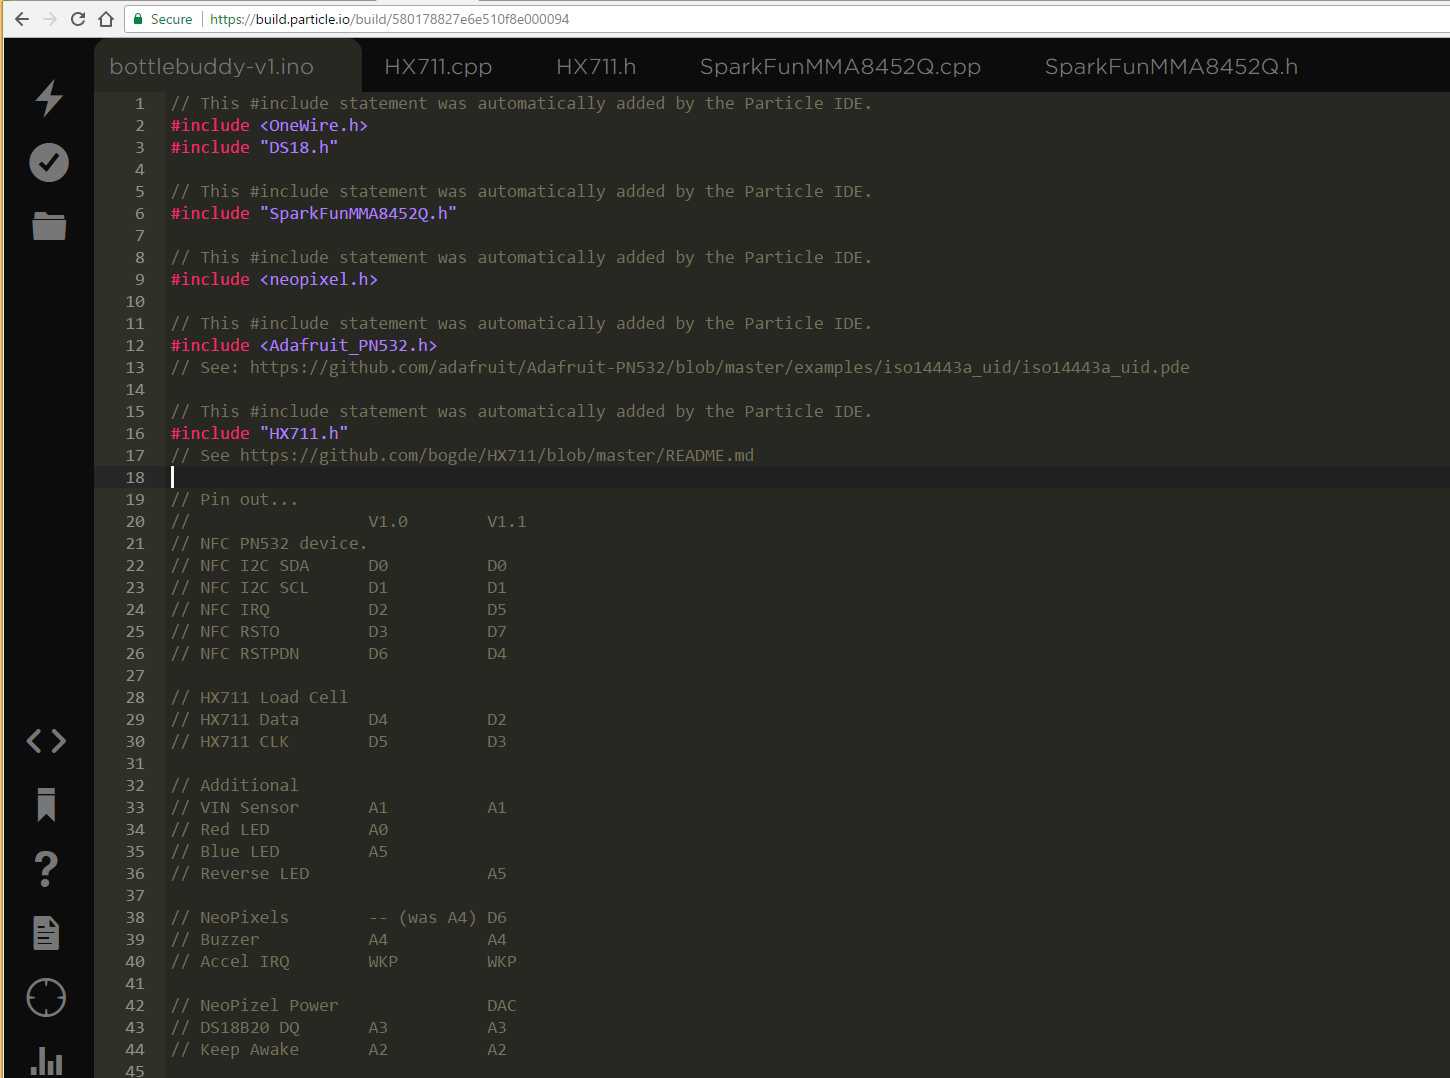
Add new tabs using the (+) in the top right:
- HX711
- SparkFunMMQ8452Q
You should get a .cpp and .h tab for each of those. Paste in the appropriate files (note theirs a bit of a bug where pasting in the .cpp code will end up in the .h file as well).
The HX711 library is available through the Particle Library system as HX711ADC however I had some issues with it at the original time of writing so brought it into the project as a C++ file, also the tare function uses an incorrect type (double should be long).
The MMQ8452Q library didn't support configuration of tap interrupt events so I've modified that slightly from the original SparkFun library to support Tap Interrupts.
You will find the build environment has duplicated the #include statements. Remove the duplicates.
It should look something like this:
Ensure you have the correct device selected and the firmware version is set to 6.2.
Ensure that the pin definitions in the .ino file match your build, these have changed between V1.0 and V1.1 of the PCB.
Click the verify icon and the application should build.
Now click the Flash icon to program the Photon code. It may take a little time initially to get the Photon's base firmware up-to 6.2, updates after this are lightning fast.
Once the Photon has been flashed it is going to spend most of its time asleep so we won't be able to re-flash the device without doing something special. At this time the standard build environment doesn't support queued firmware updates so we can't build the code and request it to be flashed on next connect. I think the product deployment functionality on Particle is able to do this, but it's not really suitable for 1 or 2 devices and still requires you test your firmware on a device or two first.
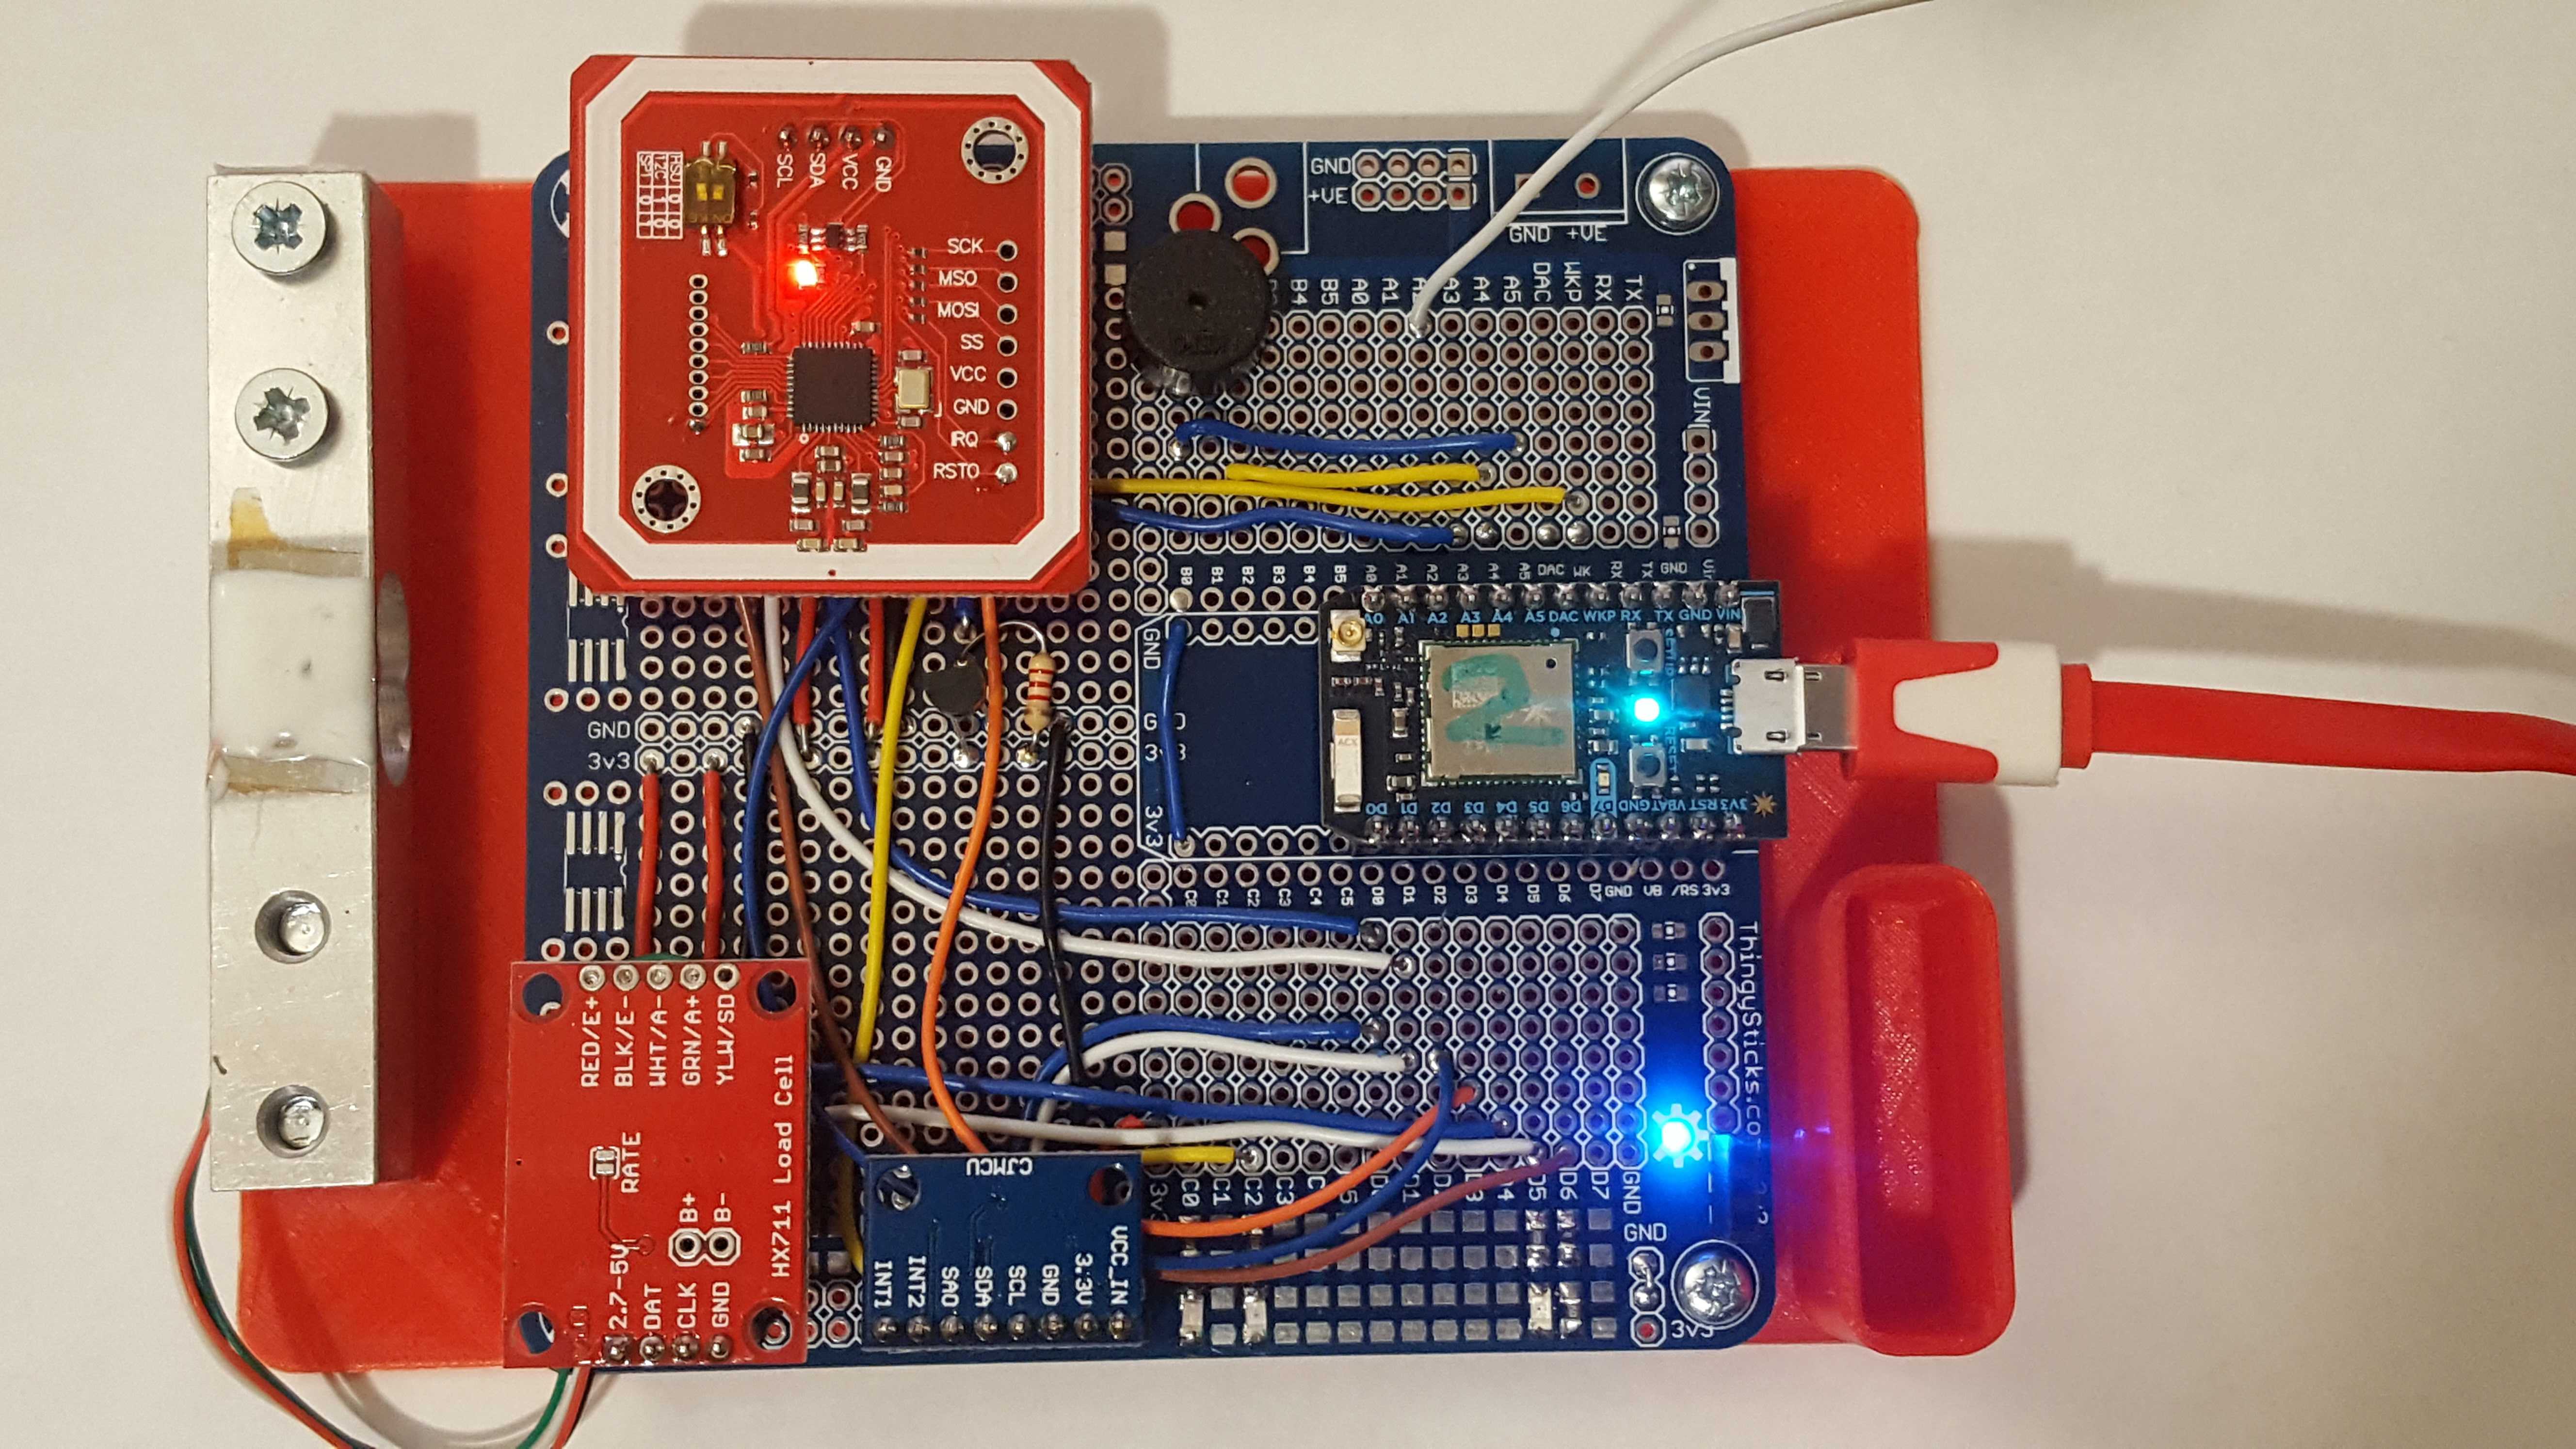
Their are a few ways to keep the Photon connected to allow firmware updates. The KeepAwake pin (A2) is probably the most useful, particularly on a prototype board set-up, notice the white flying lead below, this connects to 3v3 to keep the application awake. V1.1 of the PCB has a (KeepAwake) test point that can be soldered too if required.
Alternatively we can place the Photon in Safe Mode, this is handy to know about not only for firmware updates but for when we mess up the firmware and are not able to get the Photon to connect.
To place the photon in Safe Mode, hold both Set-Up and Reset buttons down, release Reset and wait for the LED to flash Purple (it does this almost immediately), then release the Set-Up button. The Photon will now connect to the Particle Cloud and we can updated it, but it won't run any of our code until it is reset (manual or due to firmware update).
Discussions
Become a Hackaday.io Member
Create an account to leave a comment. Already have an account? Log In.