Jayraj Desai
Let's get started.
Step 1: A Complete Video
This video explains all steps in 5 mins. Take a look.
Step 2: Required Items
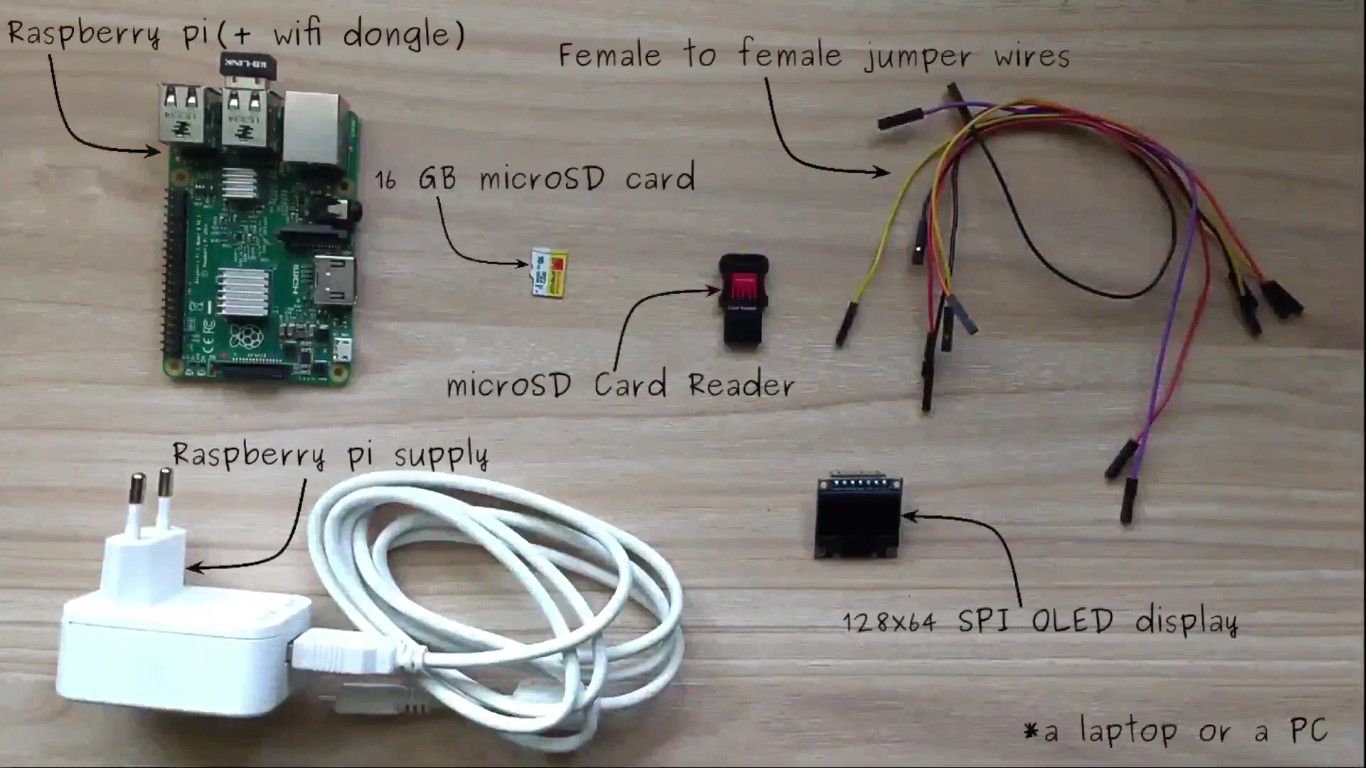
The following is a list of required items:
- Raspberry Pi + WiFi dongle or Raspberry Pi 3
- Raspberry Pi power supply
- 16 GB microSD card
- microSD card reader
- 126x64 SPI OLED display
- Female to female jumper wires
You will also need a laptop or a PC to setup and access the Raspberry Pi.
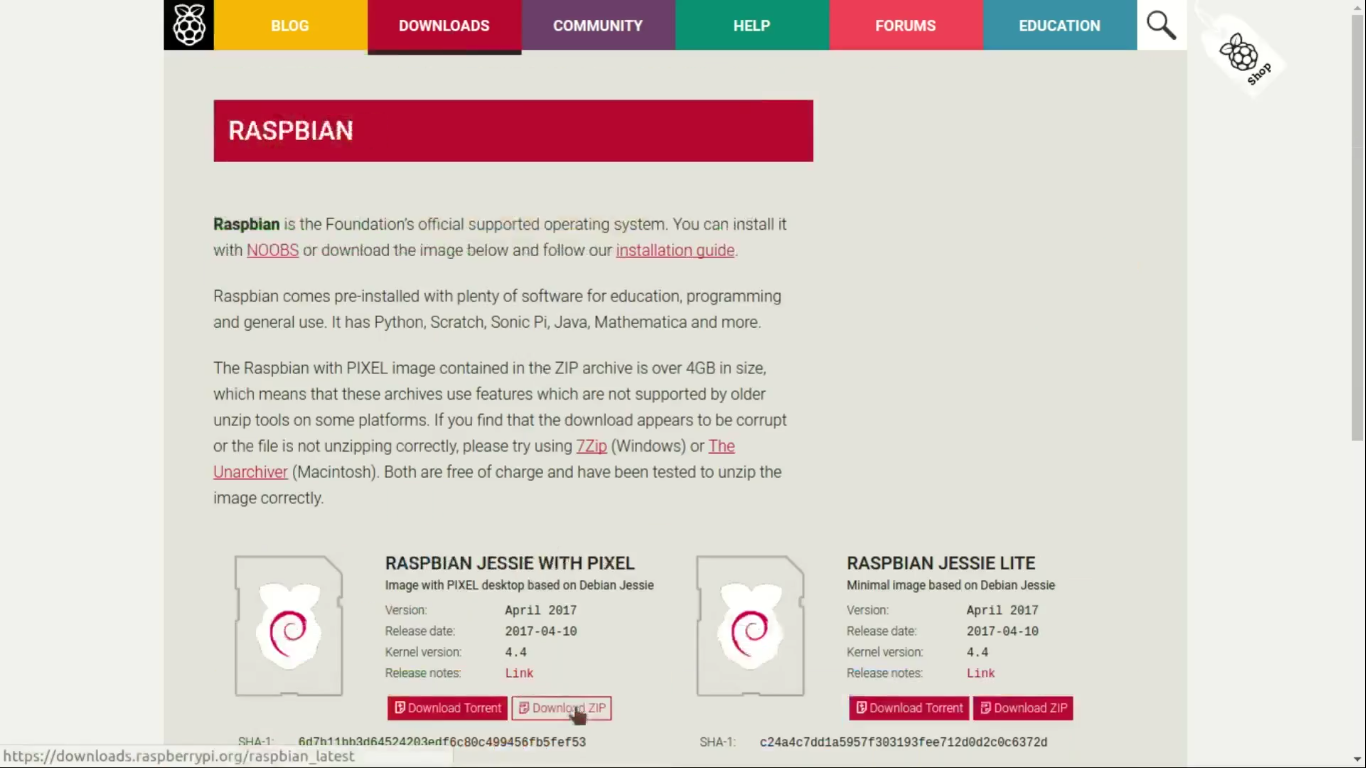
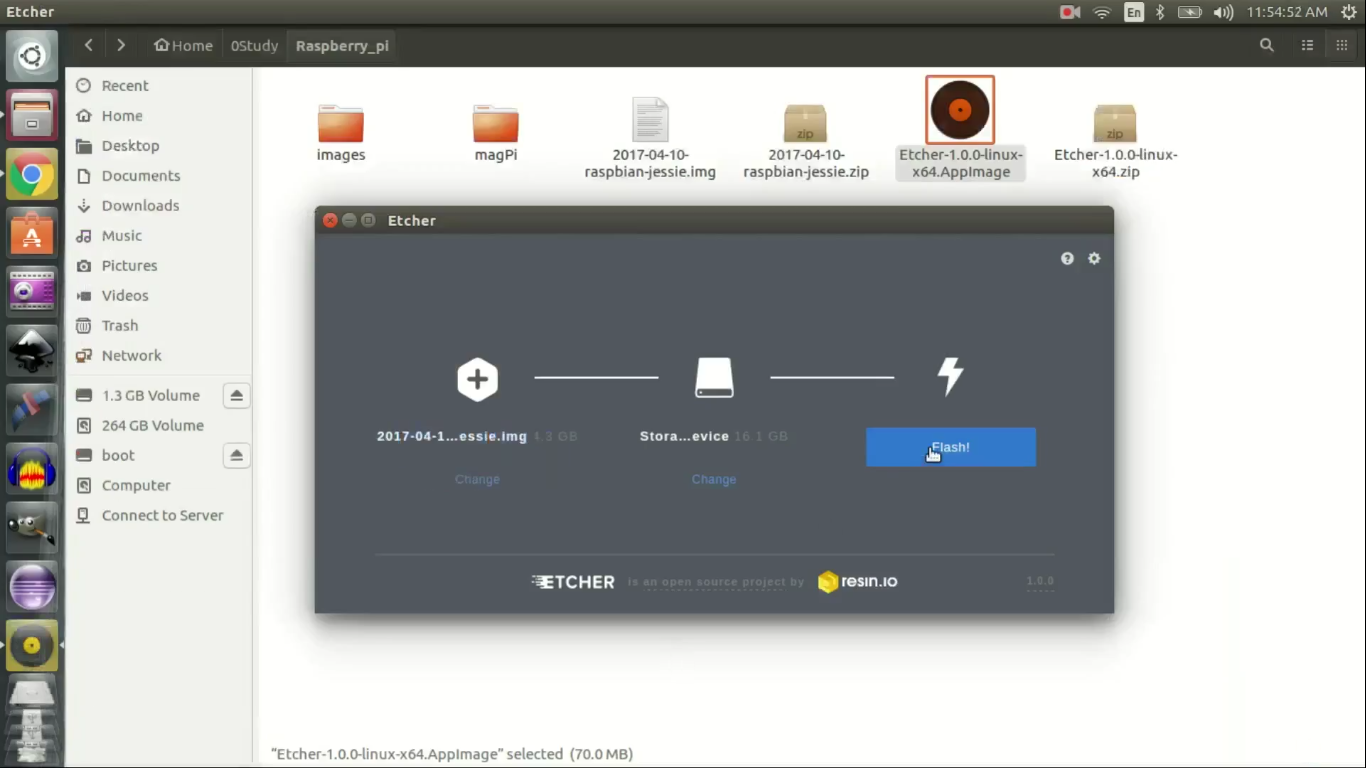
Step 3: Flash Raspbian to Your MicroSD Card
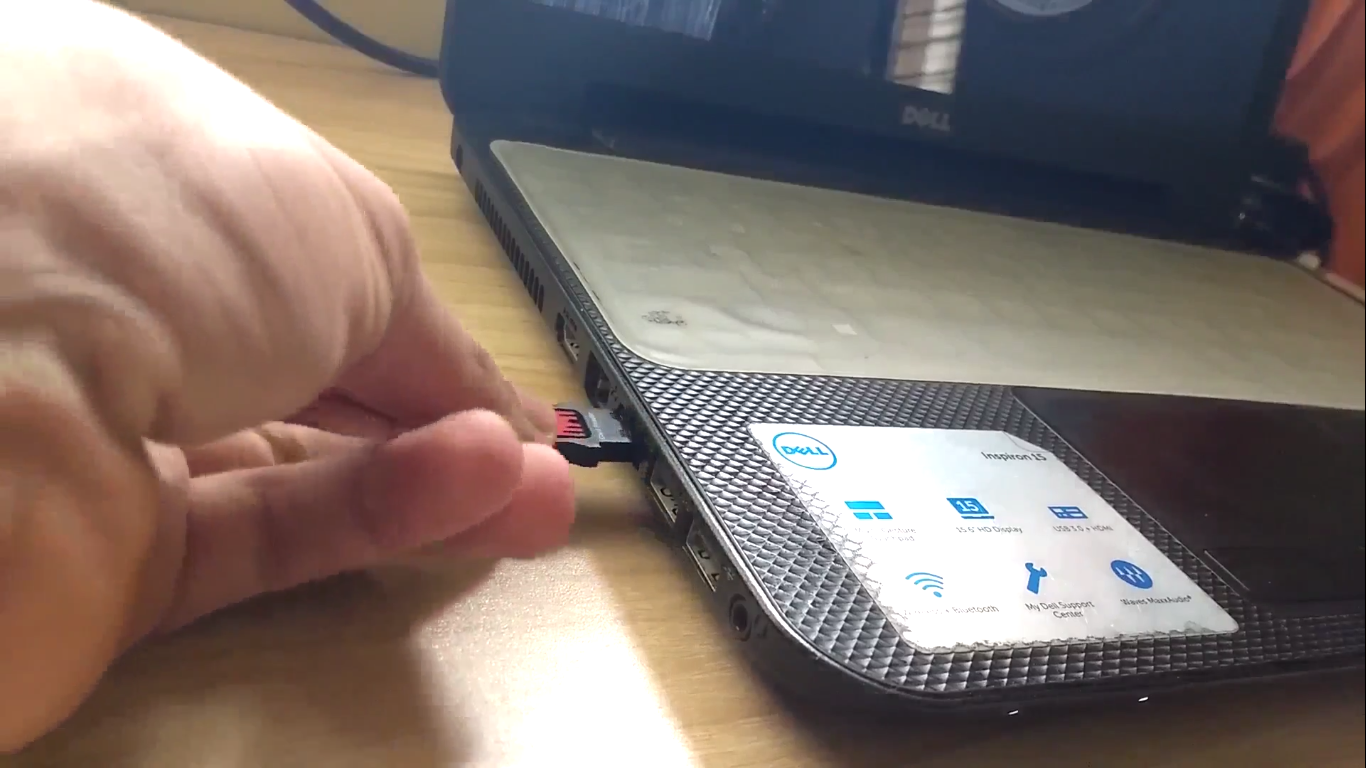
Description: First thing we need to do is flash Raspbian on a microSD card. So head to www.raspberrypi.org and download latest version of Raspbian and extract it from the zip file. Now insert an empty microSD card in the microSD card reader. Connect the microSD card reader to your laptop or PC. Bring up the etcher application and burn the extracted Raspbian image on your microSD card.


Step 4: Configure Raspbian for WiFi and SSH
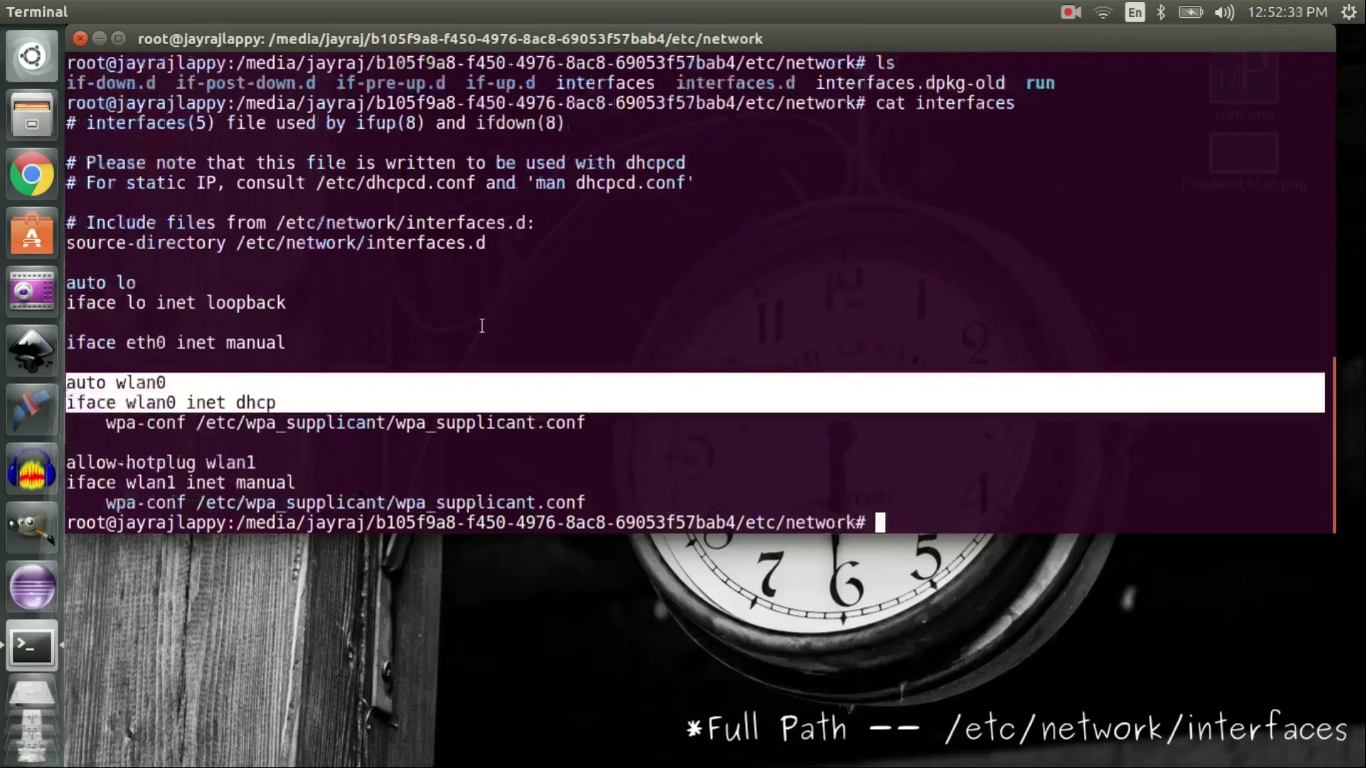
Description: To configure WiFi, open up a terminal on a Linux machine and become root user, cd into Raspbian's root directory. If you are on a Windows machine, open up Raspbian's root directory as administrator. Modify file /etc/network/interfaces as shown in the first image, i.e. change lines for wlan0 to:
auto wlan0
iface wlan0 inet dhcp
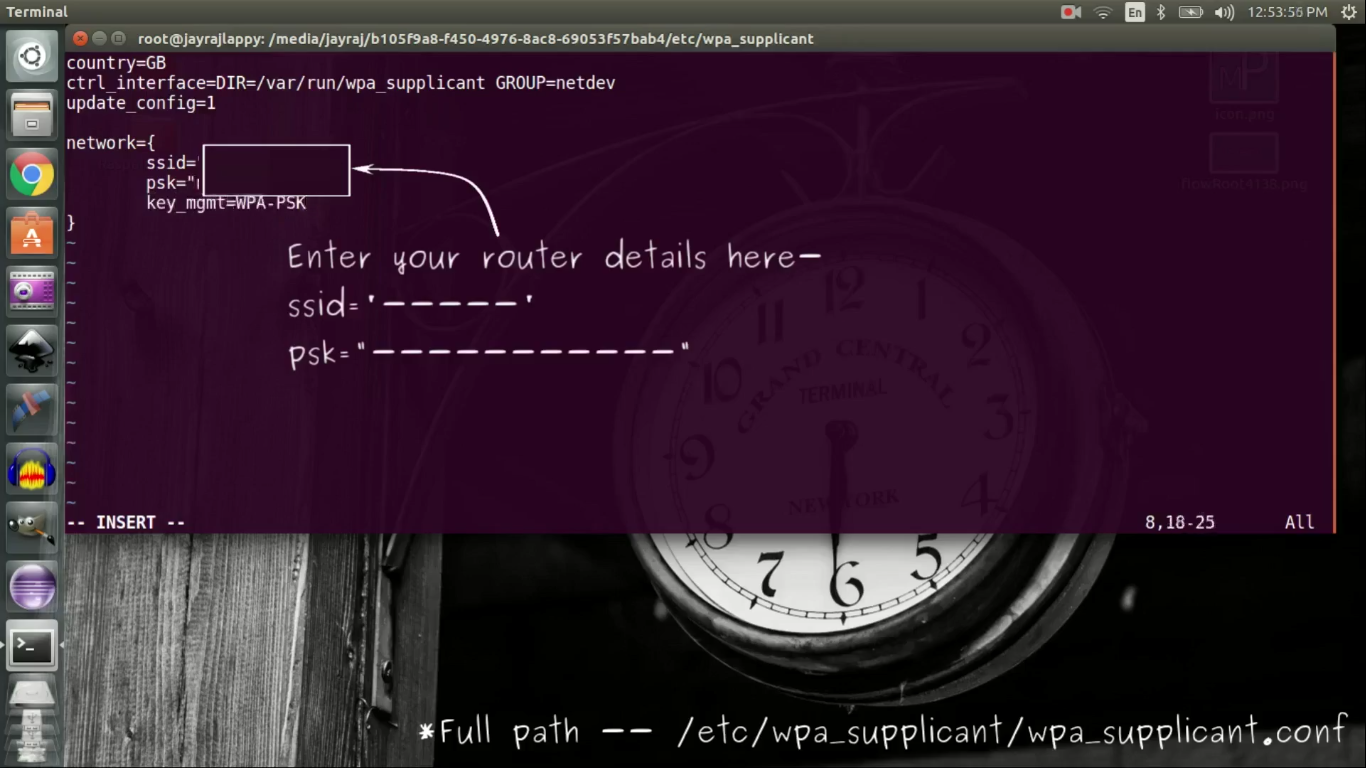
This will allow your router to assign a random IP address to your Raspberry Pi, but we haven't specified SSID and password for your router, right. The /etc/wpa_supplicant/wpa_supplicant.conf file lets us do exactly that. Look at the second image.
country=GB
ctrl_interface=DIR=/var/run/wpa_supplicant GROUP=netdev
update_config=1
network={
ssid='-----'
psk="--------"
key_mgmt=WPA-PSK
}
To enable SSH which we will use to securely access headless Raspberry Pi. Create an empty file called 'ssh' in boot directory of Raspbian.
Finally, unmount microSD card from your machine and take it out from the card reader to put it in Raspberry Pi.
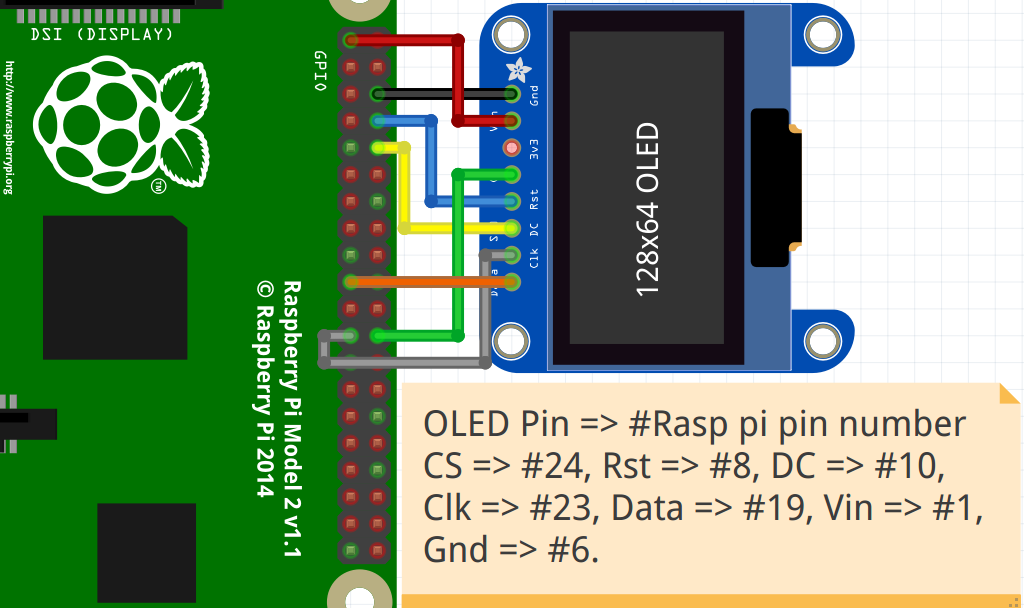
Step 5: Connect OLED to Raspberry Pi
Description: Connect SPI OLED display to your Raspberry Pi according to attached image.
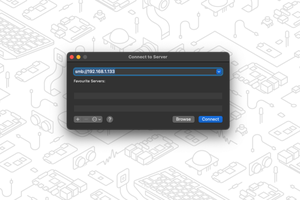
Step 6: Finding IP Address of Raspberry Pi
Description: Once OLED is connected to the Raspberry Pi, power on the Raspberry Pi. As we have enabled DHCP, the router will assign a random IP address depending on availability to Raspberry Pi. To securely access a headless Raspberry Pi, we will use SSH for which we will need IP address of Raspberry Pi. To find the IP address of the Raspberry Pi, use applications like angry IP scanner which scans your network for active devices. The attached image shows angry IP scanner showing the IP address of a Raspberry Pi.

Step 7: Enable SPI Interface on Your Raspberry Pi
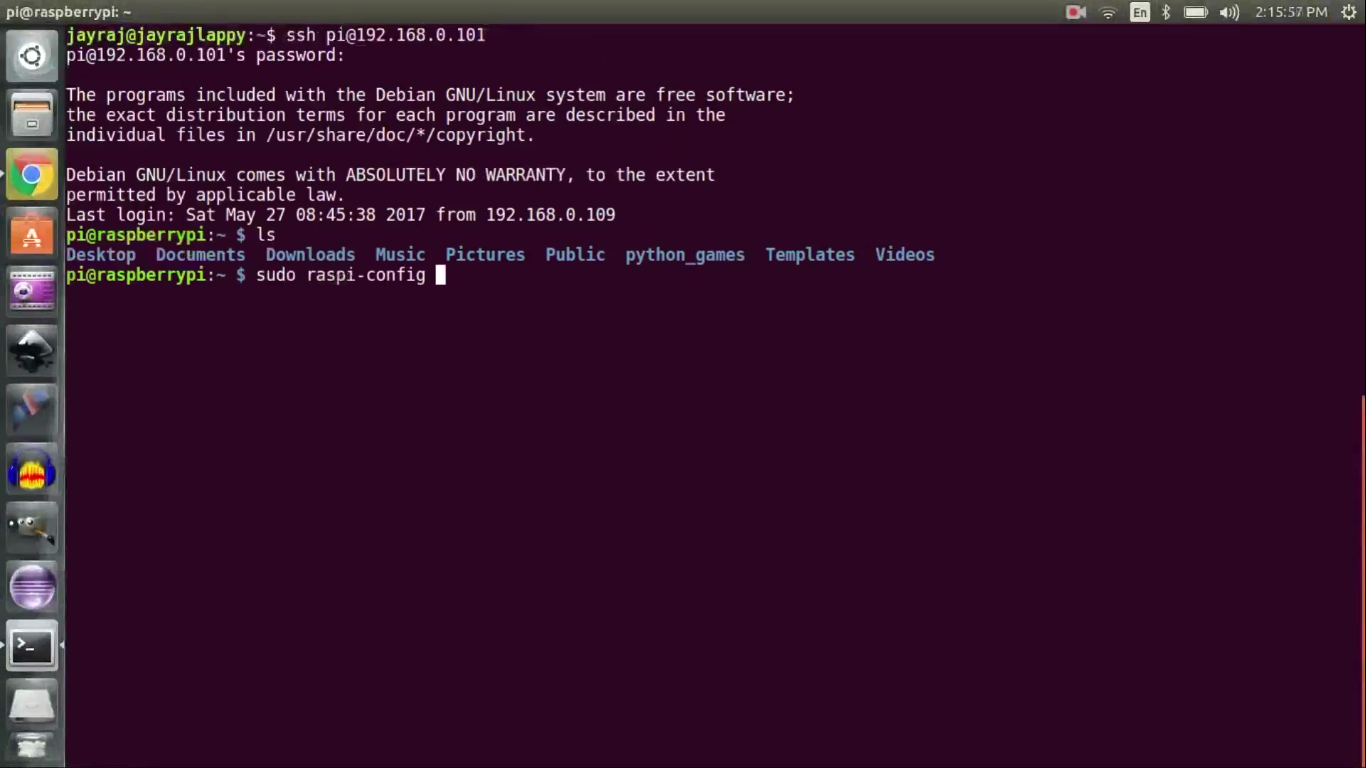
Description: Once you have IP address of raspberry pi, ssh into your raspberry pi. First thing to do is enable SPI interface.
Steps:
- Once you are in the Raspberry Pi using 'ssh pi@---.---.---.---', type 'sudo raspi-config ' to get a menu
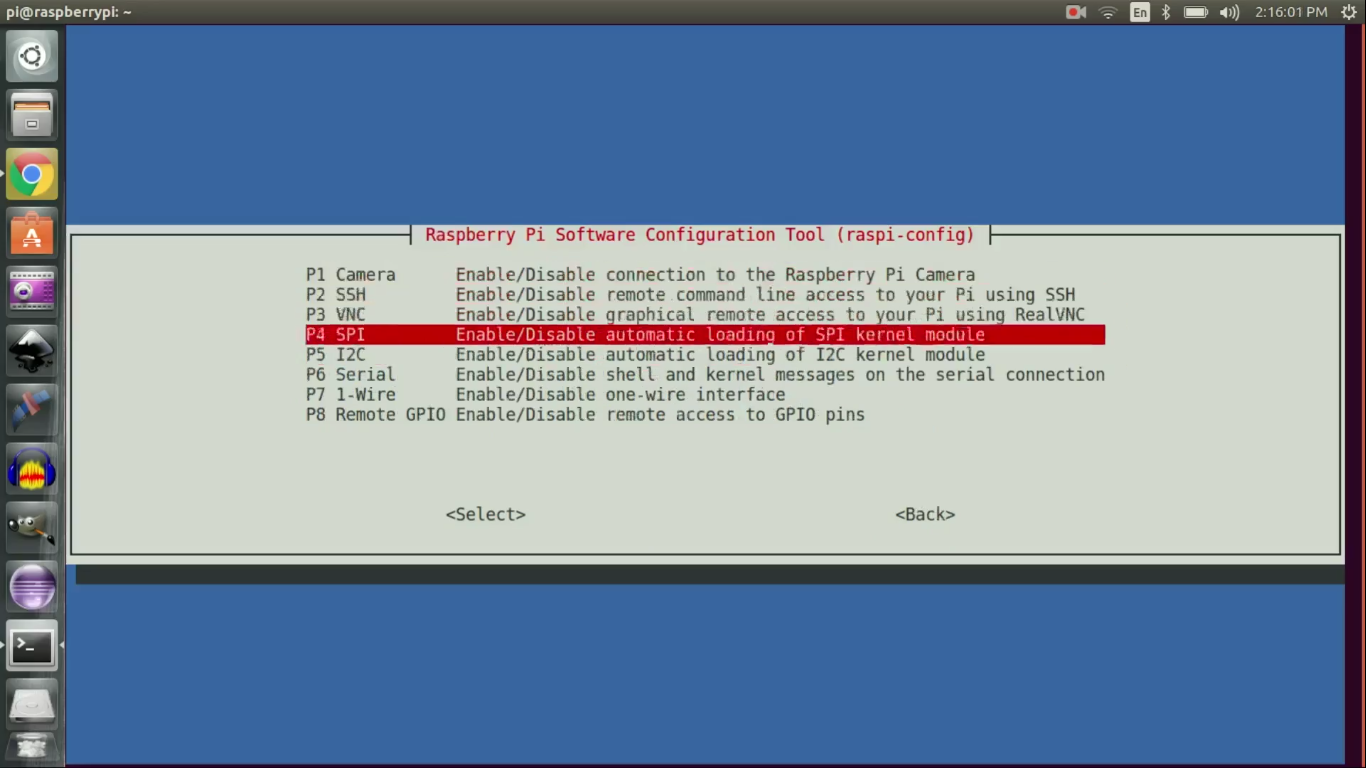
- Select 'Interfacing Options'
- Select 'SPI'
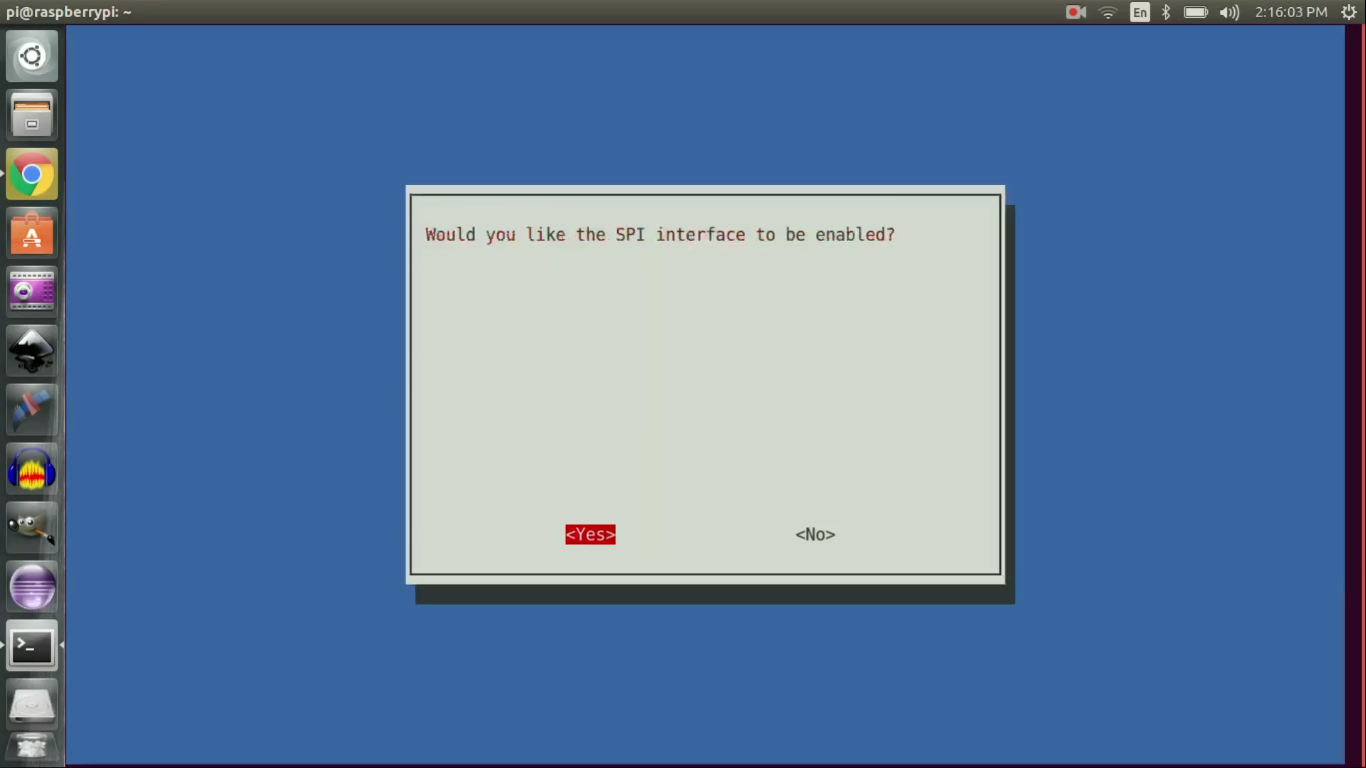
- It will ask 'Would you like SPI interface to be enabled' select 'yes'
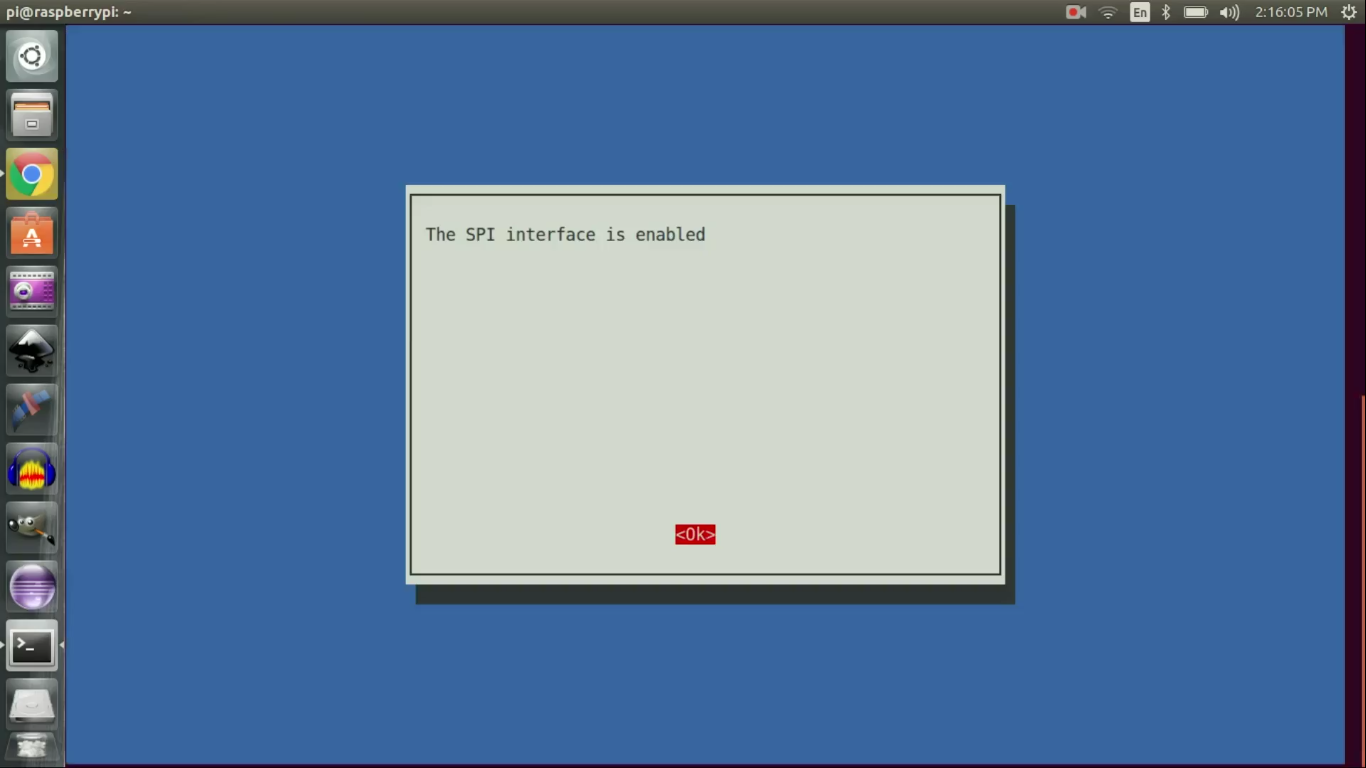
- A confirmation image will appear
- Exit the menu
- Reboot your raspberry pi using 'sudo reboot '


Step 8: Getting Git Repos
Description: Once rebooted, ssh into Raspberry Pi one more time. Now we need to download two git repos. First is from the raspberry pi guy which does handling of SPI interface and second is mine which enables the OLED vital monitor.
Steps:
- Clone the raspberry pi guys repo using:
- Once done you will see a directory called OLED in your home directory, go inside OLED directory using 'cd'
- You will find a file called OLEDinstall.sh, run it using 'sh OLEDinstall.sh',
- Now clone my git repo using:
git clone https://github.com/jayraj4021/Raspberry-pi-vital-monitor-via-OLED
- Once done you will find a directory called Raspberry-pi-vital-monitor-via-OLED, cd into it to find a file called OLEDMem_cpu.py that's our master file.
- Copy OLEDMem_cpu.py file to python_examples directory in OLED directory.
- Run this python script using:
sudo python /home/pi/OLED/python-examples/OLEDMem_cpu.py --sleep_time 1
- Script will error out saying...
 Dmitry