 Sergei V. Bogdanov
- Introduction. More than 50% of stroke survivors have the secondary Post stroke in the next 5 years. We made the Differential Dynamometer (DifDyn) for post stroke rehabilitation.
- The objective of the project. Post stroke rehabilitation can be done with very expensive Exoskeletons or some kind of joystick devices (kind of a computer games). The use of joystick is impossible for heavy patients with weak muscle control. We have to make simple chip open source device to measure fingers forces.
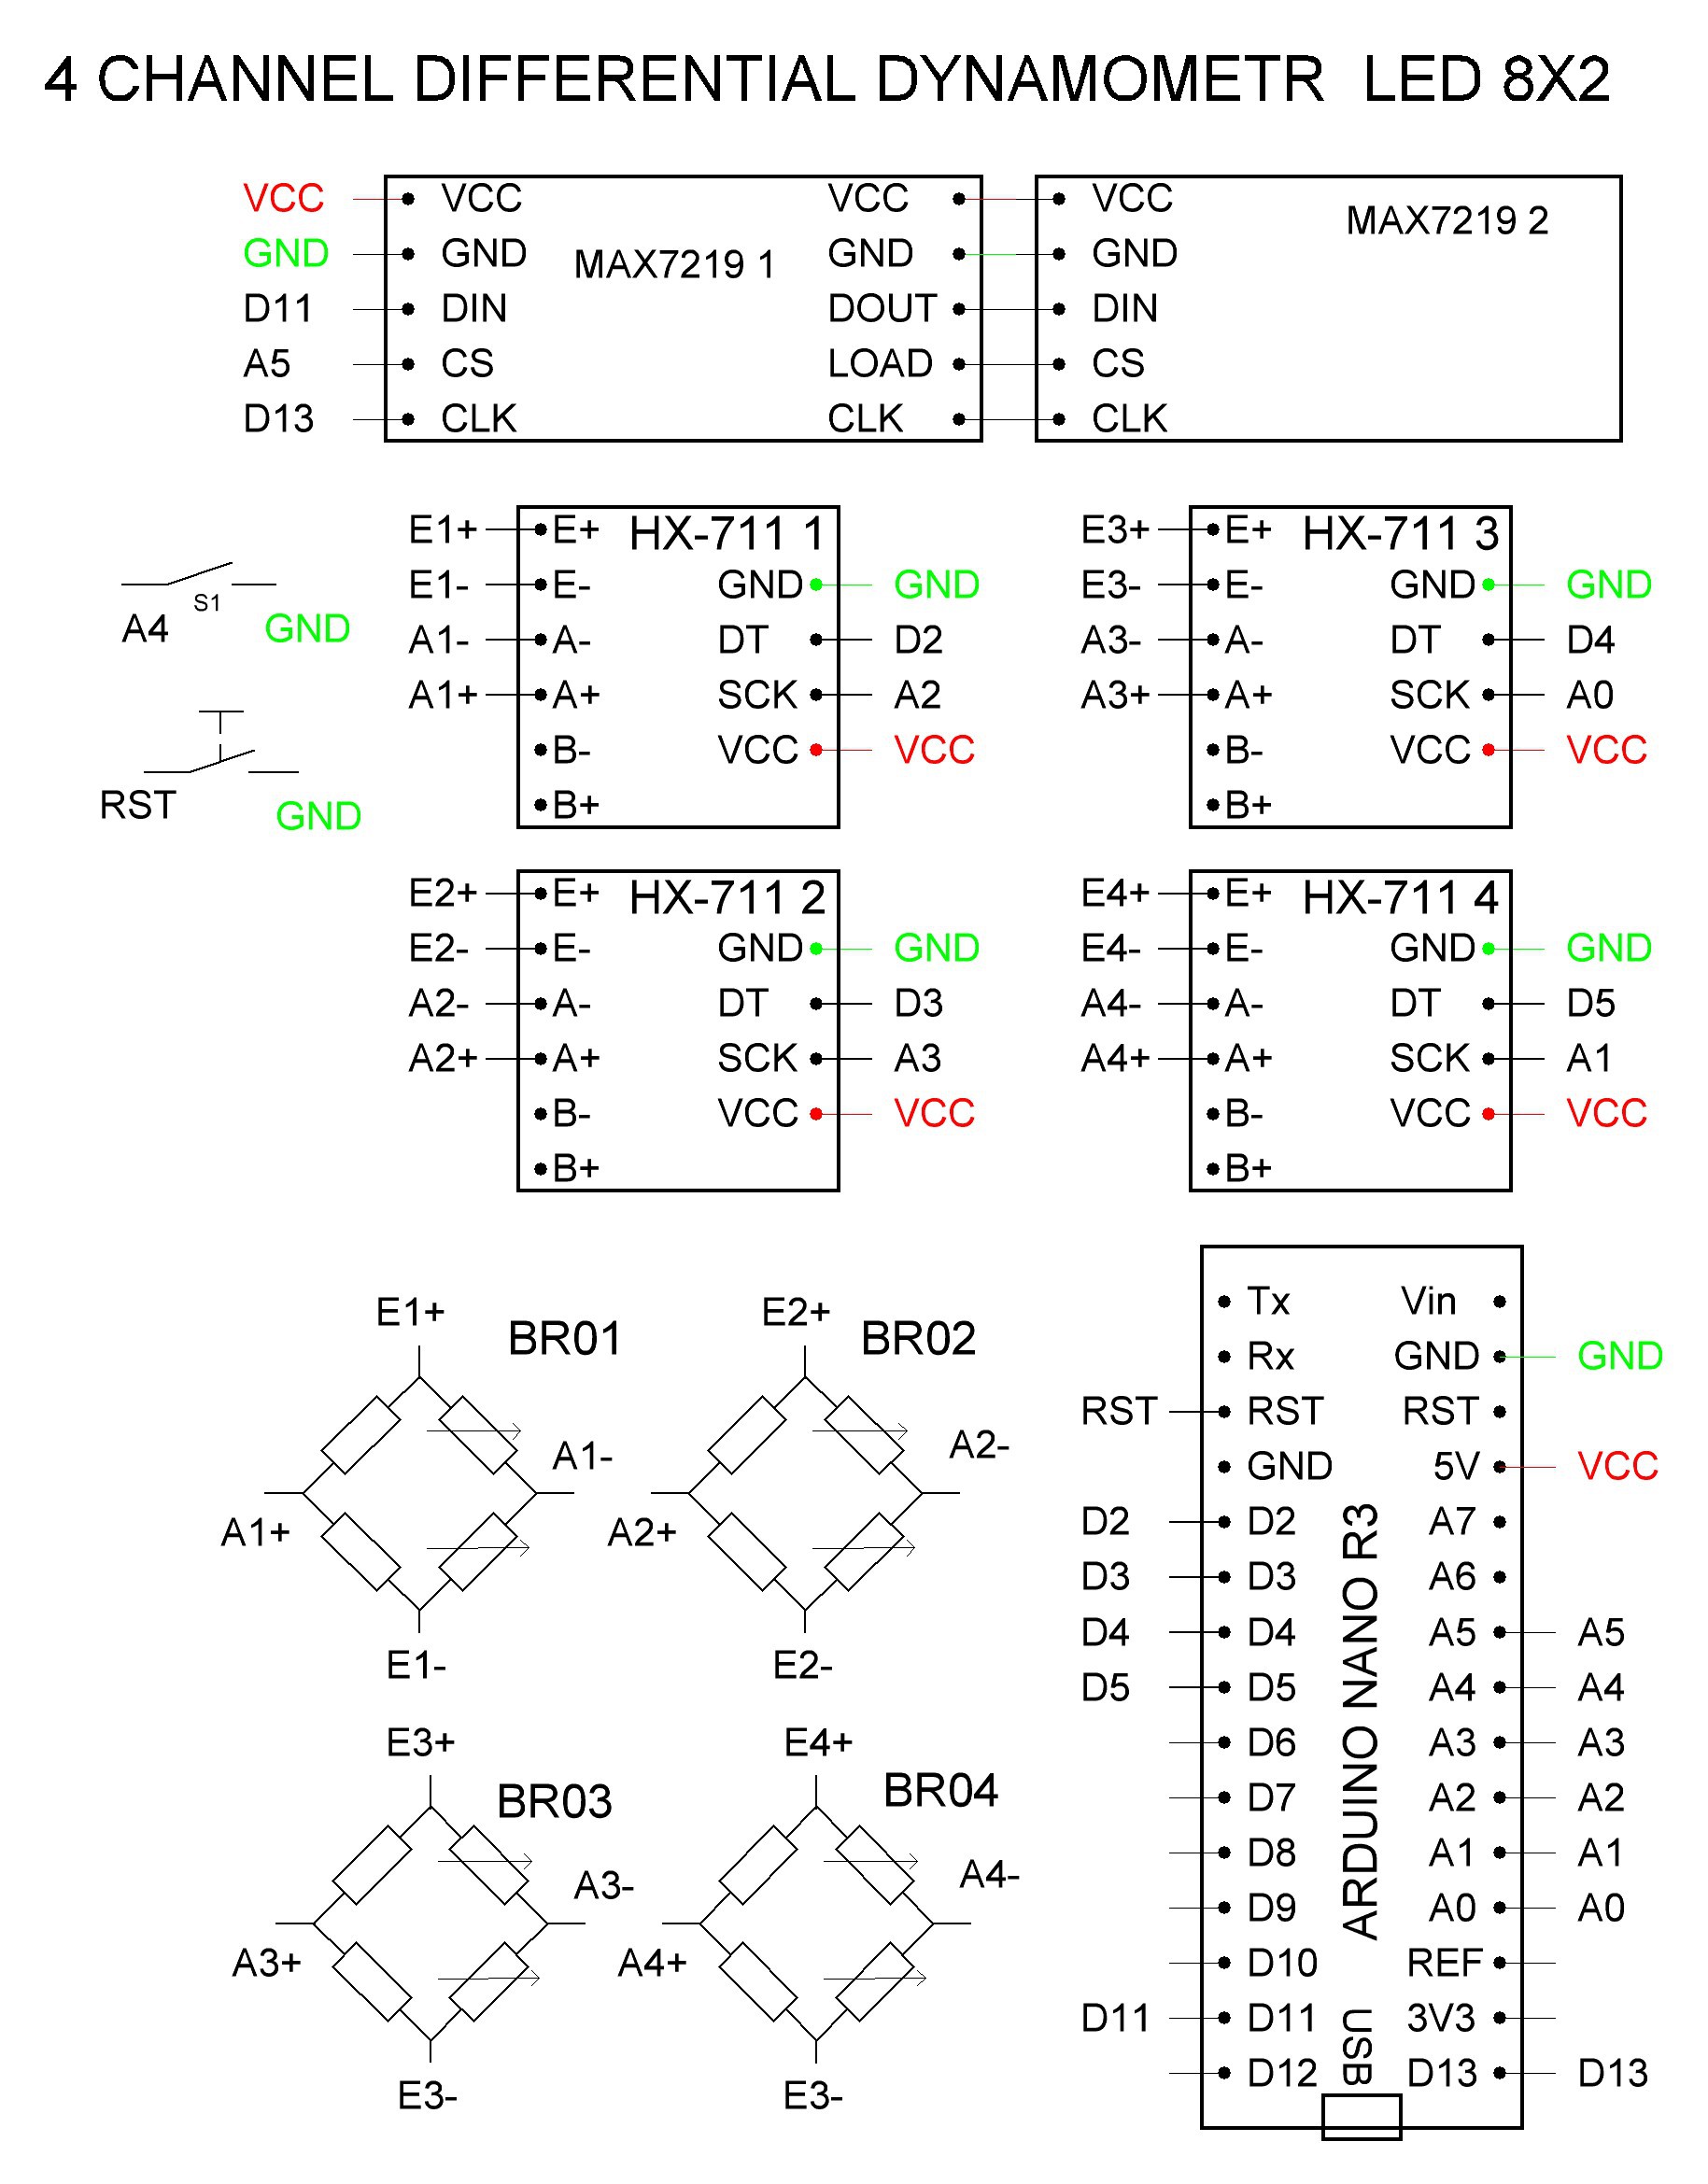
- DifDyn can measure the forces in the range ± 5000 Gramm (1 Gramm resolution). We try to construct the devise using very chip Arduino Nano controller and Arduino Shields.
- 3 types of Sensor Board are constructed, using plywood and plastic cutting boards (breadboards).
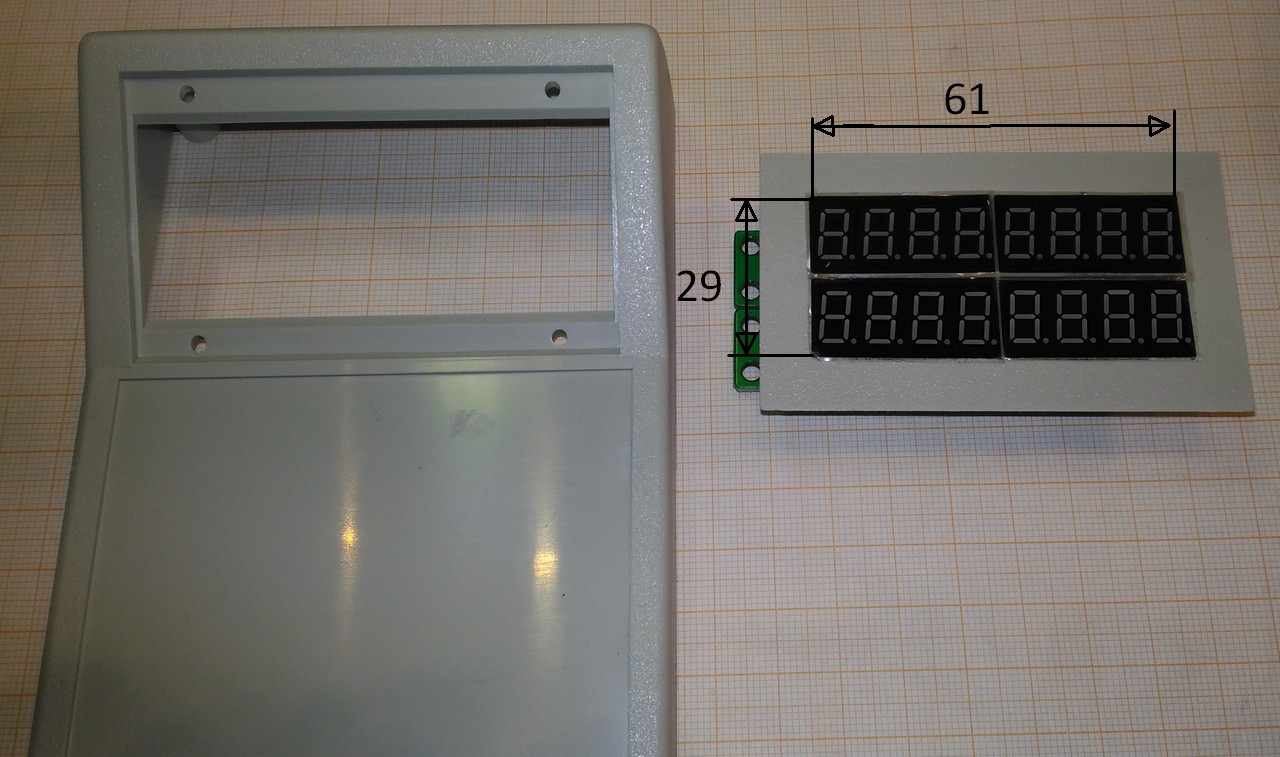
- The DifDyn has a 0.36 inch LED, 4x4 digits. The data can be shown in 4- digit format or as a bar in log scale. It is also LCD Display version. The program code is free and it is open source Arduino IDE code.
- The data can be seen in PC monitor. The program is free. The program shows 4 values of pressing forces (in Gramms), the 4 bars in log scale. The data can be stored in file as a text or in electronic table format. The data can be shown, stored and loaded as a graph diagram.
- 3 types of sensor board are tested and described- simple plywood board, plastic breadboard, and sandwich - type 3 -layer sensor board using plastic breadboards.
0%
0%
Dynamometer for Post Stroke Rehabilitation
An open-source, 4-channel differential dynamometer for post-stroke rehabilitation. Includes 4 force sensors, device with display and PC soft
Become a Hackaday.io member
Already have an account? Log in.
Just one more thing
To make the experience fit your profile, pick a username and tell us what interests you.
Pick an awesome username
hackaday.io/
Your profile's URL: hackaday.io/username. Max 25 alphanumeric characters.
Pick a few interests
Projects that share your interests
People that share your interests
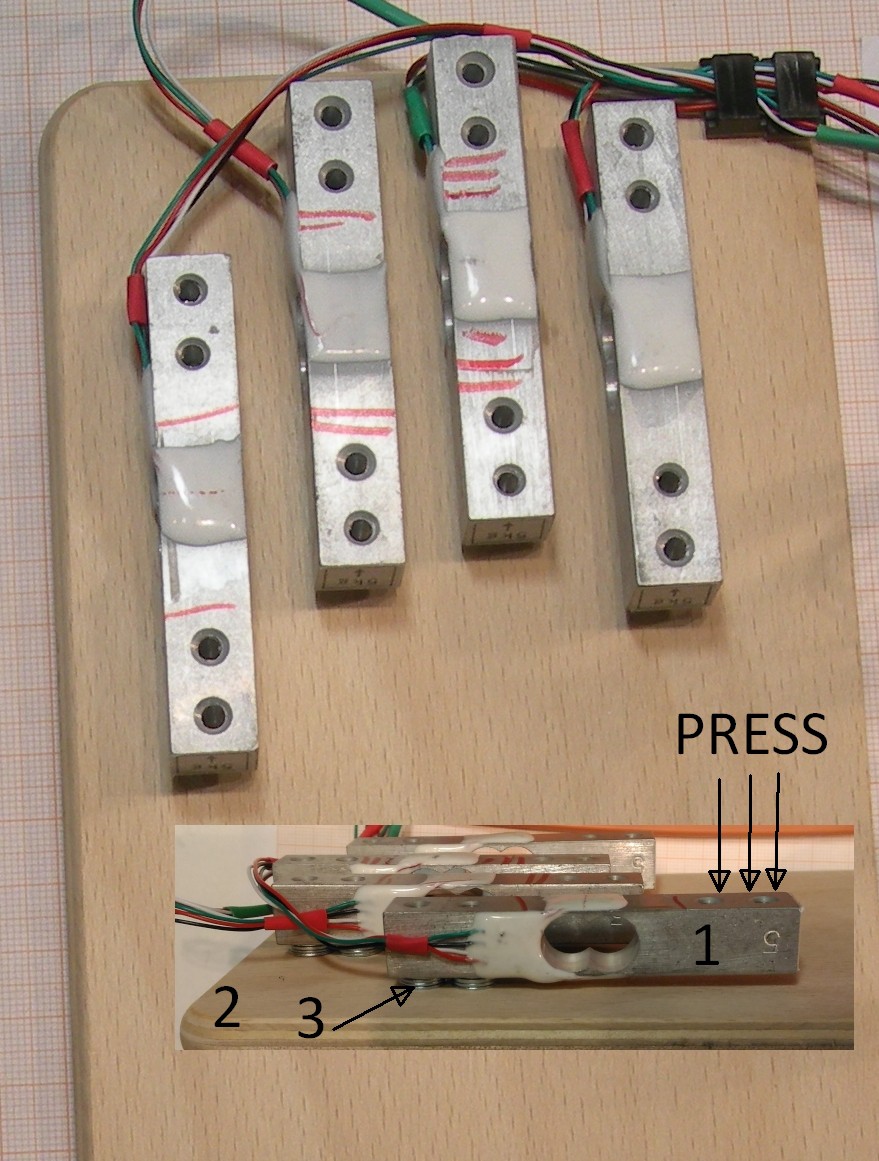

 1 - Sensors, 2- Screws M5 (fasten sensors to the board), 3- Screws M4 (fasten sensors to the moving moving base, 5 - cable to ADC, 6- Moving base for fingers
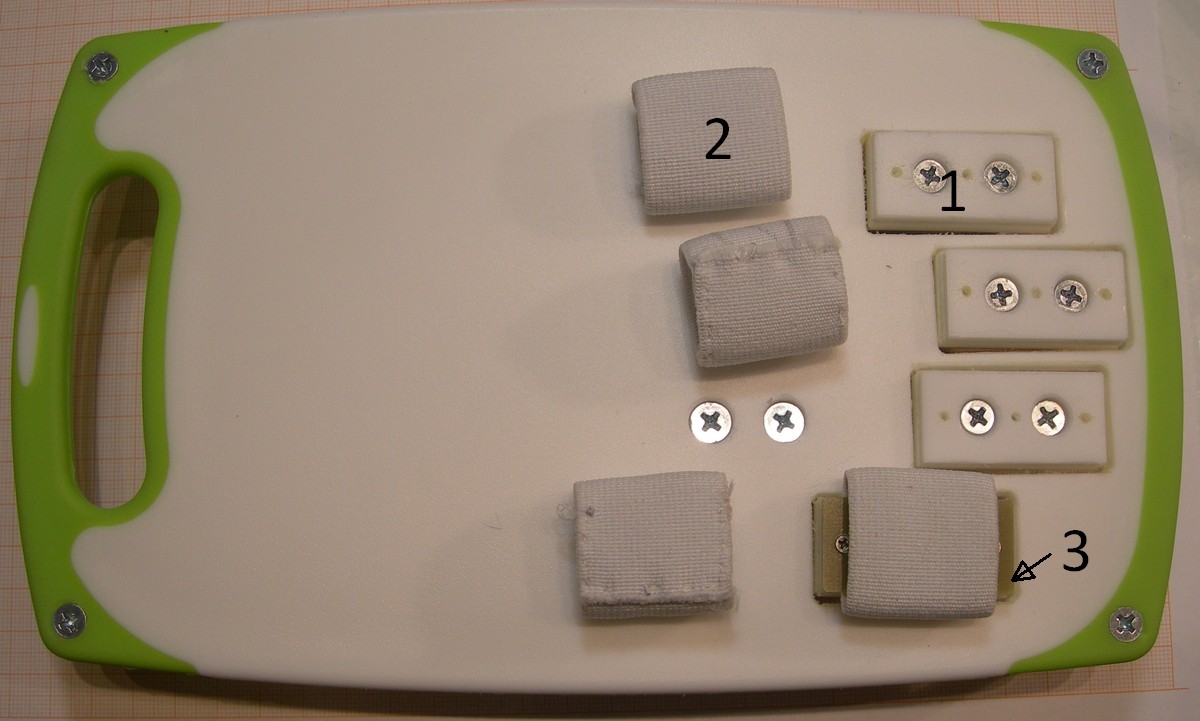 1- Moving bases, 2- Ribbon Fabric rings, 3- plastic fastener
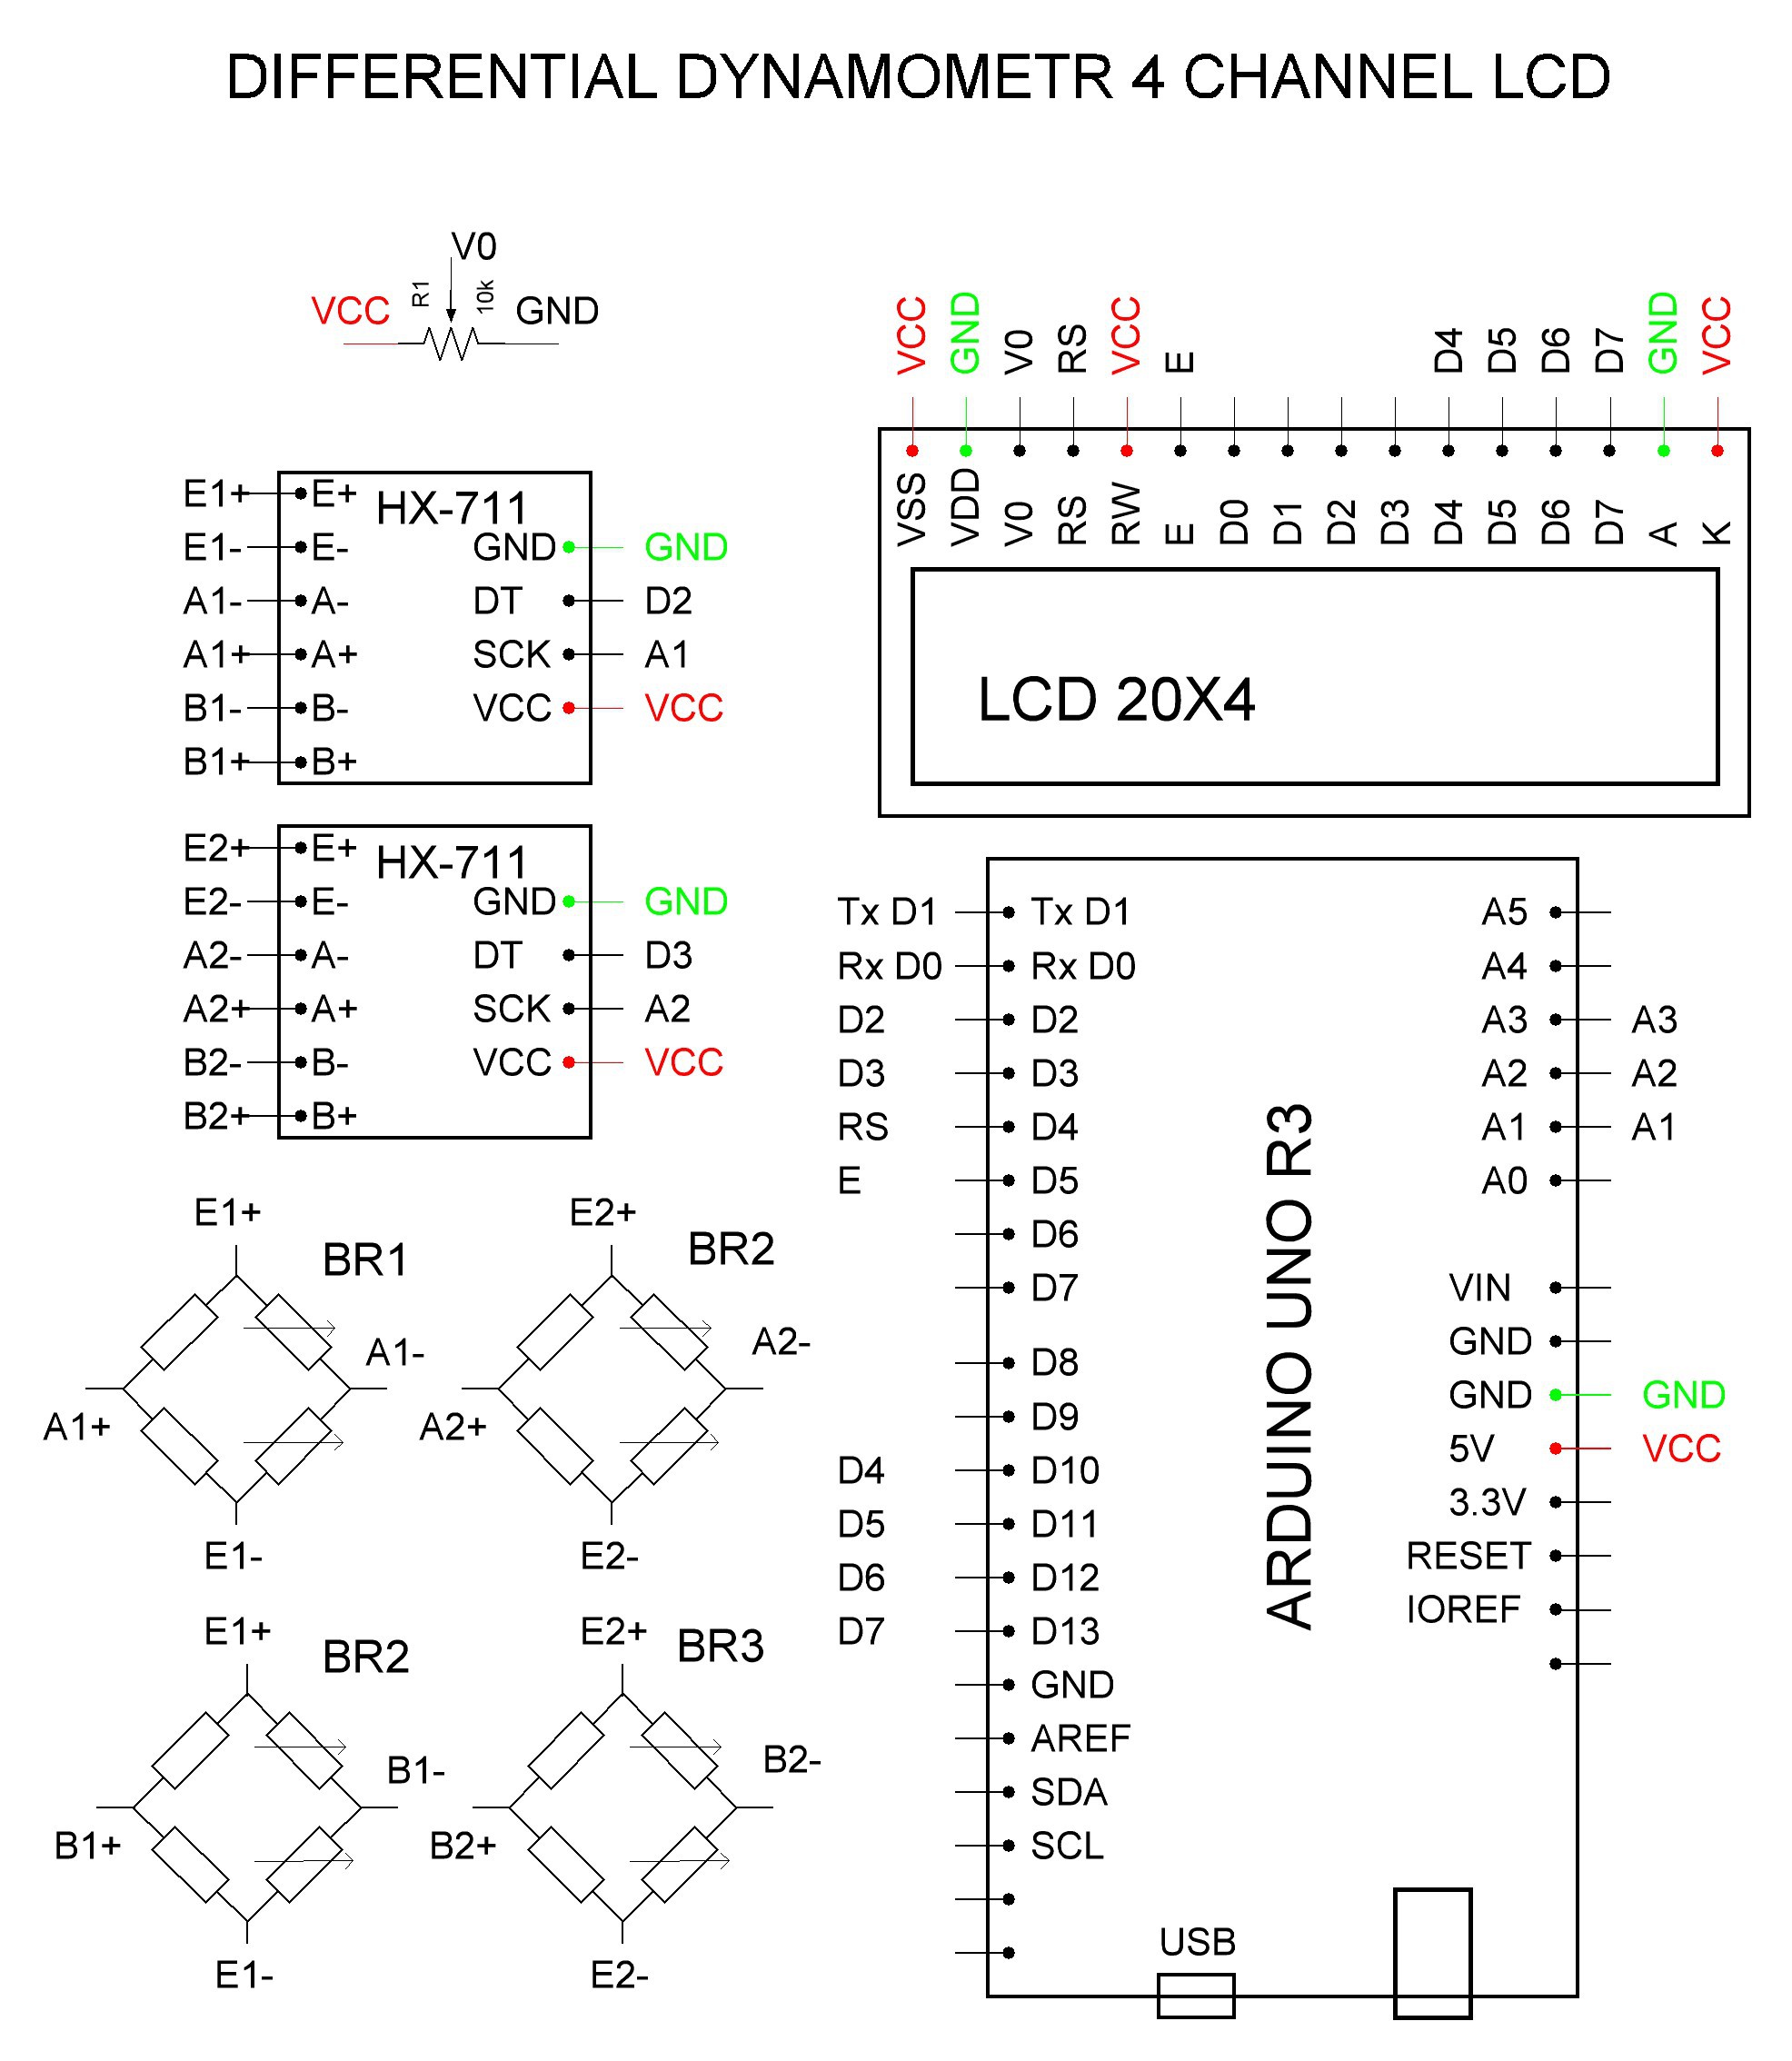
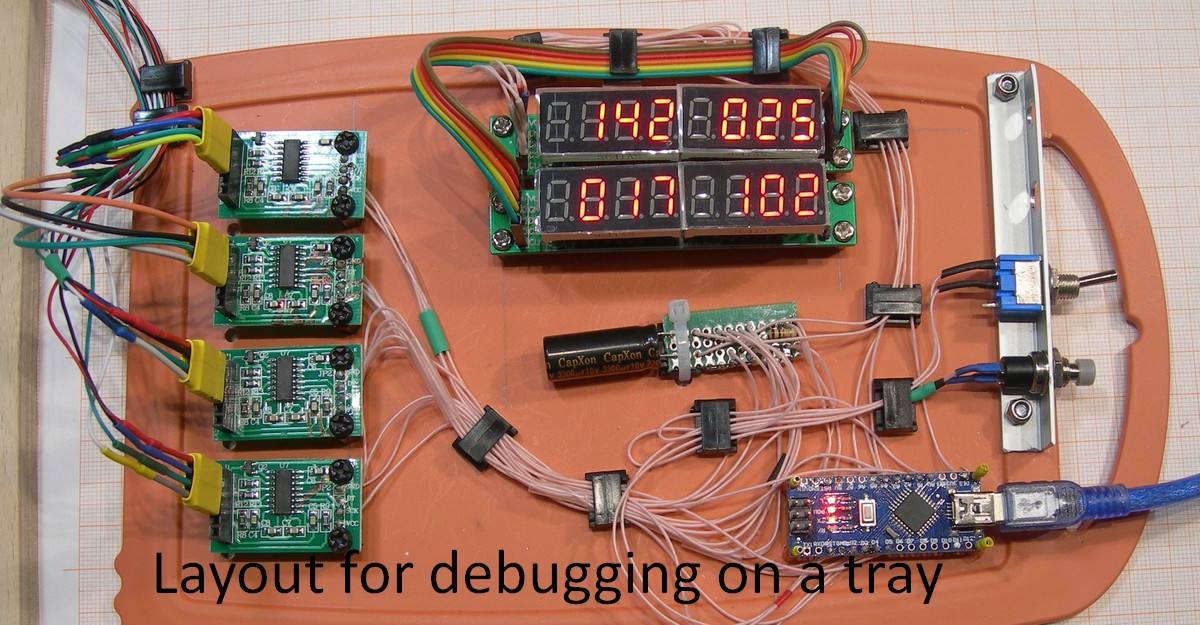
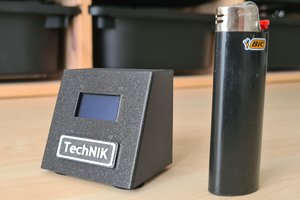
 Assembled devise is shown here, with
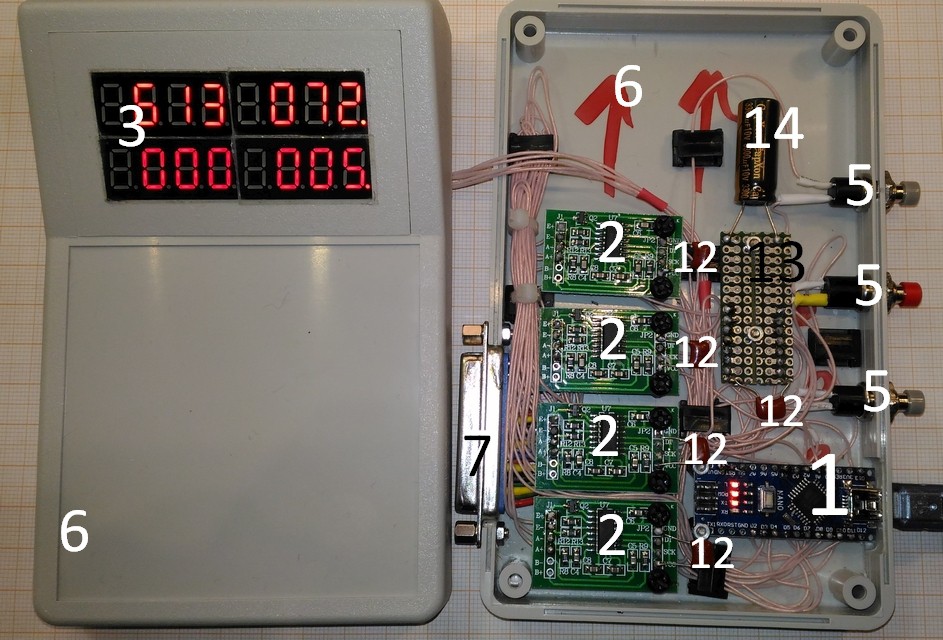

 Nik Reitmann
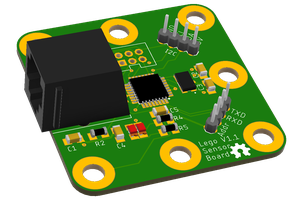
 StanislavJochman
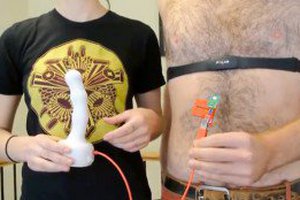
 blorgggg
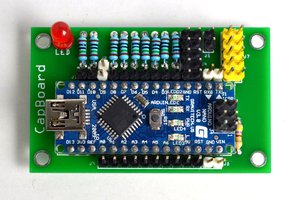
 Artis Lab
Nice project! Do you plan to use it mainly as an assesment device or are you developing any interactive games that could potentially be used for rehabilitation training?