Close
0%
0%

Latskap

A semi-automatic liquor cabinet

Similar projects worth following

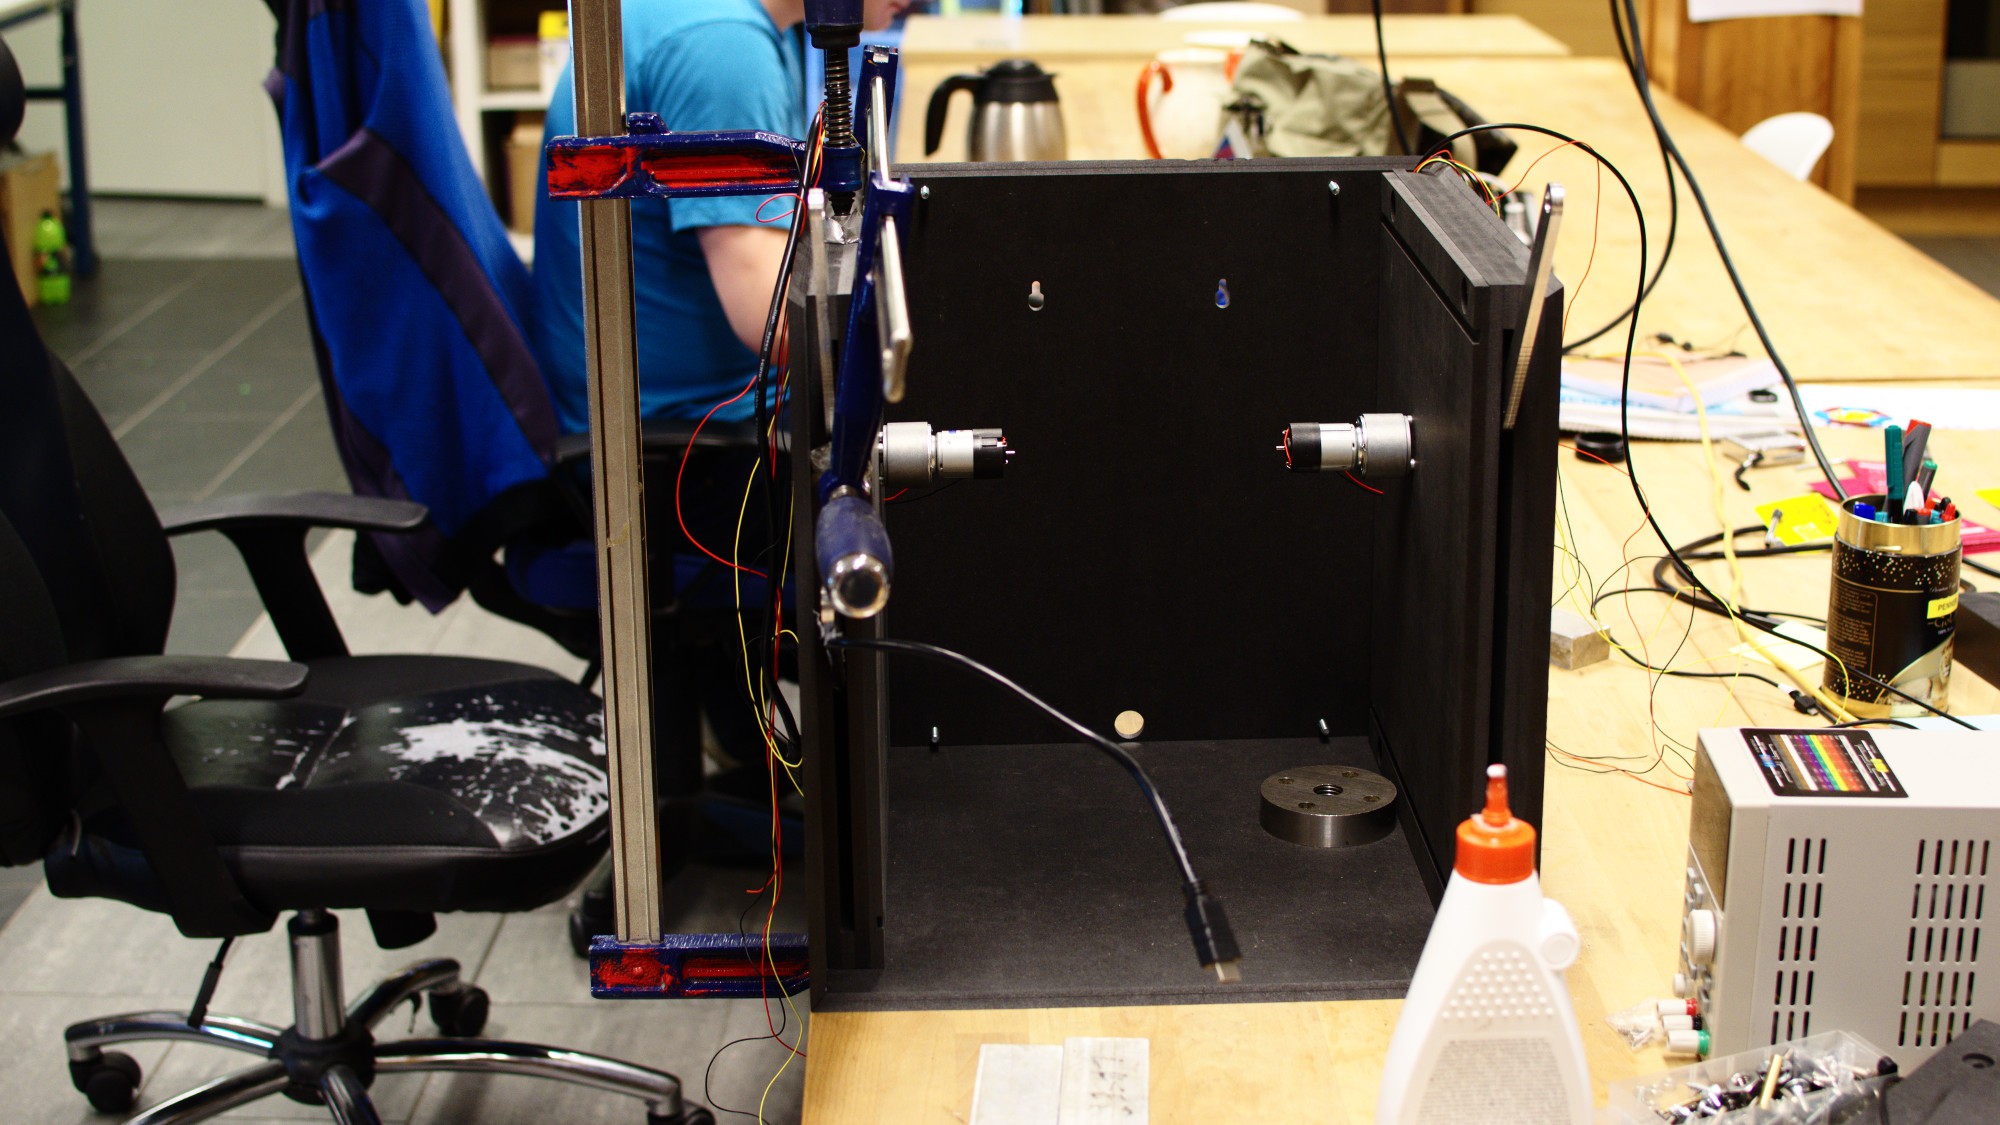
This is a semi-automatic liquor cabinet, meaning that you can choose a recipe and it will guide you through the process using lights and a weight cell. So you follow along on the screen (Manga Screen), and it will tell you which bottle to choose using lights as a guide and then using a load cell, it will tell you when to stop pouring.

Latskap is a Norwegain pun. The literal translation is "laziness", but "lat" means translates to "lazy" and "skap" translates to locker/cabinet. 

This project was initiated together with  my uncle Mike Moulton who has has making lockers for a long time. And it's been a running joke at dinner parties that "we really have to get going with Latskap", but we are to lazy to get started. 

Well Mike, I've finally gotten started! 

Latskap.ino

Arduino sketch for H-bridge, NeoPixels and load cell

x-arduino - 4.18 kB - 08/16/2017 at 14:31

Download

Latskap.fcstd

Freecad model of the cabinet

x-extension-fcstd - 1.42 MB - 08/16/2017 at 14:30

Download

  • 1 × Valchromat 8 mm
  • 1 × Aluminium sheet 6 mm
  • 1 × Acrylic 5 mm
  • 1 × Acrylic 4 mm
  • 1 × Load cell 1 Kg

View all 16 components

  • ​Assembly fails

    Elias Bakken08/12/2017 at 11:45 0 comments


    Some pretty stupid mistakes has been discovered so far with the assembly of version 1. 

    - Motor mounting holes on right side inverted

    - Manga Screen upside down

    - Missing back plate and spacers

    - Nordic triangles should be added to outer plates for the side walls, to add registration geometry

    - Use M6x30 instead of M6x20

    - Slots for roof and floor are too tight at 8.1 mm for 8 mm plates

    - Use ledges for the acrylic in the floor, also add pocket for Neopixel. 

    - The roof should be held in place by magnets

    - The front should be held in place with magnets

    - Make pockets for the End stops and add M3 nordic triangles for them. 

    - Small gear keeps breaking! Works fine to create them with Aluminium

    - Remember to add a channel for the motor cables

    - Add a channel to the aluminum for the HDMI and USB cables. 

    - The front cover needs more space than 6 mm

  • CNC aluminium + Valchromat completed

    Elias Bakken08/10/2017 at 23:55 0 comments


    Finished the Valchromat and Aluminium CNC milling on the ShopBot today. The Valchromat was 8 mm, 1250 x 2500 and the whole plate was used, just scraps to spare. Used one 6 mm single flute upcut for outlines and pockets, a 3 mm single flute upcut for small holes (3.4mm + 5 mm + 6 mm) and a 90 degree V-bit for the 45 degree angles along the edges. Managed to break the 6 mm upcut while brainfarting. Mountd the holddowns before doing the pockets. Big mistake. Luckily Siemen had two extra upcuts, since the Bitraf Boutique was out. The Valchromat is the only thing that has been purchased so far with a price of 750 NOK for the sheet. 


    I made some big mistakes on the aluminum, should not have used tabs on the parts with holes in them, instead should have opted for hold downs. Was lazy during V-carve post processing, but learned a valuable lesson. Luckily the part that will really show is the load cell holder where the drink goes. 6 mm Aluminium found in the free area. 

    Also milled the weight cell drink holder on the mill. Got some help from Nikolai on that topic, he had a background as a mechanical engineer, but had really only learned anything from Youtube, haha. Here is a 21 second video of it.

  • Load cell resolution

    Elias Bakken08/09/2017 at 12:37 0 comments

    - Had a short discussion on load cell resolution. We have a 1 Kg load cell with a HX711 ADC which has a resolution of 24 bit. In practice it is very difficult to get more than 14 bit resolution from this (according to Trygve), but 10 bit should not be a problem. 10 bits resoution is 1024 levels, giving a 1 gram resolution which should be fine for measuring drinks, since drinks seldom have ingredient quantities smaller than 1 cl = 10 gram. 

  • Freecad model completed

    Elias Bakken08/09/2017 at 00:03 0 comments

    - Completed the Freecad model and added it to the github repository. Link in description. 

    - Jon finished the N-MOS H-bridge

    - Gathered Neopixles, radar, and 1KG load cell. 

    - Decided to use an Arduino Uno for controlling NeoPixels and H-brdige

View all 4 project logs

Enjoy this project?

Share

Discussions

Similar Projects

Does this project spark your interest?

Become a member to follow this project and never miss any updates