 SunFounder
Check the video here:
Step 1: Slice the Carrot into Pieces
First, we should slice the carrot into pieces, ensure the slices are the same in thickness. And prepare two more slices just in case.
This step would be easy for you if you often cook. We prefer a fresh and juicy carrot to ensure good conductibility.
Step 2: Carve into Letters
Cut those slices into the letters you like. Here I make them to SUNFOUNDER.
Note: the knife is quite sharp, so be careful to operate to prevent getting injured.
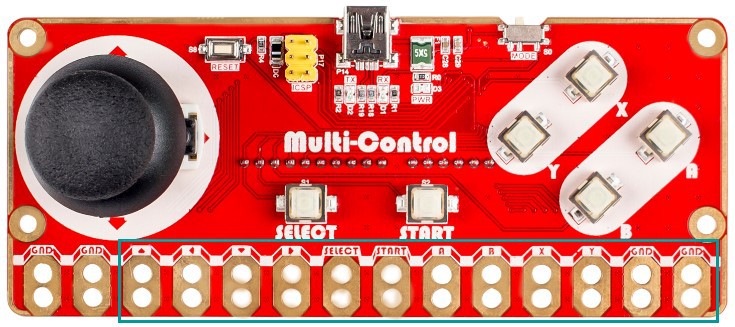
Step 3: Complete Wiring
First, clip each alligator clip cable to each male-to-male wire. Then connect the carrot pieces “SUNFOUNDER” to the holes of Multi-Control board one by one as follows:
Carrot pieces------------------------------Multi-Control
S----------------------------------------------------UP
U--------------------------------------------------LEFT
N--------------------------------------------------DOWN
F---------------------------------------------------RIGHT
O-------------------------------------------------SELECT
U---------------------------------------------------START
N-------------------------------------------------------A
D-------------------------------------------------------B
E--------------------------------------------------------X
R---------------------------------------------------------Y
Extend the GND of Multi-Control with an alligator clip cable.
Step 4: Modify and Upload the Code
Visit the wiki page of Multi-Control (http://wiki.sunfounder.cc/index.php?title=Multi-Control), you can see the related resources.
Then go to Github page (https://github.com/sunfounder/SunFounder_Multi_Control) and download the code.
Unzip the download package. Open multi-control-keyboard.ino code, and click kepmap.h to modify the mapping of keyboard values.

Then select the board type (Leonardo) and port, and upload the code.
Step 5 Carrot Keyboard! So Cool!!
After uploading successfully, create and open a new file. Hold the GND cable at one hand, and touch those carrot slices to type the corresponding words.
Note:
1. Remember to turn on the Caps Lock before typing;
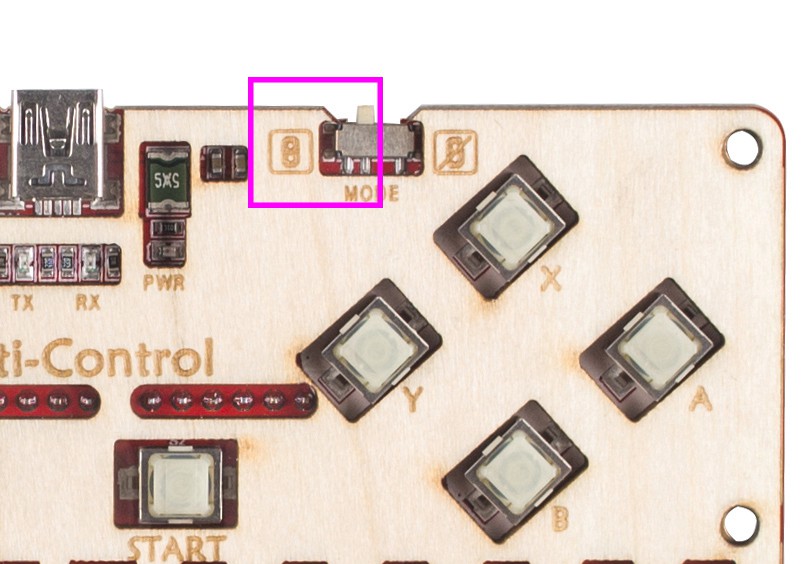
2. You need to turn on the Touch Input Control switch.

 Chris B
 laurenternes
 ptrav
ptrav
 remotemod328