Close
0%
0%

Open Source PCB "Business Card"

My business card is an ATtiny85 dev board the size of a credit card. Types out my contact info when a capacitive touch sensor is activated.

Similar projects worth following
Primarily designed to be used a Business Card/Resume/Portfolio, it is an ATtiny85 dev board in a credit card sized form factor. PCB files in Fritzing, so easy anyone can modify them for personal use. The demo app types out contact info when capacitive touch sensor is activated. This can be easily changed though as the micronucleus bootloader is used and the device can be programmed in the Arduino IDE as a Digispark. The main components on the board are all SMD to be low profile and easily slip into a wallet, but there are some optional through hole component upgrades the recipient can add as well as a prototyping area and all the ATtiny85 pins are broke out. Its not just something to look at and throw away, its a usable dev board for the recipient of your Business Card, it can basically be used like an Arduino™. Also would be great to hand out to potential employers as a supplement to your resume.

PCB Business Card by: Corey Harding
Files available at GitHub: https://github.com/exploitagency/PCB-Business-Card

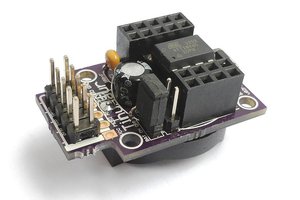
My PCB "business card" was designed with a credit card sized form factor in mind to easily fit into a wallet. The board also doubles as an ATtiny85 development board with pins broke out and a prototyping area. The ATtiny85 is pre-programmed to type out my contact info when a capacitive touch sensor is activated. There are also several optional through hole component upgrades for the end user to experiment with. You can even program the board using the Arduino IDE. It is preloaded with a custom 1s delay micronucleus bootloader and it is digispark compatible.

The hardware is based on the minimal schematic for a digispark/micronucleus compatible board. A few parts have also been added for better stability as well as a capacitive touch sensor. Gerber files are included in the repo to send immediately to a board house as well as Fritzing PCB files to allow users to easily customize my board design.

I have seen other similar PCB business cards out there but I made sure to make my project easy for people to modify for personal use as well as allowing the person receiving the business card to have something extra to play with. I believe the ease of use and giving the end user something functional vs just something to look at and throw away is what makes my project stand out. Not to mention capacitive touch sensors are always fun to use!

Hardware License: Attribution-ShareAlike 3.0 Unported (CC BY-SA 3.0)

Video Demo:

  • 1 × Attiny85-20SU Microprocessors, Microcontrollers, DSPs / ARM, RISC-Based Microcontrollers
  • 1 × 0.1µF Ceramic Capacitor package 0805
  • 2 × 68Ω Resistor package 0805
  • 2 × 10kΩ Resistor package 0805
  • 1 × 1.5kΩ Resistor package 0805

View all 6 components

  • 1
    Assembly
    ATtiny85attiny85version Attiny85-20SU
    AVR ISPAVR ISP 6 Pinpackage 1x6; pins 6; variant pth
    C1Ceramic Capacitorvoltage 6.3V; capacitance 0.1µF; package 0805 [SMD, multilayer]
    R168Ω Resistorresistance 68Ω; tolerance ±5%; package 0805 [SMD]
    R268Ω Resistorresistance 68Ω; tolerance ±5%; package 0805 [SMD]
    R31.5kΩ Resistorresistance 1.5kΩ; tolerance ±5%; package 0805 [SMD]
    R410kΩ Resistorresistance 10kΩ; tolerance ±5%; package 0805 [SMD]
    R510kΩ Resistorresistance 10kΩ; tolerance ±5%; package 0805 [SMD]
    Z1DIODE-ZENERpackage sod-323; variant -bzt52; part # 3V6 Zener
    Z2DIODE-ZENERpackage sod-323; variant -bzt52; part # 3V6 Zener

    All of the required components are surface mount to easily fit into a wallet for use as a business card.

    This sounds terribly difficult if you have never tried soldering surface mount components before but it is incredibly simple, no need to use your iron.  Get some low temp solder paste and any cheap hot air gun will work(preferably temp controlled hot air rework station), but even a frying pan or hot plate will work.  Just dab, place, and heat, then clean it up a bit when it cools.  Done...

  • 2
    Initial programming instructions if building the board from scratch

    (Any of my assembled boards already have the bootloader burned in)

    Fuse: avrdude -c buspirate -P /dev/ttyUSB1 -p attiny85 -U lfuse:w:0xe1:m -U hfuse:w:0xdd:m -U efuse:w:0xfe:m -B 20

    Burn Bootloader: avrdude -c buspirate -P /dev/ttyUSB1 -p attiny85 -U flash:w:bootloader.hex:i -B 20

    The Micronucleus build included has a custom 1 second programming delay before running the application.   The default 6 second delay was too long to wait to run the application for my specific use case.

  • 3
    Programming the application portion via the Arduino IDE

    File - Preferences - Additional Board Manager URLs

    http://digistump.com/package_digistump_index.json

    OK

    Tools - Board - Boards Manager... - Digistump AVR Boards - Install

    Select - Board: Digispark (Default - 16.5mhz)   Programmer: Micronucleus

    Upload

View all 4 instructions

Enjoy this project?

Share

Discussions

bguince.y wrote 02/24/2022 at 19:14 point

Can this device help to swipe new credit cards? I want to test it for credit cards for bad credit programs.

  Are you sure? yes | no

EngineerAllen wrote 11/06/2017 at 08:40 point

your video is in 240p

  Are you sure? yes | no

Similar Projects

Does this project spark your interest?

Become a member to follow this project and never miss any updates