It was not a trivial task to make the necessary permanent changes to the QNAP NAS.
Some parts of this are at/beyond my usual skillset: Linux, setting up a Linux toolchain.
My intention was to make a useful and reliable tool. Much more would have been possible if the UPS's interface had offered more information. In my case, the simplicity of the UPS’ interface limits how much we can do.
Terminology
cron The "task scheduler" build into all Unix-like systems.
NAS Network Attached Storage (a network device for storing files)
UPS uninterruptible power supply
stty a command-line application commonly provided on *nix operating system installations for serial communication from the command line.
Theory of Operation
For those who aren't familiar with a sequence diagram shown below (figure 1), at one minute intervals, the NAS's operating system will run a scheduled task (we will configure this in the setup file for "cron"). I had chosen for it to run this task every minute but you could choose any polling interval you like.
When our cron task runs our application, the application will open the USB port and initiate a conversation with the Arduino asking about the power situation (literally "HowAreThings?"). The Arduino will be aware of the power status because it's polling the UPS status signals. The Arduino will tell our NAS application whether the NAS must initiate shutdown or not. If the NAS application has been instructed to initiate shutdown, it will run the QNAP/Linux application /sbin/poweroff. When the NAS shutdown is complete, the USB power will go off. The Arduino is powered from the UPS so it continues running even when the NAS shutdown is complete. When the Arduino sees that the USB power went off and that the UPS is running on batteries, it will signal the UPS to also shut down.
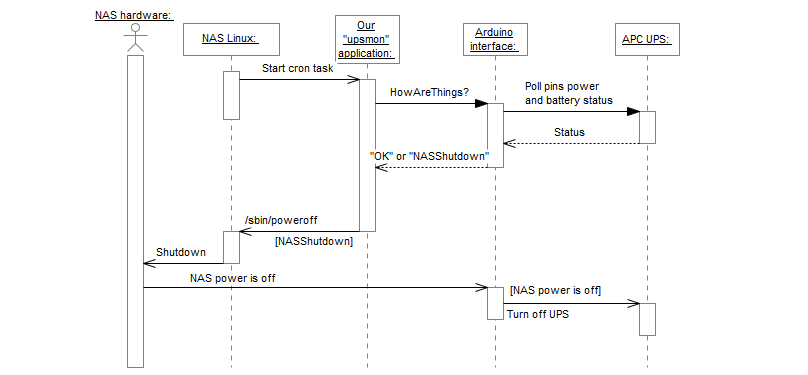 Figure 1: sequence of operation
Required skills
Soldering with a good soldering iron (3 wire plug)
Basic Arduino IDE skills
Basic Linux skills
Skills with Linux text editors
Basic C
Software you’ll need
Arduino IDE
A Linux installation having gcc (or an ability to cross-compile to Linux)
Libusbp (C USB library)
 Lee Cook
 Pat Hogan
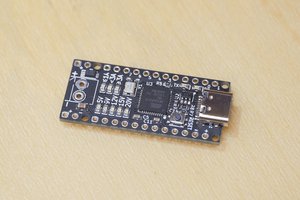
 Euripedes