 facelessloser
tl;dr
Well why wouldn’t you want a night vision camera. My first idea was to have a raspberry pi with a night vision camera but instead of a screen it would stream to a phone in one of these “virtual reality” headsets but I couldn’t find a setup that didn’t have too much lag.
I also didn’t want to make just another raspberry pi camera so that’s why I went with the night vision camera. What started as an “easy” project turned into a long list of problems to solve, that’s where the fun lies
Hardware

Hardware list
- Raspberry pi zero W
- Night vision IR raspberry pi camera
- Xiaomi power bank board
- 3x push buttons
- Power switch
- 1200 mAh lipo battery
- ADS1115 analog I2C
- 3.2″ touch screen
- Aluminium enclosure
- Female USB panel mount
- Female micro USB panel mount
- 3x 3mm LED’s
- 3x 3mm LED panel mounts
Total cost £66.51
The power struggle
I thought this would be a relatively straight forward project untill I got into the details. One of the details was the power requirements. Its easy enough to power a raspberry pi but when you throw in a screen and the camera. What makes it even more difficult is that fact that the camera has 2 high power IR LED’s. While testing I tried a few power banks I had on hand. I found out that the raspberry pi, screen and camera were pulling about 1.5amp – 2amps with the IR LED’s on pull power.
I found that most power banks I had wern’t up for the task. I took a punt on Xaomi power bank board, It claimed to output 2amps. I tested the power bank when it arrived and sure enough I was able to support the Raspberry pi zero, screen, camera as well as the IR LED’s.
I was all set, Found a 1200 mAh lipo battery and give it an endurance test. With the IR LED’s on the whole time I was only managing 45 mins, This wasn’t terrible considering the whole setup was pulling 1.5amps. I went looking for a bigger battery and found a 2000mAh battery that was nice and slim, the problem with this battery was it couldn’t handle the high current draw from the power bank so I switched back to the 1200mAh battery. ideally I would use a Samsung 25r 18650 cell but there isn’t enough space. These battery’s are designed for high current draw and are often used in the vaping scene.
LED’s

I know what your thinking, why would you add LED’s to a night vision camera. The first LED I always add to a raspberry pi project is to break out the ACT LED, This is so that when you shutdown the pi you can see the 10 flashes that tell you it’s finished shutting down and its safe to turn off plus it doesn’t hurt to see the activity of the pi.
The other 2 LED’s I added were broken out from the power bank board, On the power bank board there are 4 LED’s to indicate the battery level while discharging and charging. I only broke out the 1st and last LED’s so I would know when that battery’s getting low and when it had finished charging.
Software struggle
Where do I start with the software. While I was waiting for my 3.2″ screen to come I was using a 5″ HDMI screen. I got the camera up and running using pi camera. It wasn’t until I received the 3.2″ screen that my first problem cropped up, You see the pi camera using a hack where is basically pipes the camera to the HDMI output so when I was using the 5″ HDMI screen it worked find but the 3.2″ screen didn’t show anything.
To solve this I turned to pygame, This wasn’t a problem since I would be building my interface with this. I found this code that grabbed the output from the camera and put it into a frame buffer that was then displayed in pygame. This was great because it allowed me to scale down the stream to fit the 3.2″ screen.
My next problem was how was I going to access the photos from the camera. I first thought about turning the pi zero w into an access point and viewing the photos in the web browser on my phone, This seamed clunky. I finally came up with the plan to use a removable usb flash drive and hard coding...
Read more »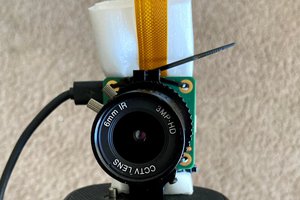
 Huan Truong
 Jim Bennett
 nick.r.brewer
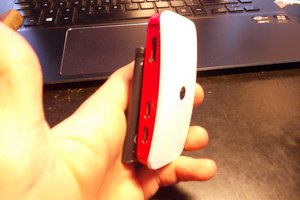
 Arya
Arya