 Saimon
If you need to add some rotary encoder to your project, the I2C Encoder is the right choice!
Reading a rotary encoder is not easy task, you need at least 2 interrupt pins for each encoder. When you need to add more than one encoder, it becomes more complicated to achieve accurate reading.
I2C Encoder not only solves such problems, it also has more features as following:
Feature:
- I2C bus working up to 400kHz, with possibility to enable the pull-up resistor
- Possibility to connect 16 encoders on the same I2C bus, by setting the addresses with 4 SMD jumpers
- Possibility to add a bi-color LED and setting a 8 bit PWM value
- Open-drain Interrupt output pin, so no need to continuously polling the devices
- Easily chainable thanks to the connectors on the left and right sides
- Any type of rotary encoder fits
- It can read in X1 and X2 modes. This can be useful with the encoder without detent
- 32 bit counter with also MAX and MIN thresholds
- Voltage range is 2.5V to 5V
- Possibility to customize the internal FW
More details
The I2C Encoder is powered by the microcontroller PIC 16F15323. It is a cheap microcontroller but it has 2 very important pheripherals that are essential to this project. It has 4 CLC peripherals and dedicated I2C pheripheral.
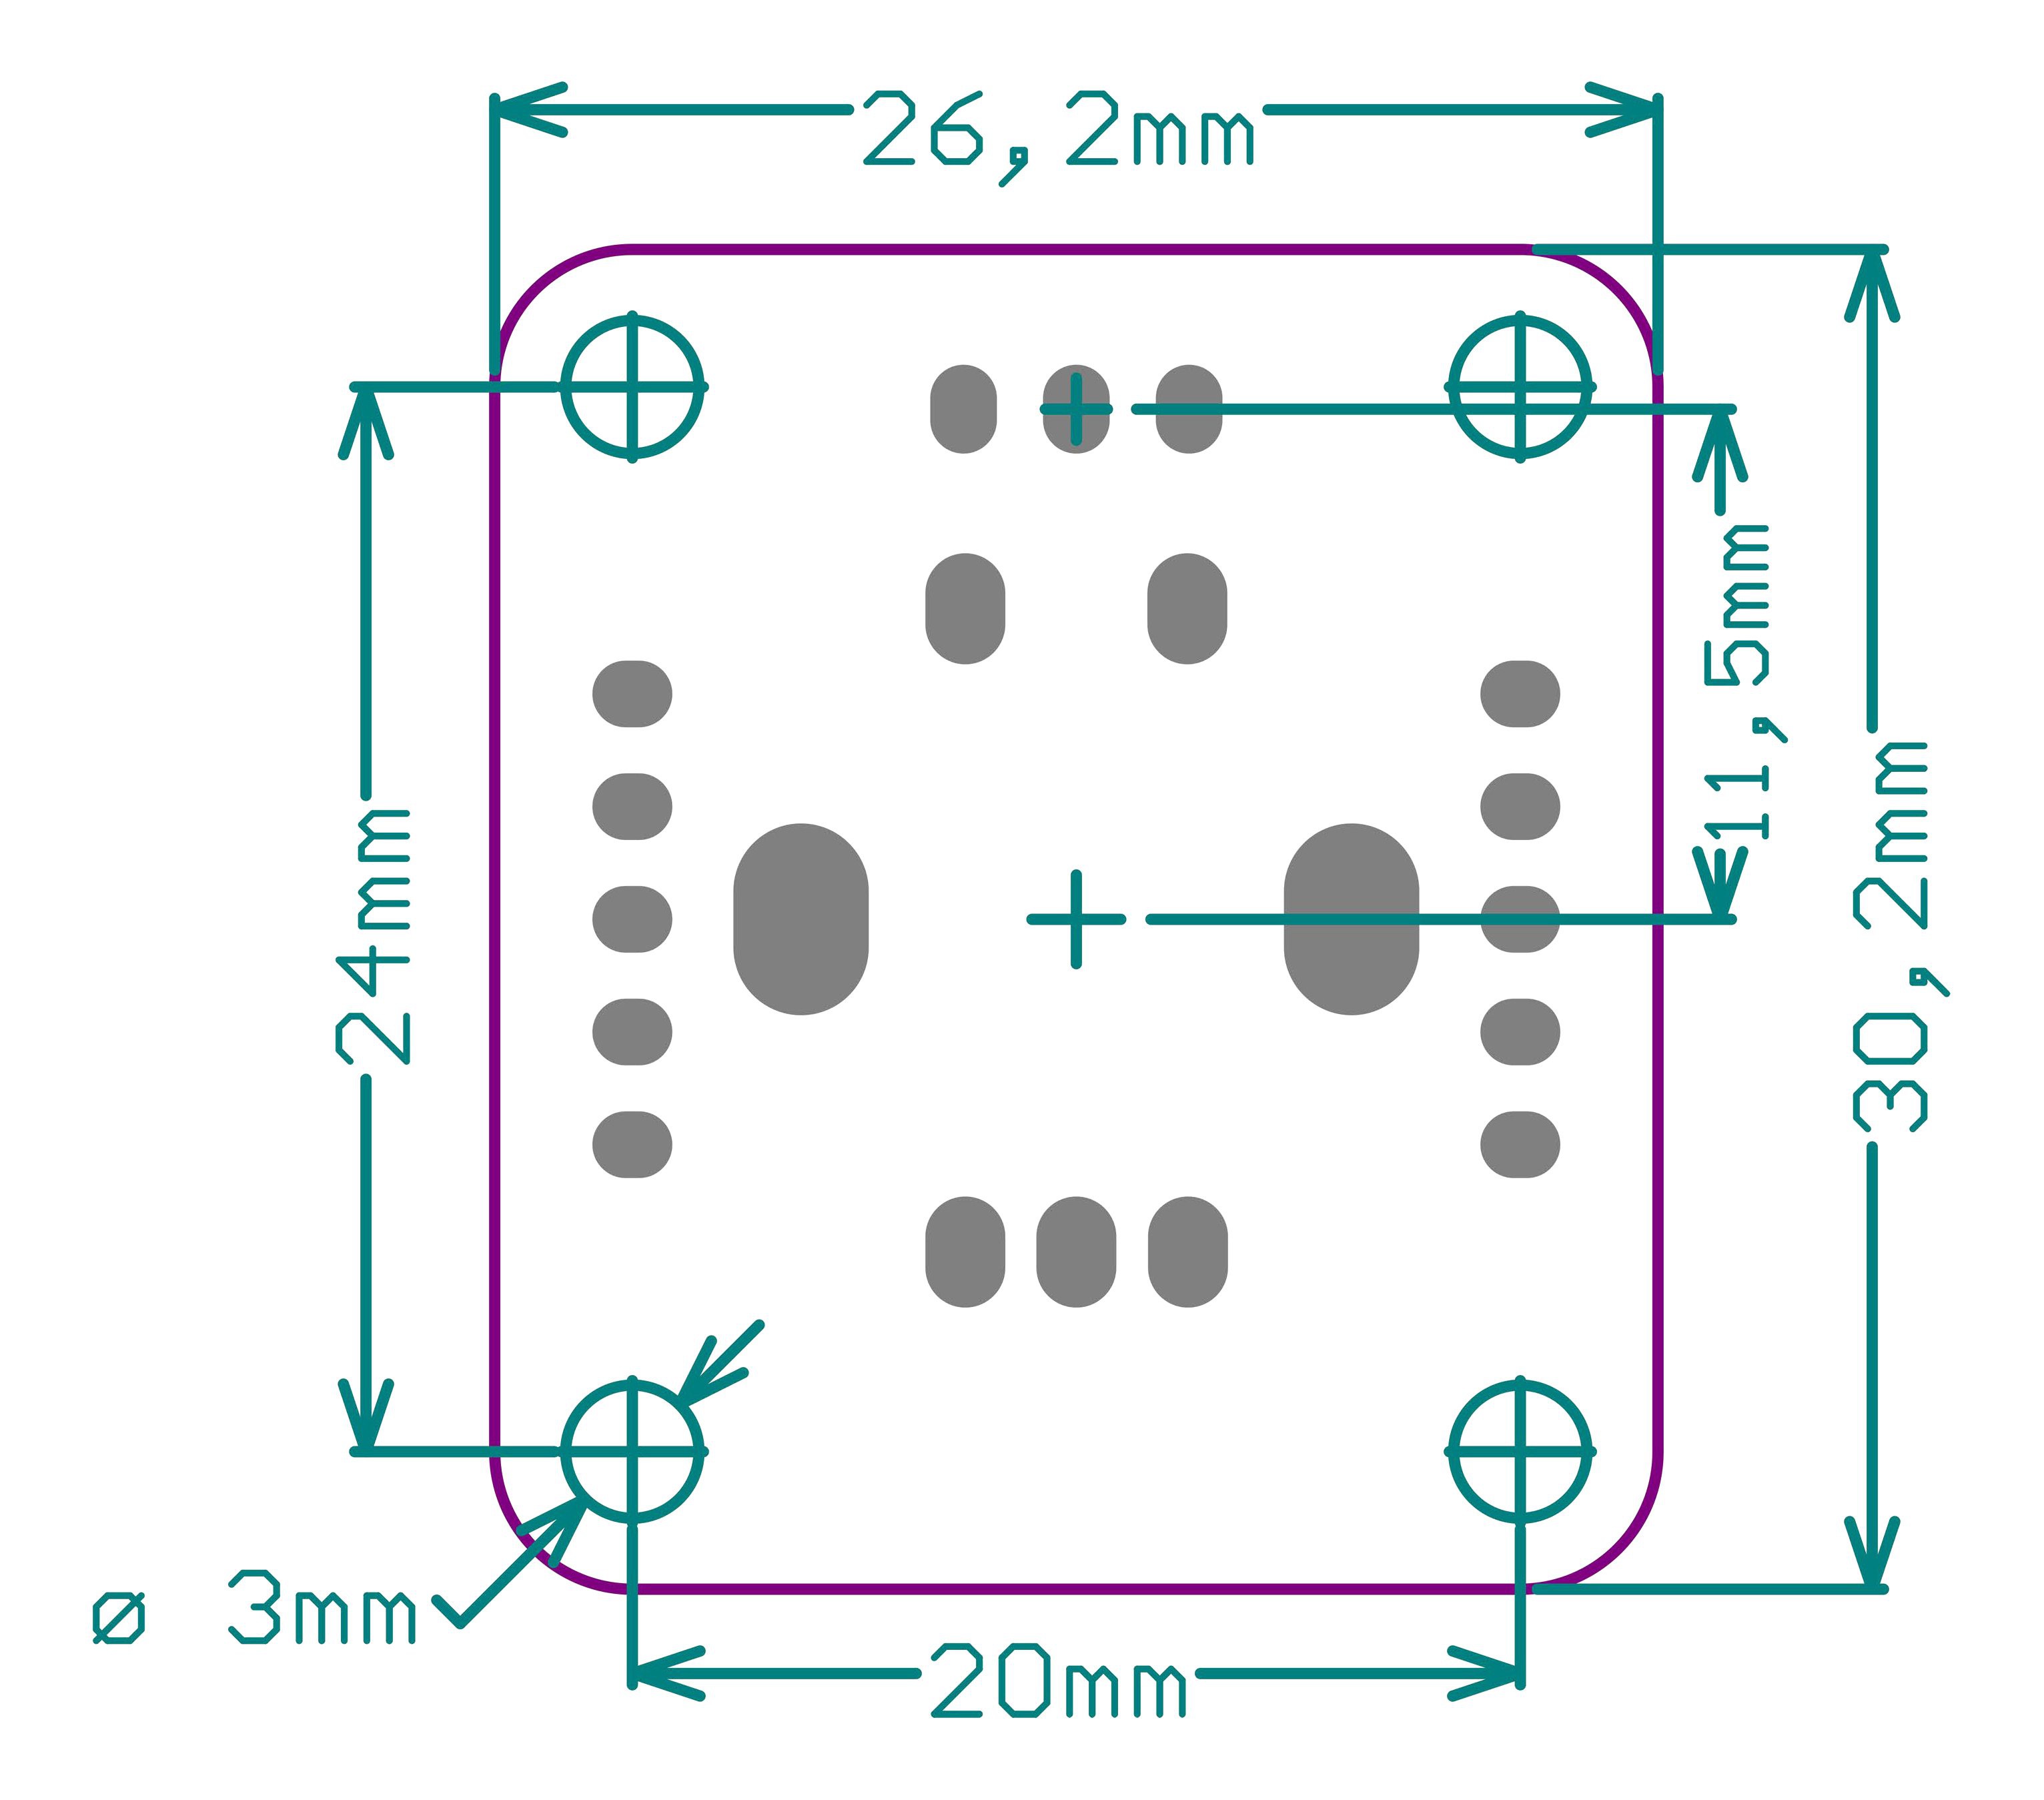
The board dimension is just 26,2 x 30,2mm
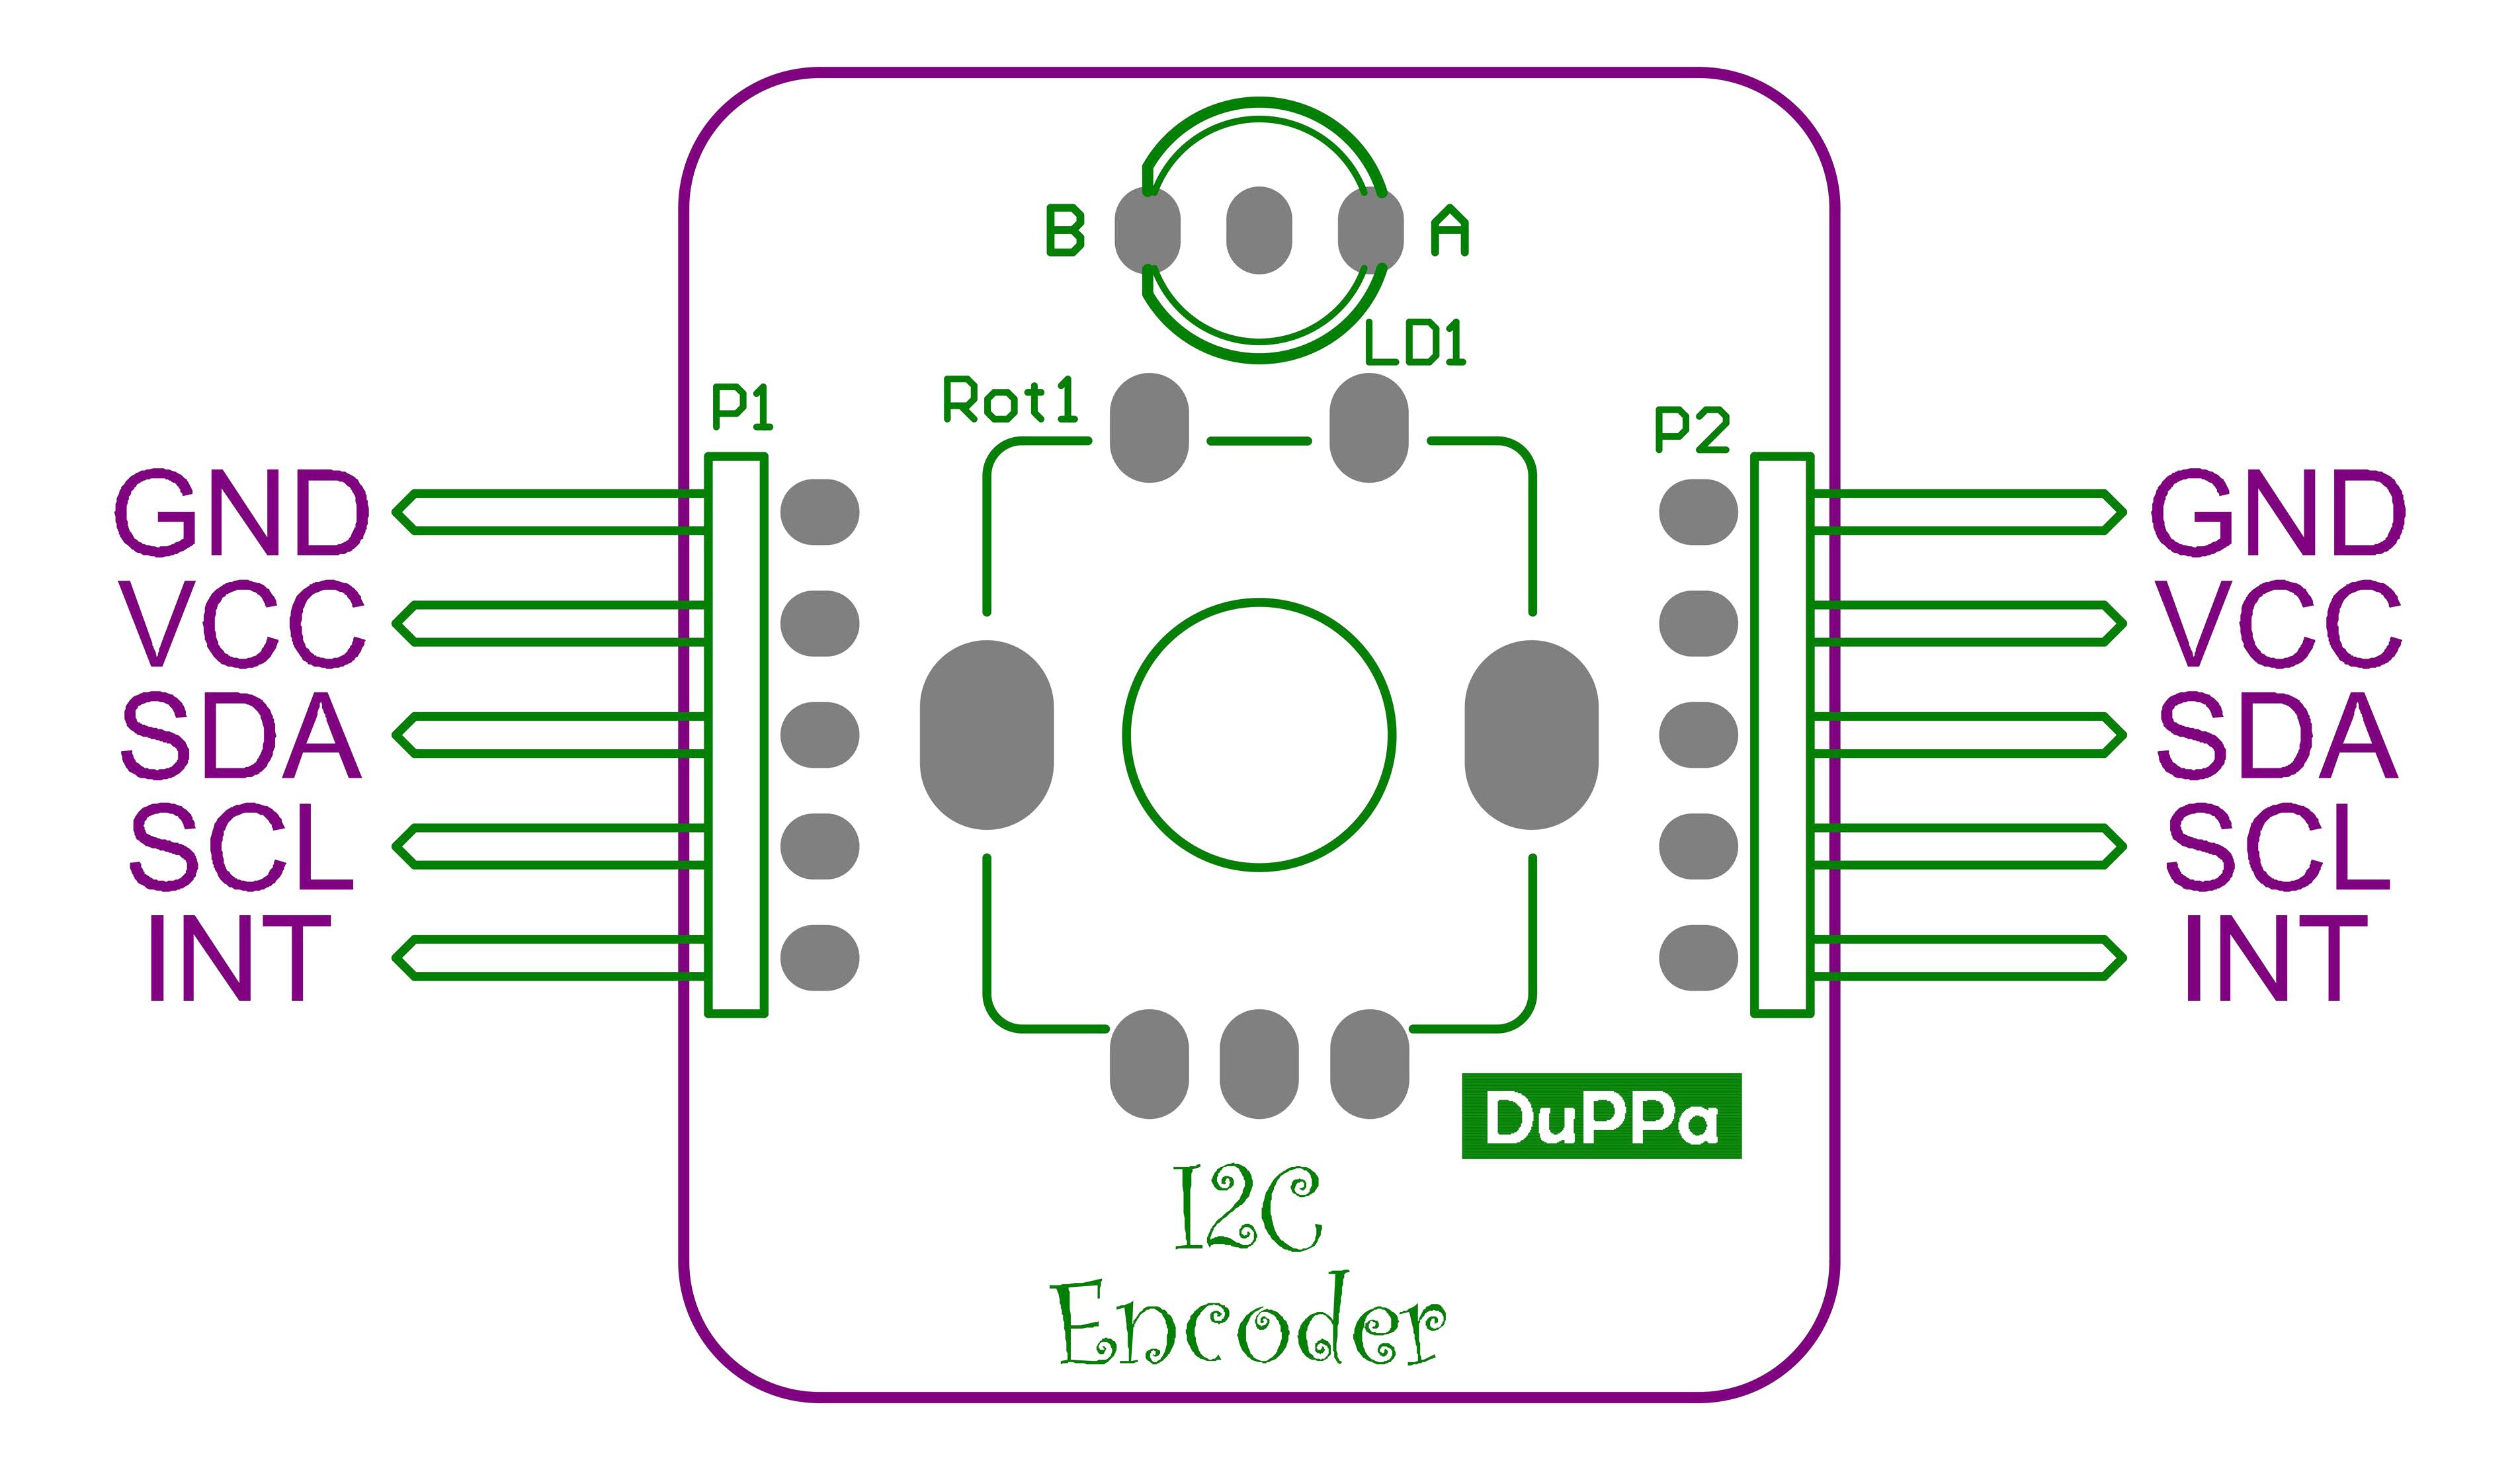
There are 2.54mm of 5 pin headers on the right and on left sides. So it is possible to solder directly the wires or a connectors. There is the space for the encoder in the middle of the board. On the top of the encoder, there is the possibility to solder a LED: single color LED or a bi-color common anode LED.
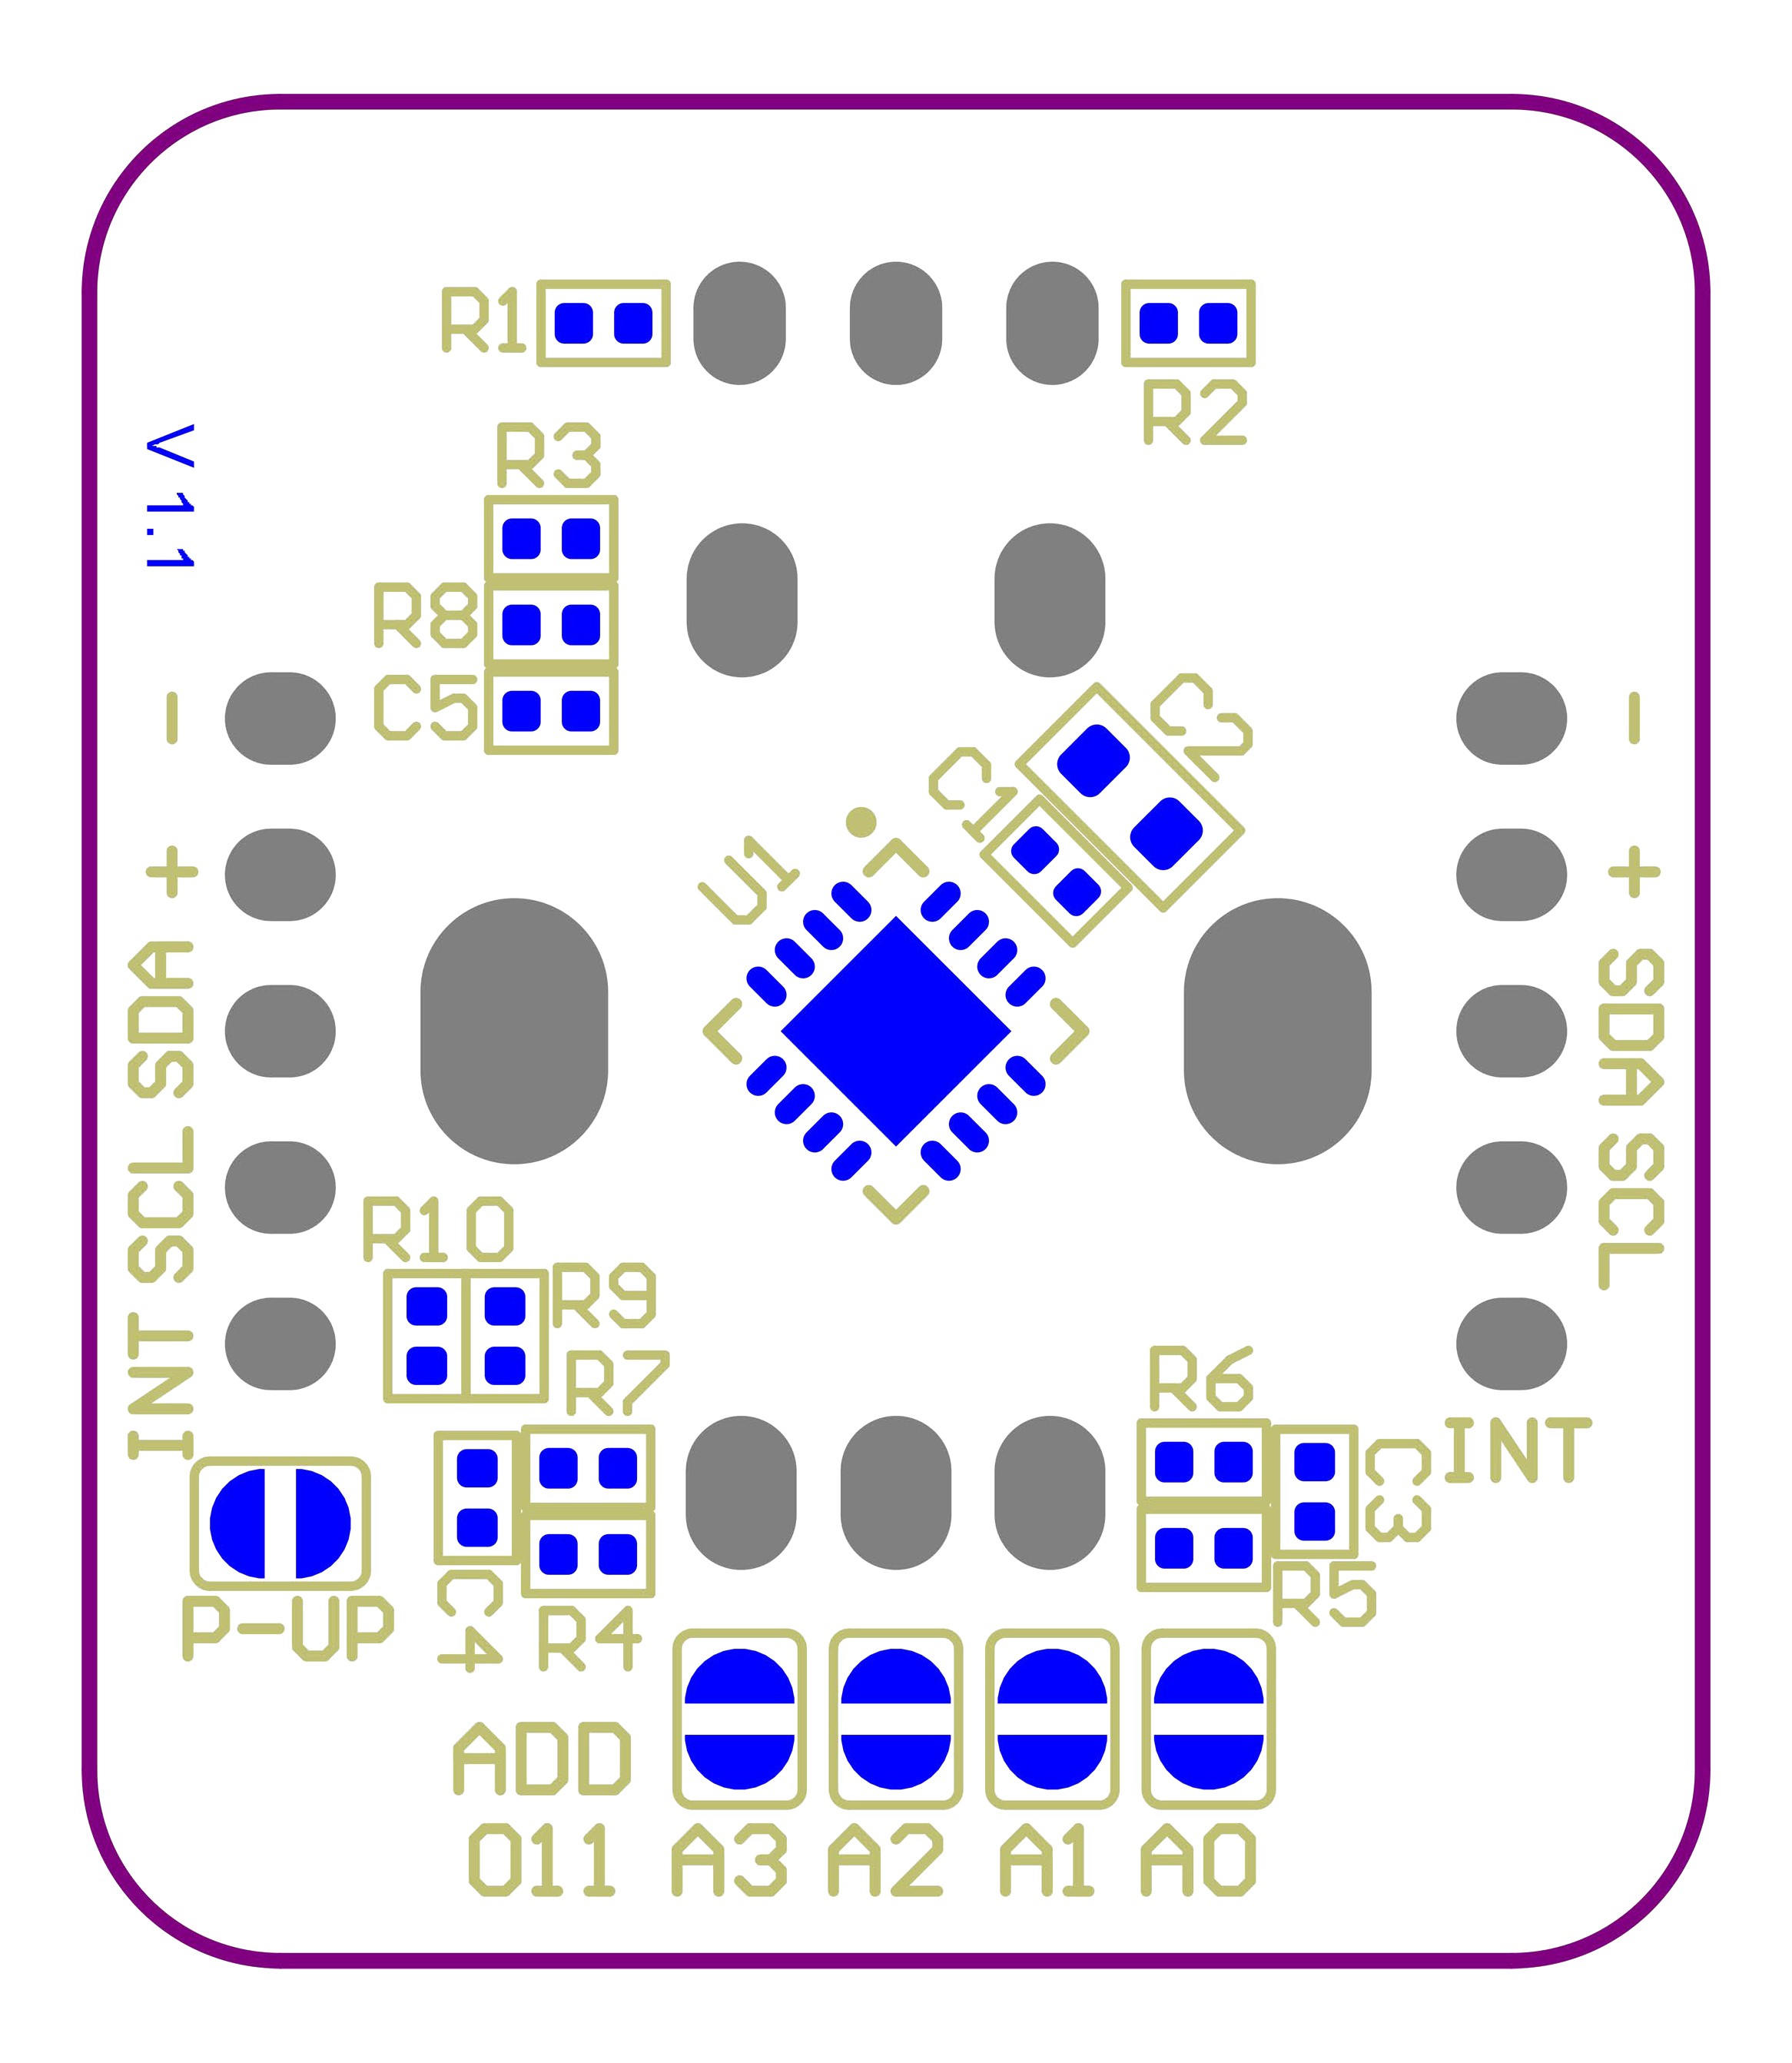
On he bottom side of the board, there are the 4 SMD jumpers, A0 to A3 for selecting the address. There is also the SMD jumper P-UP for enable the I2C pull-up resistors, in case that your master I2C doesn't have one.
The I2C Encoder has 16 register that user can read and write:
| Address | Description |
| 0x00 | General configuration |
| 0x01 | Status |
| 0x02 | Counter Value Byte 4 |
| 0x03 | Counter Value Byte 3 |
| 0x04 | Counter Value Byte 2 |
| 0x05 | Counter Value Byte 1 |
| 0x06 | Counter Max Byte 4 |
| 0x07 | Counter Max Byte 3 |
| 0x08 | Counter Max Byte 2 |
| 0x09 | Counter Max Byte 1 |
| 0x0A | Counter Min Byte 4 |
| 0x0B | Counter Min Byte 3 |
| 0x0C | Counter Min Byte 2 |
| 0x0D | Counter Min Byte 1 |
| 0x0E | LED A intensity |
| 0x0F | LED B intensity |
Example:
I already prepared an Arduino library (soon on github), here is one simple example.
In this example, i want my variable counter between -10 and 10. When it reaches the limit the LED will blink red in case of minimum and will blink green when it reaches the maximum.
Here is the code:
#include <Wire.h>
#include "i2cEncoderLib.h"
const int IntPin = 12;
i2cEncoderLib encoder(0x30); //Initialize the I2C encoder class with the I2C address
int32_t counter;
uint8_t encoder_status;
void setup(void)
{
  pinMode(IntPin, INPUT);
  Serial.begin(115200);
  Wire.setClock(400000) ; //Set I2C speed at 400kHz
  Serial.print("Encoder Test!!\n");
  encoder.begin((INTE_ENABLE | LEDE_ENABLE | WRAP_DISABLE | DIRE_RIGHT | IPUP_ENABLE | RMOD_X1 ));
  encoder.writeCounter(0);
  encoder.writeMax(10); //Set maximum threshold
  encoder.writeMin(-10); //Set minimum threshold
  encoder.writeLEDA(0x00);
  encoder.writeLEDB(0x00);
}
void loop() {
  if (digitalRead(IntPin) == LOW) {
    encoder_status = encoder.readStatus();
    if (encoder_status != 0) {
      if ((encoder_status & E_PUSH) != 0) {
        Serial.println("Encoder Pushed!");
      }
      if ((encoder_status & E_MAXVALUE) != 0) {
        Serial.println("Encoder Max!");
        encoder.writeLEDA(0xFF);
        delay(50);
        encoder.writeLEDA(0x00);
      }
      if ((encoder_status & E_MINVALUE) != 0) {
        Serial.println("Encoder Min!");
        encoder.writeLEDB(0xFF);
        delay(50);
        encoder.writeLEDB(0x00);
      }
      counter = encoder.readCounterByte(); //Read only the first byte of the counter register
      Serial.print("Encoder: ");
      Serial.println(counter, DEC);
    }
  }
}
And here is the result:
I will put all the documents on github in these days. You can find product datasheet on this project file, and the product will be available on my Tindie Store soon.

We sell only the I2C Encoder board without encoder, LED and connectors. This way user can add a encoder that s/he prefers. The price will be between 5-7$ according to the quantity you will buy.
Thank you for your attention. Please leave a command if you liked this project.