 Stephen Newberry
Detailed Explanation:
To begin with, I had to research how my truck unlocked the power doors. I thought it was a simple 12 V on a switch but I was definitely wrong. I found that it needed a “Negative Trigger” on a certain wire through a 330 Ω resistor. I tested this on the truck and found the proper wires that needed to be shunted with the resistor. I knew I was going to use a relay to close the circuit, but the only relay I had on hand had a 12 V coil. I knew I wanted a 2N3904 to activate the coil, so I did a bit of research and found an excellent write up on how to design the circuit. (http://www.instructables.com/id/Connecting-a-12V-Relay-to-Arduino/?ALLSTEPS). I already measured my coils on current at 30 mA and the β of my transistor to be 282. I needed a base current of about 0.1 mA to drive the collector current. I realized just now that I should have accounted for the 0.7 VBE drop, but originally I didn’t. I simply took 5 V / 0.1 mA and found that I needed a base resistor of about 50 kΩ. I used a 51 kΩ that I had already.
Beyond this, all the work was wiring and putting it together. I didn’t take photos while I was working on it, but I stuffed it all into a jewelry box.
Device Use:
This device is meant to be very easy to use. The code is initialized as “123AB” in the program above. Any time the Arduino loses power, it will have this code upon power restoration. At any time, the user can enter “CDCBA” to enter the “Password Reset” mode. After entering that special code, a series of beeps would be heard, and the next five buttons pressed become the new password. The device uses a “rolling” entry method, so if a mistake is made when entering the code, simply start over at any time. As long as the correct five characters are entered in the correct order, the doors will unlock. Additionally, there is a time-out feature; if at any time 10 seconds goes by without pressing a button, the previously pressed buttons will reset to “0”. This is active all the time except when entering a new password.
Future Considerations:
The first and most obvious mistake I made was with the buzzer. It is far too quiet to be heard outside the truck. I was originally going to mount the box with the buzzer held firmly against the sheet metal, but I had to flip it around to get it where I needed it. This means that the buzzer is essentially useless. Some have brought up the consideration of weather resistance. I would have loved to use a higher quality keypad, but I was working with what I had on hand. It seems as though the keypad itself will be very weather-proof. Additionally, the adhesive on the back seems very strong, but time will tell if it will hold up to the elements. Lastly, had I access to a 3D printer, and more time, I would have loved to have printed a custom enclosure for this device. I would have also loved to have printed a custom PCB, as that would have been easier for wiring. Since there were only a few components, the point-to-point soldering worked fine for inside the box.
Code:
// Dodge Dakota Keypad Entry System
// S. Newberry, August 2014
//*************************************
//*****SETUP FOR KEYPAD****************
//*************************************
#include <Keypad.h>
const byte ROWS = 4;
const byte COLS = 4;
char hexaKeys[ROWS][COLS] = {
{'1','2','3','A'},
{'4','5','6','B'},
{'7','8','9','C'},
{'*','0','#','D'},
};
byte rowPins[ROWS] = {3, 4, 5, 6};
byte colPins[COLS] = {7, 8, 9, 10};
Keypad entryKeypad = Keypad( makeKeymap(hexaKeys), rowPins, colPins, ROWS, COLS);
//*******************************************
//************SETUP FOR OTHER VARIABLES******
//*******************************************
int relayPin = 2; //set pin number for the relay actuation
char pw1 = '1'; //these are the password
char pw2 = '2';
char pw3 = '3';
char pw4 = 'A';
char pw5 = 'B';
char key1 = '0'; //starting values in the thingy
char key2 = '0';
char key3 = '0';
char key4 = '0';
char key5 = '0';
unsigned long startTime = millis(); //set the start time
//*******************************************...
Read more »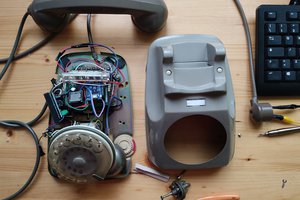
 Giulio Pons
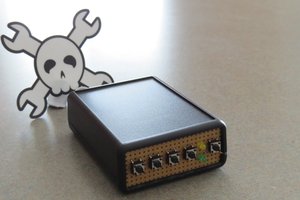
 Johan Berglund
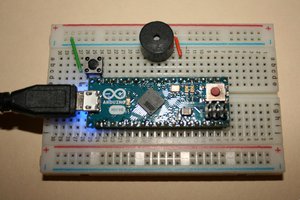
 The Lightning Stalker