 Greg Duckworth
The plan for the mill is to temporarily convert the X and the Y axis to CNC control using 3D printed parts. Then I should be able to use the 2 axis cnc to machine the final axes conversions. I have got temporary access to a Makerbot 2X which does a great job of printing sturdy parts. I am sure that most 3D printers would be perfectly capable of printing these components.
I designed a coupling in blender and then 3D printed it. It should be noted that the printed parts are not dimensionally precise and therefore needing some filing after printing.
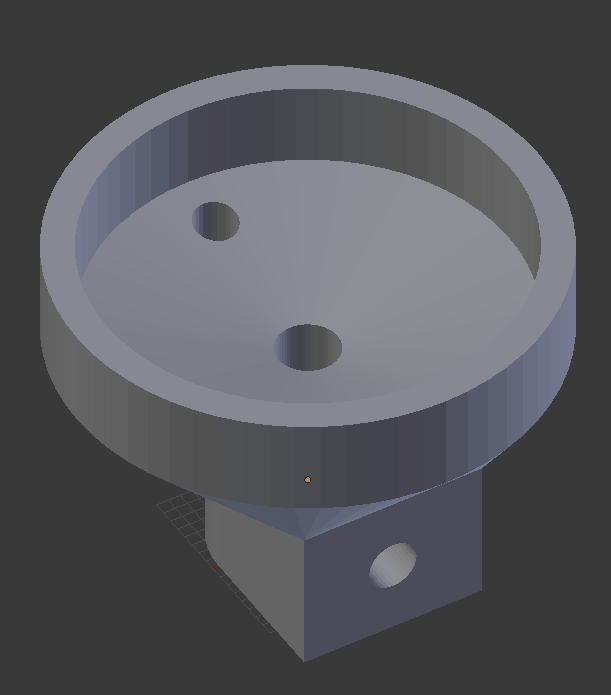
In the next image you can see the handwheel fitted snugly into the coupling. These can be fitted without disassembling the XY table, which was a big thing at the time...
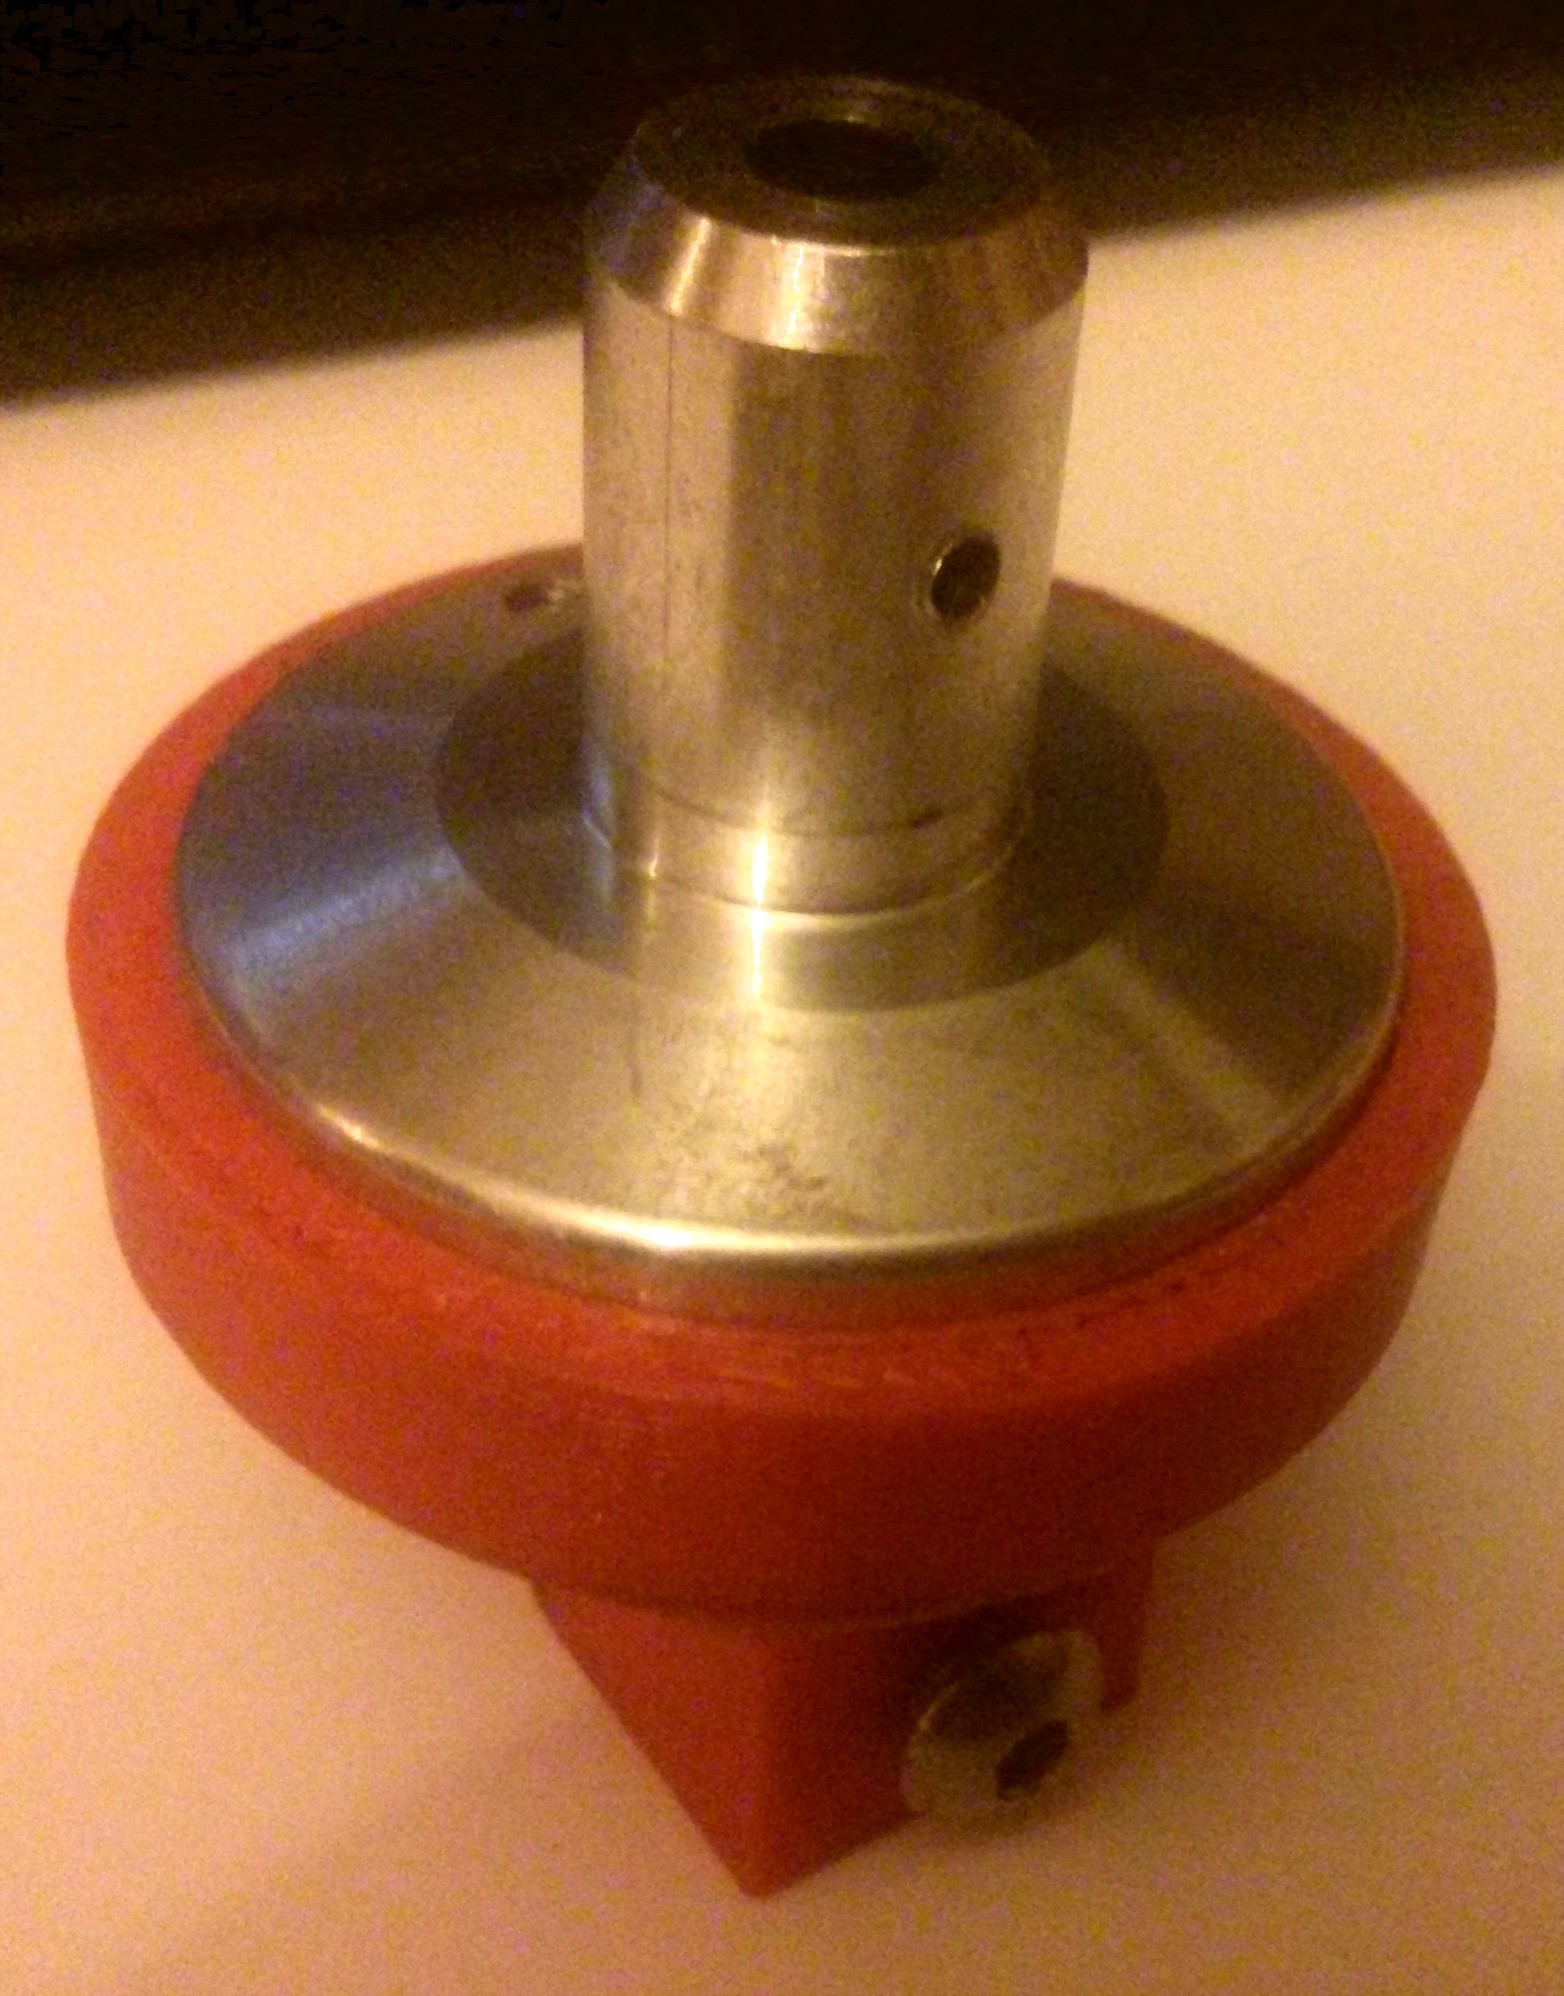
In the shank of the coupling is a captured nut, this means that I can use a set screw to hold the coupling to the motor shaft. Since the handwheel has an M3 hole for the handle, we can use that to secure the coupling to the handwheel. The last part to be 3D printed was the Y axis morot mount. The X axis mount was fairly easy to make as the motor can be fixed to the T-slot table but the Y axis motor is fixed in place, with nothing to fix it to. This was solved by filling the gap between the motor and the table then clamping it in place. This was simple and effective but not pretty.

The fixings are M3 and longer bolts were used for ease as I did not know the final dimensions that the bolts needed to be and I didn't fancy making two sets.
Discussions
Become a Hackaday.io Member
Create an account to leave a comment. Already have an account? Log In.