 icstation
ICStation team introduce you this APR9600 voice recording and playback system used in elevator based on the ICStation Mega2560 compatible with Arduino. It uses DC5V voltage to work. When you press the different keys, the loudspeaker will sound that which floor you arrive. This design uses a APR9600 voice chip as the core of the circuit and realizes the function of auto recording and playback. It uses power amplifier chip JRC286D to amplify the audio and enhance the volume. The voice recording and playback circuit is widely used in everyday life. For example, the leaving message and response of the telephone, game machine, and toy voice recording and playback, telling time of the clock or alarm, selling products and control of the household appliance, etc. The designed circuit control is easy ,high-quality sound and big volume. It can be recorded and played for many times and has strong ability of portability. It can be used in other ares for a little modification.The voice recording and playback using the APR9600 chip as the core has the advantage on the price.It is worth of promoting.
Functions:
1.When you press the key NO.1 to NO.5, the loudspeaker will sound the different floor arriving.
2.When you press the key NO.6 and NO.7, the loudspeaker will sound the "go upstairs" and "go downstairs"
3.When you press the NO.8 key, the loudspeaker loudspeaker will sound "close the door"
Code for your reference:
http://www.icstation.com/newsletter/eMarketing/APR9600_voice_record.txt
Step 1: Components List:

1.ICStation ATMEGA2560 Mega2560 R3 Board Compatible Arduino
2.830 Point Solderless PCB Bread Board MB-102 Test DIY
3.2K 202 Blue White Resistance Adjustable Resistor
4.APR9600 voice chip
5.JRC386D power amplifier chip
6.Electret condenser microphone
7.Breadboard Plug Wire Cable Tire
8.Dupont 20cm Color Cable Line 1p-1p Pin Connector
9.+5 DC power supply
10.8Ω 0.5W Small Trumpet 36mm Diameter Loudspeaker
11 9PCS 6X6X5mm Tact Switches 4 Legs
12.2mm Pitch 8 Pins 4 Position Slide Type DIP Switch
13. 2PCS LED Light Emitting Diode
14.220uF 25V 105°C Radial Electrolytic Capacitor
15.100uF 50V Radial Electrolytic Capacitor
16.0.047UF 50V 473 Ceramic Capacitor DIP
17.10UF 25V Radial Electrolytic Capacitor
18. 2PCS 47UF 25V Radial Electrolytic Capacitor
19.4.7UF 50V Radial Electrolytic Capacitor
20. 6PCS 0.1UF 275V Polypropylene Safety Capacitor
21.5PCS 1K-100K 400 1/4w Resistance
22 2PCS 1K ohm 1/4W 1% Accuracy Metal Film Resistor
23.4.7k ohm 1/4W 1% accuracy Metal Film Resistors
24.470K ohm 1/4W 1% Accuracy Metal Film Resistor
25.43K ohm 1/4W 1% Accuracy Metal Film Resistor
Step 2: Schematic Diagram


Step 3: Hardware wiring program


Step 4: The connection of the potentiometer and power amplifier chip

According to the schematic diagram, connect the pin3 of the 1K potentiometer to the ground and the pin2 connects the JRC386D power amplifier chip. At the same time, connect the pin2 and pin4 of JRC3680 power amplifier chip to the ground.
Step 5: The connection of the capaciptor C1,C9,C11![]()


1.The connection of the capaciptor C1
According to the schematic diagram, put the 0.1uF capacitor C1 and make the capacitor connect the pin1 of the 1K potentiometer. Connect the pin6 of JRC386D power amplifier chip to the anode of the power supply.
2.The connection of the capaciptor C9
Put the 10uF capacitor C9 and make one end of it to the pin7 of the JRC368D
3.The connection of the capaciptor C11
Put the 0.1uF capacitor C11 and make one end connect the capacitor C9. Then the other end connect to the anode of the power supply
4.And then connect the 10uF capacitor C9 and 0.1uF capacitor C11 to the groundStep 6: Connection of capacitor 15 , 13

1.Connection of capacitor 15
According to the schematic diagram, put the 47nF capacitor C15 and 10K resistor R20 to the bread board. And according to the schematic diagram to connect the pin5 of JRC386D to 10K resistance R20 and 47nF capacitor C15. And connect the other end of 47nF capacitor to the ground.
2.Connection of capacitor 13
Put the 220uF capacitor C13,...
Read more »
 sidsingh
 Kris Slyka
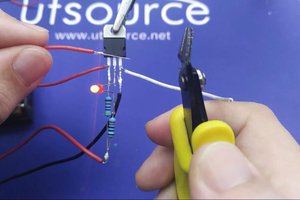
 Electroniclovers123
 ElectroBoy