Close
0%
0%

Henk the Hexapod

Scrapped. See Hexapod Henk MkII.

Similar projects worth following
I decided that I really need a hexapod in my collection of walking robots. I had a bunch of servos, a servo controller and PyBoard lying around, so why not? Alas, I never finished programming it, and it spent some time on the shelf. Then I got my OpenMV board, and decided I have to put it on a robot. Henk volunteered.

This project waited on the shelf for so long, that I decided to scrap it and rebuild into #Hexapod Henk MkII. Go there for the latest news on the project. This project is kept for archive.

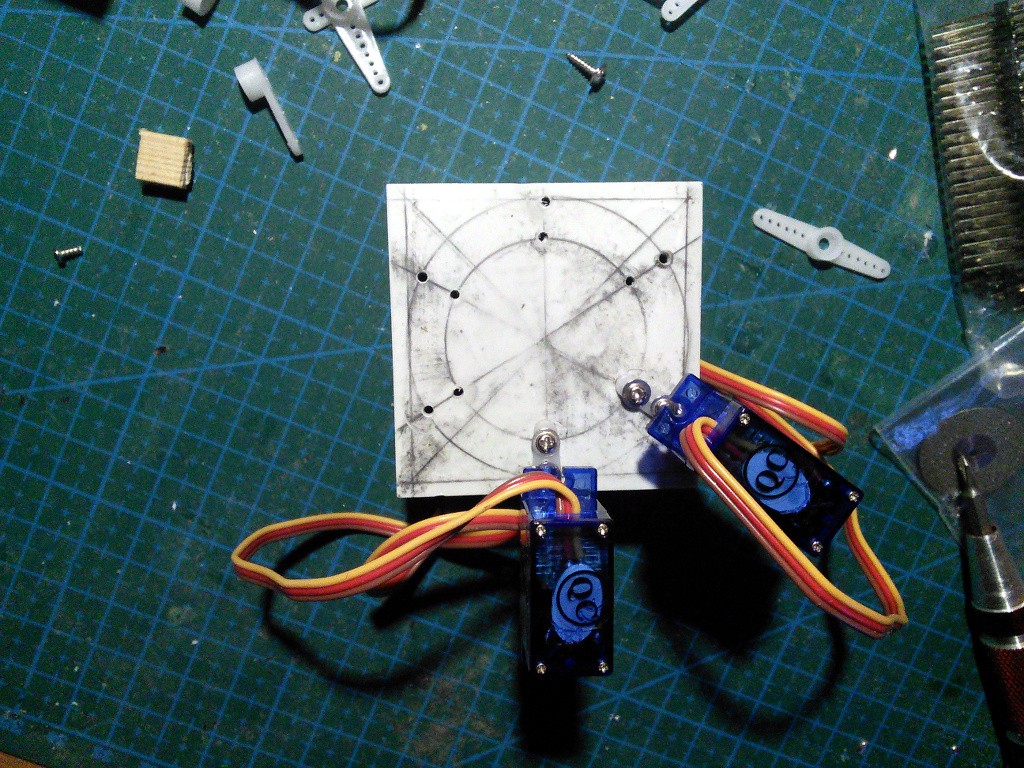
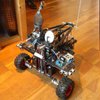
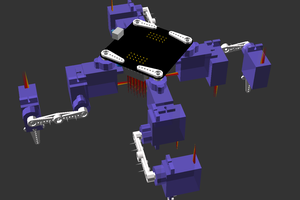
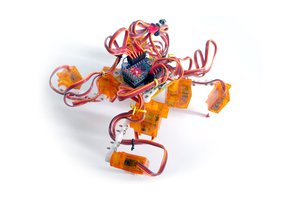
The legs are arranged in a circle, every 60°. The alternative was to have them in two rows, but they seemed to be too close together that way.

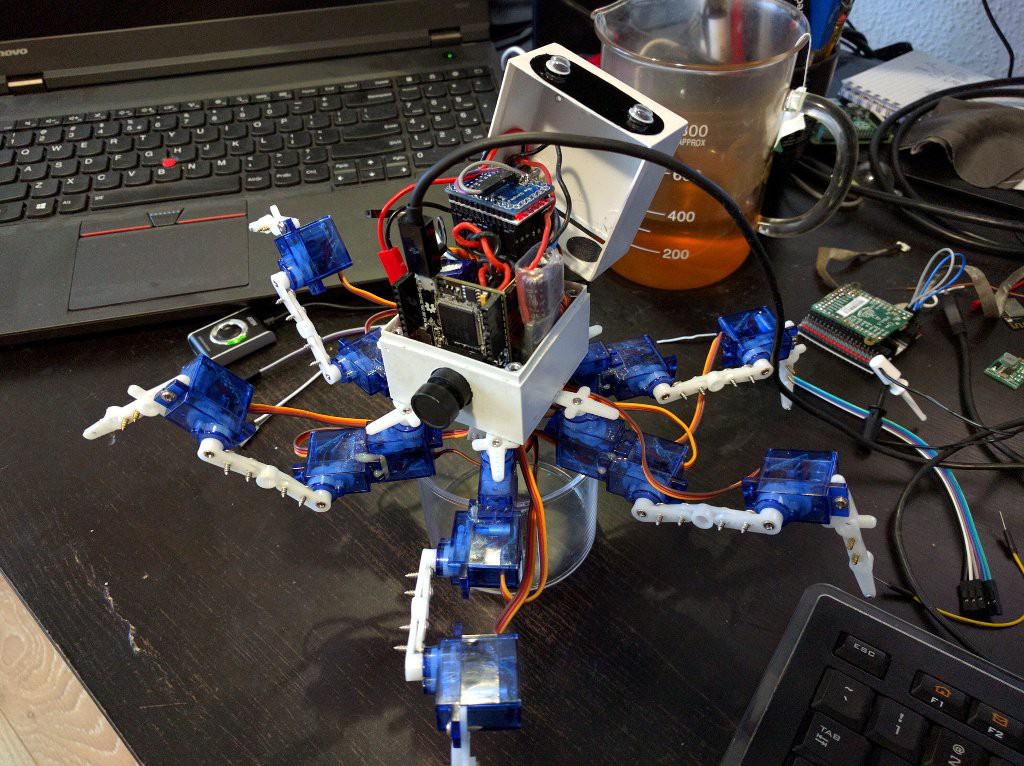
The power switch has a couple of 47kΩ resistors added to it, which form a voltage divider, connected to an analog pin. This way I can tell the battery voltage, and monitor it. Since the analog pin also doubles as DAC pin, I had to remove the speaker. It's a bit of a shame, but it was too quiet anyways. I might add a proper audio board in the future, if really needed (or monitor the voltage differently).

  • 18 × SG90 Microservo
  • 1 × Pro Mini 3.3V
  • 1 × OpenMV
  • 1 × 5V 5A UBEC
  • 1 × 2S 350mAh LiPO Battery

View all 10 components

  • Henk MkII

    deʃhipu03/25/2016 at 14:22 0 comments

    After the rebuild, I decided to start a new project profile, #Hexapod Henk MkII. It's also so that I can enter this project in the Hackaday Prize 2016. Since I'm basically starting from scratch here, it makes sense to start a new project. The old logs here, while still may be interesting, no longer talk about this new, overhauled robot. So go there for any new developments.

  • Up Side Down

    deʃhipu02/14/2016 at 19:18 0 comments

    Today I worked a little bit more with the robot. It's actually quite convenient to have it sit on a box (so that the legs are in the air) next to my computer, connected over the USB cable.

    As you can see, the OpenMV camera is actually installed up-side-down. That's because it was more convenient for me, and it looks a little bit like a snout. I figured it wouldn't matter, as I would simply reverse the y coordinate of any results I get from the camera. It turns out that sometimes it does matter -- in particular, the face detection algorithms don't detect up-side-down faces. I looked for a way to flip the image, and after I couldn't find anything, I asked on the OpenMV forum, where the authors immediately helped me. Turns out the sensor has a setting which you can enable to make it flip the image in hardware. Here's a photo from the eyes of the robot:

    The quality is not that great, because it's pretty dark in my room. I'm using a wide-angle lens, so you can see the two front legs of the robot in there.

    Next I went on working on the walking code (again). As usual, starting with the Servo class:

    import pyb
    import ustruct
    import math
    
    
    class Servo:
        min_pos = 600
        max_pos = 2400
        pos_range = 180
    
        def __init__(self, servos, index, reverse=False, trim=0):
            self.servos = servos
            self.index = index
            self.reverse = reverse
            self.trim = trim
    
        def move(self, radians=None, degrees=None):
            if degrees is None:
                degrees = math.degrees(radians)
            degrees += self.trim
            if self.reverse:
                degrees = self.pos_range - degrees
            position = self.min_pos + (
                degrees * (self.max_pos - self.min_pos) / self.pos_range)
            position = min(self.max_pos, max(self.min_pos, position))
            self.servos[self.index] = position
    
    
    class Servos:
        ADDRESS = 9
    
        def __init__(self):
            self.bus = pyb.I2C(2, pyb.I2C.MASTER)
            self.servos = [0] * 18
    
        def __setitem__(self, index, value):
            self.servos[index] = value
    
        def __getitem__(self, index):
            return Servo(self, index)
    
        def update(self, servos=None):
            if servos is None:
                servos = range(18)
            for servo in servos:
                try:
                    pyb.disable_irq()
                    self.bus.mem_write(
                        ustruct.pack('<' + 'H', self.servos[servo]),
                        self.ADDRESS,
                        servo,
                    )
                finally:
                    pyb.enable_irq()

    Now I can move each of the joints of the robot individually. Next up, leg (practically the same as in #Tote) and then body (the hard part) inverse kinematics.

  • Brain Surgery

    deʃhipu02/13/2016 at 13:21 0 comments

    This robot waited on the shelf for a long time (enough for its LiPo battery to go bad), so when I got the #OpenMV board, I decided to install it here. I'm also replacing the Pololu servo controller I used in there with a much simplier #Servo Controller that I built out of a Pro Mini board. Other parts will probably remain the same, although I might need to skip the speaker, as ADC and DAC are on the same pin, and I need that battery voltage monitoring.

    I started by testing the I²C communication between OpenMV and the servo controller. Since OpenMV is still in beta and not even yet released to Kickstarter backers, I didn't expect this to Just Work™ out of the box, and I was right. First, turns out that the SDA and SCL pins are reversed compared to what the documentation says. That was relatively easy to figure, I just swapped them and suddenly I2C.scan() started showing my device. Splendid!

    Then I just copied the line that I previously tested with PyBoard:

    bus.mem_write(struct.pack("<H", 1500), 9, 0)
    and... nothing happened. Except that further I2C.scan() stopped finding anything, and further writes just returned IOError 16 until the OpenMV board was hard reset. Interesting. I connected my pocket oscilloscope to see what is happening, and sure enough, the SCL line is being held low by the master after the first write. Looks like a bug in the firmware.

    So I started looking through the source code (it's available on Github). Initially I looked at the soft_i2c.c file, but soon I realized that it's only being used in the mlx module. Perhaps the authors had the same problem, and used software I²C to work around it and get the mlx to work?

    Then @Arsenijs suggested on the hackaday chat that this may be related to an I²C bug that was recently fixed in Micropython. I tried disabling IRQs before calling the I2C.mem_write(), and lo and behold, it works! It's not necessarily this bug (as it only manifests when there is an error reading or writing), but switching the interrupts off makes the Micropython not use DMA, and apparently this works. Happy with that, I wrote about my findings on the OpenMV forum and went to sleep.

    Next day I took Henk, opened it, ripped out the servo controller, connected the servos to the new one, drilled a hole for the camera to stick out, and here I am now, wondering how to best arrange the UBEC and battery inside. I will keep you updated.

  • Moving a Leg and Making Sounds

    deʃhipu12/29/2014 at 21:41 0 comments

    The software for the basic inverse kinematics is going slowly, mostly because I'm reorganizing the code that I already used in all the other robots, with a goal of making a library of it. In the meantime, I had a little distraction: I added the buzzer to a DAC pin of the PyBoard, and it turns out it's fast enough to play WAV files! After some mucking around with the turret lines from Portal, I finally used bfxr to generate some simple bleeps and pews, and then avconv to concert them to 8bit, 11025 rate files.

    A video showing that I have control over the servos and the speaker:

  • Ready to Program

    deʃhipu12/27/2014 at 21:52 0 comments

    This robot took me two days to build from scratch, but I'm pretty happy with it already. I think it's pretty much finished mechanically (only missing some rubber endings on the legs). Software-wise, I have ported my maestro controller library to Micropython, so I can already move the individual servos from the REPL console of the PyBoard, over USB. The next step will be to port the inverse kinematics code, adjust it to take into consideration that there are six legs now and that they are at various angles to the body, and then make it walk.

View all 5 project logs

Enjoy this project?

Share

Discussions

Rob wrote 02/21/2015 at 22:11 point

Thanks alot ! This is very helpfull, I ll give it a try.

  Are you sure? yes | no

Rob wrote 02/19/2015 at 14:25 point

Hey Radomir. first and for all thanks for this fantastic article and congrats to your nice hexapod. I got quiet exited while reading it since I love to use my Pyboard in a simlar project with 6 servos, but I have no clue how to connected the Pyboard with Dupont wires to the motor controller, so I wanted to ask you if you could give me some informations how you did it or point me to some infos...

all the best

-rob

  Are you sure? yes | no

deʃhipu wrote 02/19/2015 at 16:15 point

It's quite simple. If you look at the pyboard's pins at 
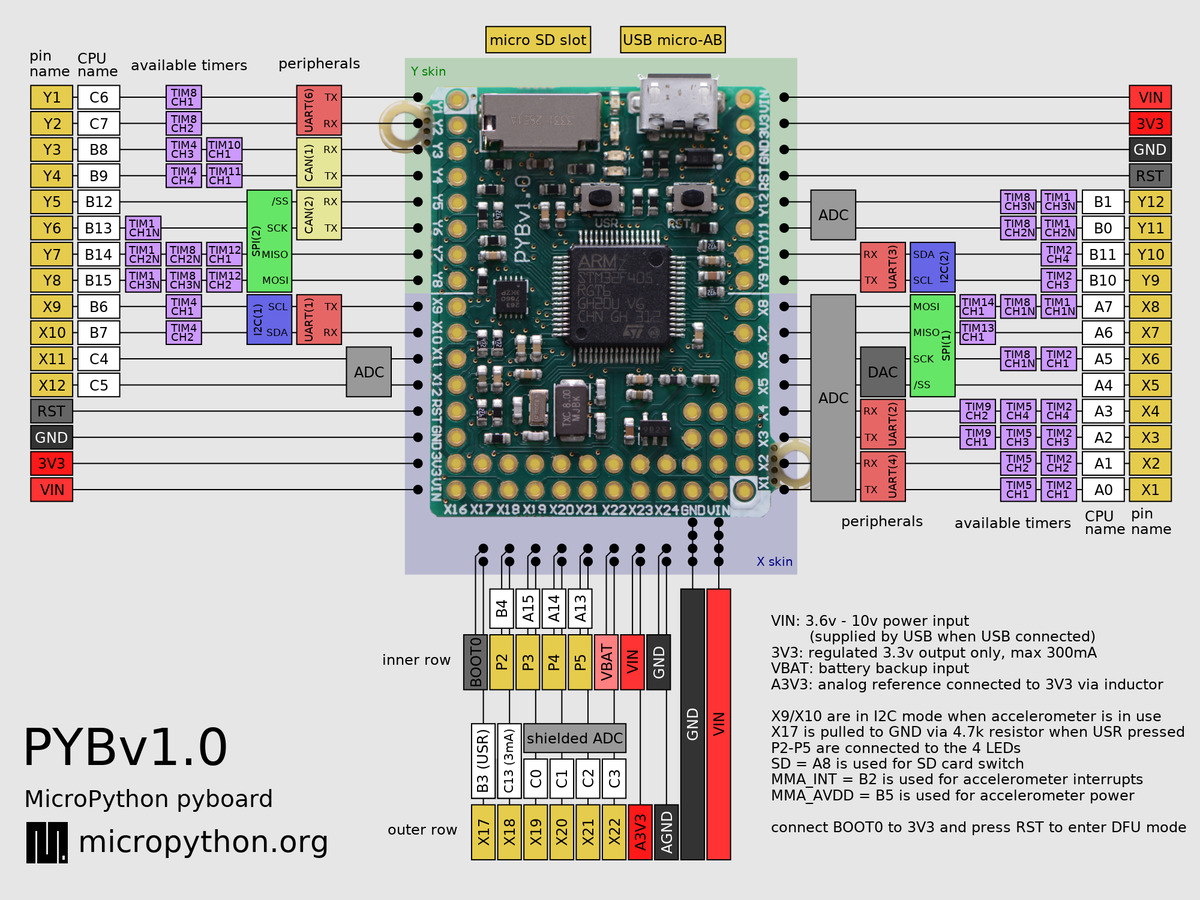
, you can see that there are several UARTs available (the red squares). Each has RX and TX pin. If you look at the servo controller's pins
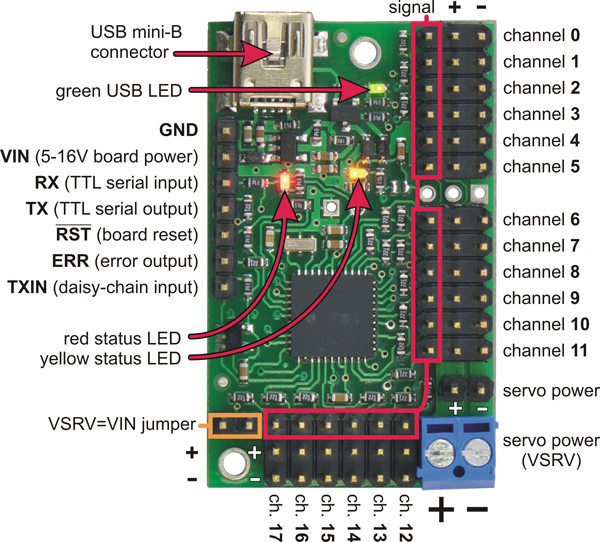
you can see there are pins marked RX and TX too. Just connect the RX with TX, and vice versa. You also need to connect the ground, and I also connected the power pins, because I'm powering the pyboard from the controller (which is not ideal, but works for me). Then I wrote a very simple Python class to talk to the controller over that serial: https://bitbucket.org/thesheep/henk/src/tip/maestro.py

By the way, for just 6 servos, you don't need a servo controller at all. You can connect 4 of them to the servo pins of the pyboard, and two others to any of the pins that have timers, and use those timers' PWM mode to control the servos.

  Are you sure? yes | no

Similar Projects

Does this project spark your interest?

Become a member to follow this project and never miss any updates