Anthony
-
Battery Selection
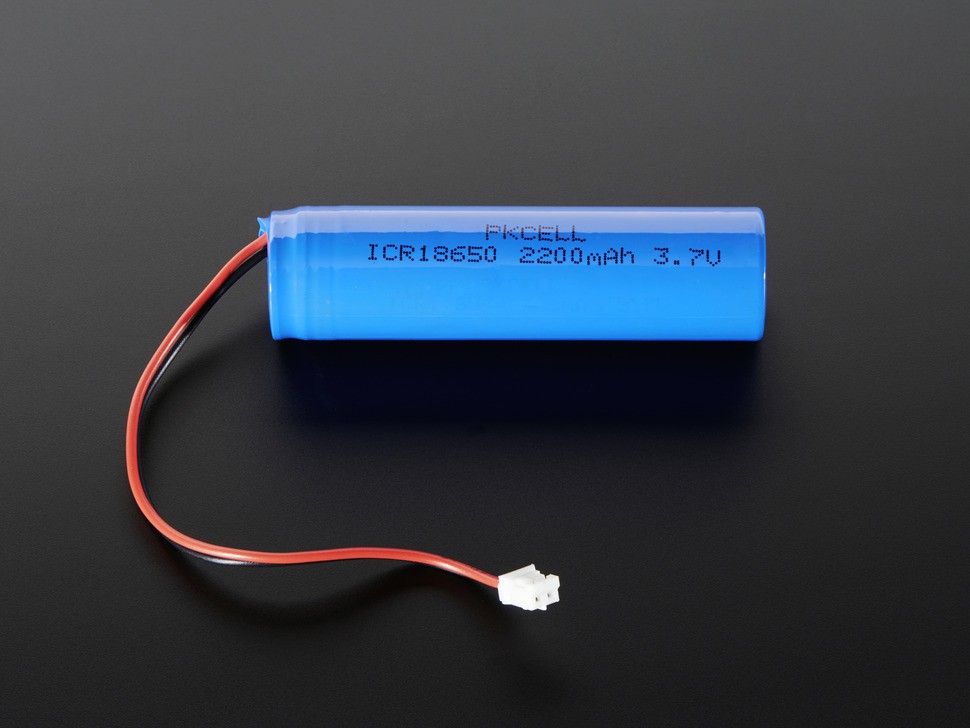
02/19/2015 at 17:07 • 0 commentsTruly, almost any high amperage 3.3 - 3.7v battery is suitable for this project. Why then did I select the more 'modest' capacity ICR18650 battery from Adafruit then ?
![]()
Mostly because with this project, rather than simply 'gutting' the Holga and sticking modern electronics in, basically using it as just another 'case', with this project I am trying to as seemlessly as possible work with and replicate the 'retro feel' of the original camera, and while updated, at the same time preserve all the originally functioning elements as I can from the original.
Luckily this cell is almost 'exactly' the size of an original 120 roll of film. Only a few slight modifications are required to allow it to fit in the same slot as the film-- and thus every time you open the back of the case to peek inside, one is reminded of the original magic of what 'film' was all about.
The mods are as follows:
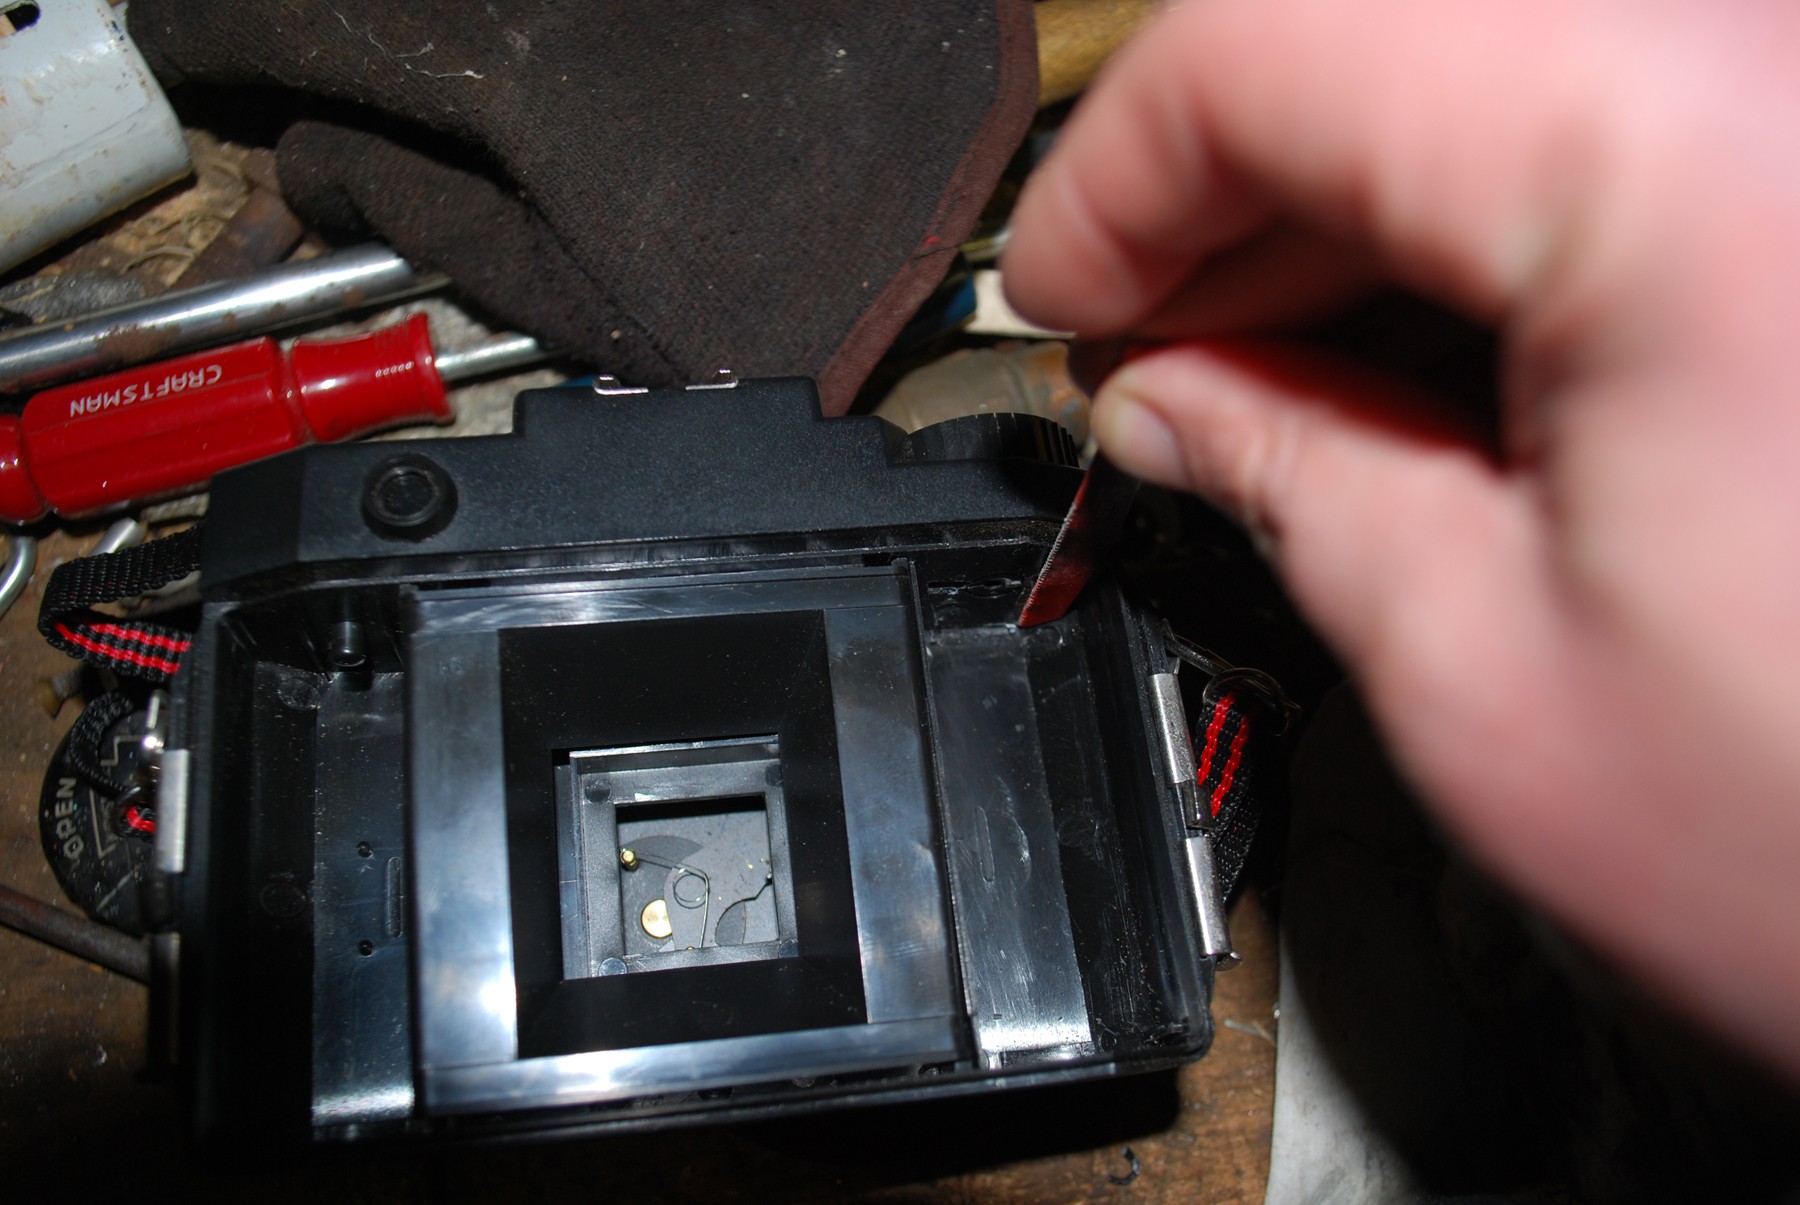
1) Remove the old film spool reel on the right hand side. We won't be needing this any more.
2) By itself, the battery will just 'almost' fit, but there are plastic bevels on the top and bottom, originally film guides, that make the fit just a bit too tight (and again, if you'd like to preserve the camera 'exactly' as it is, you can always instead select a flat pack cell and some alternate placement).
3) In order to remove these guides I first used a hand held metal saw blade to cut away the majority of the bevel on top and bottom.
![]()
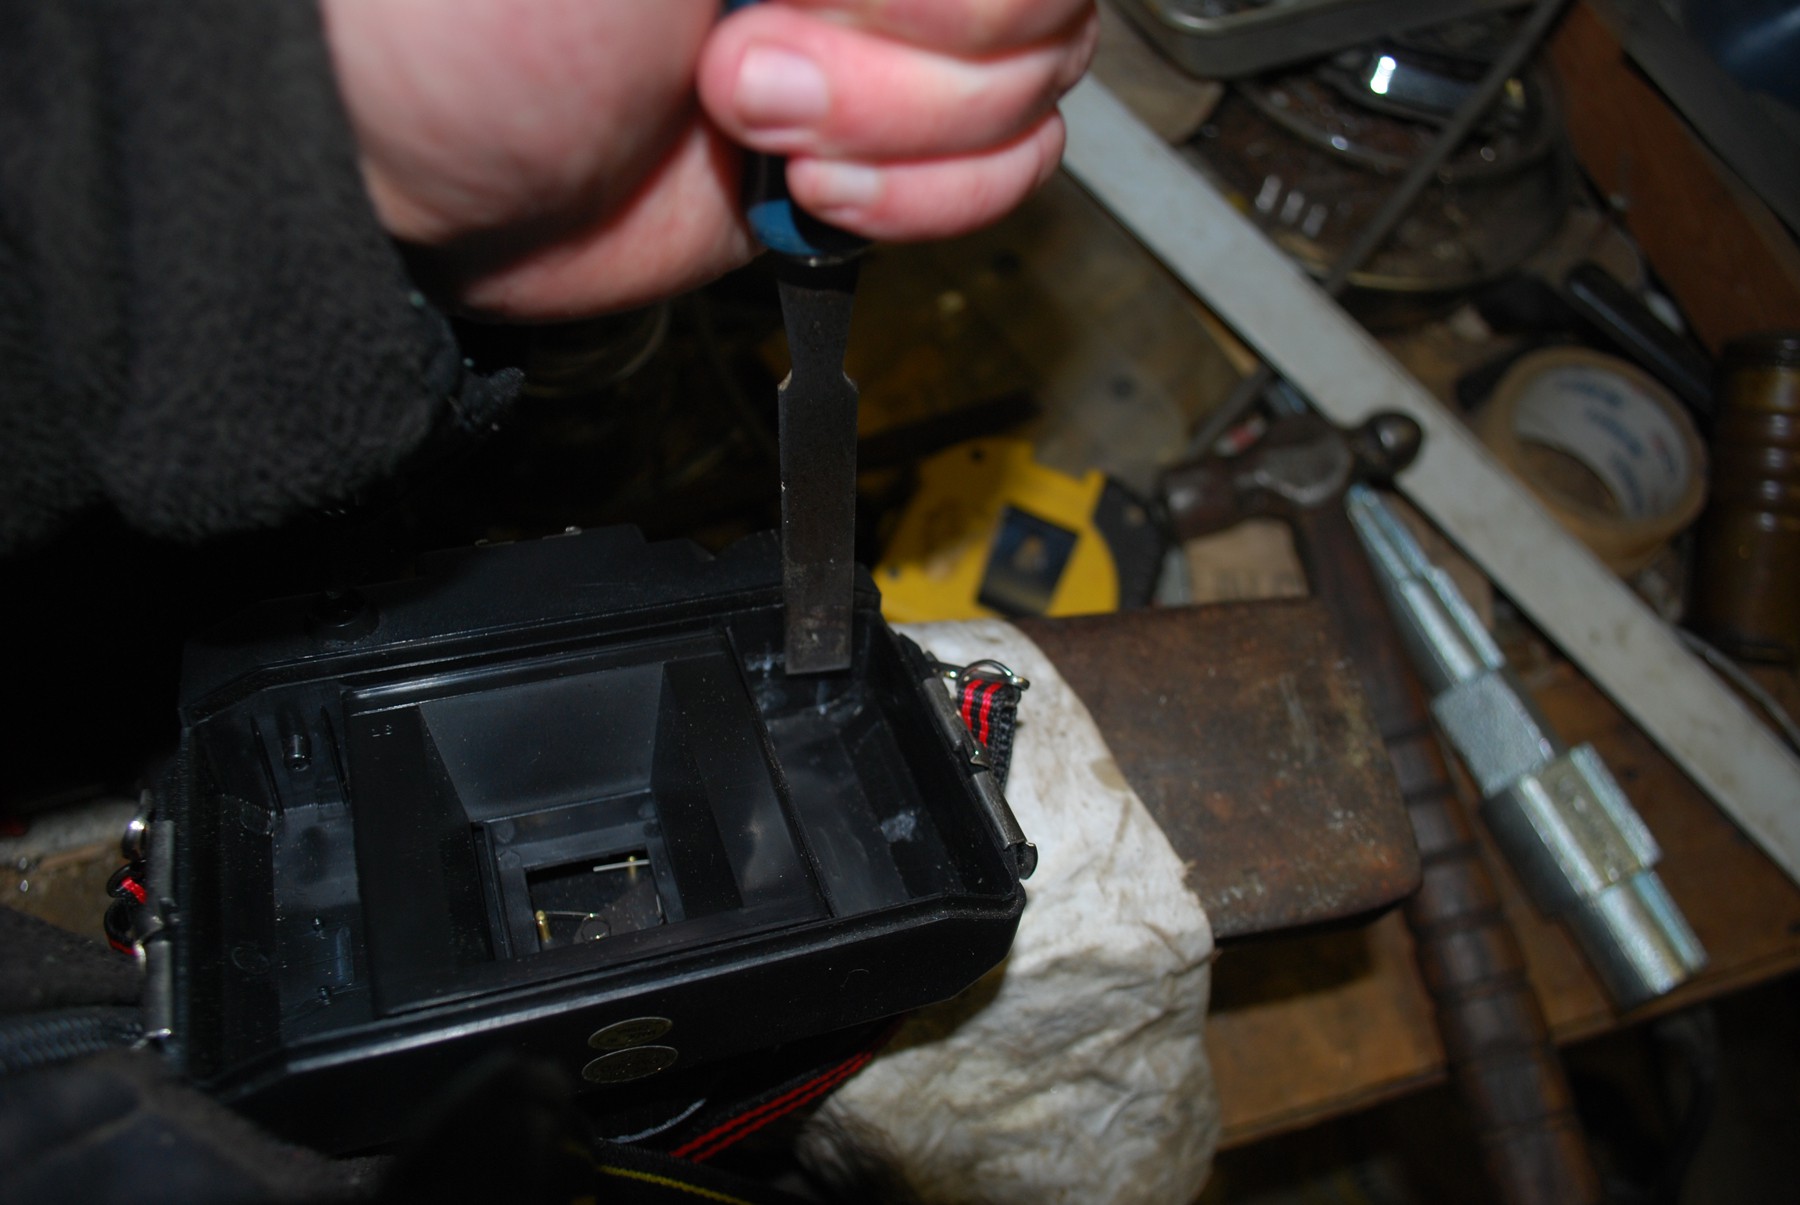
4) Any remaining portions are easily chiseled away. I placed just a drop cloth on the underside of the camera between it and my anvil so as to avoid damaging the camera's front side in the process.
![]()
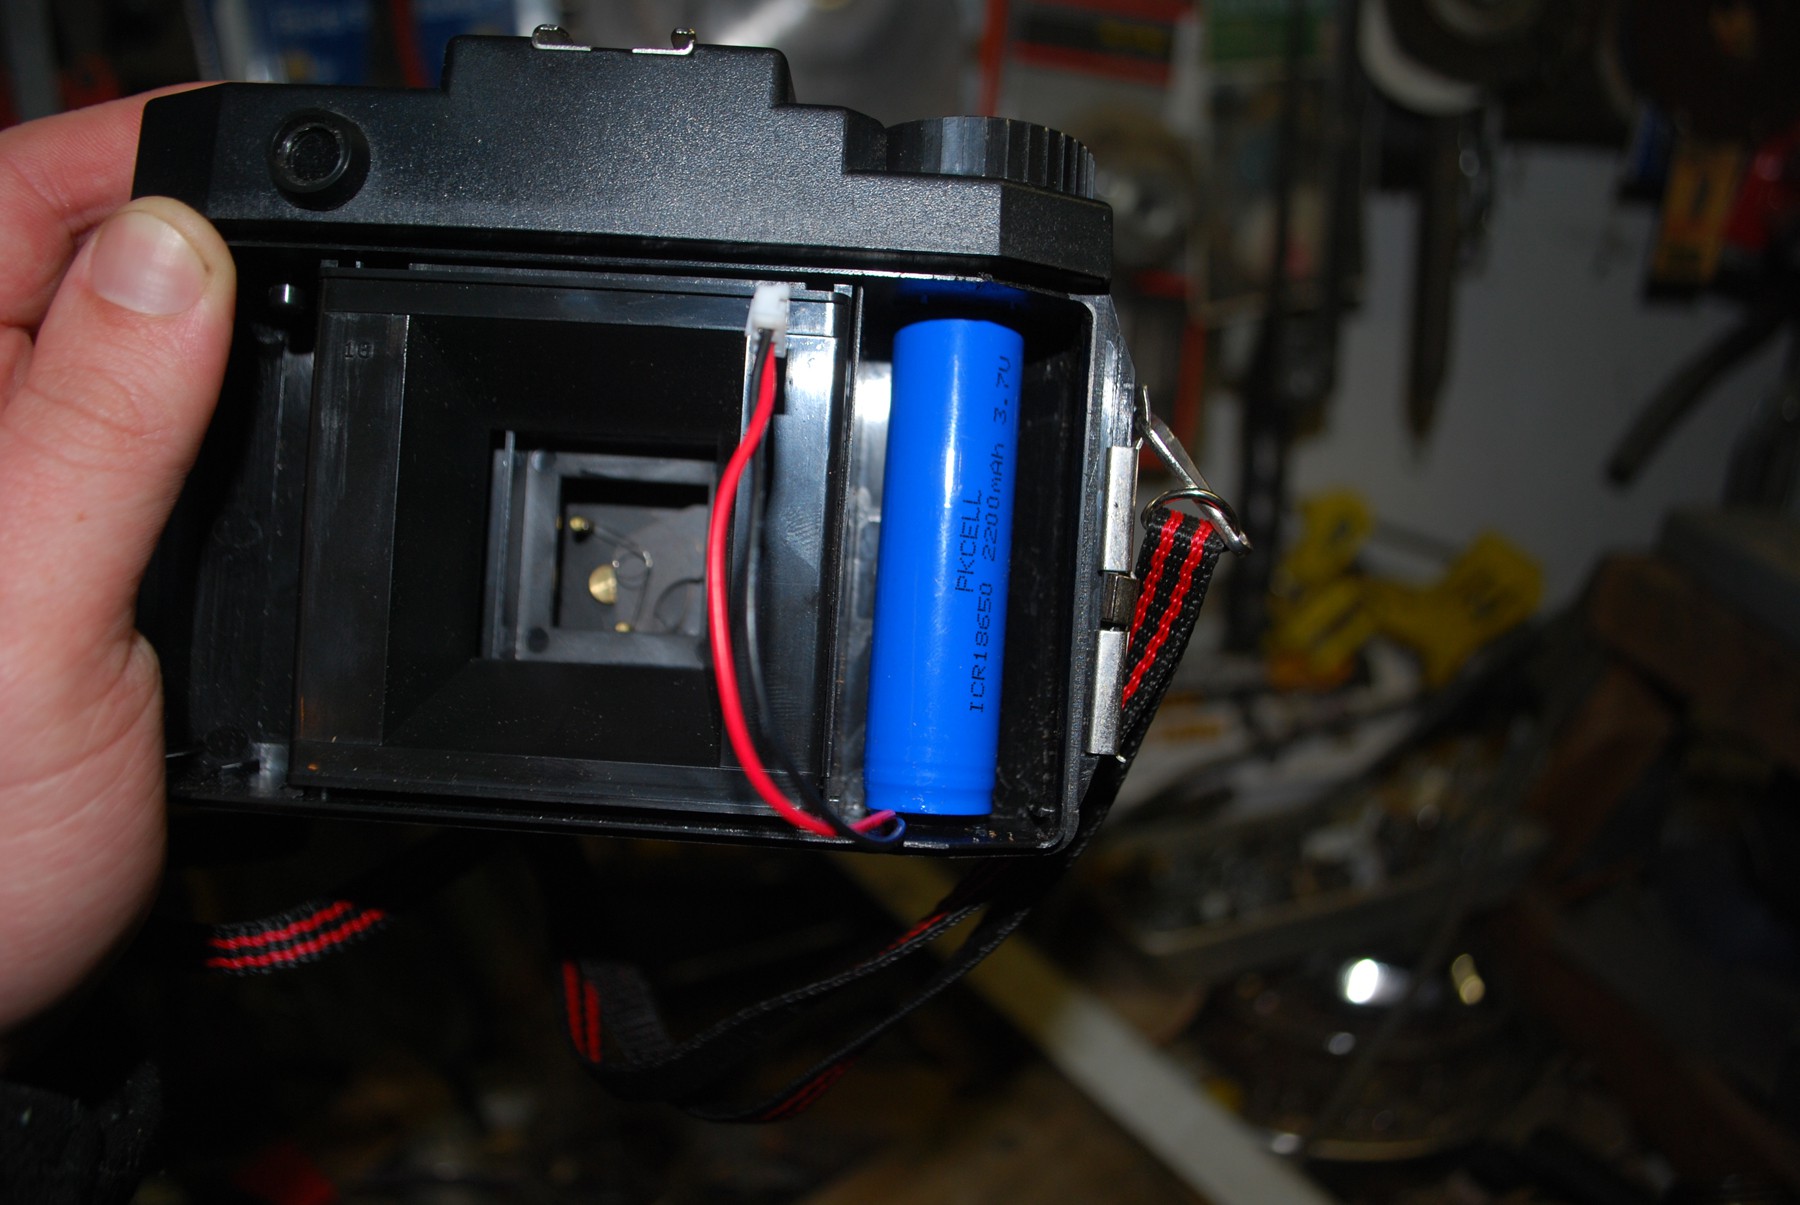
After that, the battery makes a great fit ! And just like the original-- Only it is electrons powering it now....
![]()
-
Connection Confusion
02/15/2015 at 17:25 • 0 comments![]()
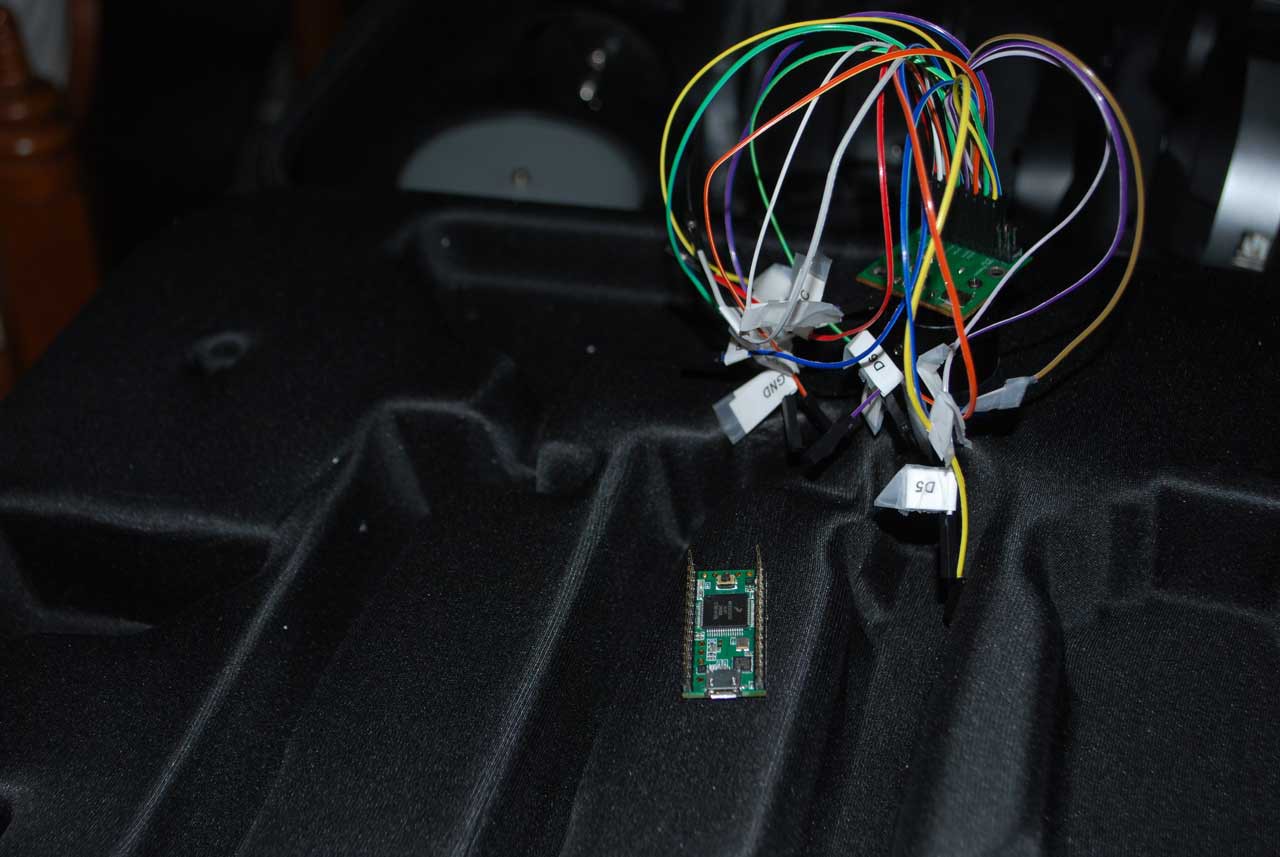
Always useful to take just a few minutes with an Excel spreadsheet, type a short list of your wire/terminal connections, print them out and then cut-- so as to have a bunch of little 'flag labels' you can put on with masking tape. Saves a lot of time later-- and also, something in the process 'I' have learned (and realized I had here forgotten), if you have already determined the pin out from your peripheral to your MCU (pre-planning, in the long run, is never a bad thing, less otherwise you suddenly realize you are 'out' of suitable pins), not only put the peripheral connection on the label, but also (as in this case, for the Teensy 3.1) the respective 'connector' pin you have designated.
For one, if you ever for some reason have to take the assembly apart, it can then be quickly 'reassembled'. And though I know there are much more 'brilliant' minds out there than mine, many times I see even this breadboard builds, which are beautiful, but nothing is labeled, which I think makes 'systematic troubleshooting' just that much more difficult.
One last point, the BPS style wire headers are not only really convenient, but also cheap enough for the price. While not quite as excellent as full 'custom crimp' connector, if you are building a 'single fixed project', a little bit of superglue placed between the plastic sides of leading headers, inserting them one at a time, and letting it cure... You have a decently stable, low cost cable assembly.
In addition, I plan on adding heat shrink wrap once the design is finalized.
Digital Holga
Conversion of a Holga 120S to digital format with SD card output.