 David Hopkins
Current thinking is this:
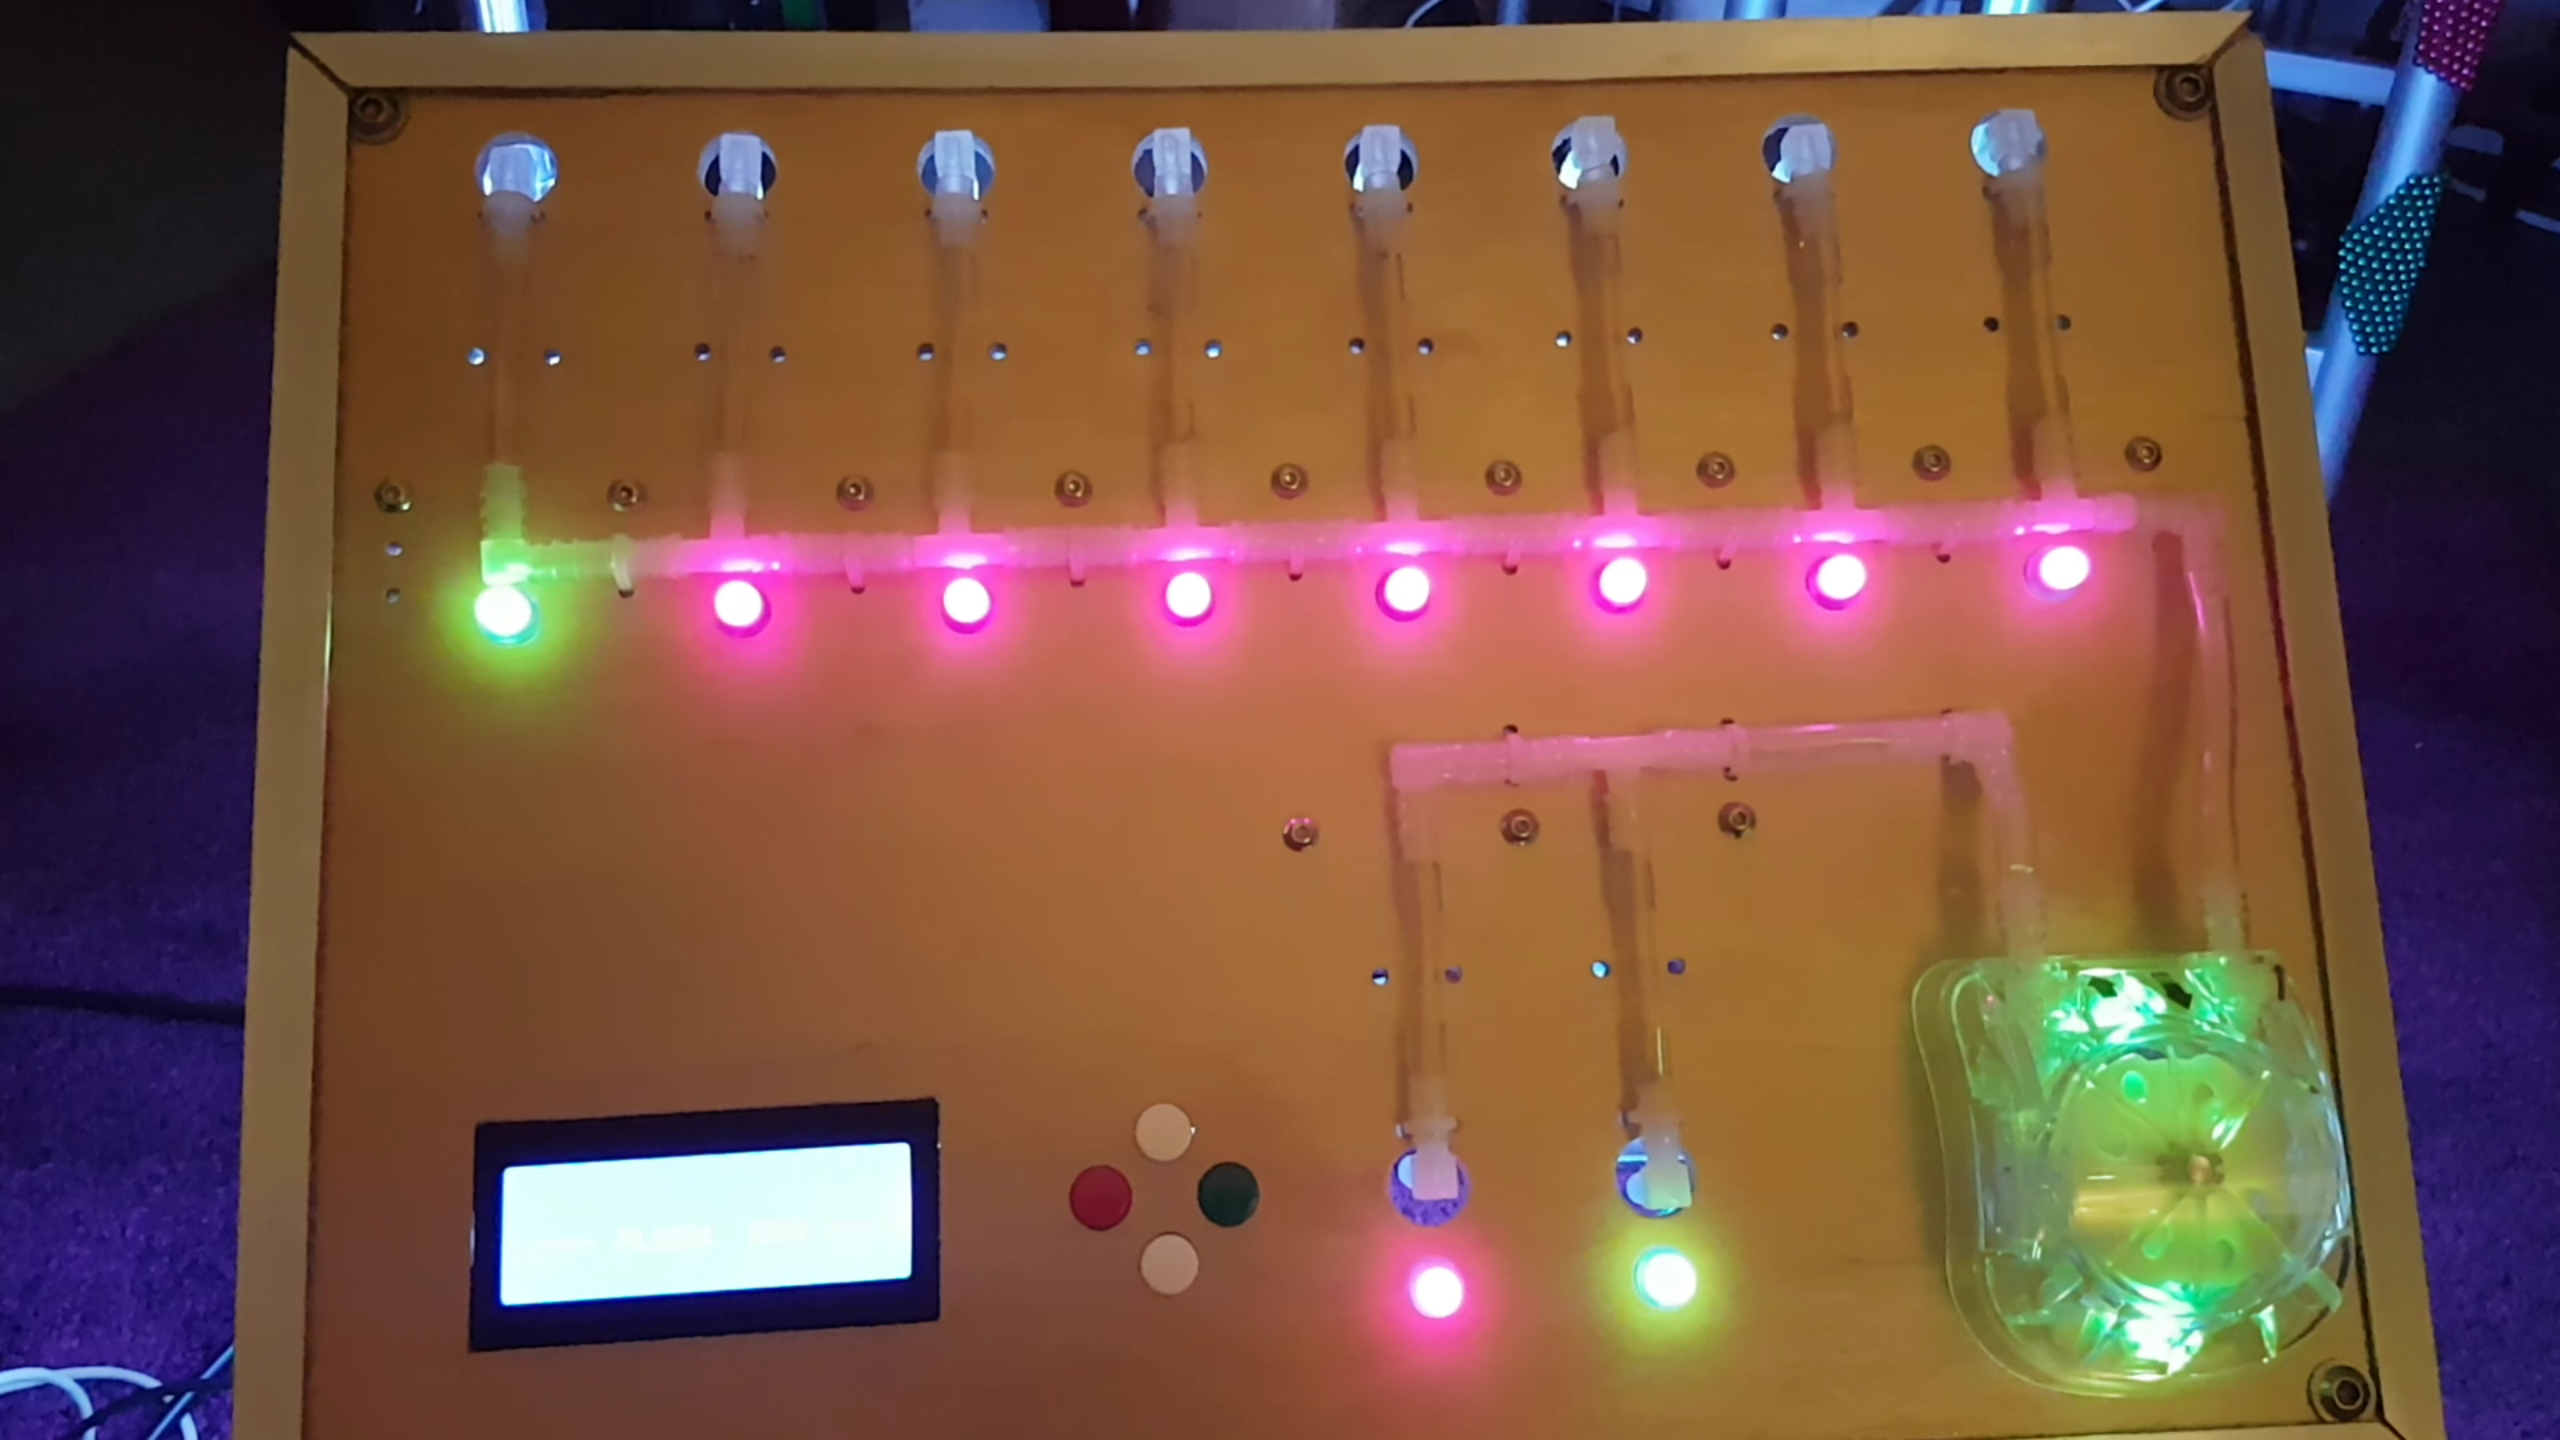
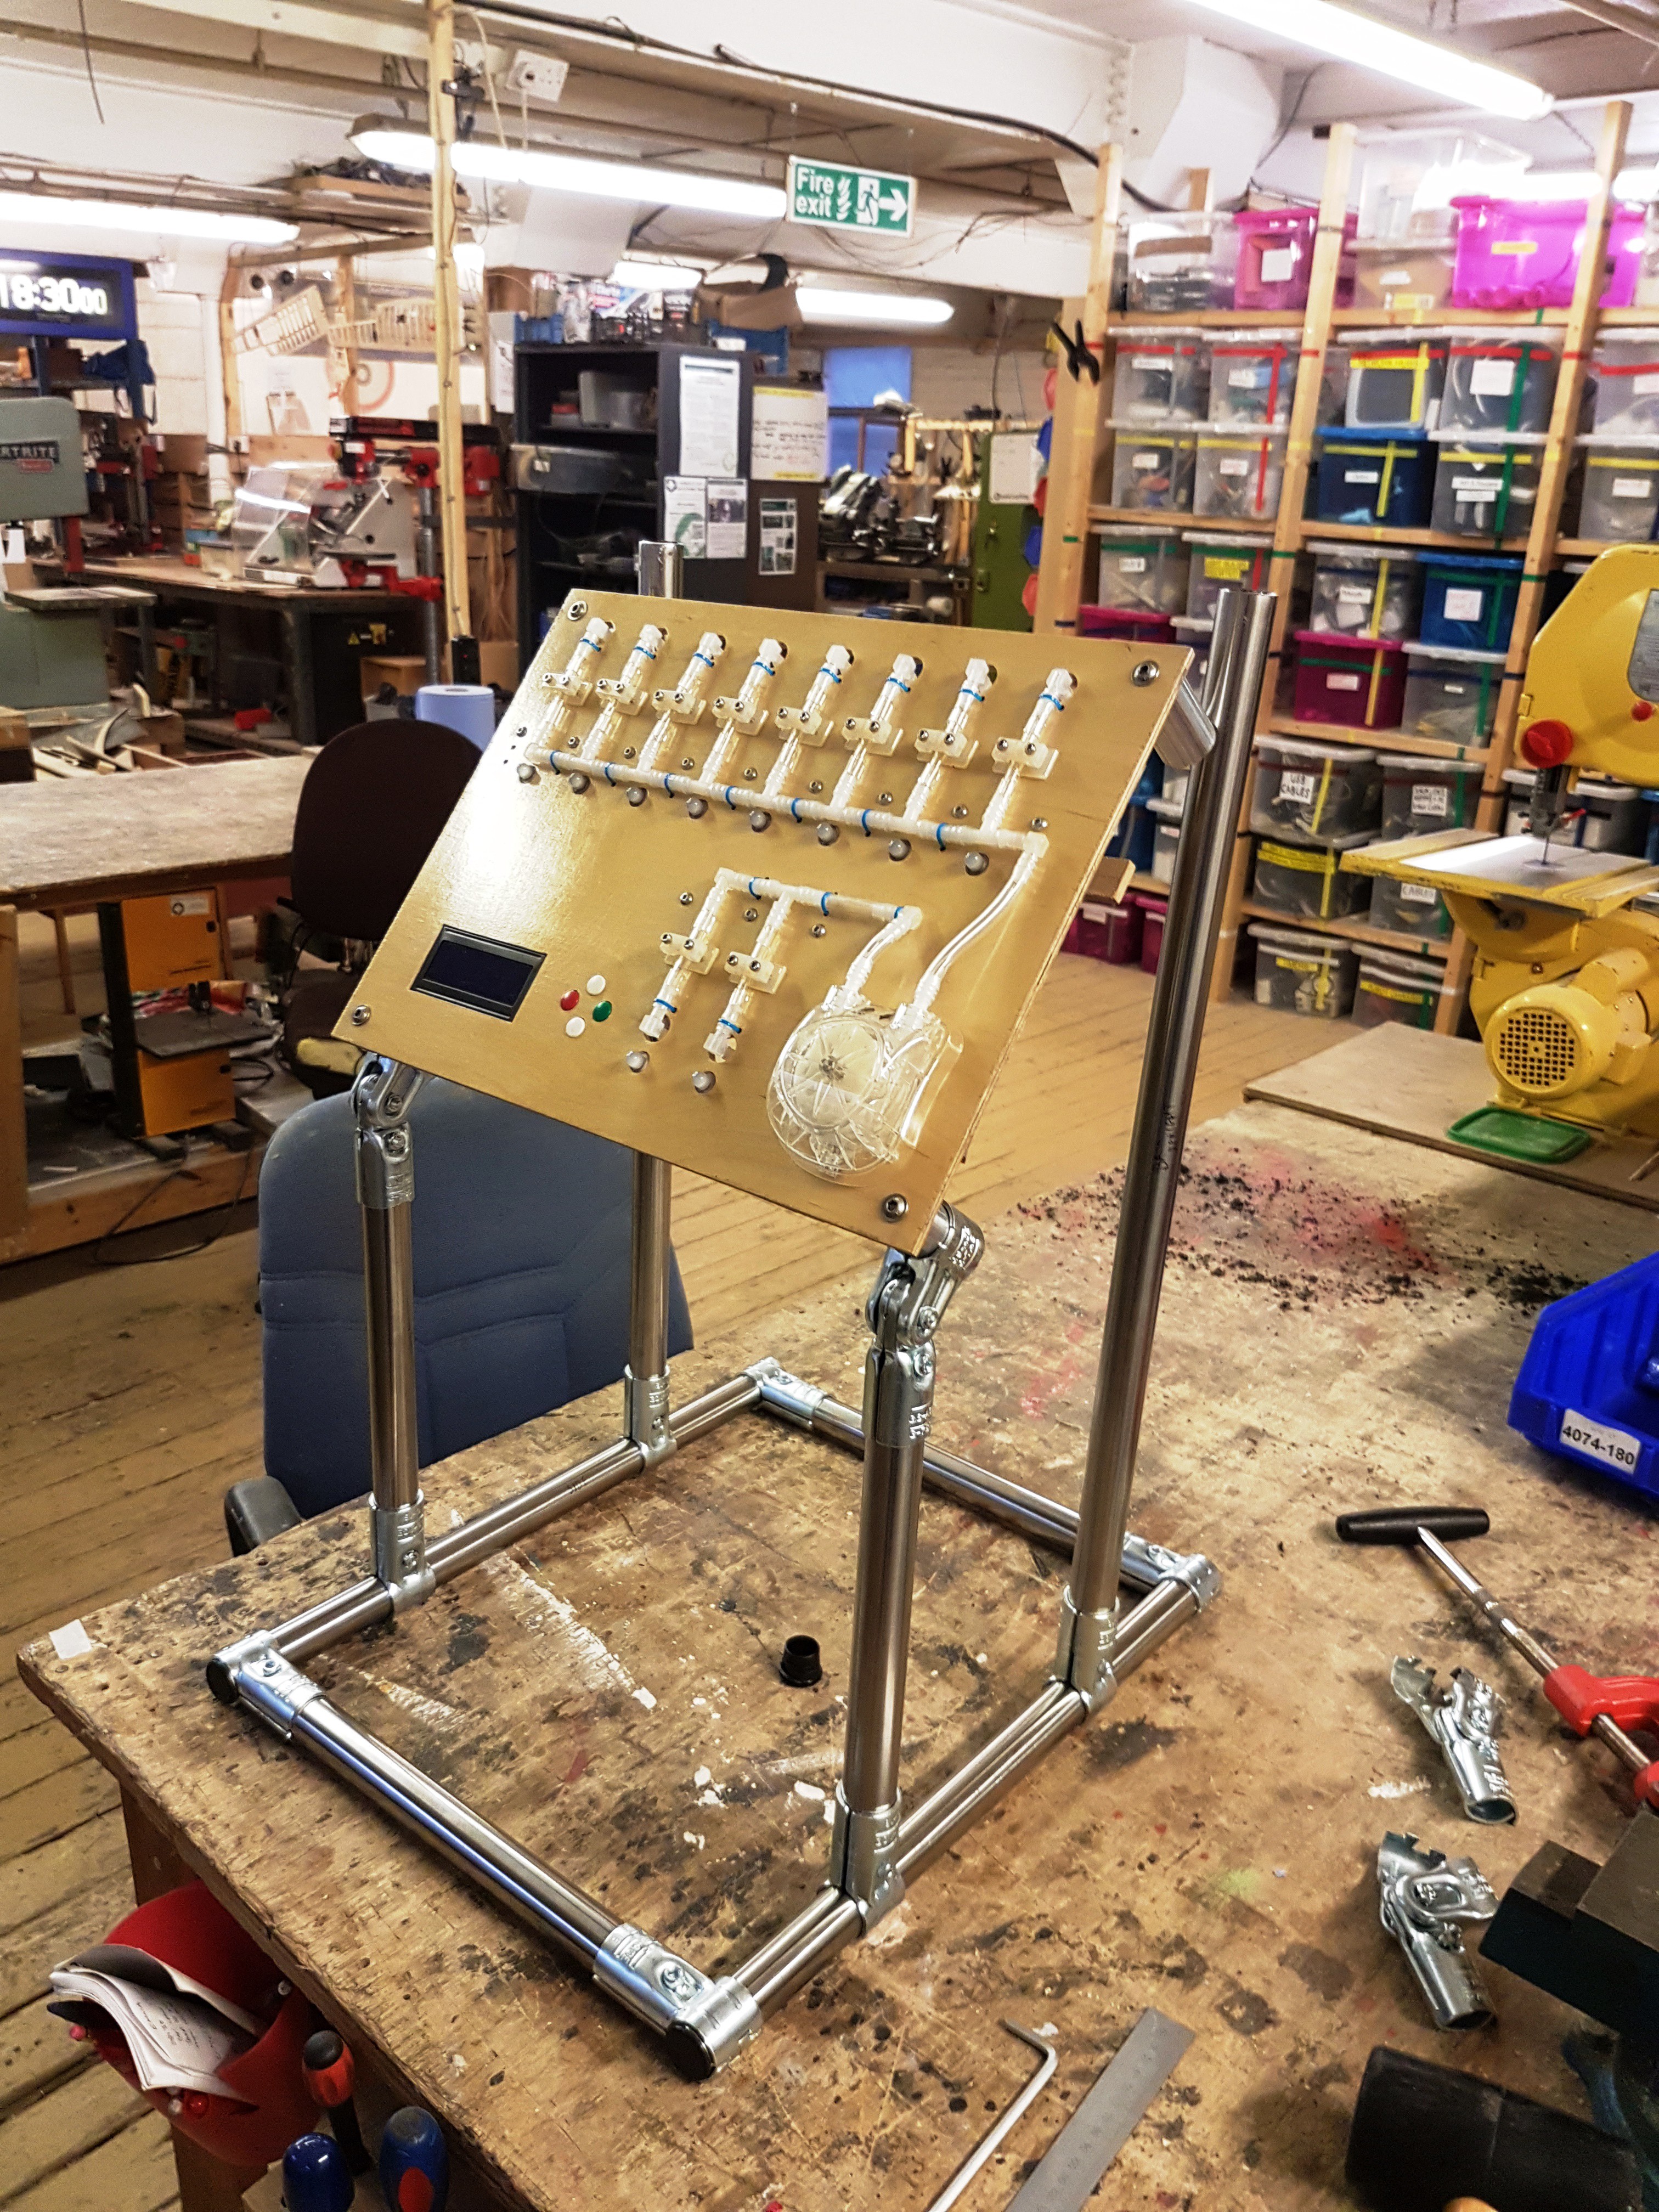
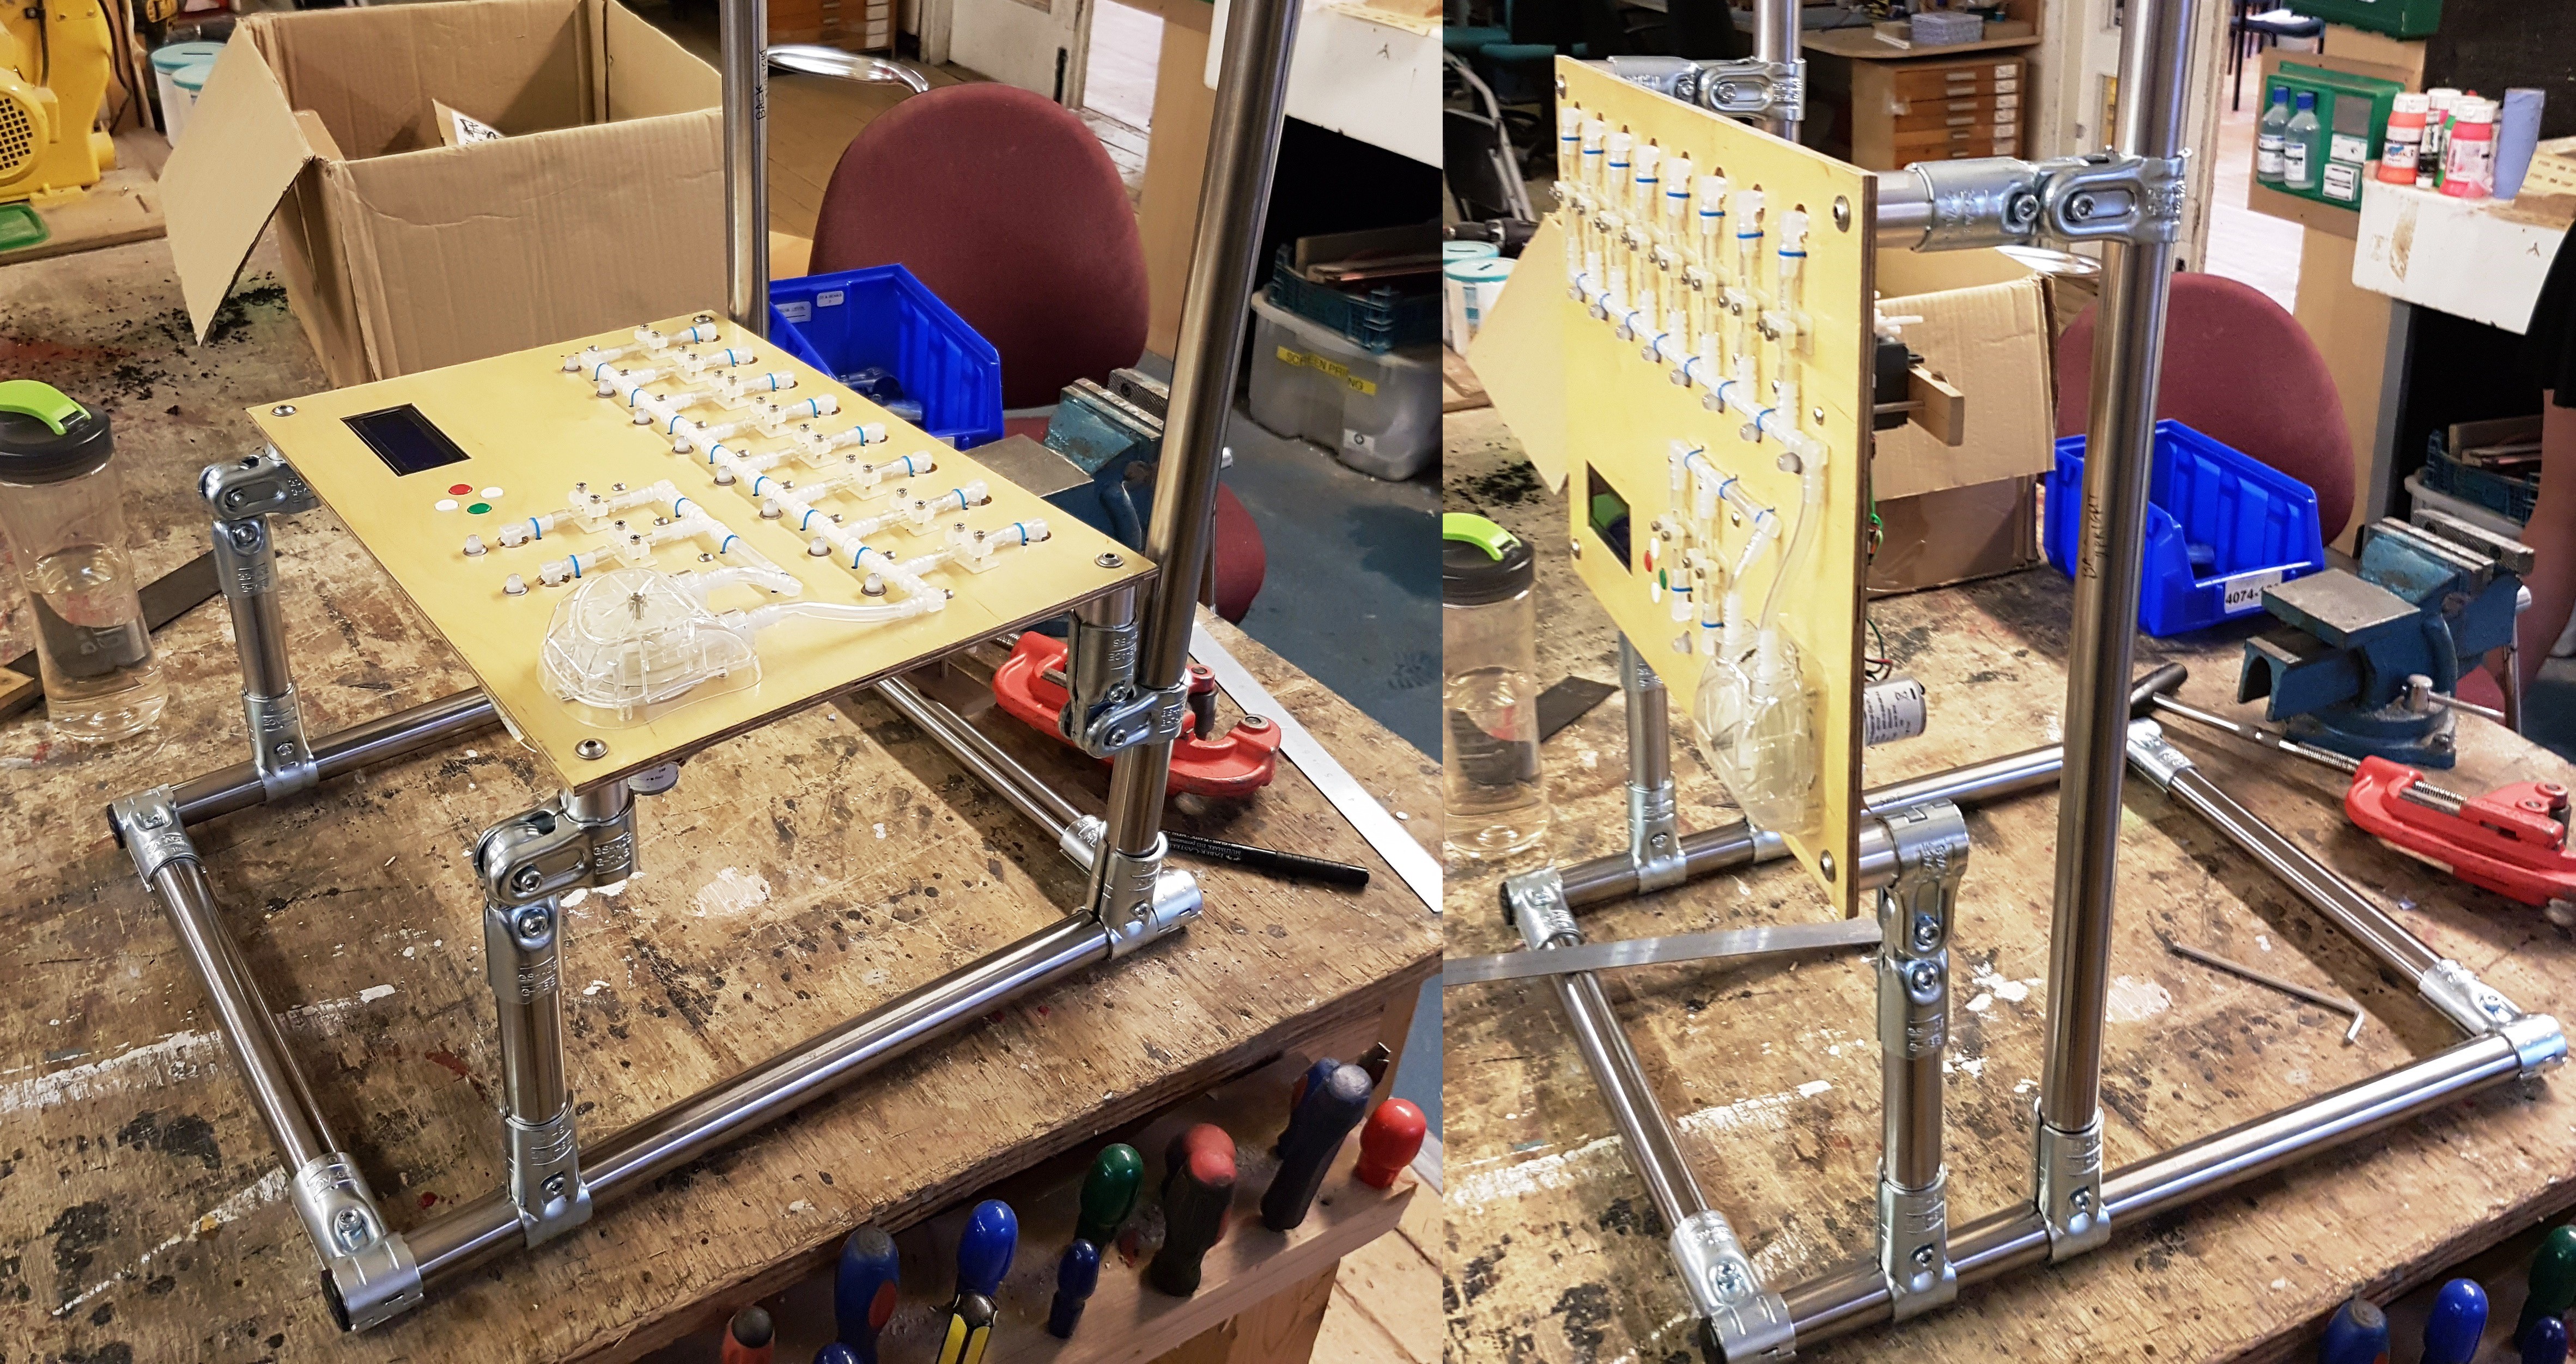
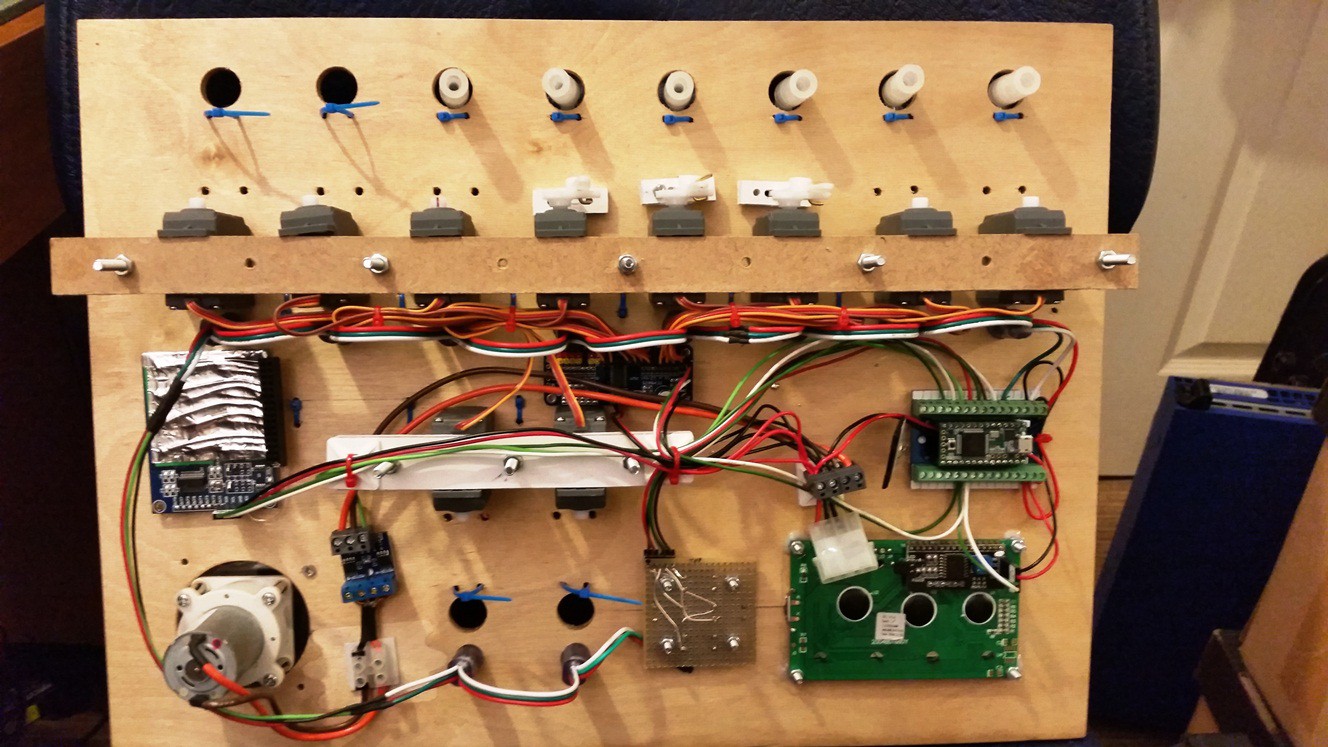
As peristatic pumps (that have a decent flow rate) are expensive (£23+), this system will have one pump connected to all reagents, these pipes will have servo controlled clamps to restrict flow... thus the process is:
unclamp desired reagent, run pump, reclamp reagent, unclamp air feed, run pump to flush reagents out.
possible addition of a flush cycle to run water through the system after every cocktail.
This is designed to be modular so another board can be added to the left, and based on findings from this one, it will be able to add another 16 reagents making 22... the servo controllers are chain-able as are the indicator LED's so in theory, many expansion boards can be added.
*note: £23+ is not expensive in itself, but if you have 10 reagents, thats £230+ just on pumps!


 Piotr Esden-Tempski
 Adam
Adam
 DTeel
DTeel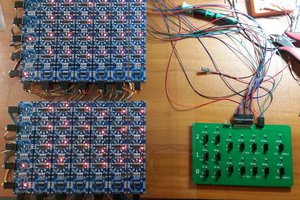
 Dave's Dev Lab
is there some Progress ? I really like this project ;) But i dont have much experience in coding...