Close
0%
0%

Solder paste stencils on Windows 7

How to make SMT solder paste stencils with the Silhouette Portrait using
Windows 7

Similar projects worth following
Using a Silhouette Cameo to cut out a stencil to use to apply solder paste for SMT assembly. See http://hackaday.com/2012/12/27/diy-smd-stencils-made-with-a-craft-cutter/ for details. This seemed like a perfect approach to stencil making, so I bought a Portrait and set about installing the software. Making it all work in Windows 7 took some effort. I document the procedure here so others might benefit, and I have a good record of what I did.

Caveat: This worked on my 64 bit Windows 7 system and with my Silhouette Portrait. YMMV, but what I did may help you.

The main program is a python script called gerber2graphtec. You can download that package anytime, but it has dependencies. You might want to load those first.

Follow the steps I provide to get gerber2graphtec working. With it, you should be able to get your Portrait or Cameo to work in Windows 7.

You should now get a nice stencil. Note that this may be just your starting point since it uses default settings. Monta talks about how to calibrate your cutter, how much you should undersize your openings, etc. But you should now be playing with those things instead of trying to get Windows to cooperate.

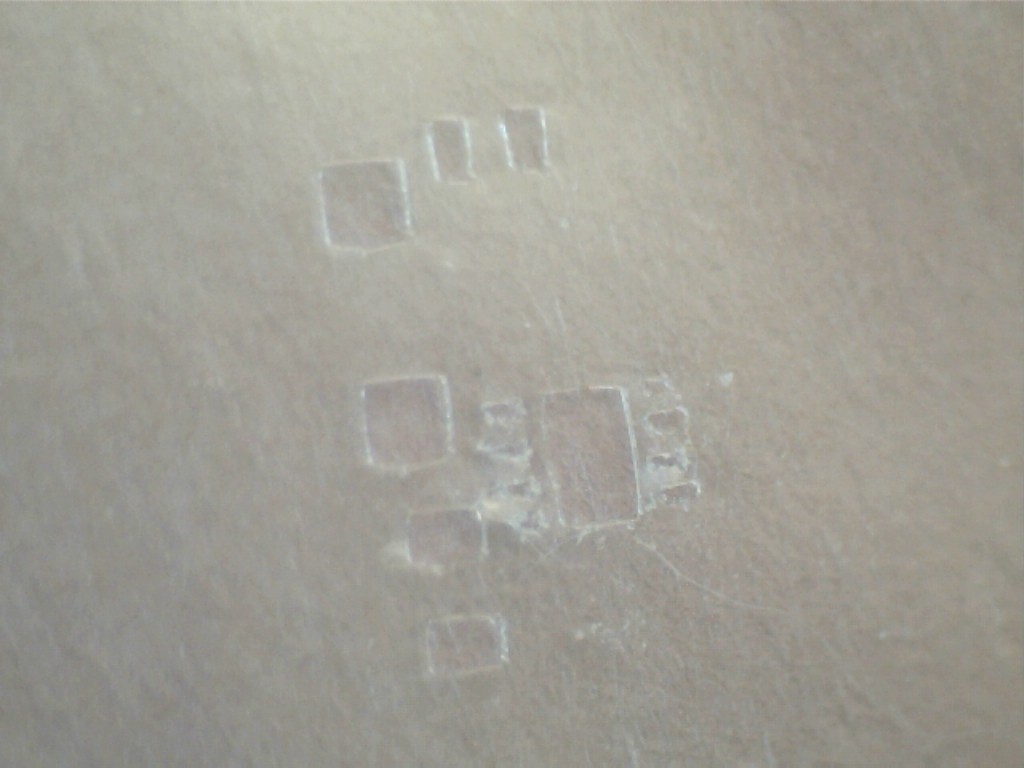
Here is what the stencil looked like after Step 1. I tried to clean out the smallest openings with a dental pick and they broke. But you can still see just how poorly defined they were.

This picture show the results after installing and using the gerber2graphtec package.

The stencil is shown on the circuit board in the Intro picture. The openings are a bit oversize (as Monta predicts), but I'll try making a board before doing any adjustments.

  • 1
    Step 1

    Try the simple and obvious: Just do what Cathy Sexton did and send a dfx to the Portrait.

    Kicad is the easy part. From the Plot Menu, select only the F-Paste Layer. Choose file type dxf. Click Plot.

    Follow the instructions from Cathy Sexton.

    Unfortunately, my experience was the same as Peter Monta had: the stencil was not usable. [Image of stencil]

    So, I decided to use Monta's method described here and here. One strong advantage of this approach is that it uses a gerber file; no dxf is needed. So it works with Eagle or KiCAD, and probably others, just fine. The tricky part is to adapt it to Windows, specifically W7 - 64 bit. Using Monta's process with Linux or the Mac is fully described in the Blog/HAD. But making it work on Windows is not as straightforward. In fact, reading the HAD comments leaves one wondering if it can be done at all.

  • 2
    Step 2

    If you don't have Python, you will need to load it. I'm using version 2.7 for 32-bit Windows. I expect the 64-bit Windows version would work also. Stick with 2.7 unless you feel adventurous.

  • 3
    Step 3

    LibUSB-1.0 is the key requirement, and becomes the gift that just keeps on giving. Start by downloading the library itself (get the 7z file for Windows) from here and unzip it. To install it, all you need to do is copy the right dll into the right Windows directory. You can choose the version built with Visual C++ or the MinGW version. You can also choose the 64 bit or 32 bit version. I chose the MinGW version and copied the 32-bit dll into Windows/System32. Even though I have 64-b Windows, I am running the 32-bit version of Python 2.7. Note that this didn't work! The Python bindings for LibUSB (which are installed in the next step) detect whether 64-bit or 32-bit Windows is running and fetch the dll from the appropriate directory (System32 or SysWOW64). Note that putting the 64-bit LibUSB-1.0 dll into SysWOW64 doesn't work either - 32-bit Python chokes on it! The correct arrangement (for my setup) is to put the 32-bit dll into SysWOW64. You should be able to pick out the correct setup for your system from these notes!

View all 10 instructions

Enjoy this project?

Share

Discussions

Does this project spark your interest?

Become a member to follow this project and never miss any updates