 Kayser-Sosa
I initially started and completed my original build back in 2008 after just getting out of college for something to do in my spare time. Not long ago a gaming gaming friend of mine saw it and was excited and ended up building his own. This got me into wanting to redo / update mine.
I was able to reuse some of the parts from my initial system to complete the new briefcase system. I also grabbed some ideas from other links and my friend's build.
Sorry some of the picture aren't the best, I was taking the pictures quickly so I could get back to work. I may have also done some of these steps out of the order listed as I had completed this project sometime in 2013.
NOTE: I used the same screws for everything and cut them to the length's I needed with a dremel.
NOTE: You are able to take this case on flights as your briefcase which flies free along with any carry-on you have otherwise. You may have to open it and possibly power it on for TSA. My friend and I have both taken ours on flights without issues.
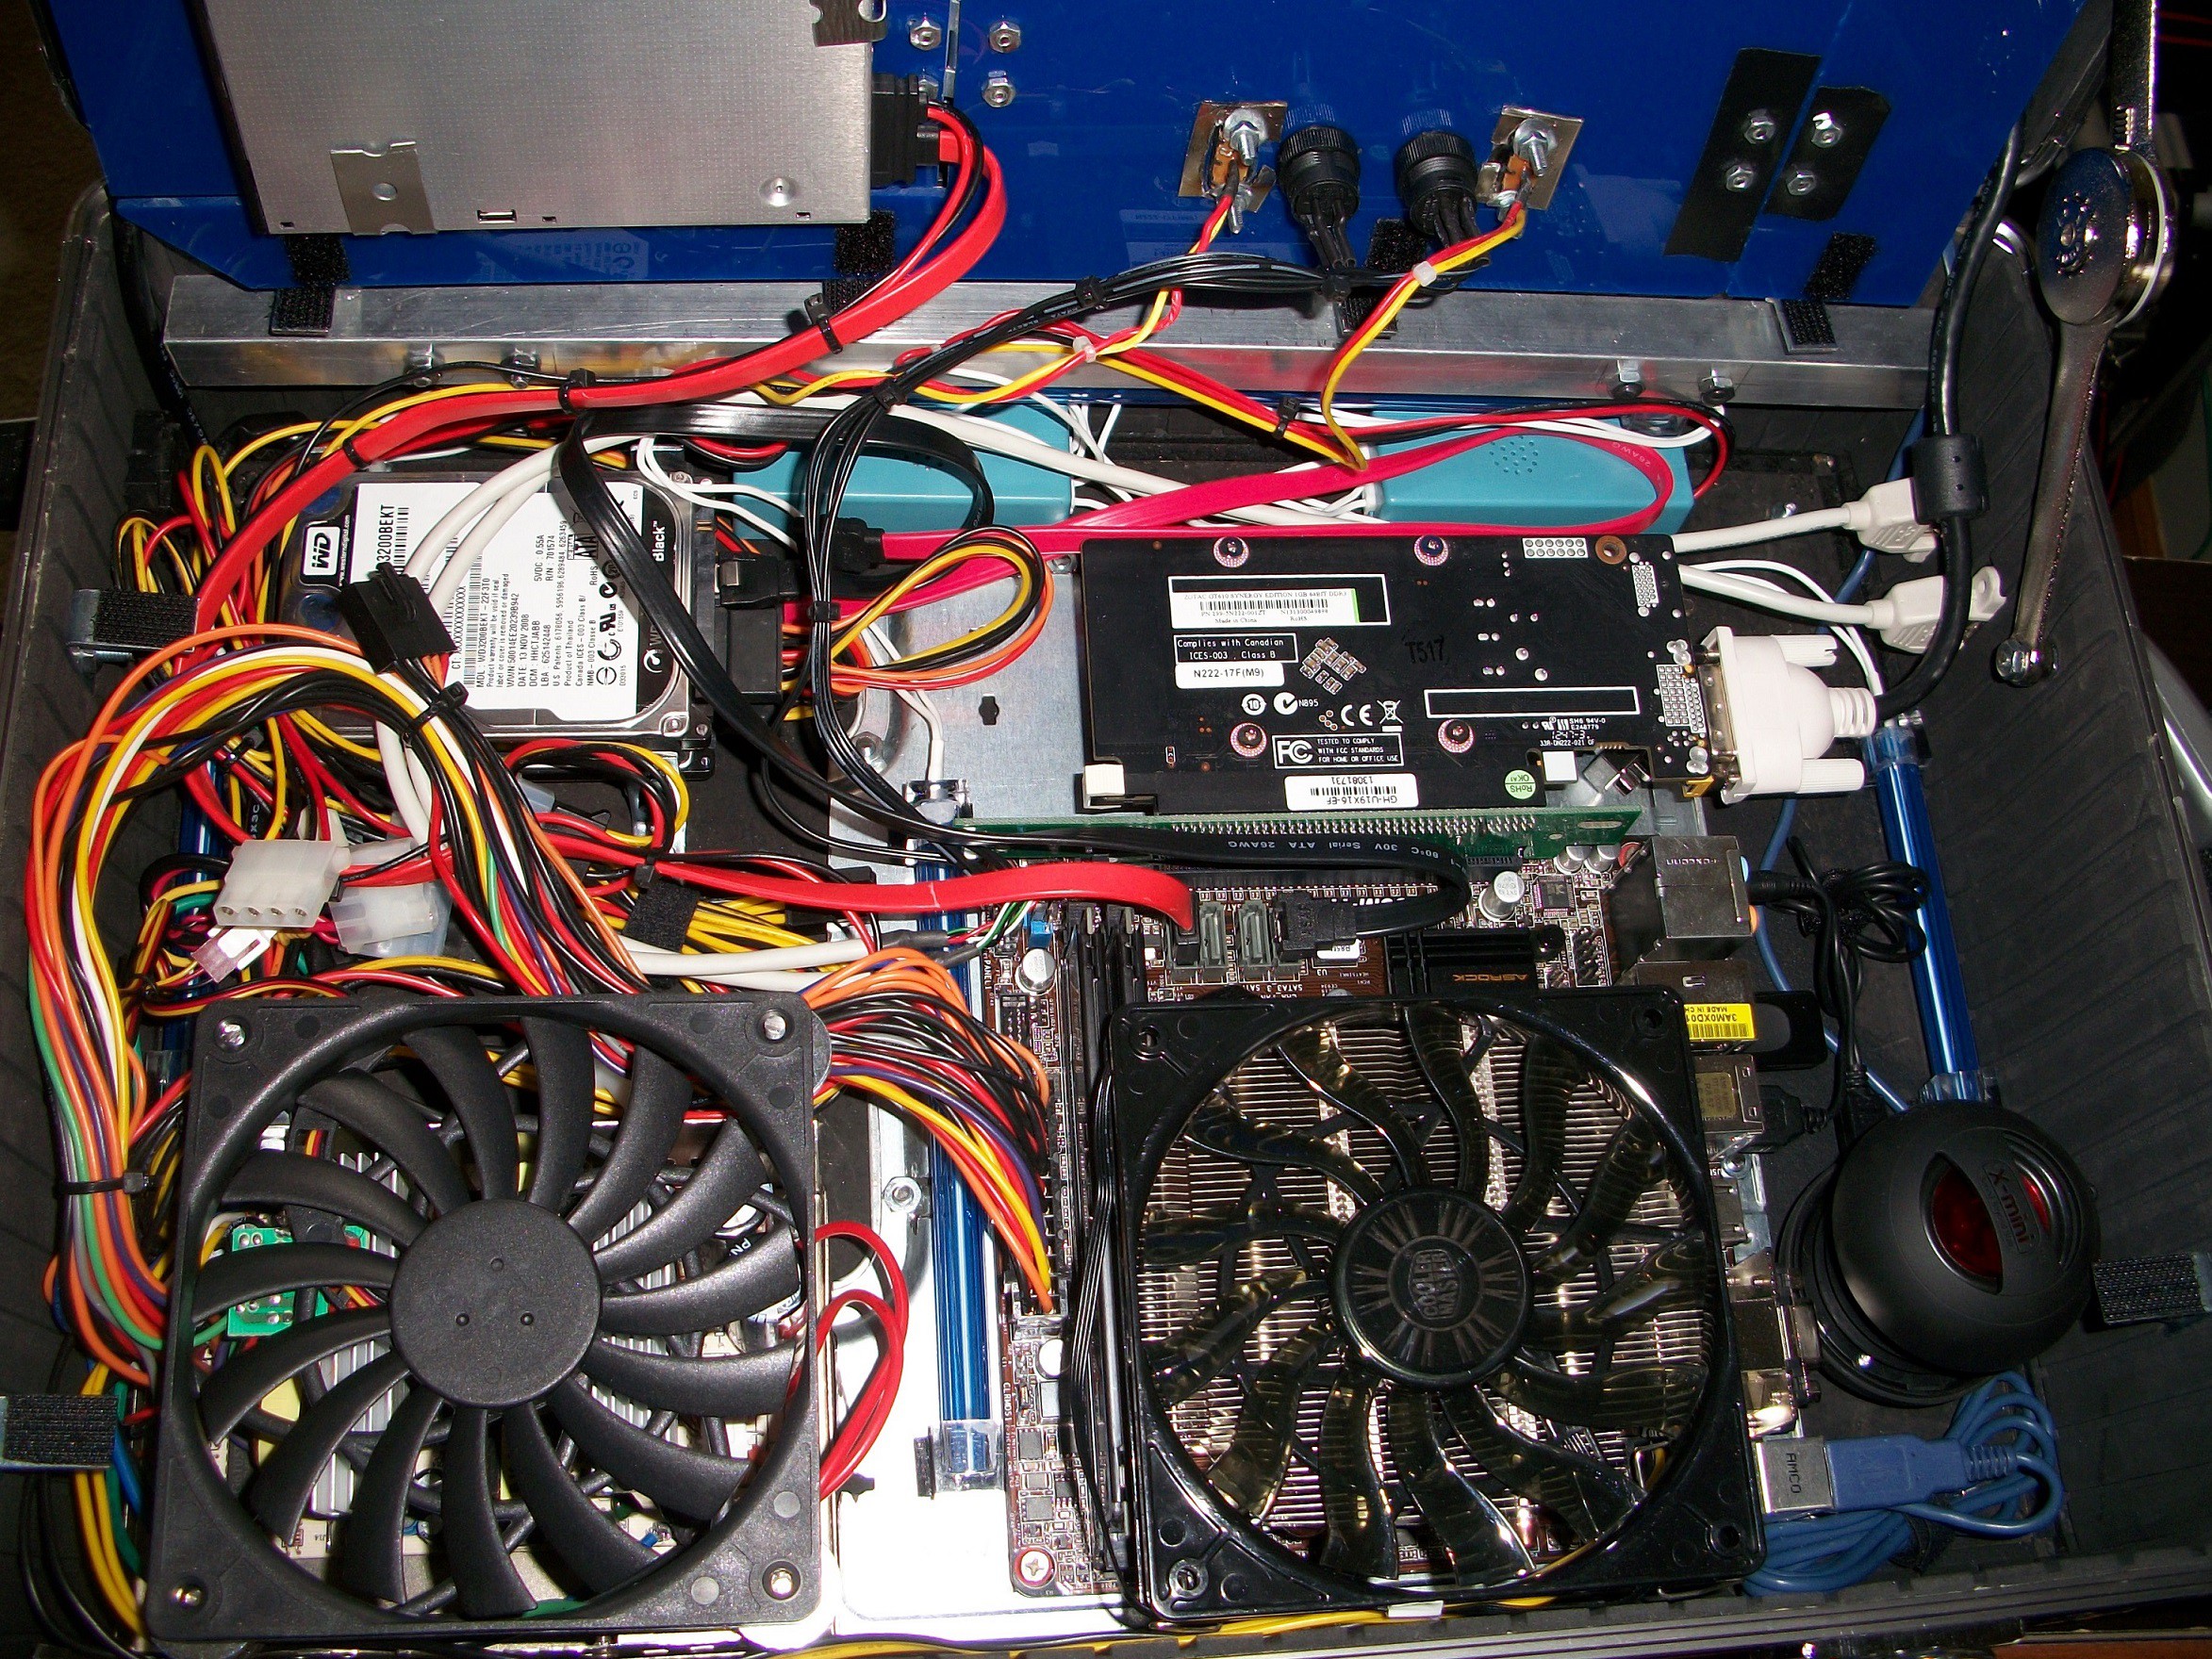
So looking above at the last picture, top left is the HDD. This only shows one, I added a second later. I would recommend using SSDs instead of full HDDs if you plan on traveling a lot with this system. To the left of the HDDs is the power connector for the PSU/LCD. You can see the black power cable from the LCD coming down from the top lid to the power connector, unable to easily see the cables run from the PSU to the power connector. Just below the HDDs is an open space I used to store extra PSU cables. I zip-tied or twist-tied them up so they don't move. Just to the left of the cables, hard to see, is one of the 4" cold cathodes. Just below the extra cables is the opened PSU with mounted fan. Between the PSU and motherboard is a 6" cold cathode. Going up from there the two blue/green boxes are the power connectors for the cold cathodes and under the supporting Aluminum Square Tubing is a 12" cold cathode, not listed in parts but an extra I had around. Moving more to the right is the GPU with fan facing down. I think I found the heaviest duty (two slot) small form factor GPU. Can't see it, but on the HDMI port is a screw holding the face plate on. I took the face plate off and cut it up. Keeping the screw holes lined up, I used it to support the GPU, so it isn't relaying on the PCI-E L-bracket connector. Below the GPU is the motherboard. To the right of the motherboard are the back ports of the motherboard and some space so I could access them. I had room and added the speaker and tied up extra cables here as well. I eventually found that the LCD was a bit heavy and the top lid needed some more support so I added the hinge, which works nicely. I zip-tied as much cabling as possible to keep everything neat and clean under the acrylic. As mentioned before the PSU fan keeps everything very cool. I do not run the system with the lid closed and I do have a switch with the input power connector so when not in use I can cut all power to the system.
All in all, I'm happy with the build. I know it's far from perfect, but I do enjoy it and use it almost every day.
If there are any questions, feel free to add them to the comments which I will attempt to check once a month.
 Michael Murillo
 TEC.IST
 Yonghan
 Øystein