theschlem
I designed my terraPin 3D printed pinhole camera with interchangeable "extensions" or pinhole/shutter assemblies.
http://www.thingiverse.com/thing:495230
http://www.thingiverse.com/thing:577223
Without 3D printing an entire dedicated camera, I can just change a sub-assembly that dictates the angle of view and magnification. Or the way the shutter is actuated.
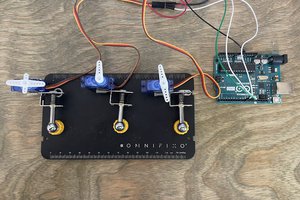
The first step in the GoSlo (not GoPro) Robo-shutter project is to interface a shutter with the servo. From the very beginning, I've been thinking about how to stick a servo on the front of my cameras. My goal was for minimal modification of existing designs to accommodate the servo. The first "micro-servo" I tried turned out to be just a bit too large for my purposes. At a local hobby shop I found a smaller form-factor in the Common Sense CSRC-35 Ultra Nano Servo.
The modified files are now on Thingiverse, and the servo recesses into a cavity and is held in place by plates that clamp the servo mounting tabs. In the 6X9 extension, I have the luxury of room to use 3mm bolts to clamp the servo. In the case of the 6X6 extension, smaller plates utilize the tiny screws that come with the servo.
The Shutter blade has been slightly modified to give a large lever arm, but lacks a designed hole for a pushrod (connected to the servo). An easy technique is to heat a bit of #12 piano wire and quickly melt a hole, through which the pushrod (made from the same piano wire) will activate the shutter. After making a custom pushrod, every shutter will be a unique assembly with a specific numerical specification for the servo's positions at the extremes of "open" and "closed". I could leave the testing as an exercise for the reader, but I will be posting code for the shutter and set up. In order for YOUR shutter to work properly, you will have to ascertain the values to send to the servo.
Code pending.
 Smalls
 badr tharwat
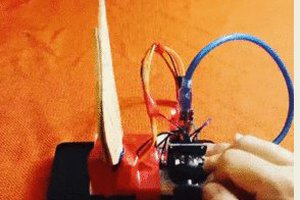
 fullyanalog-programmer