Close
0%
0%

Threaded Insert Press

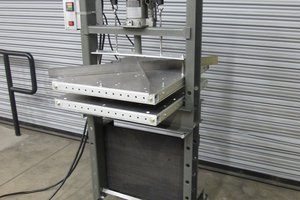
This hack combines a soldering iron and arbor press to create a cheap thermal press for installing threaded inserts into plastic.

Similar projects worth following
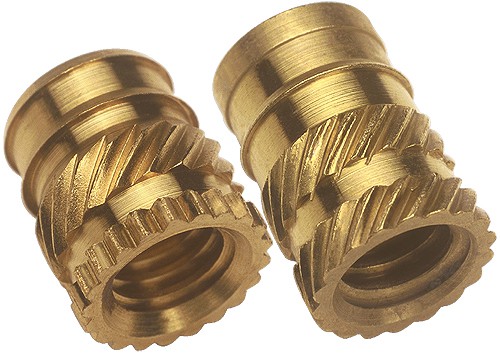
Threaded inserts, typically made of brass, are used to add reusable machine screw threads to plastic parts. To install you place them in a hole and press in using heat or ultrasonic vibration. There are no economical presses on the market for this purpose (that I know of), so I designed an adapter to mount a beefy 100W soldering iron to our shop's arbor press.

The Weller W100P series iron has sturdy replaceable tips and a body that is capable of withstanding repeated light pressing forces (insertion typically does not take much force).

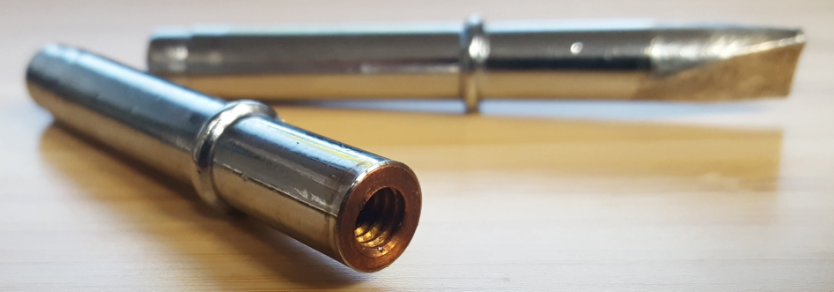
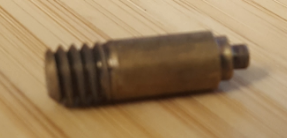
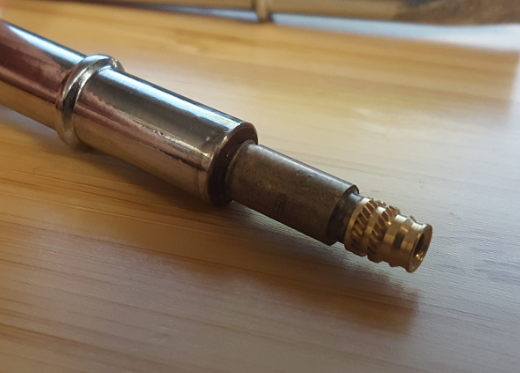
The tips are solid copper, too soft to use for pressing inserts. To solve this issue I drilled and tapped the end of the copper tip on a lathe and made some brass tips to thread into the copper soldering iron tip. The brass stands up much better over time and does not mushroom like the copper.

In addition to pressing threaded inserts, other possibilities include: heat staking, hot embossing, hot knife cutting, heat sealing, etc.

Here are links to download custom parts:

STL files for 3D printing (untested, but I bet it would work fine)

http://s000.tinyupload.com/index.php?file_id=09098959973777174112

STEP files for machining or import into CAD for mods:

http://s000.tinyupload.com/index.php?file_id=00751233921801579441

Notes:

  • The arbor press I used has a 1.5" x 1.5" square ram, this may be different on your arbor press and will require a tweak to the design.
  • You will need a #4-40 tap to add the threads necessary to assemble the parts.
  • For consistent press depth, install a shaft clamp to the top of your arbor press ram and clamp it down where you want the press to stop its downward travel. I have linked to a shaft clamp in my components list. Make sure you get the right size for your arbor press though.

Arbor Press - soldering iron mount.x_t

this parasolid is ideal to import cleanly into Solidworks

x_t - 94.57 kB - 12/08/2017 at 01:29

Download

x-zip-compressed - 71.46 kB - 12/08/2017 at 01:28

Download

Arbor Press - threaded insert press - STEP.zip

to import into any CAD tool and alter the design

x-zip-compressed - 301.02 kB - 12/08/2017 at 01:28

Download

  • 1 × Grizzly 3 Ton Arbor Press P/N: G4020
  • 1 × Weller W100P 100 Watt Soldering Iron P/N: W100P3
  • 2 × Cap Screw, 1/4-20 x 2.5" length, 18-8 SS McMaster 92198A552
  • 4 × Flat Washer, 1/4, 18-8 SS McMaster 92141A029
  • 2 × Hex Nut, 1/4-20, 18-8 SS McMaster 91845A029

View all 7 components

  • Making Insert Tips

    Alex Rich12/12/2017 at 18:33 0 comments

    Tips are pretty easy to make on a lathe using the following method.  You could also do this without a lathe if you get creative using hack saw / files and a cordless drill:

    1. Cut off end of soldering tip (tip shown is Weller CT6F7, good idea to buy a few spares) using lathe or hack saw.

    2. Drill and tap a 1/4-20 (or similar) thread in the end

    3. Use a die to make the matching male thread on a piece of brass rod, then turn a shoulder that matches the inner diameter of the threaded insert you want to install.  The shoulder can be created on a lathe or by putting the brass rod into a cordless drill, running at full speed and filing the shoulder down until it fits in the insert.  The brass tips are now interchangeable and will withstand pressing forces better than if you just put a shoulder on the copper soldering tip.

  • Threaded insert sources

    Alex Rich03/05/2015 at 19:36 0 comments

    My personal favorites are S-Lok fasteners made by Kerb Konus. They are a pain to deal with, I have to call them on the phone to order, but very cheap and the inserts are high quality. Here is the US distributor: http://www.precisionfastenersinc.com/

    Easier to deal with, but more expensive sources listed below

    PEM Engineering: http://www.pemnet.com/

    McMaster: www.mcmaster.com

View all 2 project logs

Enjoy this project?

Share

Discussions

MakersBox wrote 07/28/2017 at 21:42 point

Hey Alex,

I'm interested in building something like this, but the files are gone from the links you provided. Can you upload them to the project files section?

  Are you sure? yes | no

Alex Rich wrote 12/08/2017 at 01:31 point

@MakersBox the files are uploaded, I'm sorry I didn't see this comment a few months ago.

  Are you sure? yes | no

Eric Hertz wrote 03/22/2016 at 08:47 point

Excellent. I'm glad I've been saving all those threaded-inserts when scrapping old electronics' housings :)

  Are you sure? yes | no

Alex Rich wrote 03/22/2016 at 12:22 point

haha, yeah try it sometime. I have had a lot of luck just using a soldering iron by hand to push them in as well. This press was really just to get the insert depth really precise on some production parts.

  Are you sure? yes | no

Scott216 wrote 04/07/2015 at 02:35 point

I'd like this idea.  I removed the plastic handle of a soldering iron and replaced it with a metal adapter that will let me mount the iron in my drill press.  I purchased some heat-set inserts from McMaster (# 93365A154) and the installation tip (# 92160A127).  But I've run into a little snag, the threaded insert is a loose fit on the installation tip.  I don't know a good way to get the insert to stay on the tip.  Any suggestion?  I could have a custom installation tip made by a friend if I can't find an easier solution. 

  Are you sure? yes | no

Alex Rich wrote 04/07/2015 at 02:45 point

Thanks!  Usually you want the installation tip to be a it loose in the insert, that way when you retract your heating element the insert won't pull out.  Most ultrasonic/thermal inserts are designed with a small step down that goes into the pilot hole and aligns the insert vertically, then the insertion tip goes into the insert, heats it up, then you melts it into the hole.  Does that make sense?  If your inserts don't align into the pilot holes as I have described then you may need to order different ones or drill a small starting hole that is about the same diameter as your insert.

  Are you sure? yes | no

Scott216 wrote 04/07/2015 at 03:53 point

I don't need threaded inserts very often and I plan to use it with parts I make from my 3D printer, so the parts will already have holes.  I think I can insert them into my parts like they do in this video: 

  Are you sure? yes | no

Alex Rich wrote 04/07/2015 at 11:27 point

Exactly, insert goes in hole first, then you just press it in.  When you design your part just follow the hole design guide for the inserts you are using and they should sit perfectly vertical like the ones in the video. 

  Are you sure? yes | no

Alex Rich wrote 03/06/2015 at 01:17 point

yes, funny you say that because my first version of this was for a drill press, worked great.  I mounted it to a couple of threads that were used to mount a chip shield.  I changed it to my arbor press because I was tired of it occupying the drill press all the time.

  Are you sure? yes | no

srainsdon wrote 03/06/2015 at 01:03 point

had a thought, could this be adapted to work some how with a drill press (Power off, for this its just a press)? you did say it does not take all that much pressure. Ethere way wounderful Idea and implmention looks clean from the pictures.

  Are you sure? yes | no

Alex Rich wrote 03/06/2015 at 01:18 point

posted a reply on the main thread accidentally

  Are you sure? yes | no

Similar Projects

Does this project spark your interest?

Become a member to follow this project and never miss any updates