 Daren Schwenke
I've read many places how you can just turn the Pi camera lens to adjust the focus for near field. There are videos on it. Looks easy.
Got my new Pi camera and proceeded to try the easiest version using two needle nose pliers. That lens wasn't going to move without damaging it.
So I printed the little purpose built bracket which precisely fits the top of the lens so you can turn it without damage, and scraped off most of the glue. Still wasn't moving.
Scraped off all the visible glue holding the lens from turning the best I could and very carefully cleaned as much as I could from the little gap where the threads meet. Yes, there were threads. Still wasn't moving.
Turned harder. The top of the lens sheared right off. The top bit has joined my missing socks, but miraculously I found the lens and little black spacer inside. So in case you ever wondered what was inside a Pi camera lens, here you go. Two lenses apparently, with a tiny air-gap between them provided by a fiber black washer of sorts.
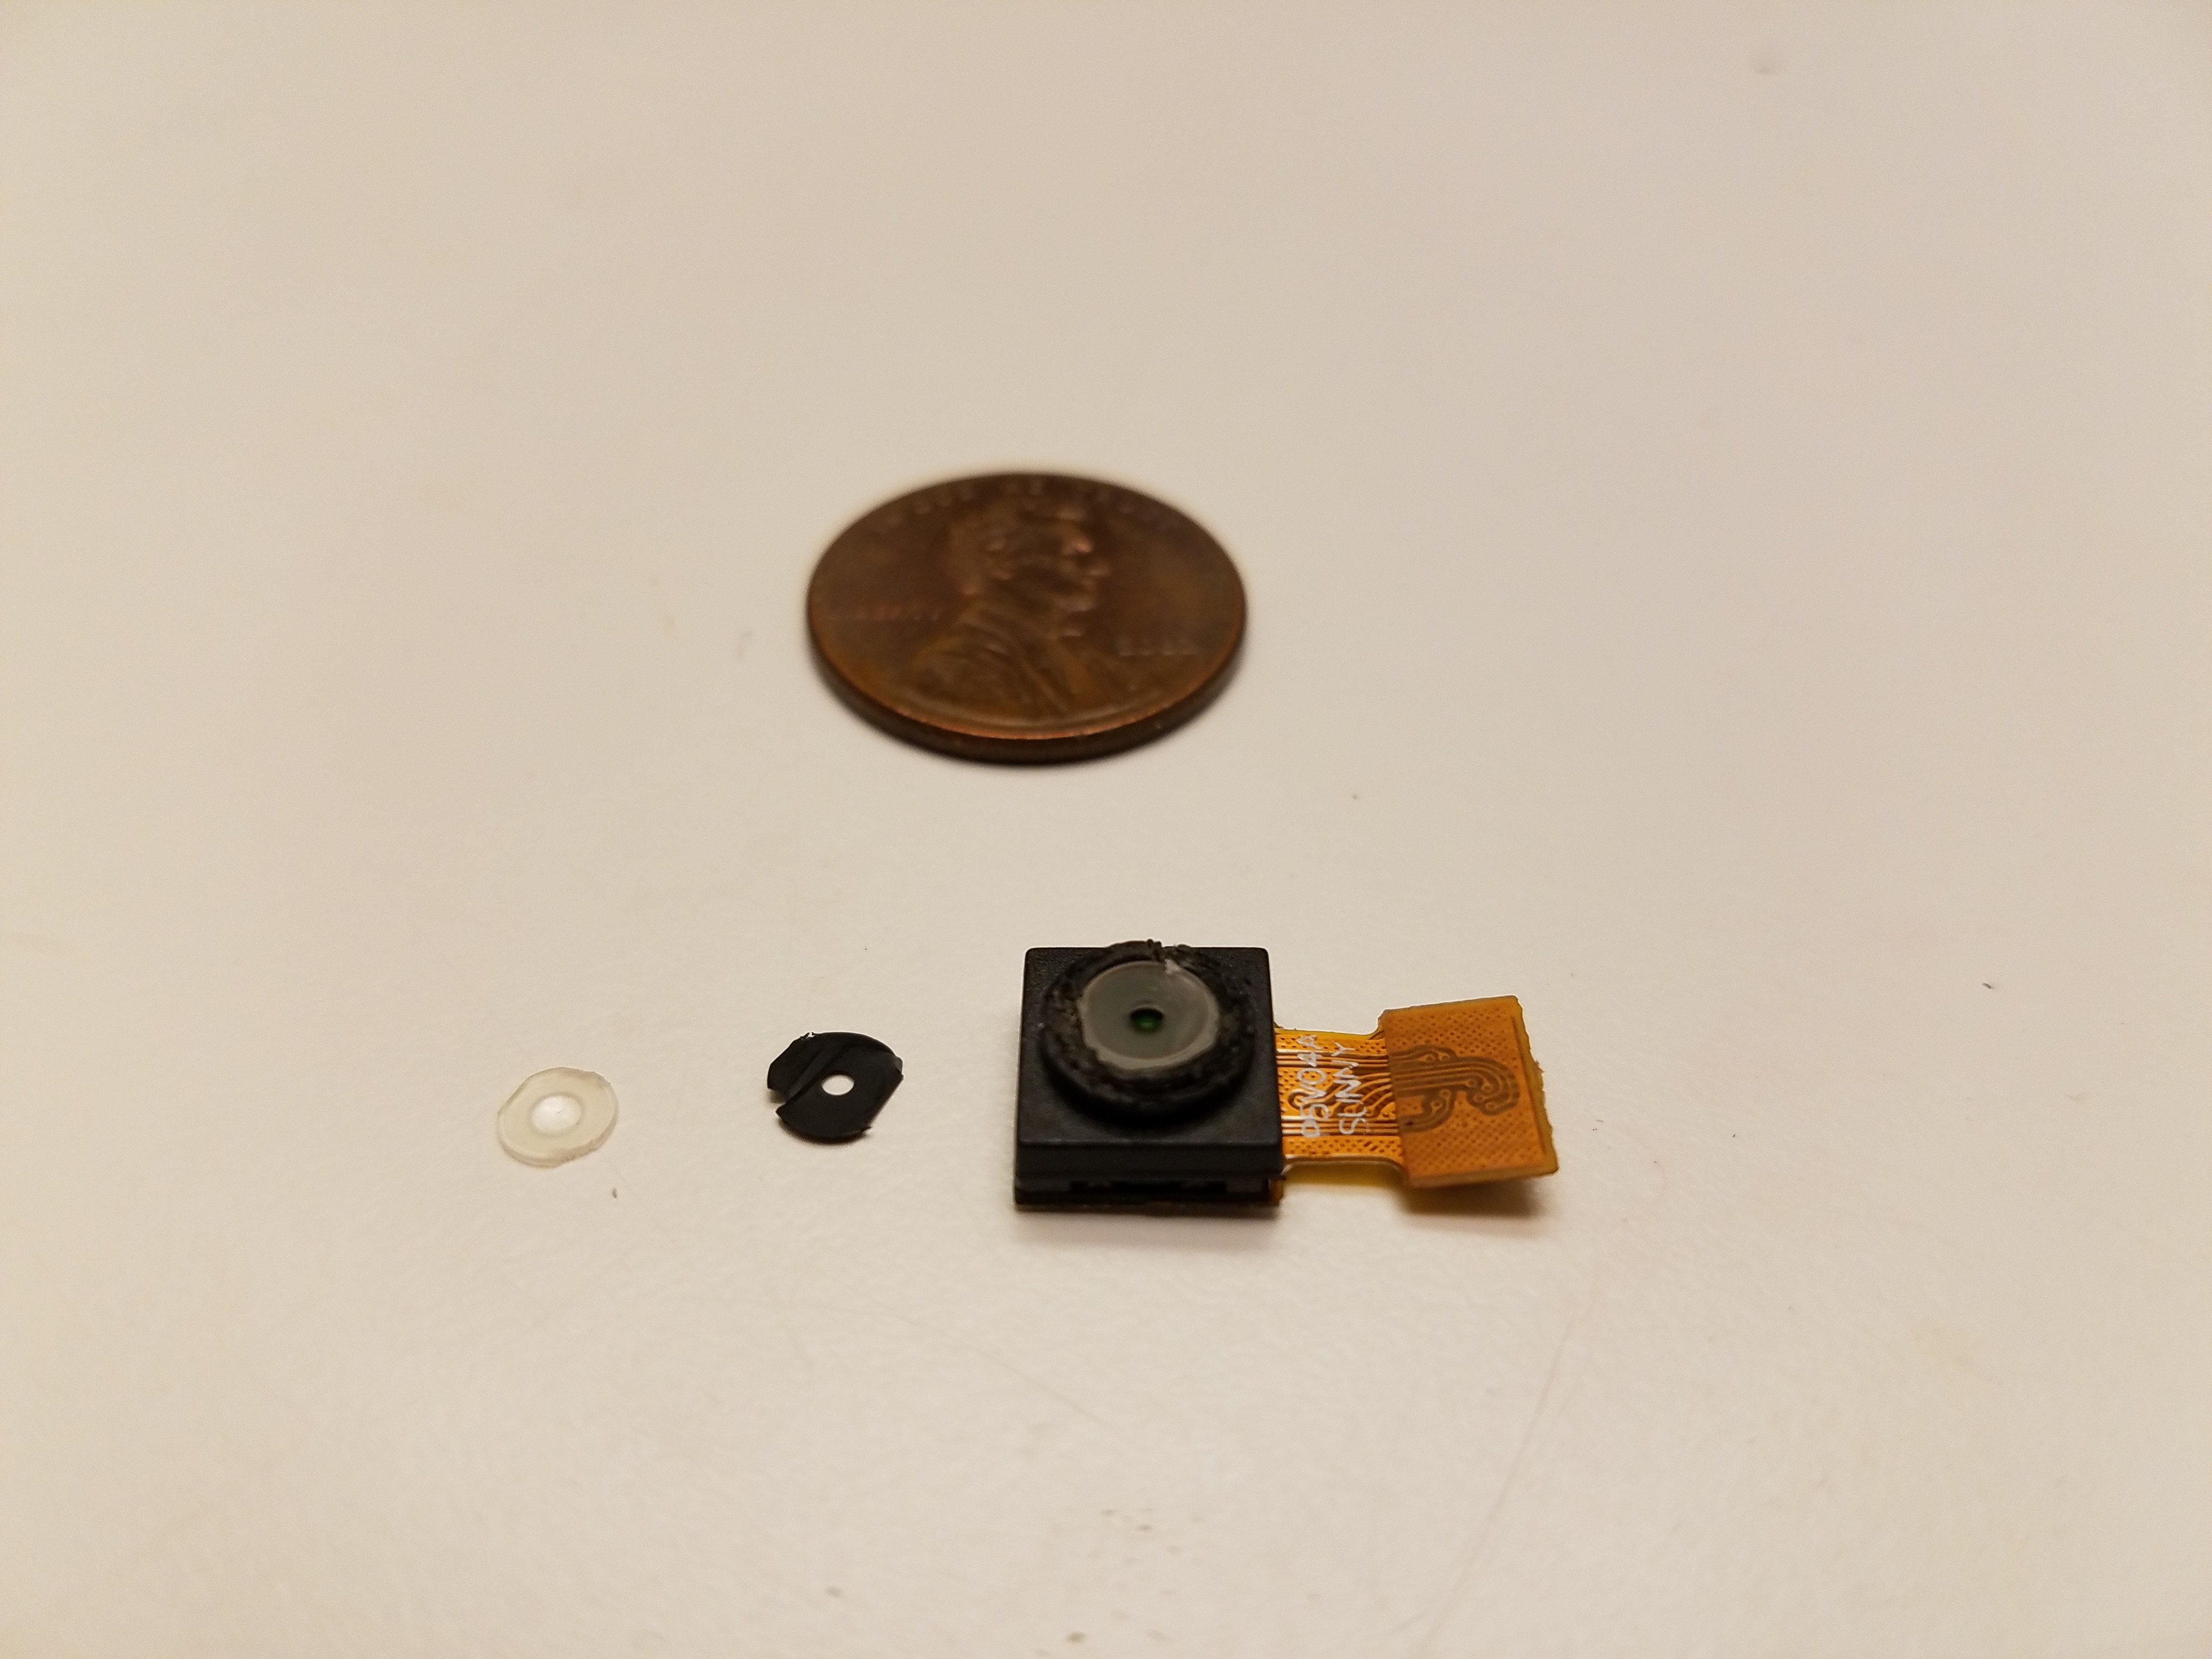
You can see impressions left in the top part of the lens from my excessive use of force in trying to budge the threaded bit. The damage on the lower lens and washer was inflicted post-breakage.
Whoever made my Pi camera copy must have used super-glue to fixate the lens, instead of the normal stuff. It's wicked all around the threads and cemented it permanently. It's not going anywhere.
I saved all the important bits still and I think I'll be able to salvage this for normal far focus, so I stopped myself from seeing if the lower lens would pop out. However, without the ability to adjust the focus, this one ceases to be useful for this application.
So I've picked a different, visually distinct, version of the 1.3 Pi camera hoping that I get a different manufacturer and ordered another one. Friday.
Other news
The head and mirror arm model have been updated to mount the Pi camera. It was relatively simple and I was able to keep the endoscope mount. There is a thin bridge below the camera here so it has a precise flat mounting spot, but you can drill that out to fit the endoscope still.

I'm now messing with the down lighting, converting the ring light to two strip lights of the same type as used in my bottom vision. One less part and the arm can sit lower against the body when retracted.
Having the top LED's of the ring light, in the visual field of the bottom looking camera if you failed to attach a nozzle, was probably a bad idea. I'll squash that one now.
Discussions
Become a Hackaday.io Member
Create an account to leave a comment. Already have an account? Log In.