 Clovis Fritzen
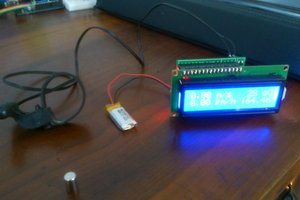
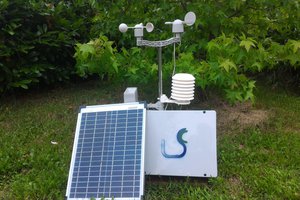
The objective of this weather station is to monitor the environment around it, while saving data to a micro SD card and (optionally) send it to over the internet (via either bluetooth, wi-fi or those 433MHz radio links).
Define ´weather station´: according to wikipedia, A weather station is a facility, either on land or sea, with instruments and equipment for measuring atmospheric conditions to provide information for weather forecasts and to study the weather and climate.
And why does it matter?: in the matter of taking care of our resources (and our planet), humans must first observe and learn, in order to only then take actions to prevent and correct; this is where a weather station comes to the figure, making it possible to effectively make science and help our big home become a better place to live.
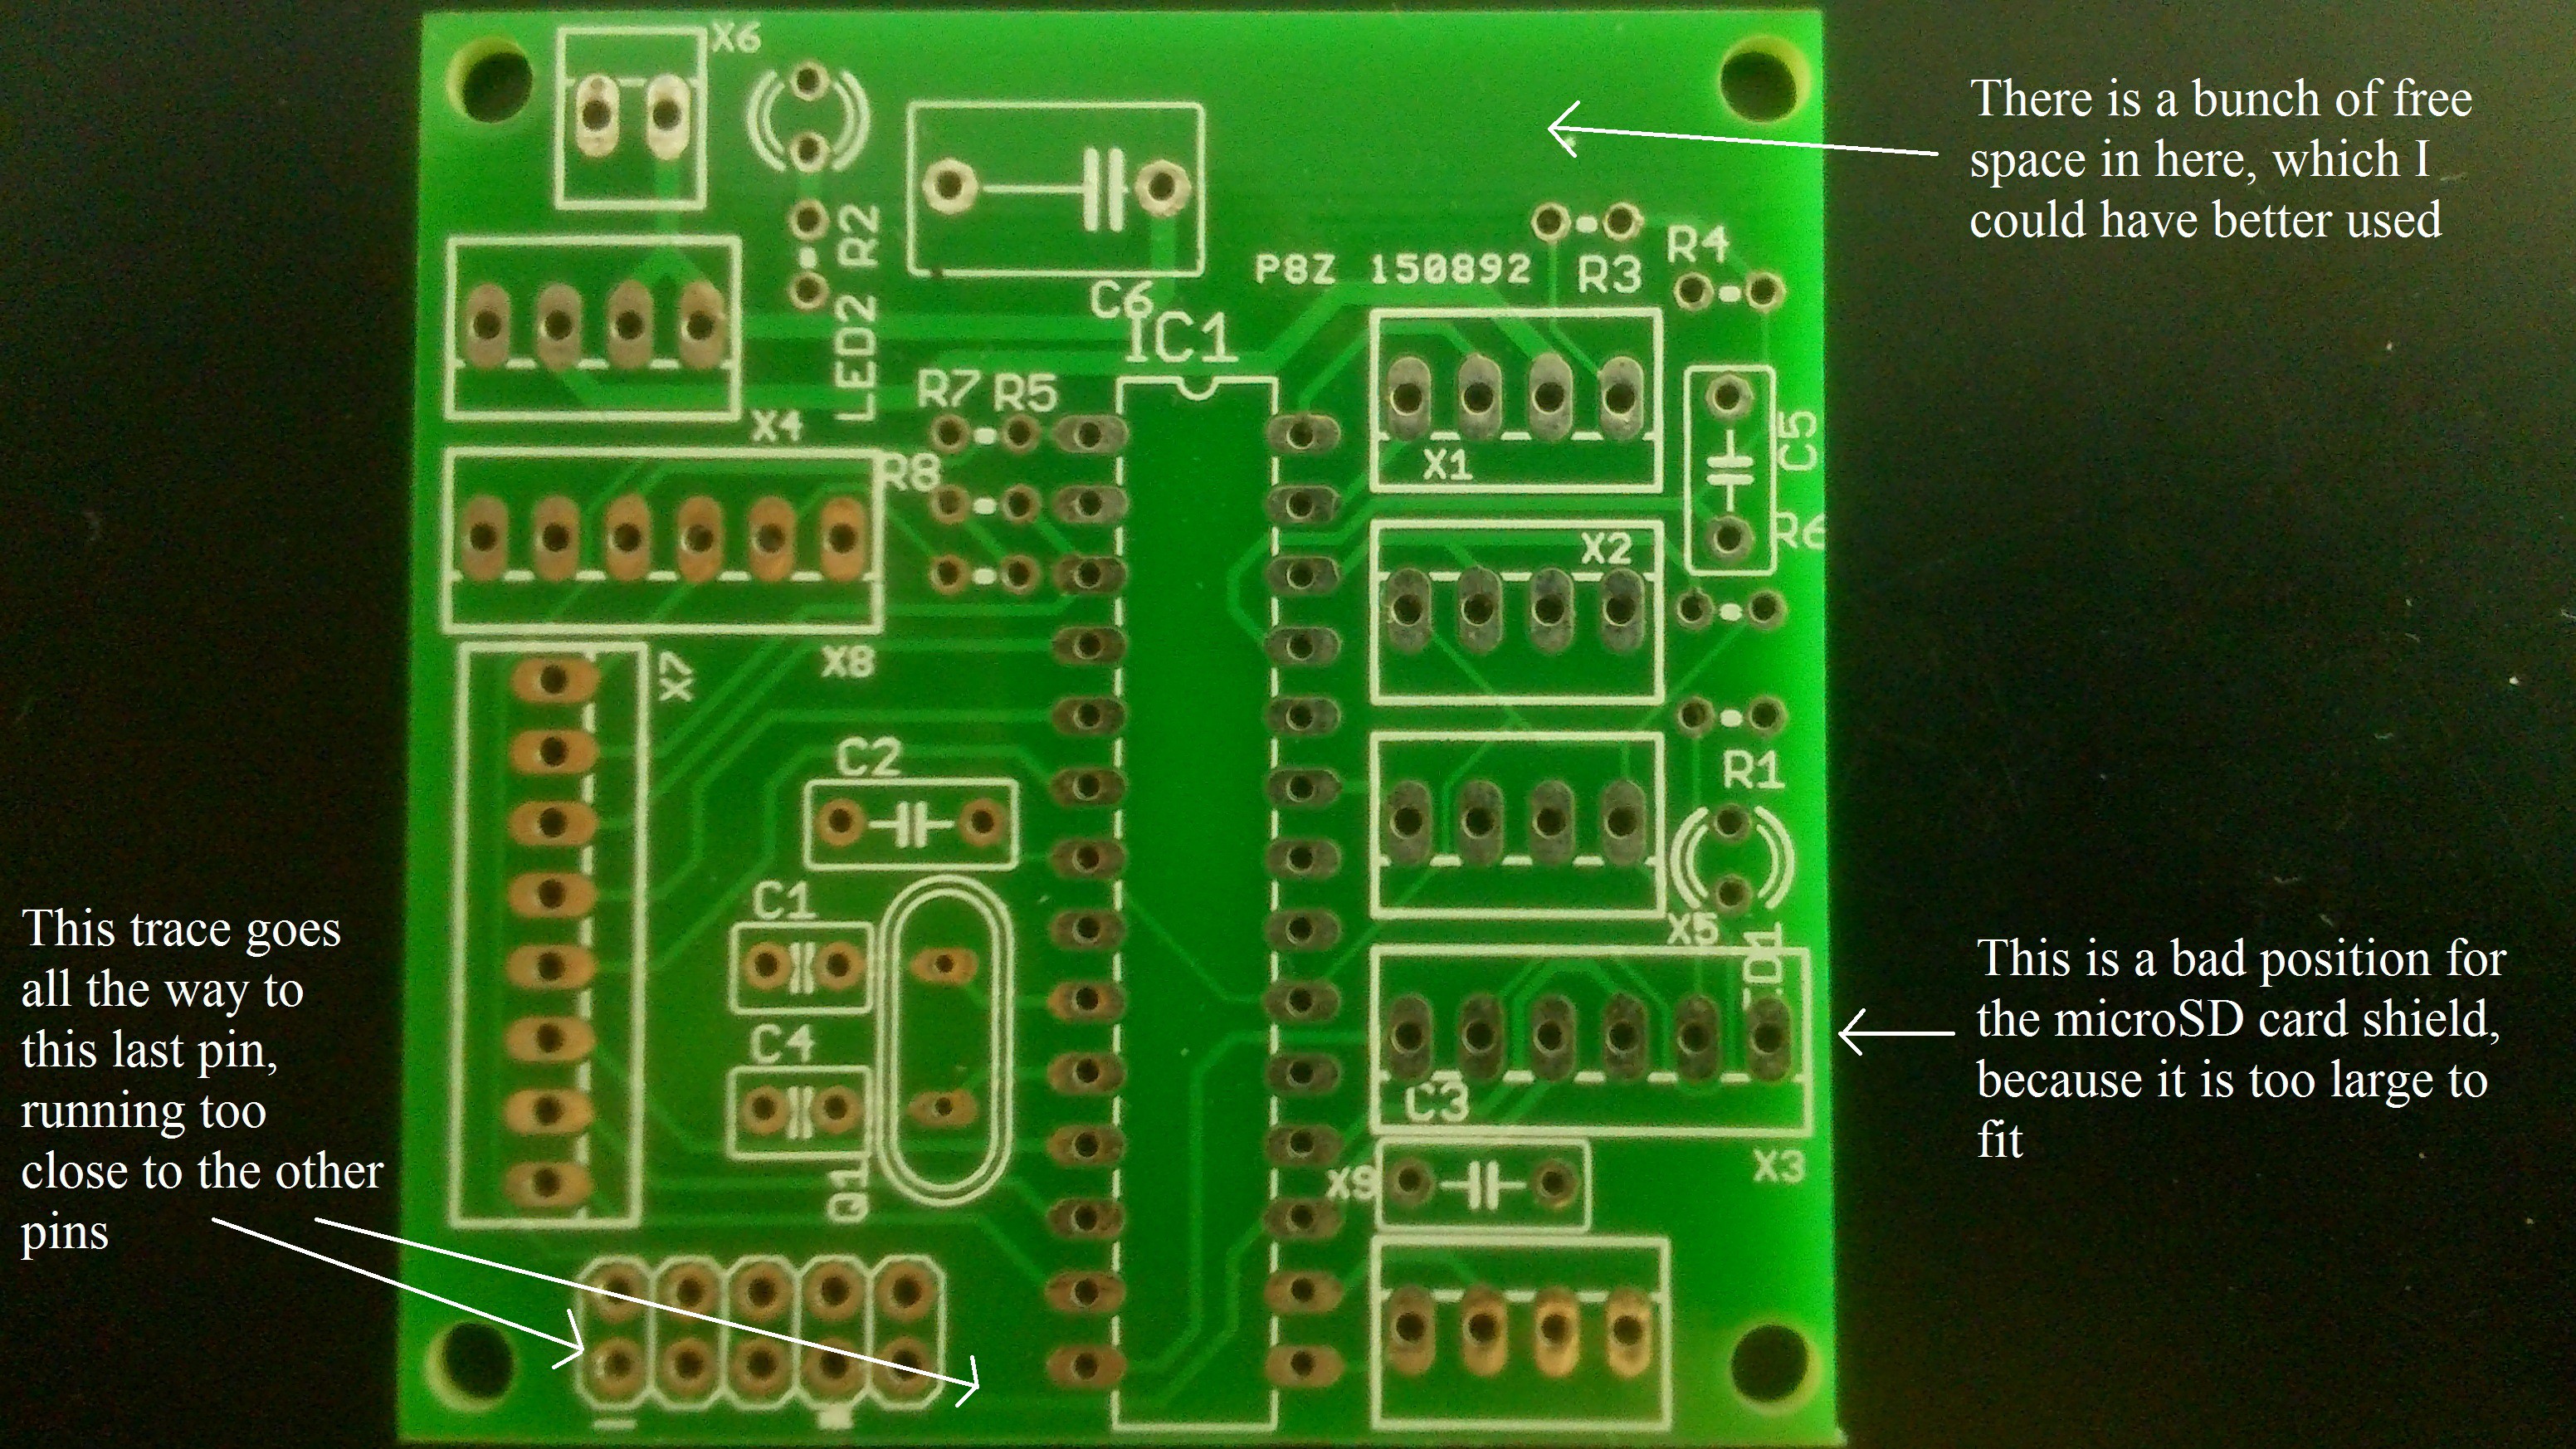
Of course it is always good (and perfectly feasible) to connect science with learning, because at the end of the day what matters the most is educating the future generations; this is the reason why this weather station is designed only with through hole components; it is also the reason why we have used Arduino on the controller side. All we want is to make this project something that matters for the world.
So here is a brief description of the systems and component utilized:
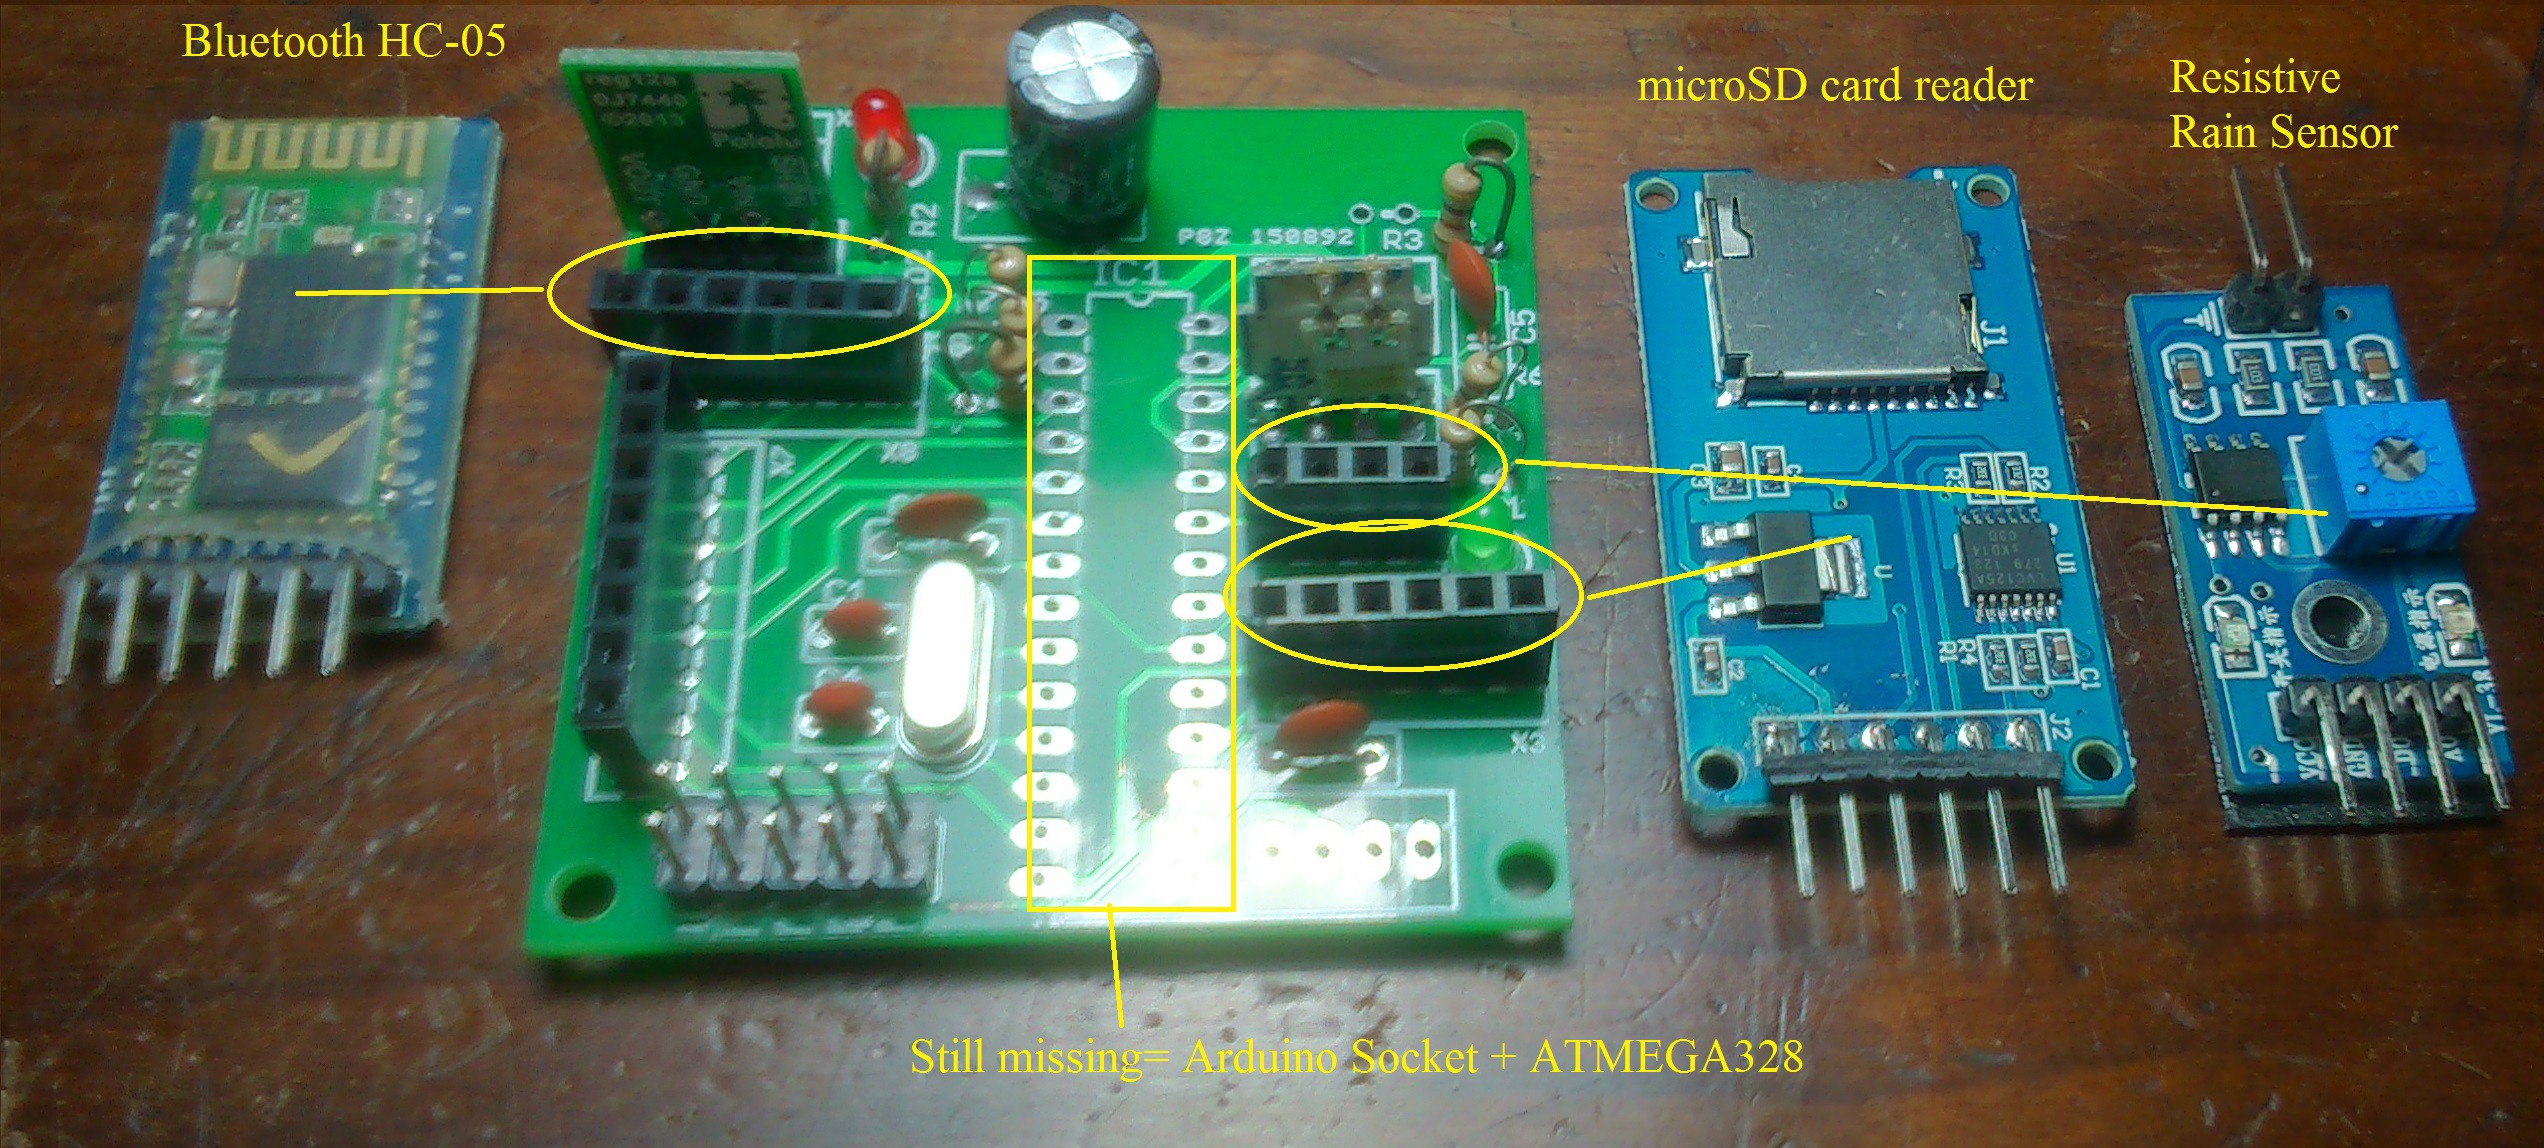
Control system: Arduino UNO (microcontroller Atmel ATMEGA328P)
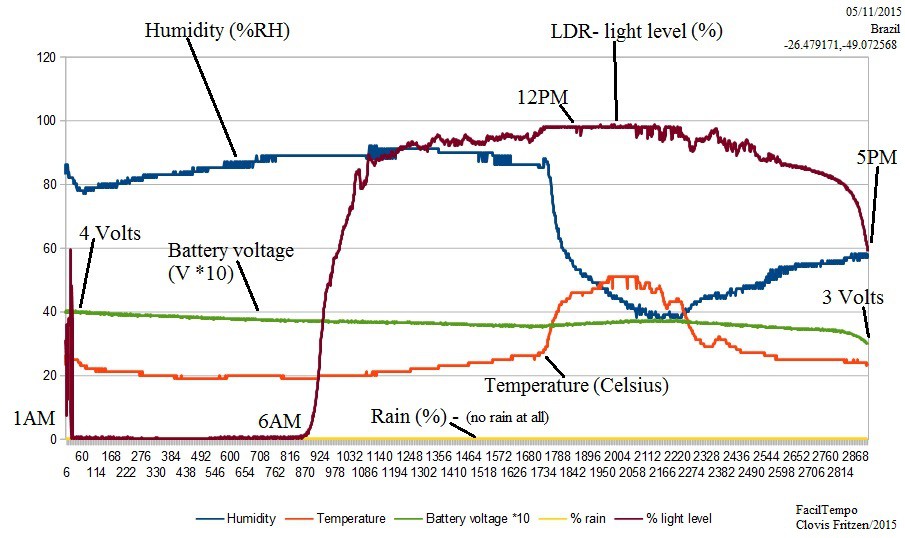
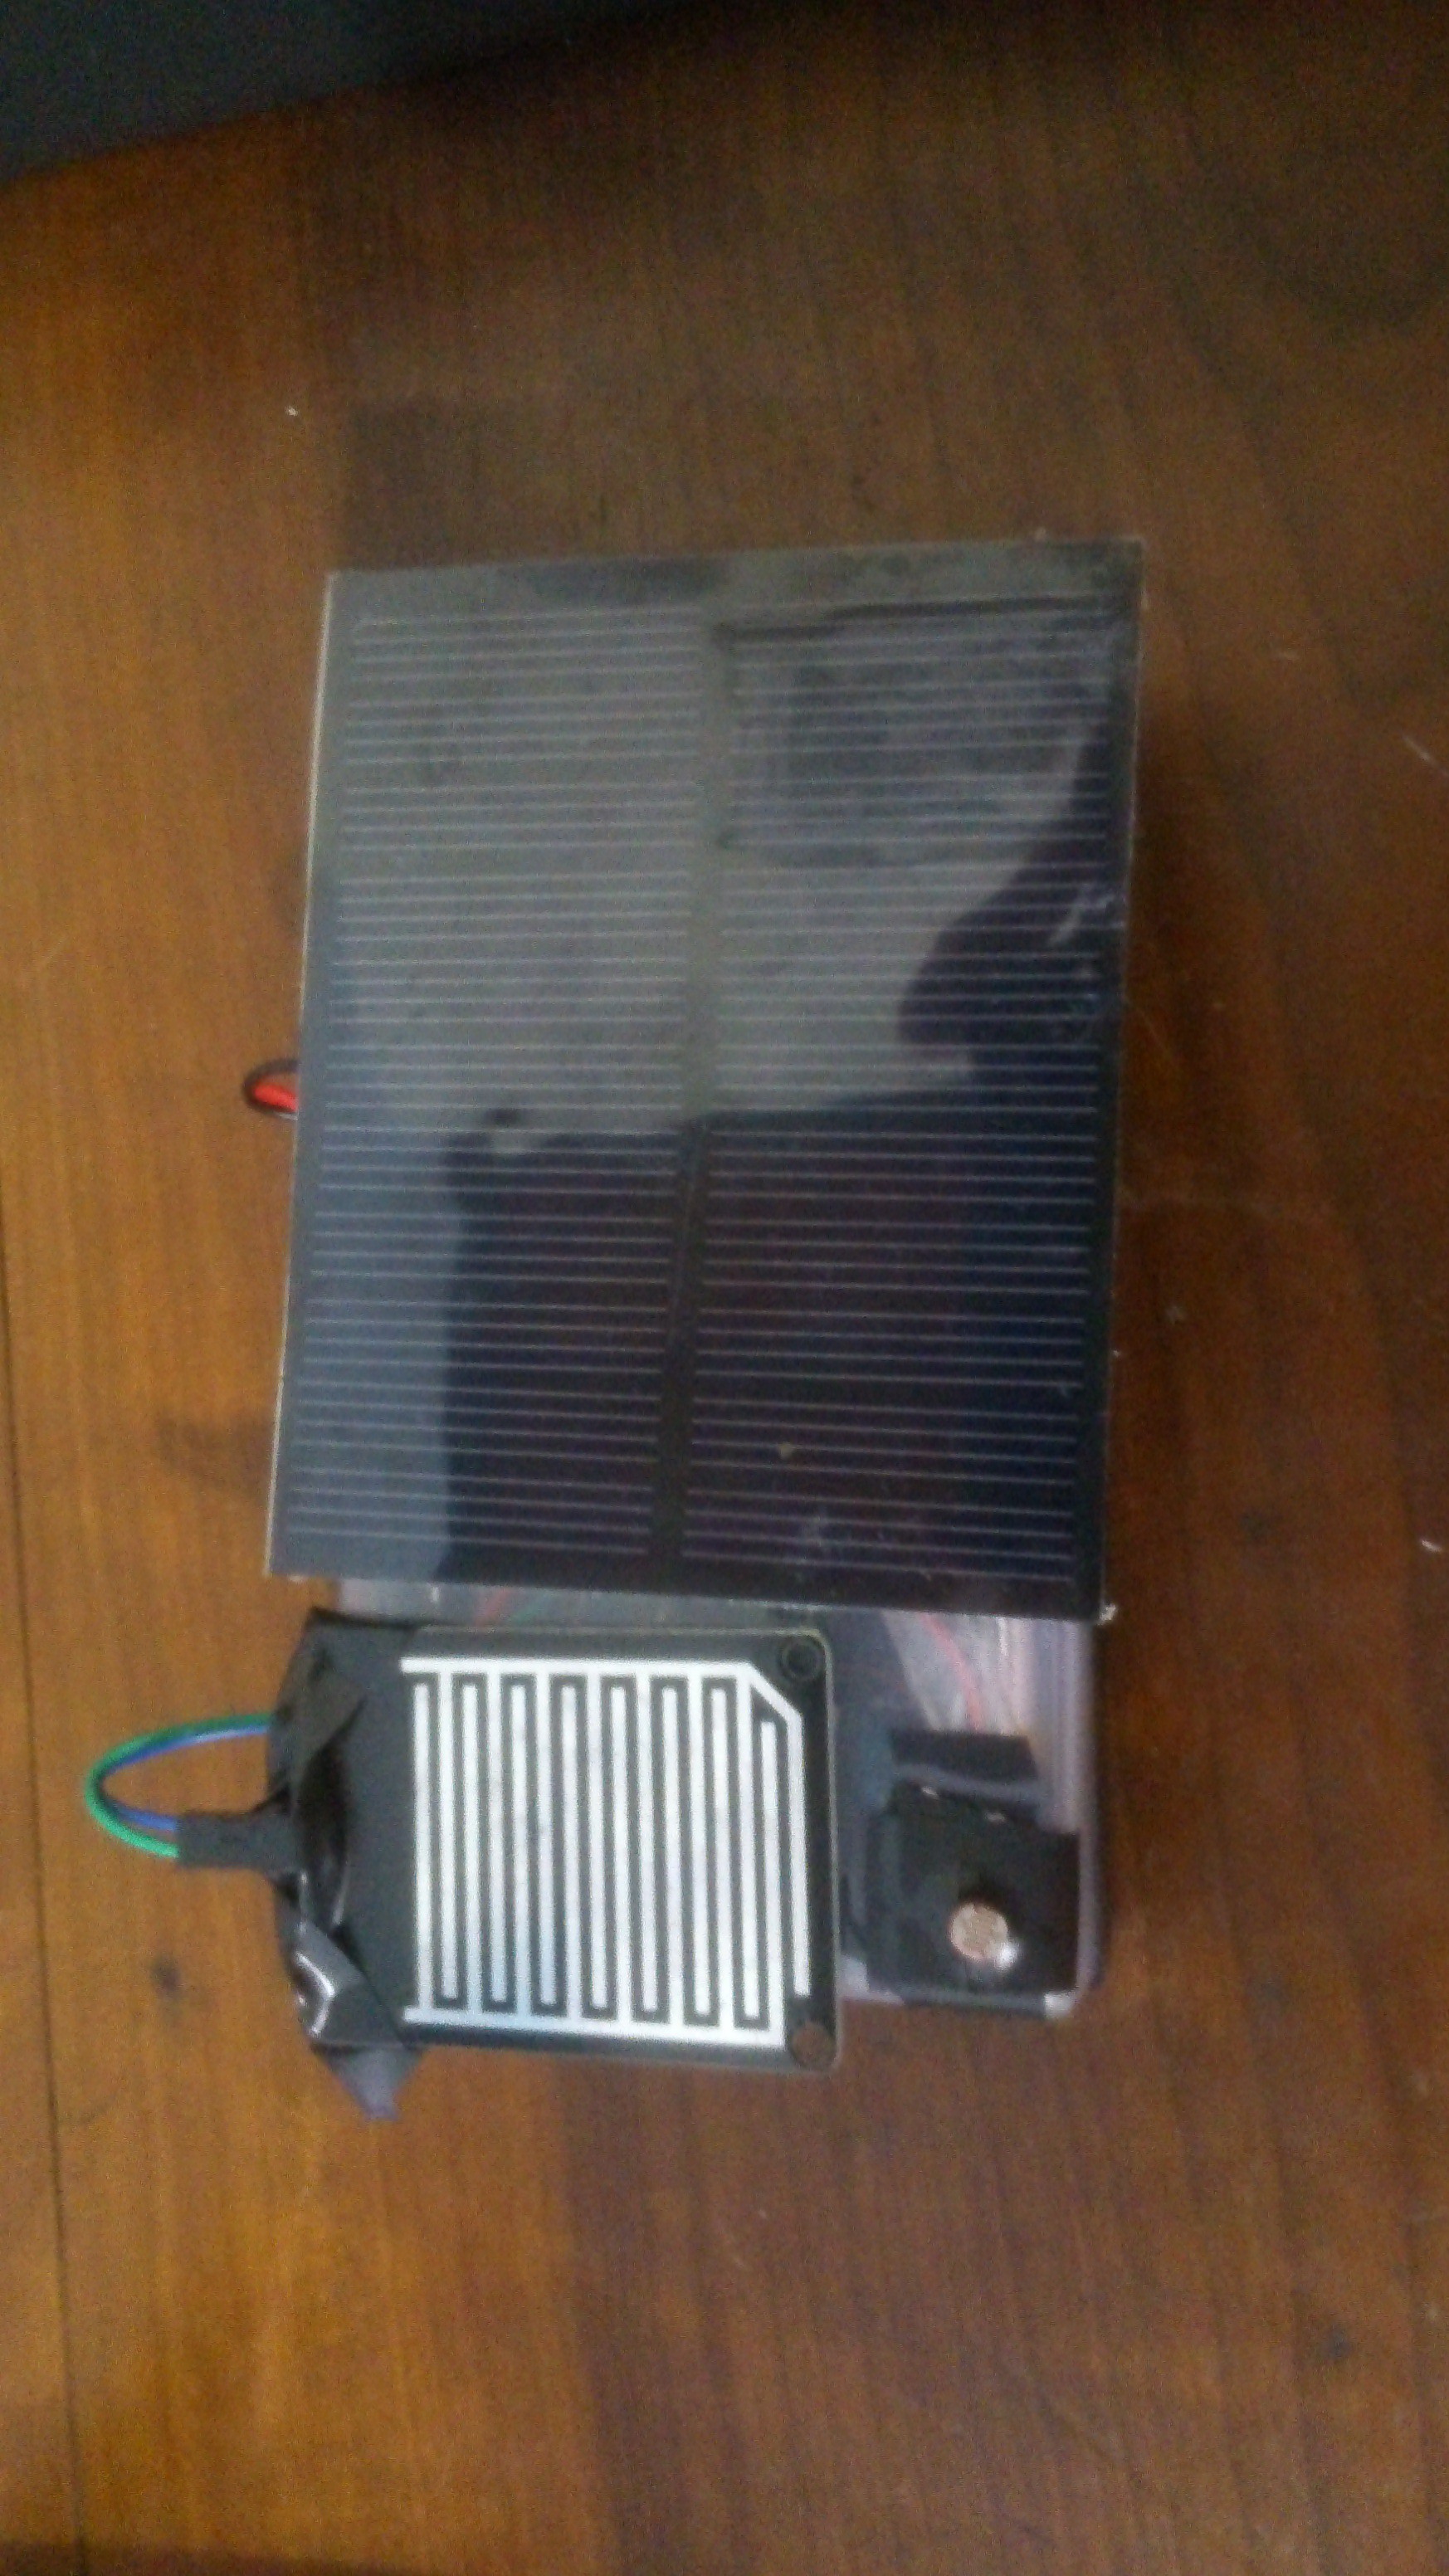
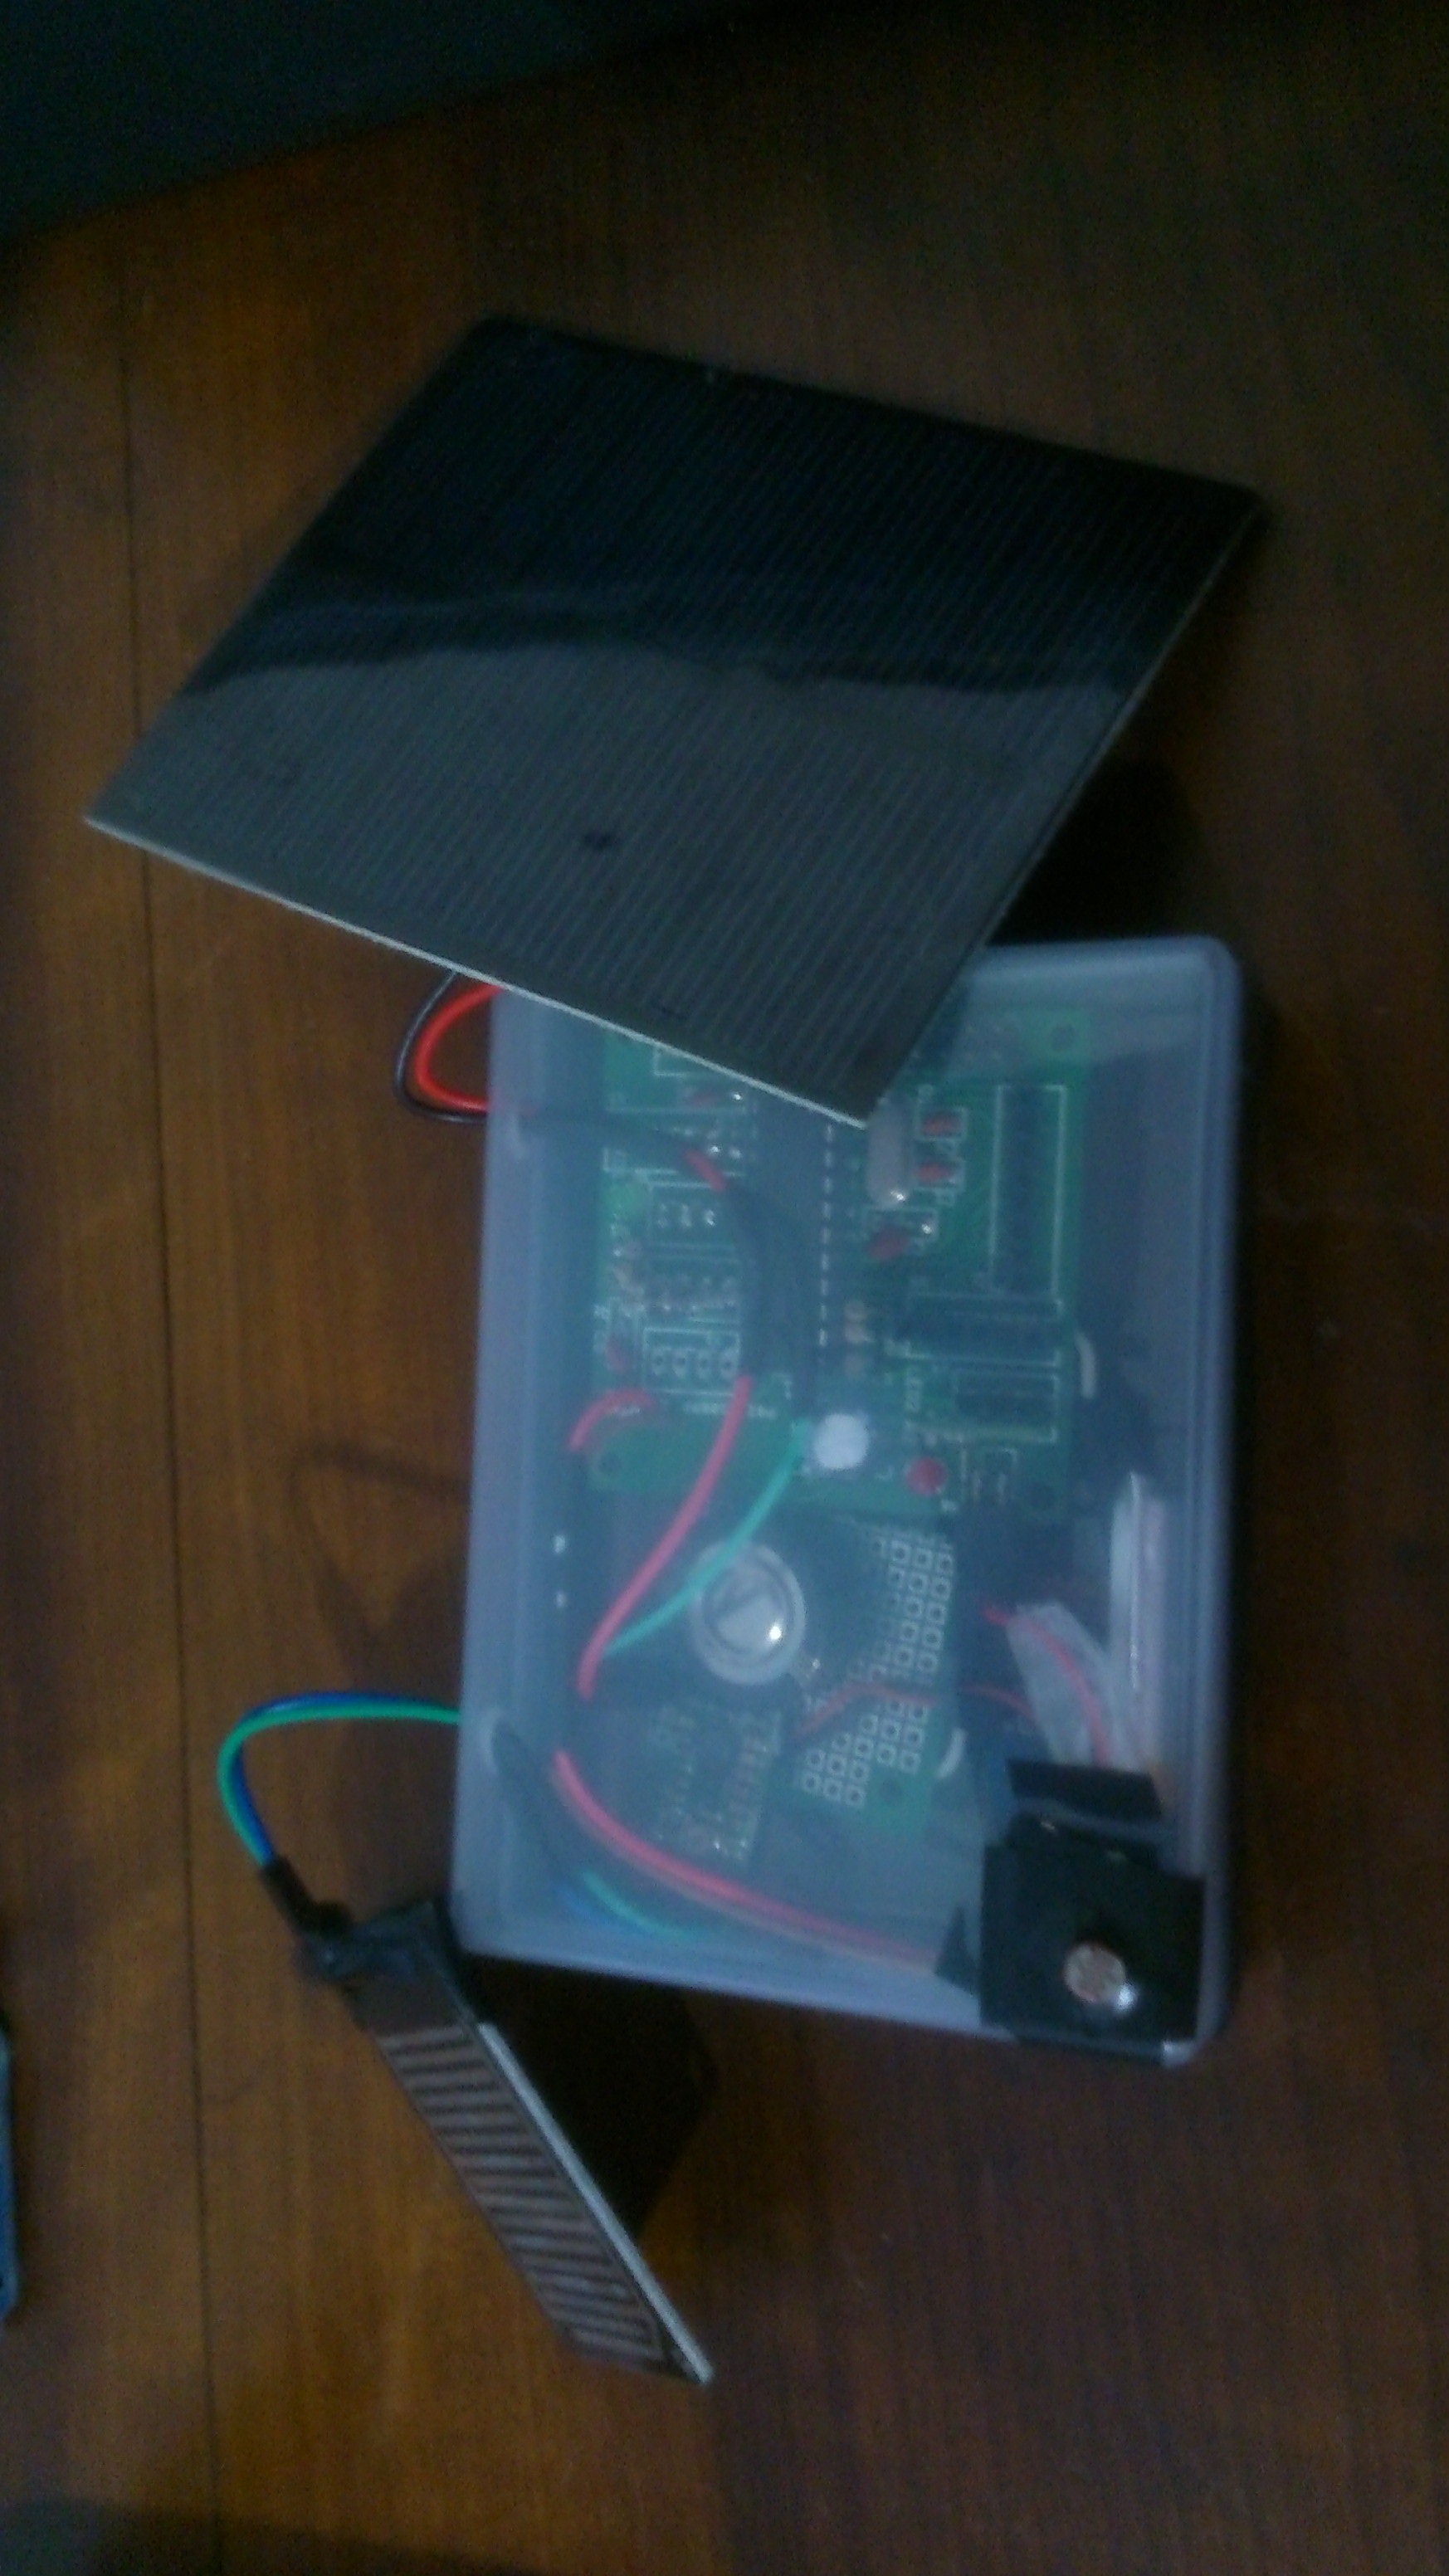
Energy supply: As it will be sit under weather, it can harvest its energy from either Solar or Wind energy. That energy will be stored on Lithium-Polymer batteries and conditioned to use (@5V) by a boost converter made by Pololu. There will also exist a battery level monitoring.
Sensors: this minimalist weather station will feature a bunch of different environment sensors:
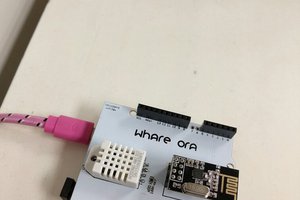
- Air temperature and atmospheric pressure using a Bosch BMP180 breakout board.
- Air humidity using a DHT11.
- Light level using a LDR (light dependent resistor) - the curve fitting for this sensor is not implemented yet, so data from it will be raw.
- Rain sensing: a simple and easy-to-use PCB featuring exposed copper lines, positioned one by the side of the other.
Communications: this is the fun part of playing with microcontrollers (and ioT): you can hook up virtually any sort of wired and wireless network layer to your hardware. I am preparing firmware to use Bluetooth (through HC-0x Bluetooth 2.0), wi-fi (that amazing ESP8266 !!) and RF (the very convenient 433MHz breakouts).
As the time goes by (and my parts arrive from China), I will update the project and this page. Hope you guys like what you see, and I am open to suggestions and tips!.
Want to reach me on twitter? @embedded_clovis
#2015hackadayprize , 2015hackadayprize


 Shiny
Shiny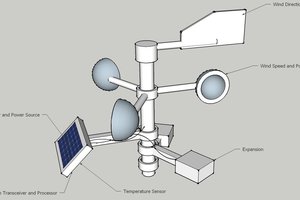
 Ulf Winberg
Nice done, dude. i live in Brazil too. And I know how get some electronic stuff here can be difficult and expensive. Good Job with this project, I'm doing something near to this using the ESP-12 (NodeMCU) as main processor. Your DHT11 is getting good values for humidity? Mine sometimes is getting very wrong values.