 Sean Ogden
My end goal is to print a circuit board in order to make the project compact enough to fit within the case of the machine. I've never done that before and I'd like not to screw it up, so I'm drawing the schematic out so I can think about it and verify that it's correct.
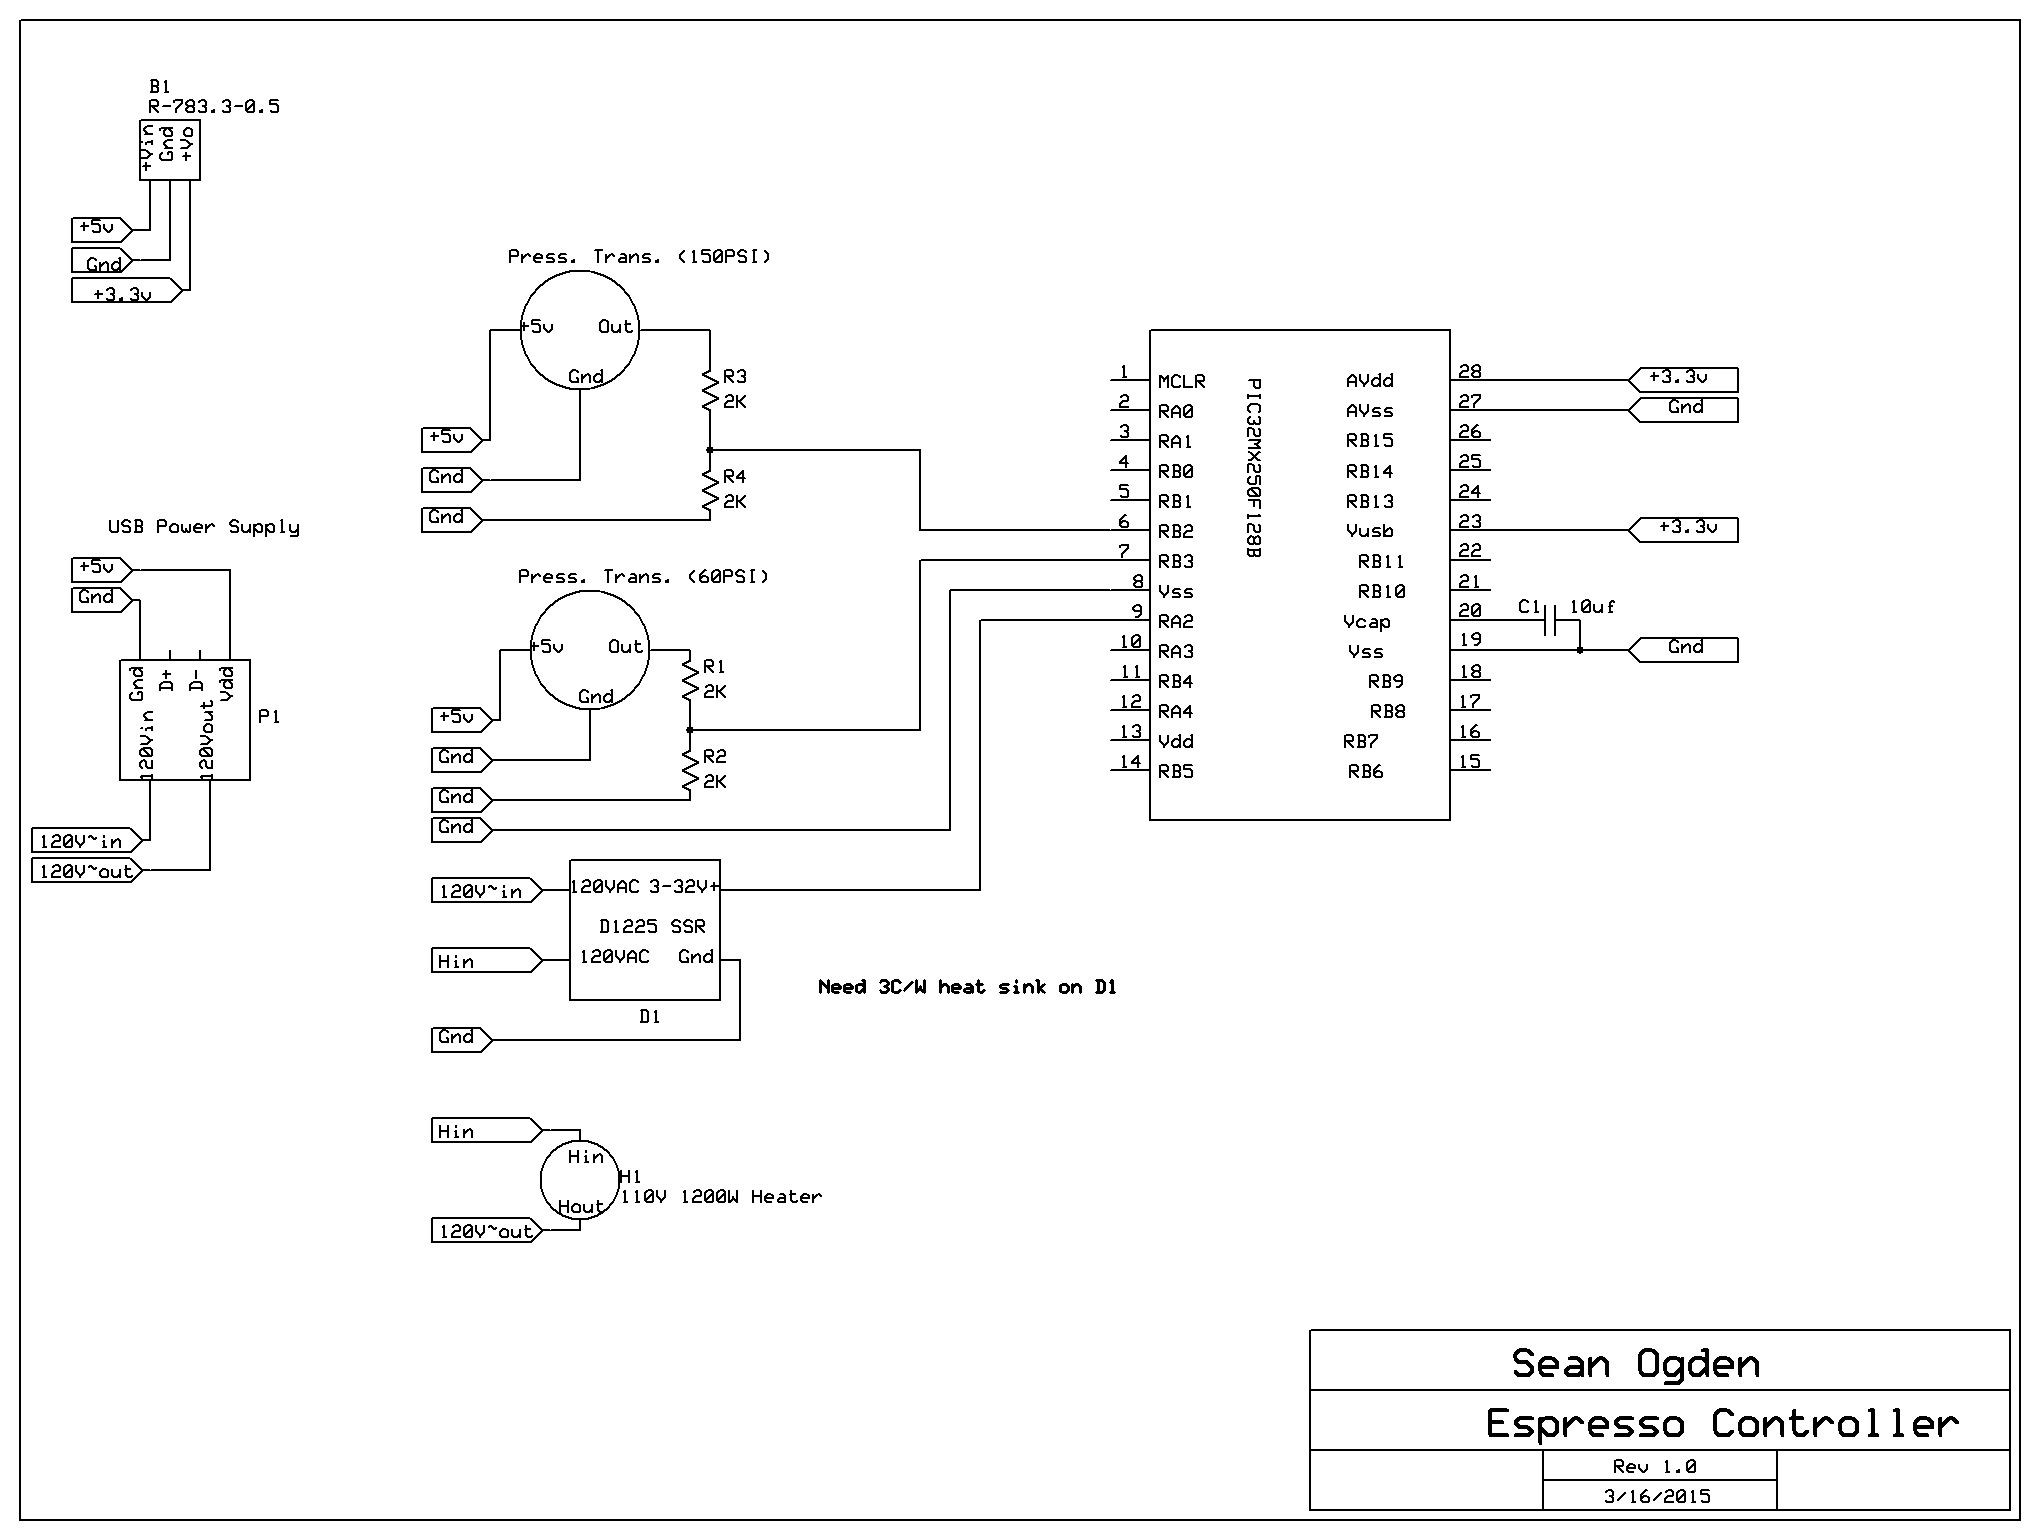
I started designing the circuit for the controller today. The basic components of the machine are the vibration pump and the heater. Both use 120VAC, so I'll need to use two solid state relays in order to control them with the PIC32.
At this time, I've designed the circuit to measure two 5V pressure transducers and switch one SSR to control the heating element. I have yet to design for the brew control, or the screen but that will be done later.
Power supply
I will be using a USB charger as the power supply, directly wired to the 120V coming from the wall. This was easier and safer than trying to design my own power supply (I'm not an EE), and it supplies the 5V I need to run the sensors. I also need 3.3V to run the PIC32, so I've used a dc-dc step-down converter to supply that voltage from the 5V supply. All of the Vdd and Vss pins on the PIC32 are connected to the 3.3V and Ground. In addition, I have the 10uf capacitor connected to Vcap and to ground, as per the following instructions on the datasheet "The Vcap pin must not be connected to Vdd, and must have a Cefc capacitor with at least 6V rating connected to ground". The capacitor can be either ceramic or tantalum.
Reading 5V sensors on the 3.3V PIC32
In order to read the 5V sensors from the PIC32, I needed to divide the voltage to something lower than 3.3V. For this, I've used a voltage divider with 2 2k ohm resistors on each sensor, so the output voltage is 5V*(R2/(R1+R2)) = 0-2.5V.
Switching 120VAC heating element with 3.3VDC PIC32
For switching on and off the heating element, I had planned on using a 10A 120VAC SSR. However, the heating element being 1200W 110V means that I need something at least 11A. So instead I'm using a 40A 120VAC SSR that I found on a surplus site. It does not have a datasheet, so I'm just going to have to try and see if it needs a heat sink.
Discussions
Become a Hackaday.io Member
Create an account to leave a comment. Already have an account? Log In.