I started by doing some research online. I found a bunch of stands similar to to our current configuration, but ended up stumbling across something similar to what I wanted to design. I found a cheap one for $15 (https://www.amazon.com/ammoon-Triangle-Percussion-Teaching-Instrument/dp/B0734YX94K/ref=sr_1_1_sspa?s=musical-instruments&ie=UTF8&qid=1518491501&sr=1-1-spons&keywords=triangle+stand+instrument&psc=1), and a nice one for $100 (https://www.amazon.com/goldon-triangle-wooden-stand-japan/dp/B00CE42OS6/ref=sr_1_18?ie=UTF8&qid=1518491204&sr=8-18&keywords=triangle+stand+instrument). Both options seemed a bit pricey. I took the measurements of the triangle, and began designing. (NOTE: the captions describing each image are located beneath the image.)
To start, I built a triangle, matching the dimensions of the real thing. I then added a frame around the triangle (as an outline for the stand).
I then proceeded to shorten the height of the stand, and cut out the top (so that the triangle can be struck and silenced with ease). I made sure to keep two overhands that will be used as hooks to hold the triangle with fishing line in two places.
I then cut out the holes that the fishing line will be tied into.
I then began adding a slanted edge, used to add extra rigidity and style.
As of now, I have the frame built, but not a way for it to stand up.
I decided to do something like the feet of a box fan.
I sketched the feet out, basing them of the feet of the box fan.
Now that I had the feet, I wanted more surface area underneath, and more structural support horizontally.
I added a base to fix this. Now it is ready to print.
I put it into Cura, and it was twice as big as it should have been. (this happened because I started with center lines in Solid Works, so I was putting in the measurement of the whole line, where I should have bean putting in the measurement for half of the line.)
I used Cura to scale the stand down by half.
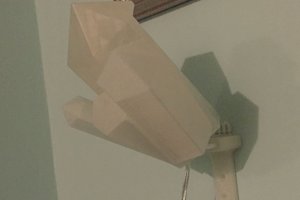
Now it was ready to print. Since it was my first attempt, I only used 6% infill. I also printed it upright.
finp
But the stress from the strikes on the triangle where to much. I also realized that printing it upright created a ton of week spots.
The print, however, failed. The print started to cool half way through, and made a huge mess of ABS plastic. I used the failed print to check that the stand would be strong enough. It was definitely strong enough for it's purpose. I had four failed prints like this, so I decided to redesign the whole thing, so that it came in separate pieces. Making it like this would also make it so that you could print it on much smaller printers.
To start, I began remaking the base, this time I made it the correct size.
I tried to make it as close to the original as possible, so that I was not starting completely from scratch.
I sketched out and extruded the slots for the arms to slide into.
I did the same on the other side.
I added the slanted sides.
I did this to both sides, and added some designs, for decoration.
I opened the original stand back up in Solid Works, and cut out the base, so that I only had the two arms left.
I then cut out one of the other arms so that I had one arm left.
I scaled the measurements of the old arm down by half.
After that, I sketched and extruded the outline of the arm (reduced by 50%).
I added the tie in point, and got rid of the larger arm.
I set it up in Cura (two triangle stand arms, and one base), and printed. I used ABS plastic, and set my infill to 50%.
 Isaac S. Gentry

 Myles Eftos
 Daren Schwenke
 Kevin Harrington