Close
0%
0%

Auto/Paddle Shifter Go-Kart

Arduino Automatic Go-Kart with Paddles

Similar projects worth following
When I was 15 (almost 5 years ago), I bought a 125cc, 2 Stroke, Shifter Go-kart. The engine comes from a Cagiva 521 Roadster mounted on a Go-Kart chassis. I had a lot of fun with it, bombing down dirt tracks but now it is time to upgrade it.

The plan is to remove the the shift lever and replace it with an Electric Actuator and a servo controlling the clutch.
I am going to read the engine RPM via the Spark plug wire..

If anyone has any questions or suggestions don't hesitate to share!

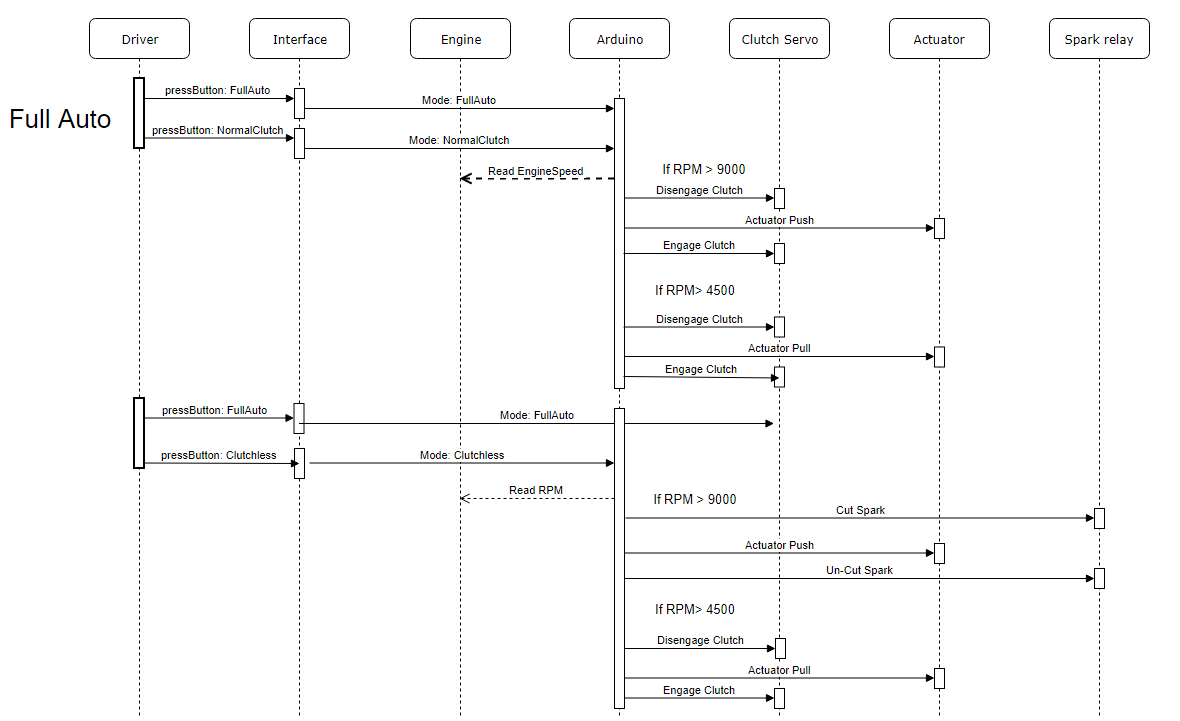
The Go-Kart will have 2 main modes: Full-Auto and Semi-Auto. Both modes will have the option for Clutch-less up-shifting. 

The Full-Auto mode will completely automate the entire gear shift sequence, up-shifting when the engine reaches a defined RPM (Around 9000 RPM)  and down shifting when the engine speed drops below a defined RPM (Around 4000 RPM).

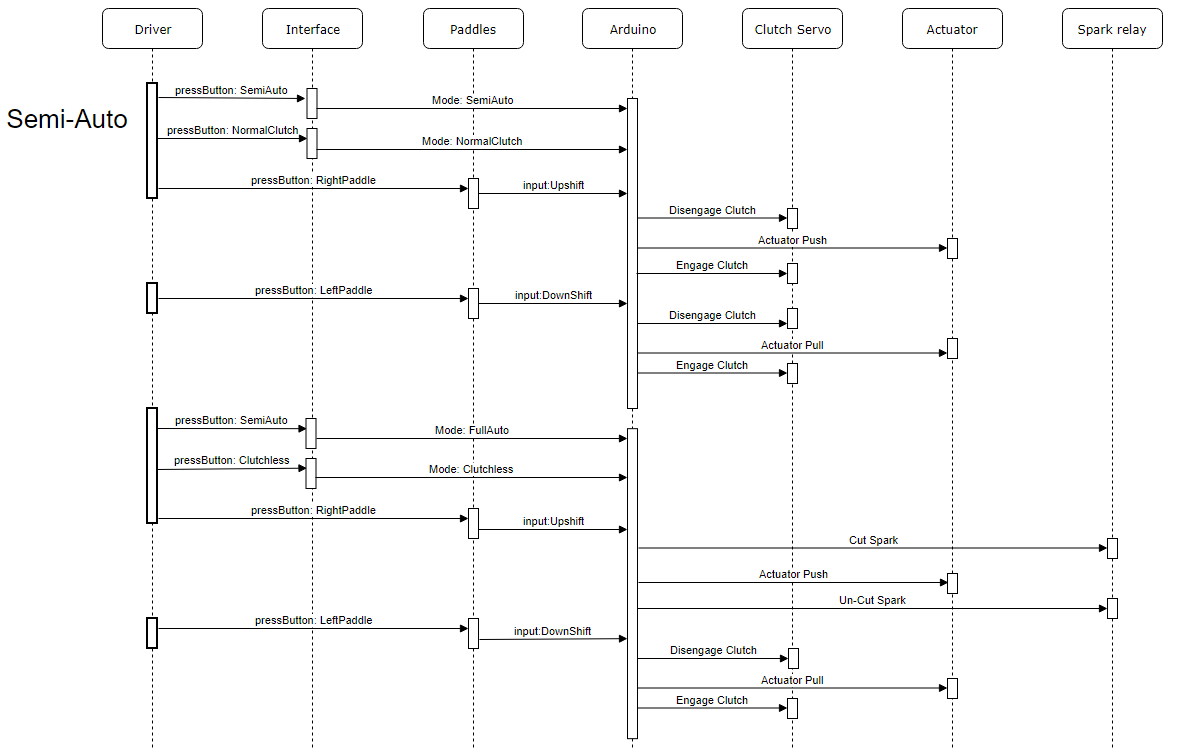
The Semi-Auto mode will use 3D printed Paddle Shifters (Another project I will be working on). You will not be able to down-shift below a defined RPM (Around 5500-6000 RPM) to protect the engine from over revving. And you won't be able to up-shift below a defined RPM (Around 4500 RPM) to stop the engine from bogging down or losing too much torque.

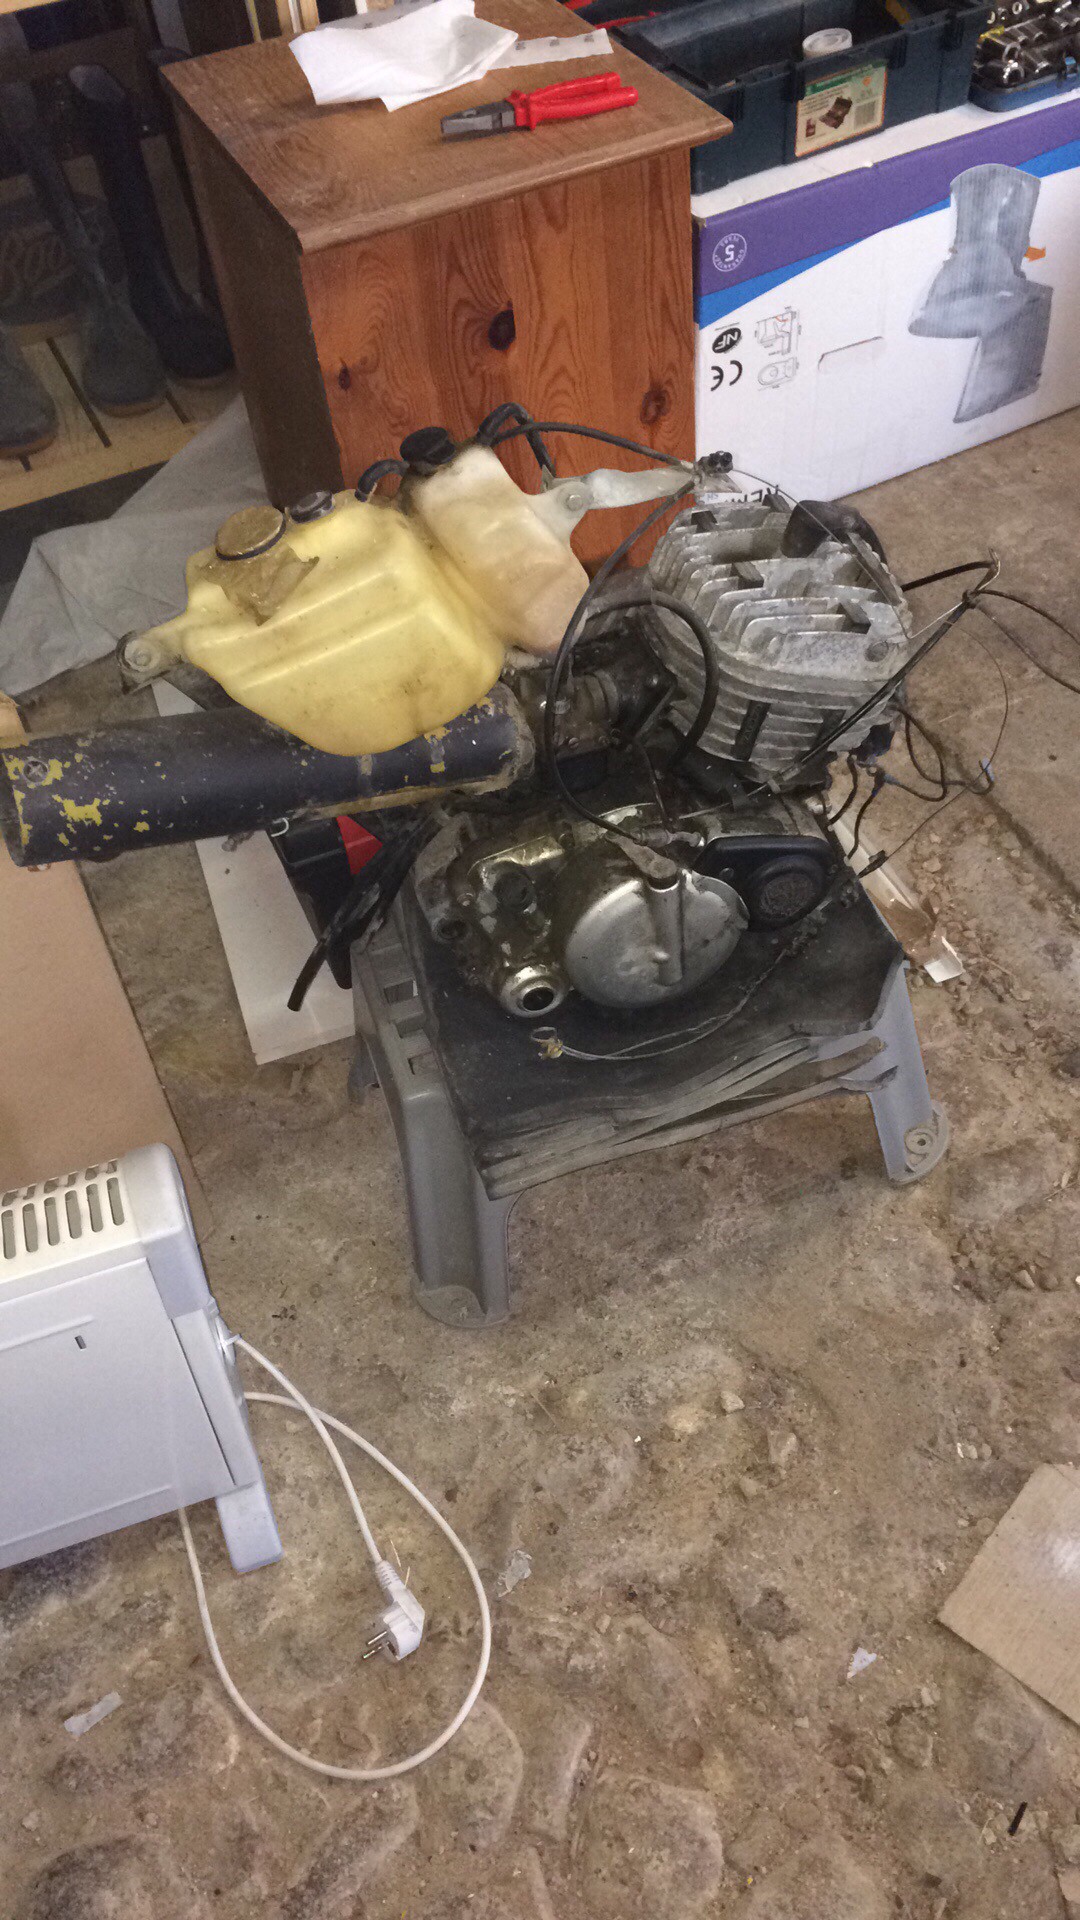
The Clutch-less up-shifts will be achieved by putting a small relay before the ignition coil and cutting the spark to make the RPMs drop allowing for smooth clutch-less shifts. This system however will most likely have a secondary effect of backfiring due to the unburnt air/fuel mixture entering the hot exhaust.

I will also be working on another project to make a steering wheel mounted, touchscreen dash where you will be able to choose between the 2 different modes and normal/clutch-less up-shifts. The dash will have a Speedometer, Tachometer and a Start button.

  • 1 × Arduino UNO
  • 1 × Kliktronic Electric Actuator
  • 1 × Shifter Kart
  • 2 × 3D Printed Paddle Shifter
  • 1 × Servo Motor

  • Log #3: Paint and Rebuild

    Matt Rouse03/15/2018 at 08:12 0 comments

    Once all the sanding was done, it was time to paint. We wanted to do this properly and get the best finish possible, so the plan was fine sanding, wash with Methylated Spirits before moving on to Primer, Base Coat and finally Clearcoat. For the main colour of the Kart we went for a Metallic Midnight Purple and for the accents Satin Black.

    Originally we underestimated the amount of paint we would need. We ended up needing 13 cans of spray paint for 2 coats per type of coat. The purple came out really good and looks incredible in direct sunlight however we had a few issues with the black paint, for some reason it would not stick to the primer (or even bare metal). Due to the limited funding for the project we just went with it and tried to get the best out of the situation, in the future we will re-paint the parts that were affected. 

    Unfortunately as the holidays drew to a close I had to leave the project unfinished as I had school work to do. The Go-Kart is almost fully rebuilt, it just needs the electrical harness, the brake system (Still needs a bit of paint on the master cylinder) and the clutch lever on the steering wheel. 

    For the next two weeks since I am at school I will be working on the Electronic/Programming side of things! For now have a good week everyone, looking forward to bring you another update in a week or two.

  • Log #2: Stripping and Sanding

    Matt Rouse03/05/2018 at 21:56 0 comments

    Me and my friends have been rather busy over the past week and a half. The go -Kart was old and weathered and hadn't seen fresh paint in well over 10 years, so we decided to give it a new lease of life in the form of metallic purple paint and satin black accents. For now we have completely stripped and sanded the entire chassis and all the other parts and we have started cleaning the engine also.

    It took a lot longer than expected due to the amount of grease, grime and rust that covered the chassis and engine. Next on the list it a bit of prep then primer, colour and clearcoat. Once we finish all of that I can get on to the electronic side of things.

  • Log #1: Sequence Diagram

    Matt Rouse02/20/2018 at 10:04 0 comments

    So just finished the Sequence Diagram of the basic idea for the programming. The interface refers to a Touchscreen TFT screen that is going to be built into the steering wheel (Another project that I will soon be starting).

View all 3 project logs

Enjoy this project?

Share

Discussions

Similar Projects

Does this project spark your interest?

Become a member to follow this project and never miss any updates